")

Contents
- How to laser print a beautiful photo
- Photo laser engraving process – all you need to know.
- What is Laser Engraving of Halftones and How Does it Work?
- How Does Greyscale Laser Engraving Work?
- Key Things to Note When Laser Engraving Halftones
- A detailed tutorial about how to make a photo engraving on plywood, metal sheet, tiles, or even a piece of glass.
- Laser photoengraving gallery
- Photoengraving process using 8.5-watt diode blue laser installed on BEAMO FLUX Co2 machine
- Materials for photo laser engraving.
- Patterns of laser engraved photos and their predominant features
- How to do laser photoengraving (requirements and steps)
- Prepare an image for laser photo engraving using T2Laser software
- Here are the Acan functions absent in Acan / Acan-mini:
- Tips for best results when laser engraving a photo
- Important pillars
- Prepare an image for greyscale laser engraving using Photoshop
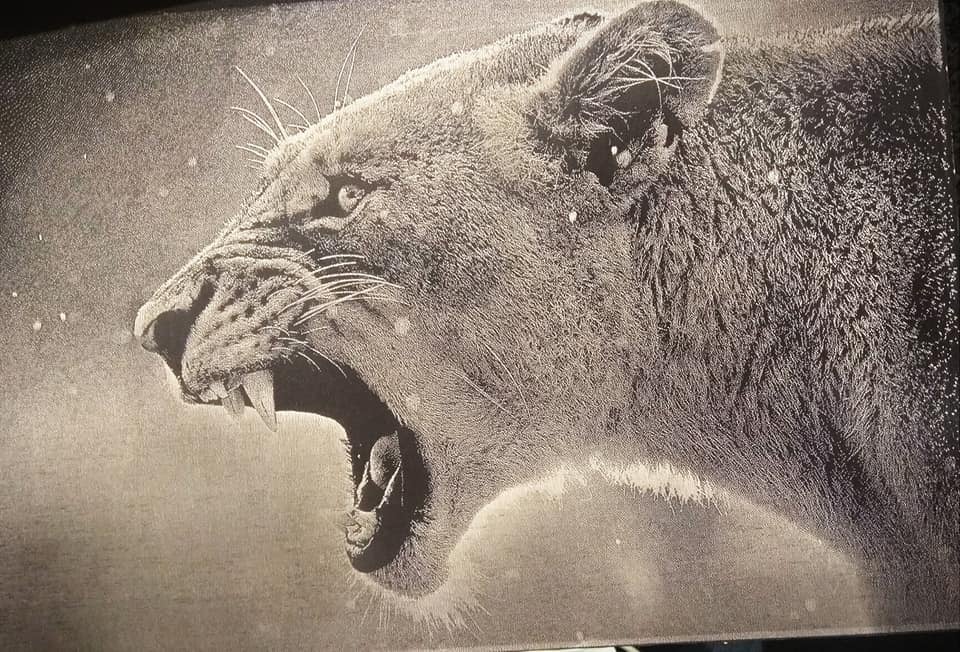
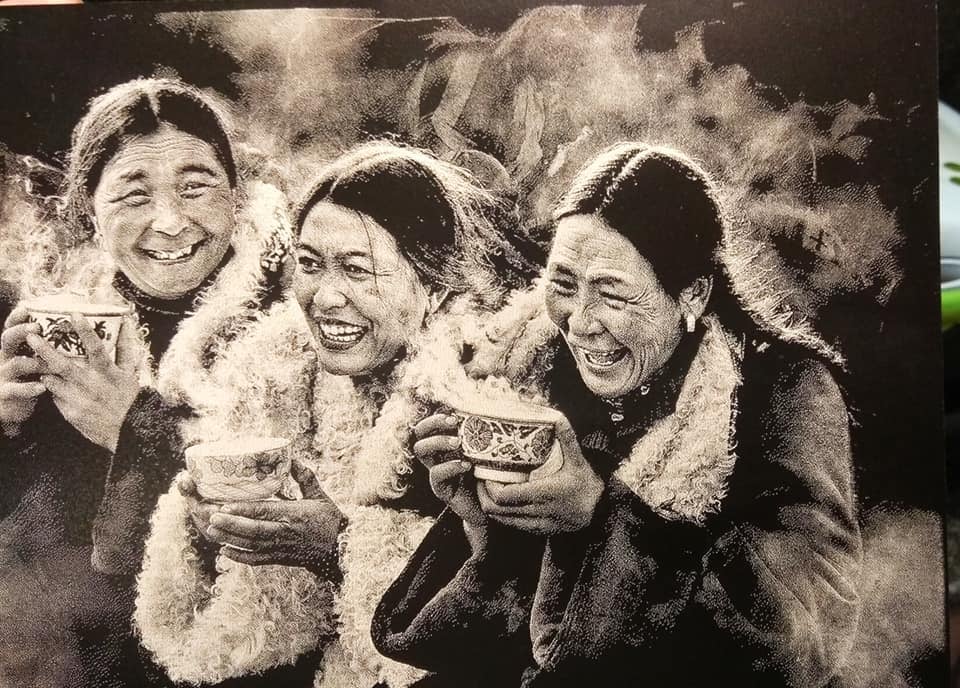
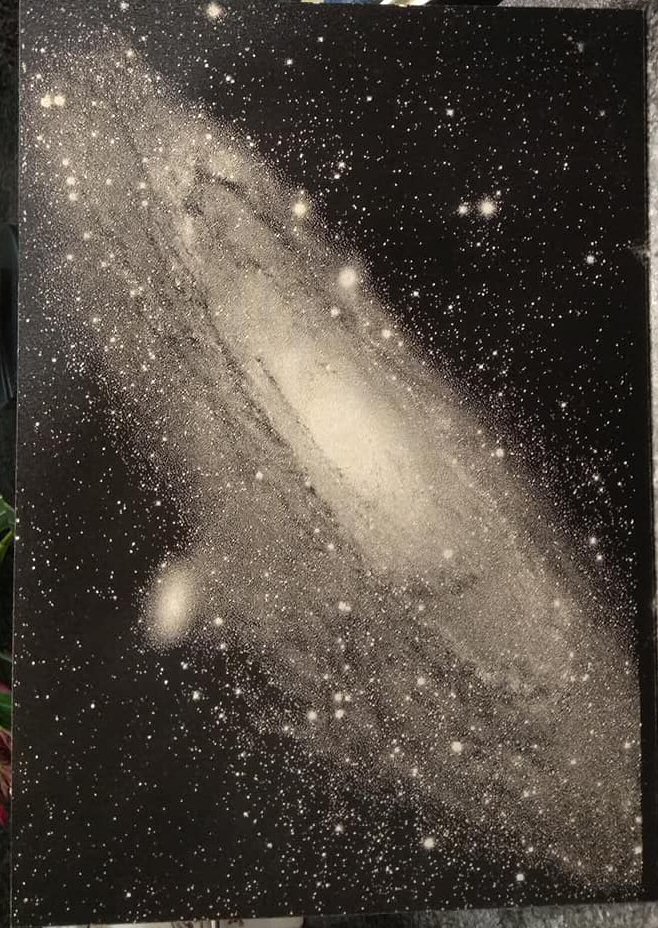
- Our customers make and share
- More g-code examples
How to laser print a beautiful photo
Halftone is a printing technique that combines dots to create a deliberate screen-like image. This printing technique is often used for photographs, but it can also be used for other images or patterns. Halftone images are made up of a series of dots, which when viewed from a distance, merge together to create the illusion of a continuous tone image.
Photo laser engraving process – all you need to know.
A satisfied buyer of a laser engraver usually quickly masters the technologies of simple image engraving on various surfaces: on wood, plastic, glass, metal.
With a diode laser or DPSS (diode-pumped solid-state), you can do very effective and nice photoengravings on many materials like wood, plywood, slate, cardboard, and hardboard.
What is Laser Engraving of Halftones and How Does it Work?
Laser engraving of halftones is a process of using a laser to etch an image into a substrate. This can be done by varying the power and/or duration of the laser beam, and by using different focal lengths.
How Does Greyscale Laser Engraving Work?

The process starts with a laser emitting a beam of light that is focused onto the material, and the intensity of the beam is varied to create different shades of grey. The material is usually some type of metal, but it can also be glass, wood, or plastic.
The process of greyscale laser engraving is similar to traditional black and white photography. An image is first rendered in black and white, and then the laser is used to etch it into the material. The depth of the etching will depend on the intensity of the laser beam, with deeper etchings resulting in darker shades of grey.
Applications of Halftone Laser Engraving
There are a number of different ways that halftone engraving is used. These includes:
- Halftone engraving is a popular choice for creating images on products or awards.
- It can also be used to create signage or to add a unique touch to a promotional item. When done correctly, halftone engraving can produce stunning results.
- Useful in creating screens for printmaking. By using a halftone screen, artists and printmakers can create detailed prints with a limited number of colors. This technique is often used for creating prints with a vintage or antique look.
- It’s also useful in creating stamps. Stamp designers can create detailed designs that can be easily replicated. This technique is also often used for creating custom logos or other images that need to be reproduced in a consistent manner.
- Used in creating textured surfaces. Designers can create raised or sunken areas on a variety of materials. This technique is often used for creating textures on metals, plastics, and even wood.
- Used for creating unique patterns on a variety of materials that cannot be achieved with traditional printing techniques. This technique is often used for creating intricate designs on fabrics, wallpaper, and even glass.
There are a few things to keep in mind when laser engraving halftones in order to achieve the best results:
Key Things to Note When Laser Engraving Halftones
- First, it’s important to use a low power setting on your laser engraver. This will help to prevent burning or charring of the paper (if it’s the one being used).
- You’ll need also to use a slow-speed setting on your machine in order to get a clean, precise engraving.
- It’s important to use a sharp bit for your engraving so that the lines are clean and crisp.
- The dots that make up the image need also to be of a uniform size. If they are not, the resulting image will be fuzzy or blurred.
- The spacing between the dots should also be uniform. Again, if this is not the case, the image will be less defined.
- Finally, it is important to use a laser with a high enough power to etch the dots into the substrate. If the laser is not powerful enough, the dots will simply be burned away and the image will be lost.
With these tips in mind, you should be able to produce beautiful halftone engravings on any type of material! Follow these tips to ensure your next project is a success.
Hardware and firmware
For photoengraving, you need to have a dynamic PWM option on your board. Most GRBL compatible boards support it including Ortur, Neje, Atomstack, Wainlux, Universal laser engraver 3000 mw 15000 mw CNCC Laseraxe and Eleksmaker Mana board. Most 3D printer boards with Marlin firmware do not support dynamic PWM that means that you cannot change laser power for every single dot and hence you cannot make greyscale engraved photos!
It is important to know that photo engraving is possible if the PWM frequency is more than 1000 Hz. That means that laser power can be changed every millisecond. Some PWM boards only support 250-500 Hz frequency that does not allow high-quality photoengraving.
Endurance PRO lasers allow 25 kHz frequency >>>
A detailed tutorial about how to make a photo engraving on plywood, metal sheet, tiles, or even a piece of glass.
Software: The software used for importing the image and to generate the Gcode for this tutorial is LaserGrbl which is a freeware program to send commands to a GRBL compatible controller. You can download it here:
Recommended laser – 8.5 watt PRO / 10 watt PRO / 10 watt PLUS PRO
Lens: Used 3 element lens on my diode.
This type of lenses gives you a very small spot. The disadvantage of them is that is not recommended for cutting materials, but only for engraving, which it’s absolutely fine for the purpose, we want in this specific case.
[PART 1] : MATERIAL: Preparation and painting
For this engraving, used a side plate cover (lid) of an old PC cover with a light grey color.
First, the surface was cleaned very well with a soft cloth and then gently applied it with fine sandpaper to make the surface smooth and taking care not to remove its initial color.
Then, it was dyed – from a distance of about 20-25cm – with a commercial acrylic spray of black satin. You can also use matte or even glossy spray depending on your preferences.
The first layer of spray usually doesn’t cover the surface nicely, so it was used second-hand quick pass, after drying it thoroughly.
Avoid covering the surface with a large amount of paint. Use only the amount of paint that will cover the surface without overloading it and creating a thick layer of color. The thinner the layer of color, the easier (and fastest) the laser beam will burn as it passes over it.
Finally, it was allowed to dry well for about 5-6 hours before being used.
You can also paint with acrylic spray-on glass or tile with the same technique.
Because the texture of these materials is different, keep in mind that you will have the best results on the smoothest surfaces. For example, don’t expect much of a tile with a slightly rough surface.
I used this brand for painting, but any acrylic-based spray will do for engraving.


At the bottom of the bottle, you can see the manufacturer Code 28528, maybe it would be useful for you in case you find the same brand.
[PART 2] : Photo editing
The process of preparing photos for laser engraving varies depending on the software you’re using, but generally, you’ll need to convert the image to a vector file. Vector files are made up of lines and shapes, rather than pixels, and they can be scaled without losing quality. This is important because you’ll want the image to be as clear as possible. Inkscape is an example of perfect software for converting your images to vector files.
Once you have a vector file, you’ll need to adjust the settings in your software so that the engraver knows how deep to etch the image into the material. The depth of the engraving will depend on the material you’re using and how much detail you want in the image. If you’re not sure what settings to use, there are many online resources that can help you get started.
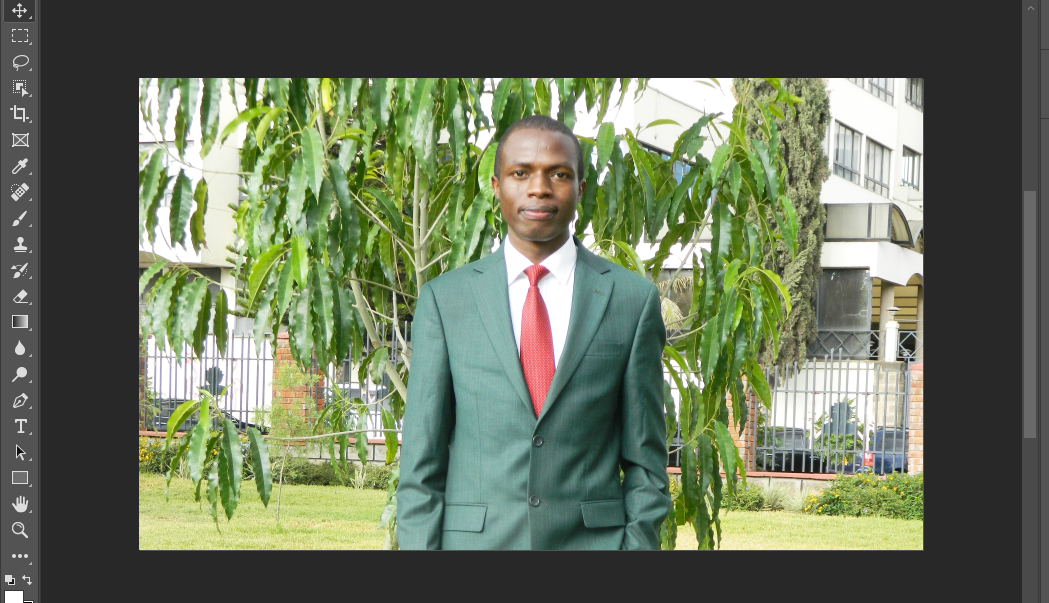
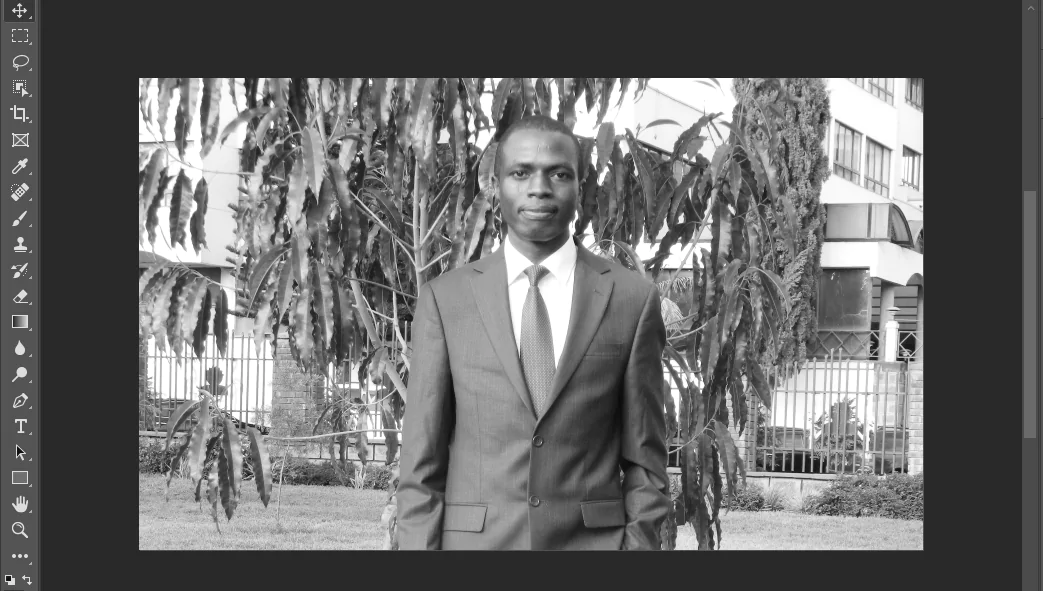
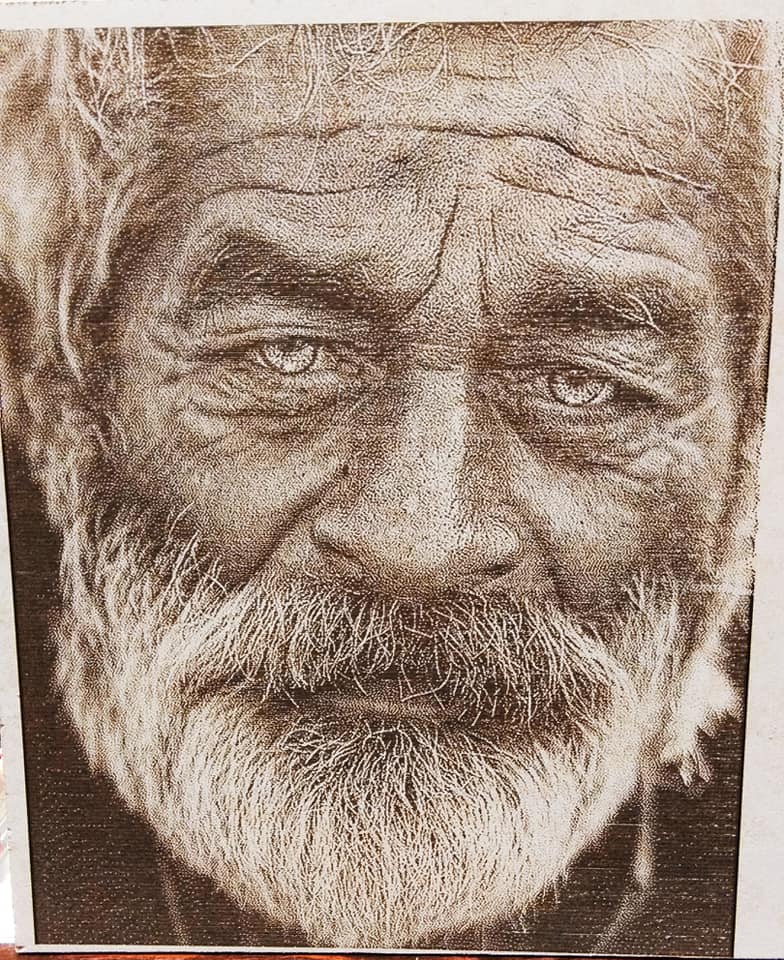
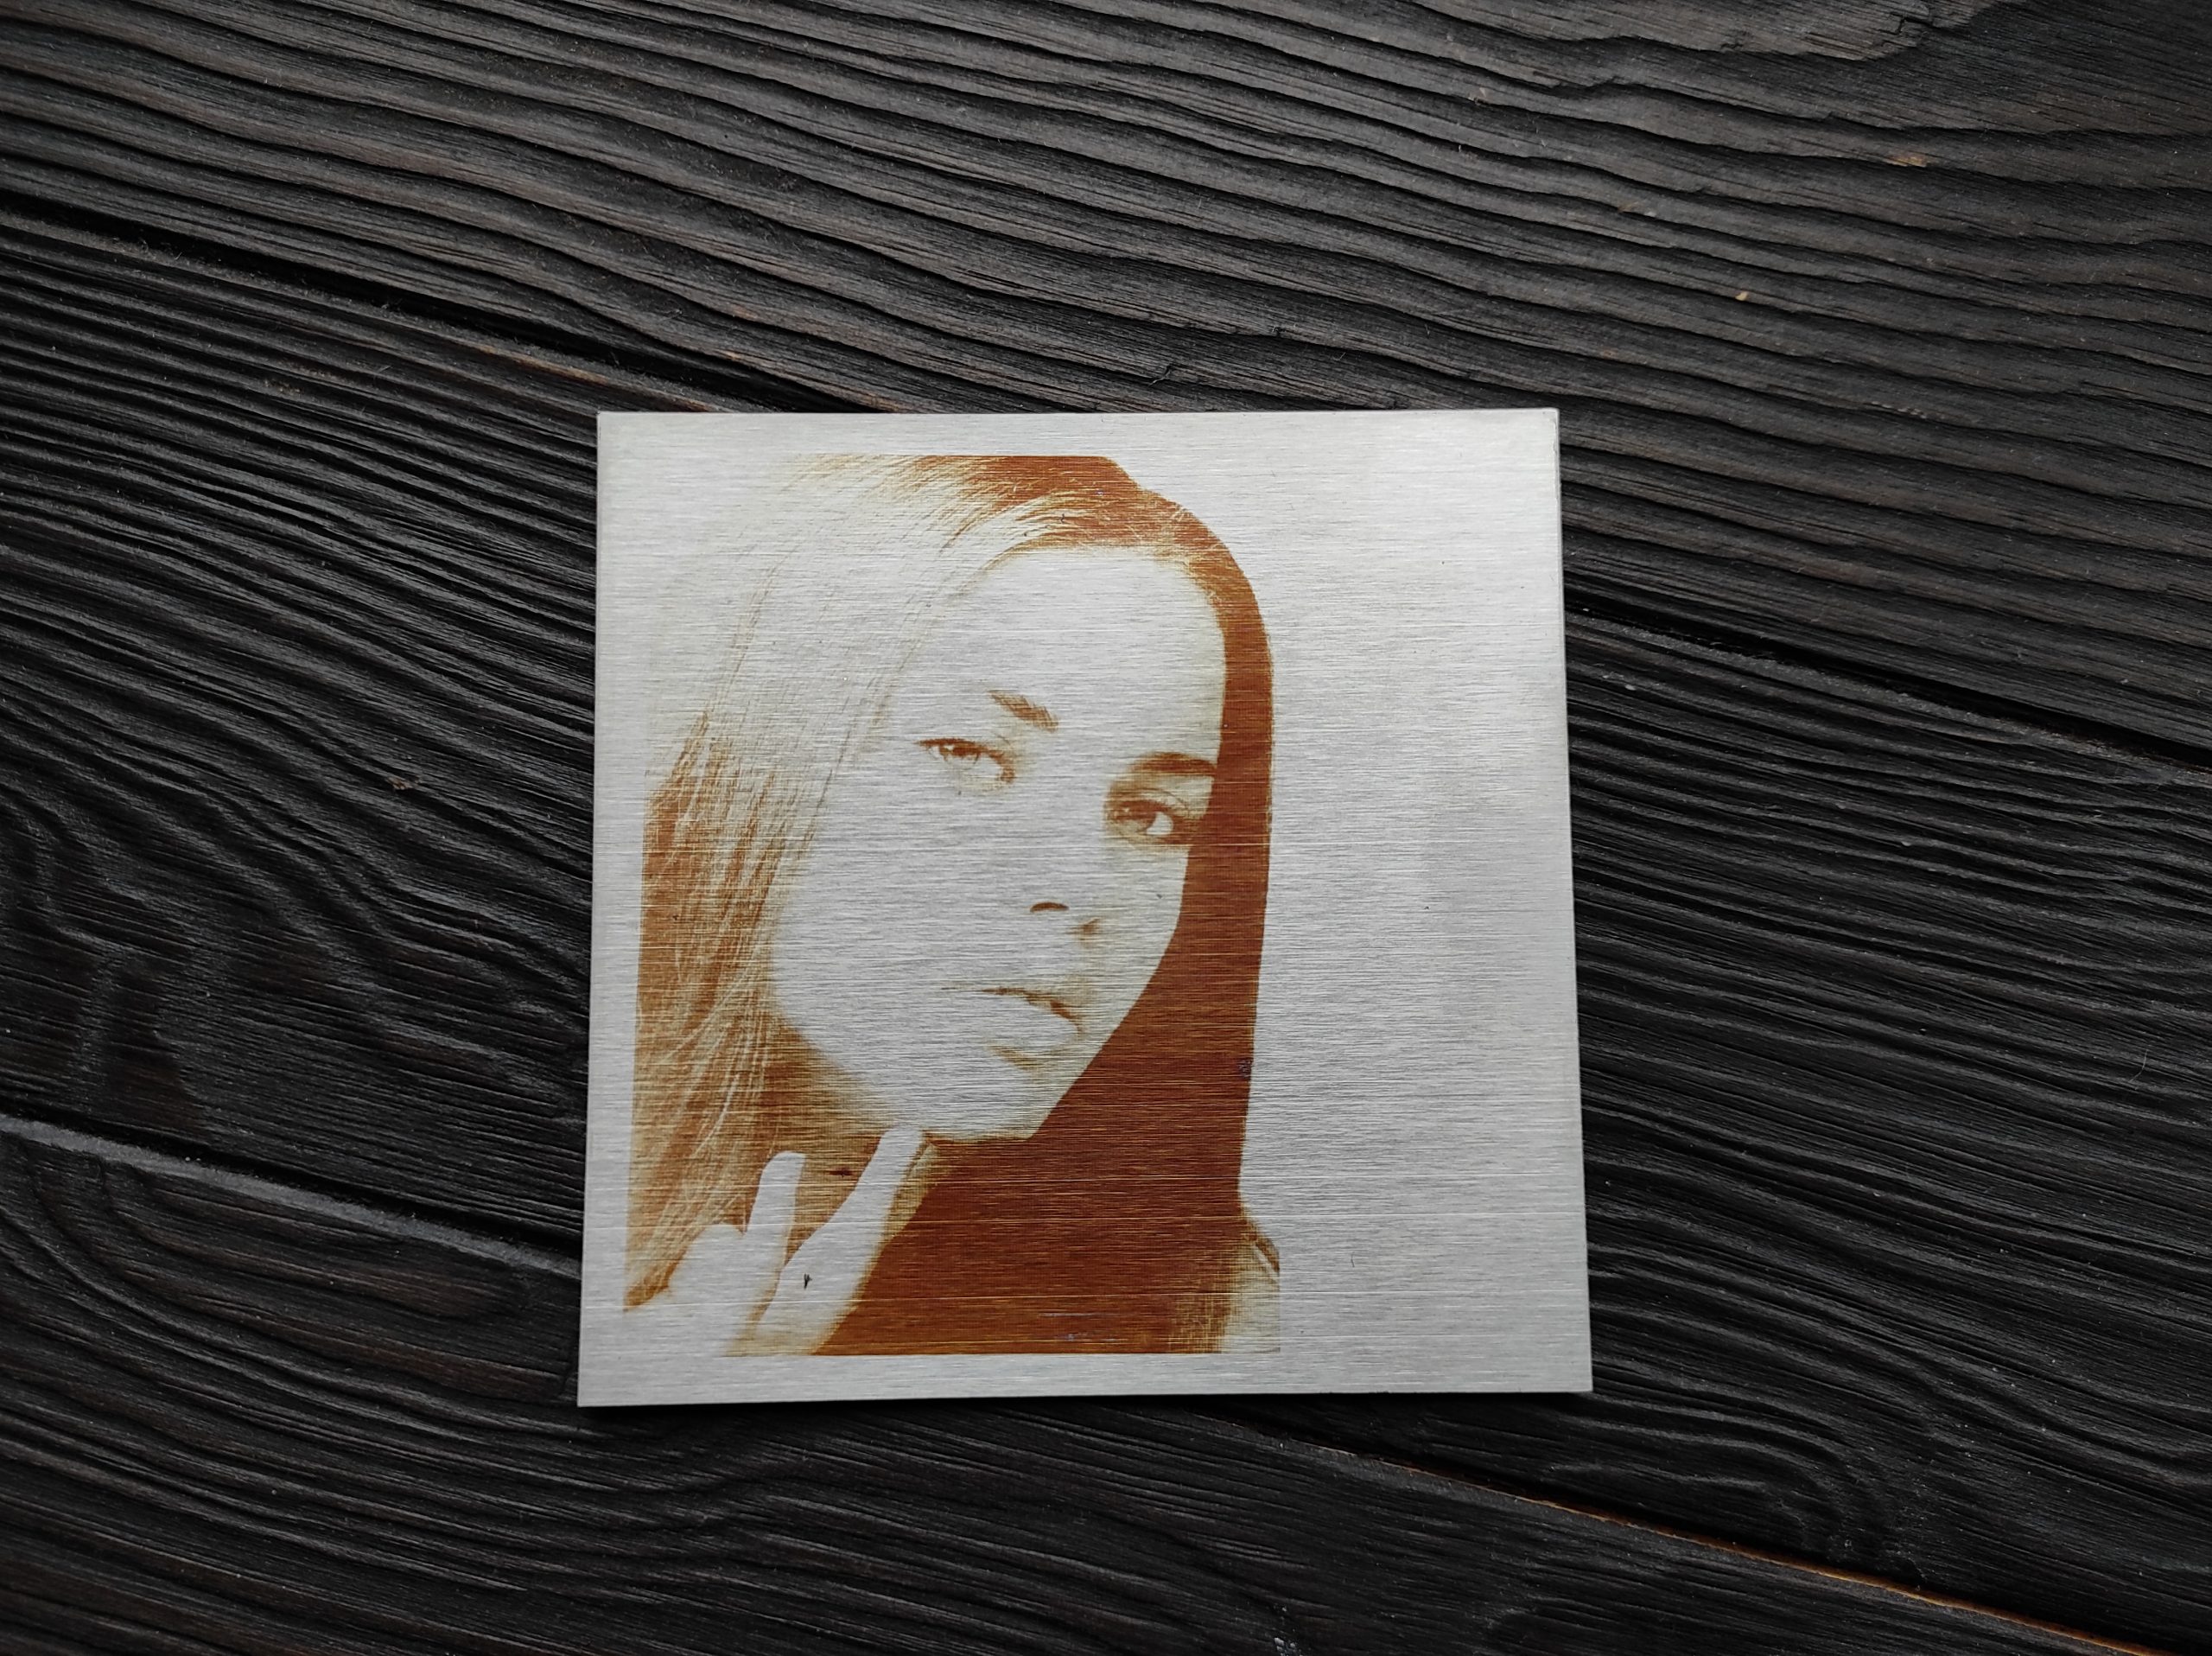
For a good result, you will certainly need a high-quality photo with good contrast.
This image has been sent to me by a friend, as a sample, to see the results of photo engraving on metal.
The first photo I got is the source file:
Dimensions: 600×758 pixels / 75 dpi / 24 bit colour depth.
The source file was not exactly what I wanted about photo quality, but he wanted to see the results on the specific one.
Generally, is recommended source images with above 150 dpi and a good diode using 3 Element lenses to show the details on the material.
Then I used Paint Shop Pro to adjust the brightness and contrast a little bit.
The second photo is the image after processing.
You can see in the second photo that it’s darker and highlighted the white tones of the image, especially on the fingers and veins of the old lady.
More adjustments for brightness and contrast can be also done later, within LaserGrbl program.
You can download this for your test, or you use any other image you like.

Note:
There are a lot of people out there that selling filters and macros for Photoshop or Corel Draw and similar programs to achieve the ultimate photo quality on engraving.
Maybe such filters could be useful to someone, but I would not spend my money on them. For example, the photo i used, has not had the high resolution I wish to, but i want to believe that the result is quite good.
LaserGrbl is indeed powerful software.
Prepare an image for greyscale laser engraving using Photoshop
If you’re looking to create anything beautiful using a laser, preparation is key. In this section, we’ll show you how to prepare an image for greyscale laser engraving using Photoshop.
- The first step is to open your image in Photoshop. You can do this by going to File and then Open.

- Once the image is open, you can then duplicate your image so that you have a copy in case something goes wrong. Then go to Image > Adjustments > Black & White.
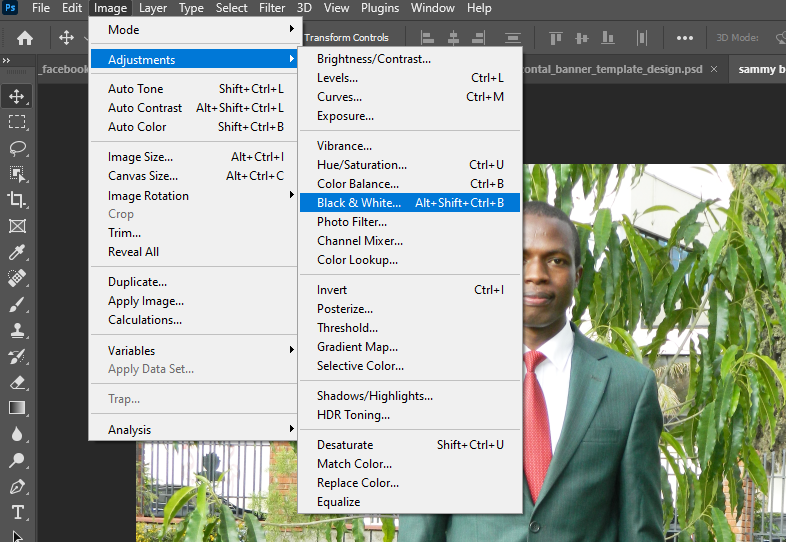

- This will convert your image to greyscale as shown below.

- Next Desaturate the image by going to Image > Adjustments > Desaturate. Alternatively, you can press Shift+Ctrl+U on your keyboard. Then, go to Image > Adjustments > Levels and adjust the levels so that the majority of the image is black. You can do that by dragging the middle slider to the left. The goal here is to make sure that the white areas of the image are as bright as possible, as these will be engraved by the laser.
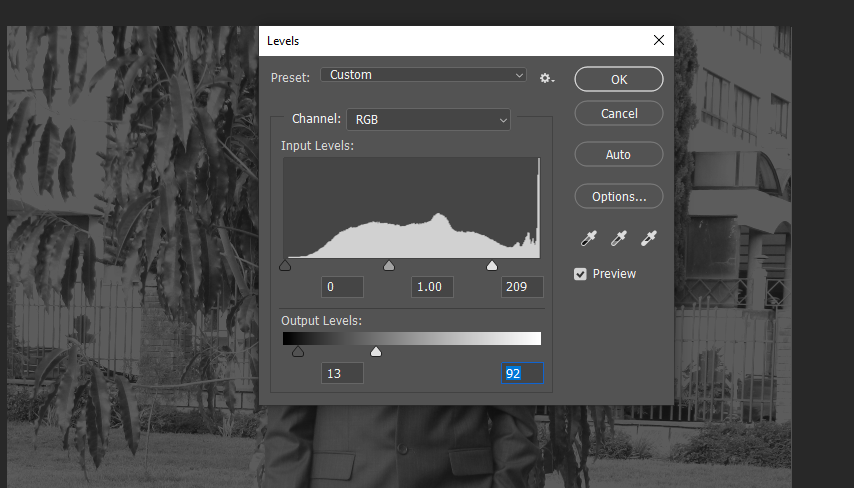

- Once you’re happy you can then save your image in png format. That is, by going to File then Save As.


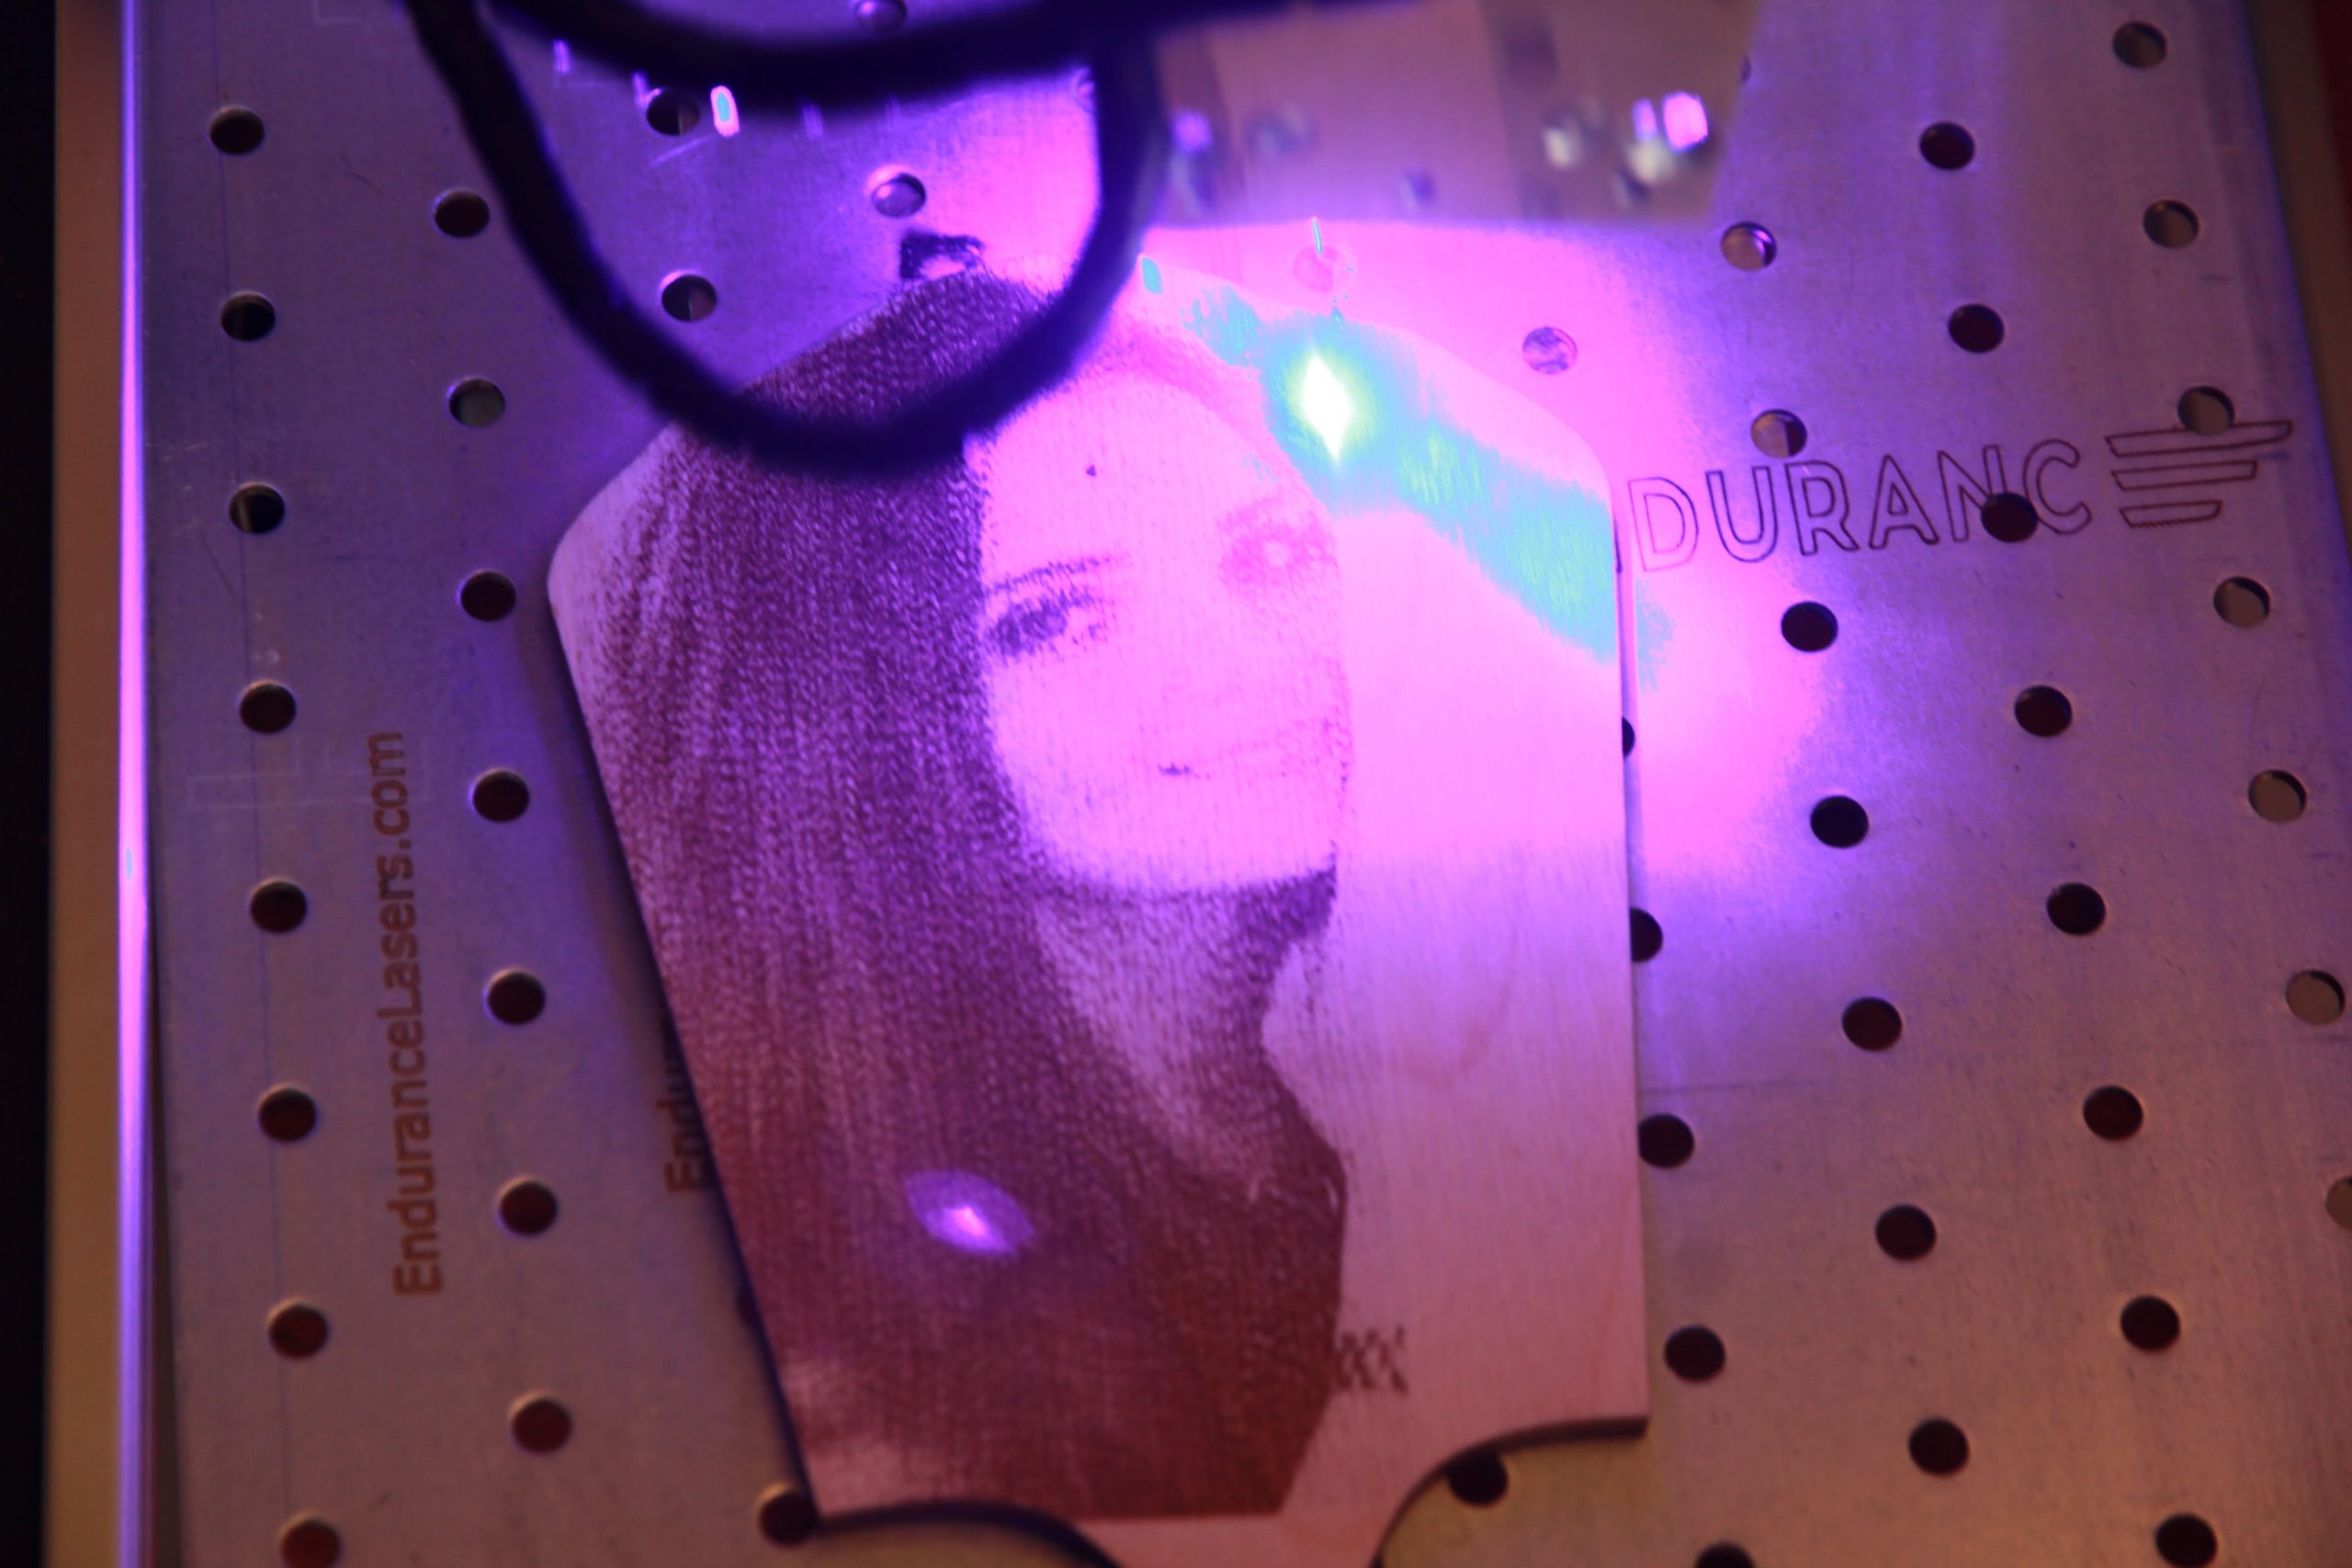
[PART 3] : Import the photo in LaserGrbl
Connect with your controller and unlock the machine.
Import the final photo to the LaserGrbl program from menu File -> Open File or the yellow icon beside the Filename field. You can see the following options in the first image attached below.
You may check the Line Preview box to see the result on any change.
My preferences used:
- Resize: Smooth (HQ Bicubic)
- Brightness: 100 (You can adjust the brightness of the photo here)
- Contrast: 100 (You can adjust the contrast of the photo here)
- White Clip: 0
You can set this option to another value, depending on your preferences. As you increase the value, the more white parts of your photo will be highlighted.
- Conversion Tool: Line to line tracing
- Direction: Horizontal
- Quality: 6 lines/mm (higher value here gives better result but also much more time to finish the engraving).
When you finish all the adjustments in this dialog box, REMEMBER to press the INVERT button shown in the first image in the red circle.
So, now you can see your image inverted as in the second attached photo.
Question: Why I have to invert the image?
Answer: If you engraving on a light color material, let’s say plywood, the beam burns much more the dark areas of the image and less the lighter areas because this is the normal image. So, no need to invert in this case.
On a surface painted black, you want exactly the opposite result. While the beam passes over the material, it will burn more the darkest areas of the inverted image which normally is white. Thus, it will remove the black paint above it and will leave the lighter color of the lid underneath.
Finally, you will have a sheet plate with black color on it for the darkest areas of the image and the light color of the sheet for the light ones.


[PART 4] : Adjust size and speed for engraving
Press Next button when finish the PART3 dialog box to proceed in the next step.
In the attached photo, you can see the Target Image options:
My preferences, according to my machine:
- a) Engraving Speed: 1500 (mm/min)
- It’s the speed that your machine will travel over the material as it burns the colour.
- b) Laser Options:
- Laser ON: M3
- Laser OFF: M5
- c) SMIN: 0
- SMAX: 180 It’s the upper value for the laser power
- d) Size (in mm)
- Width=150
- Height = will be auto-adjusted by LaserGrbl to 189,5mm, in order to maintain the aspect ratio of the photo.
- These dimensions can be changed of course, for the dimensions of the material you will use.
- e) Offset (in mm):
LaserGrbl can leave an unburned space around the engraving, in case you want to put a frame around it later.
The gcode file that the program has created, can be saved to your computer for future use (File -> Save Program) as a .nc file
This can be done in the beginning, in the end, or even during the engraving.
When you are ready, press Create to create the gcode file in LaserGrbl.
Note:
The above values I used are adjusted to my machine parameters and don’t mean that will fit for all of you. You have to deal with two critical factors:
The Engraving Speed and the SMAX value.
FACTOR 1: Engraving Speed
The acrylic color you sprayed your material is relatively thin (unless you are overdone with the coating) and it’s burning very-very easily from the beam.
So, I’m thinking: Good, let’s increase this value to 3000 mm/min to finish the work faster. Bad idea!
Here it goes the second factor: the SMAX power value. If you increase too much the speed, then the beam will not burn the paint nicely, right?
FACTOR 2: SMAX laser power
Well, i have another idea: Let’s increase to SMAX power only, to about 200-220 value (max=255), and leave the Engraving Speed as it is, for a nice deep paint burning. I don’t want to leave unburned spots on the surface.
Bad idea too!
In this case, you will have two major problems:
1) The cheap Chinese diode lasers will be overheated during the work and plus, you decrease its life span. ENDURANCE LASERS CAN WORK 48-72 hours non-stop! Keep in mind that the engraving will last over an hour in most of cases.
2) Low resolution of the engraving, because the beam will burn and the neighbor spots of the paint as it passes 6 lines per 1 mm.
A fast calculation gives us 0,16mm on each pass of the beam, while most diodes give us 0,1-0,2mm spot size. Damn, that’s pretty narrow there, isn’t it?
Laser beam spot improvement for 445 nm diode laser (success – new laser beam spot)
FACTORS 1+2: A combination for a good engraving
Increase both values OR decrease both values? Hmm…
You have to balance your settings between those two values and that‘s the tricky part for a good engraving.
Here it is what I have done to find those:
I first painted a sheet as described in STEP 1 of this tutorial.
First try: Speed = 1000 / SMAX = 200 -> bad result / poor quality
Second try: Speed = 2000 / SMAX = 100 -> bad result / not burning nice on paint.
Third try: Speed = 1500 / SMAX = 150 -> almost good result
Forth try: Speed = 1500 / SMAX = 180 -> astonished !!!
Each time i was testing a part only of the image, about 5-6cm height of engraving, observing the result and then moving the sheet to the unburned black area above and repeating the process with other values.
I noted down each time these value, so I don’t have to try again with the same ones.
THOUGHTS:
The value I used for SMAX=180 is relatively high for a new 7-watt laser diode with Engraving Speed = 1500 mm/min.
But my diode is quite old now and the power has reduced enough by the time.
I suppose that in a new 7 watt laser diode the SMAX value can be set on 100-130 and the engraving speed could be raised above 2000 mm/min without overheating the diode at all.
I remember that my first try with a new diode, gave me very good results with SMAX=180 and Engraving Speed 3800 mm/min and the diode get warm, but not very hot. The engraving time was about 45min for a surface of about 22×32 cm.
Of course, machines with diodes with less power of 1,5 or 2,5 or 3,5 Watt has to be configured for engraving, with less engraving speed and more SMAX power.
Too many parameters:
Material, diode power, how old is the diode, engraving speed and SMAX power.
The experiment is my best advice.
When you find the ideal settings for your machine, write them down and start shooting. I assure you that you will not be disappointed.

[PART 5] : Start engraving and precautions
1) Final preparation
- -Adjust your focus point to the diode because you want as much as more precision for a good engraving result.
- -When you are ready, RUN the program to start your engraving by pressing the green arrow besides the progress field.
2) Precautions
- a) Always wear your goggles.
- b) Make sure that your room is properly ventilated.
As the machine engraving on the material, keep in mind that dust will be generated from the burnt paint will be deposited on it and a large amount of it is suspended and dispersed in your area by the blow fan of your diode.
If you have an air pump, use it to blow the smoke out of your room. You don’t want of course, to breathe the floating particles of burnt paint.
The first time I didn’t use an air pump, so after about 2 hours of engraving, I had to clean up the entire machine, straps, wheels, electronics, diode fan and generally the whole room from a thin layer of burnt grey dust which covered almost everything.
3) During the engraving
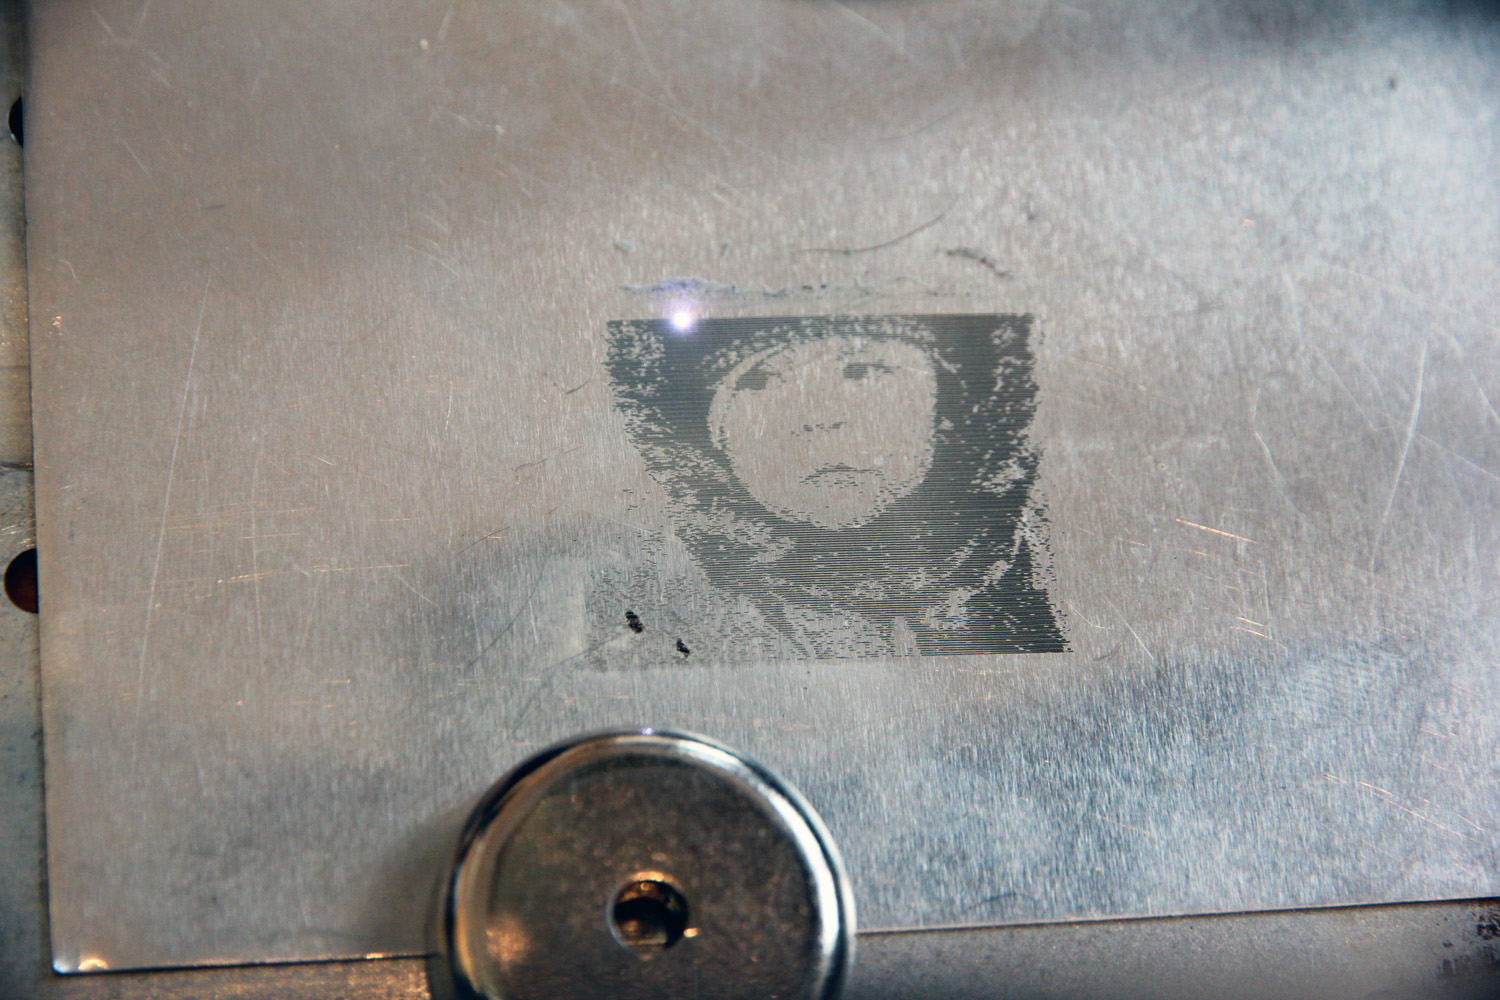
Don’t be disappointed if you initially don’t see the effect you want when engraving on the material, because it just won’t be the final result.
As the beam passes over the paint layer, it engraves it but does not remove it. If you try to blow the dust away, you will remove some, but again this is not the final result.
However, do not attempt to remove it with your own hands as you will damage it before it is finished.
So wait patiently for the process to complete.
You can see in the attached image, of what about to expect after the engraving finishes.
The photo is on tile engraving, but you will have similar result on sheet of metal or glass.

[PART 6] : Last step – The revelation!
Wash carefully the surface with cold running water from the tap, avoiding touching the marking area with your fingers.
Then, moisten a very soft sponge and wipe the surface VERY gently with slow movements.
Wash the surface and the sponge again with cold running water from the tap.
Do not put too much pressure from the beginning.
Soon you will see all the photo details to appear on the surface.
CAUTION !!!
Repeat this process as many times as necessary until all the details of the photo appear, but do not overdo with it!
From one point on – and the more pressure you put on the sponge – you will also remove the paint that must remain on the material.
And because your engraving can take several hours, it is a pity to ruin your work.
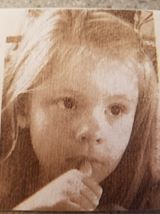
Final Result
Let your work dry for a few hours and wipe it with a soft cloth.
If you want to protect it from scratches, you may apply varnish on it.
Now, you are ready.
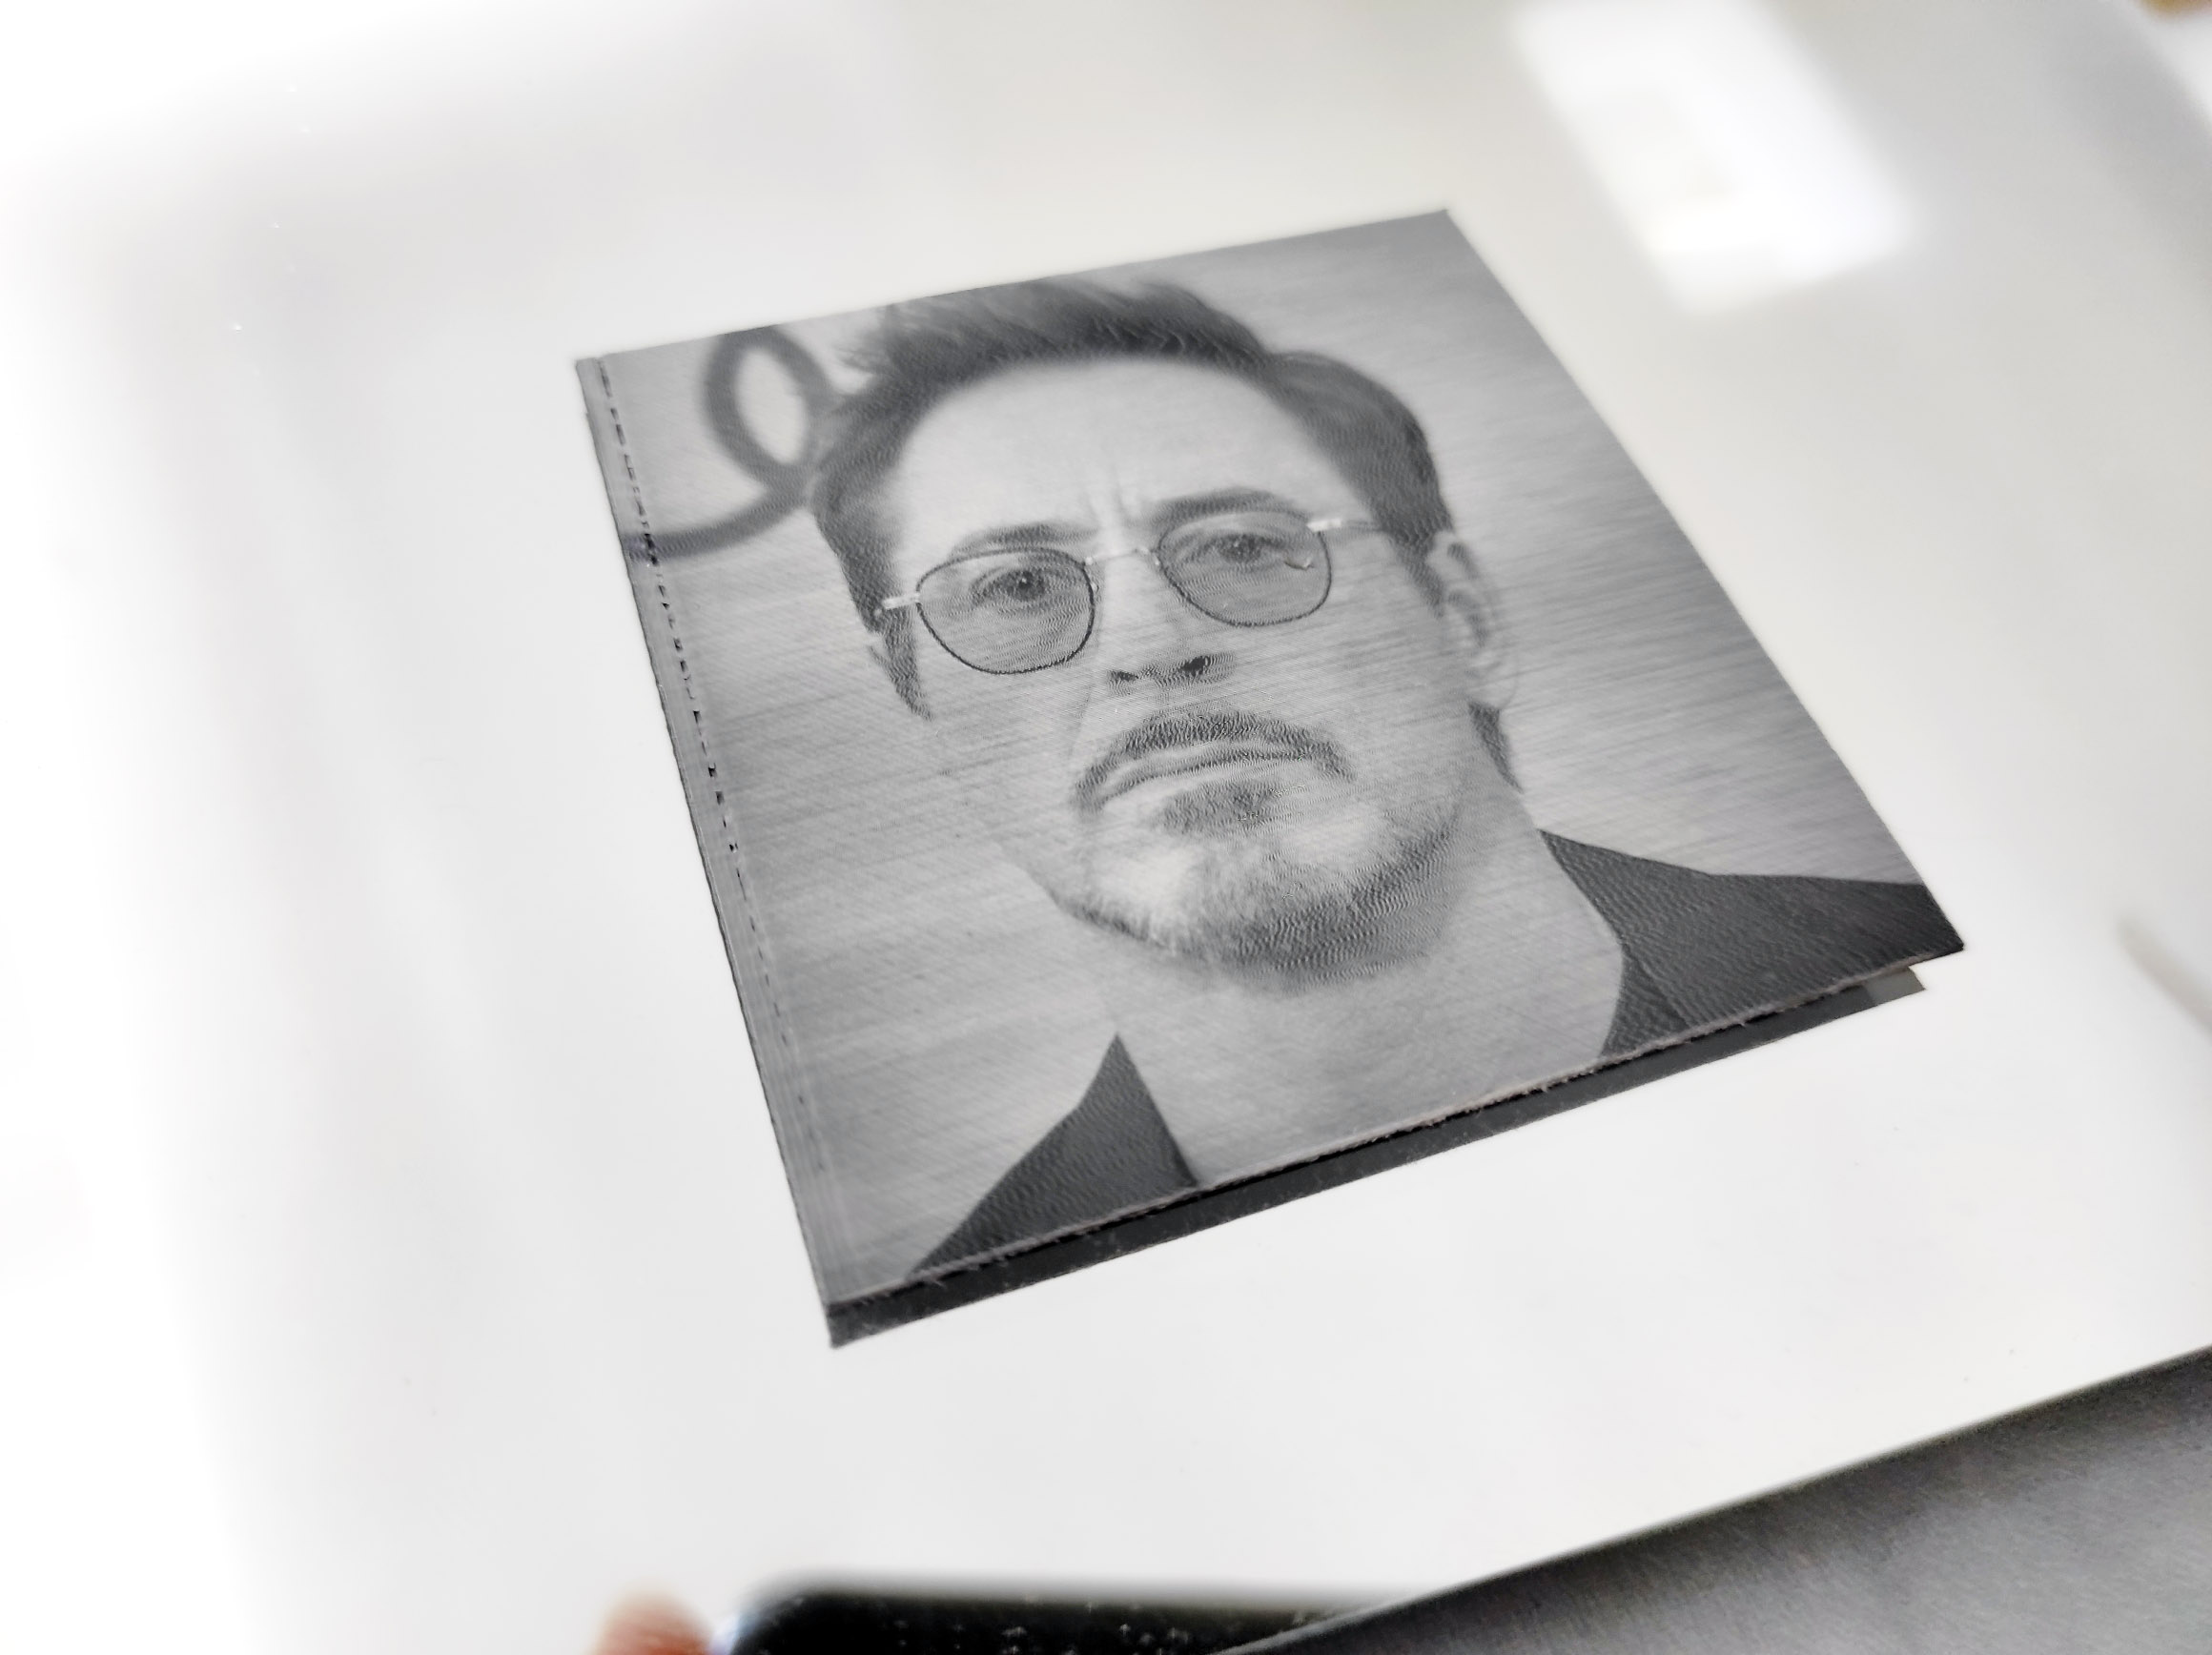
The attached image below shows the finished engraving with the image used as a sample in this tutorial.

Credits:
About this last wash process: I had seen a relative video with engraving on a tile long time ago, posted by Selenne Láser
Take a look in the video, to see how you must do the wash process.
https://www.facebook.com/watch/?v=623688311455872
https://www.facebook.com/LaserGRBL/videos/pcb.360977264572703/623688311455872/?type=3&theater
Epilogue:
– Sorry if I was too tired for you to read all this stuff, but I tried to be as detailed as I could. I hope to help a little bit if anyone of you wants to engrave photo on various materials such as glass or tiles.
– And remember No one is born with the knowledge inside his head.
Try, learn, post your works and don’t let anyone to discourage you with his comments. There will always be a smart ass somewhere (maybe more 
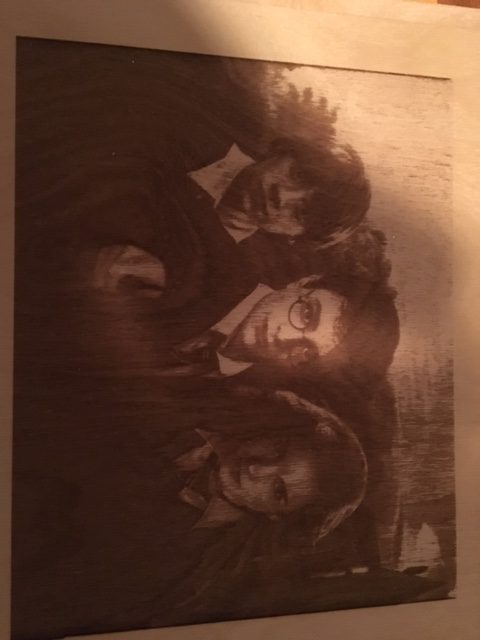
A simple proof of that is the following comparison:
I start making engraving photos about the summer of 2019.
This was my first engraving then and was very excited to print a face on plywood with my machine.

These ones are some of the latest engravings I made on mdf painted with black actylic.
You can see the improvement over time with a lot of practice.
Many of my tries were failed, but with a lot of practice, tries and patience you will find the ultimate settings for your machine.
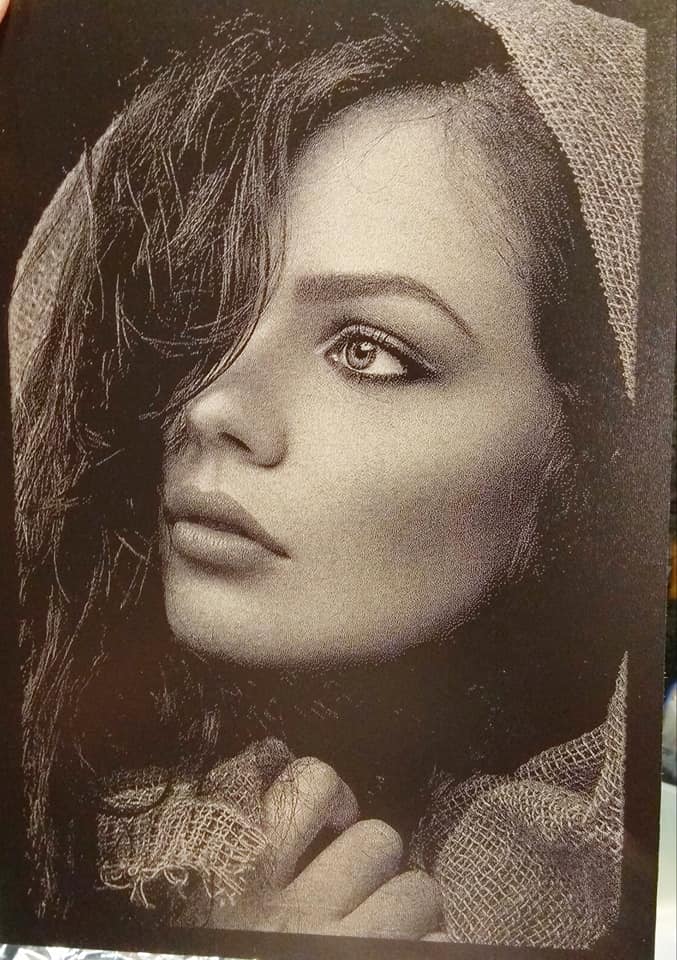
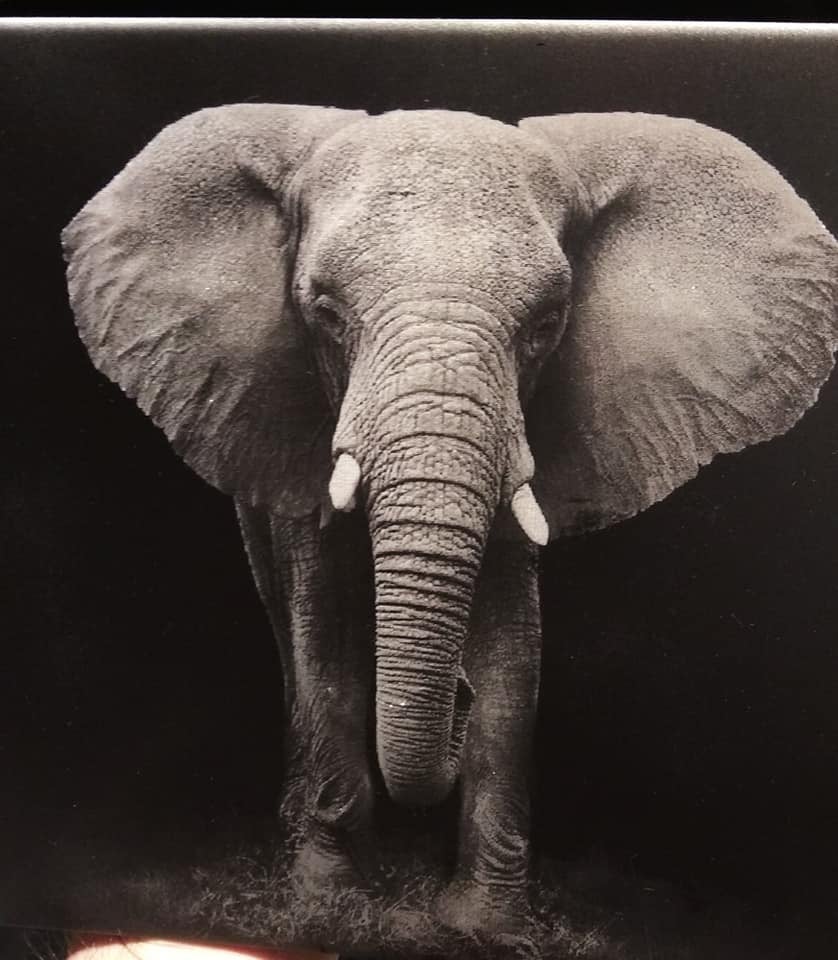
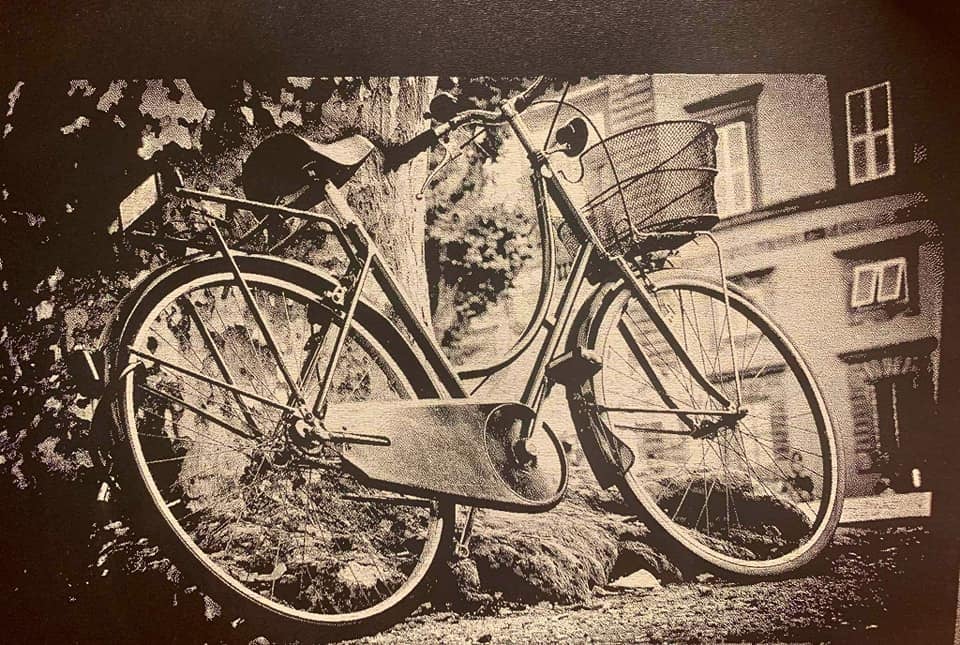
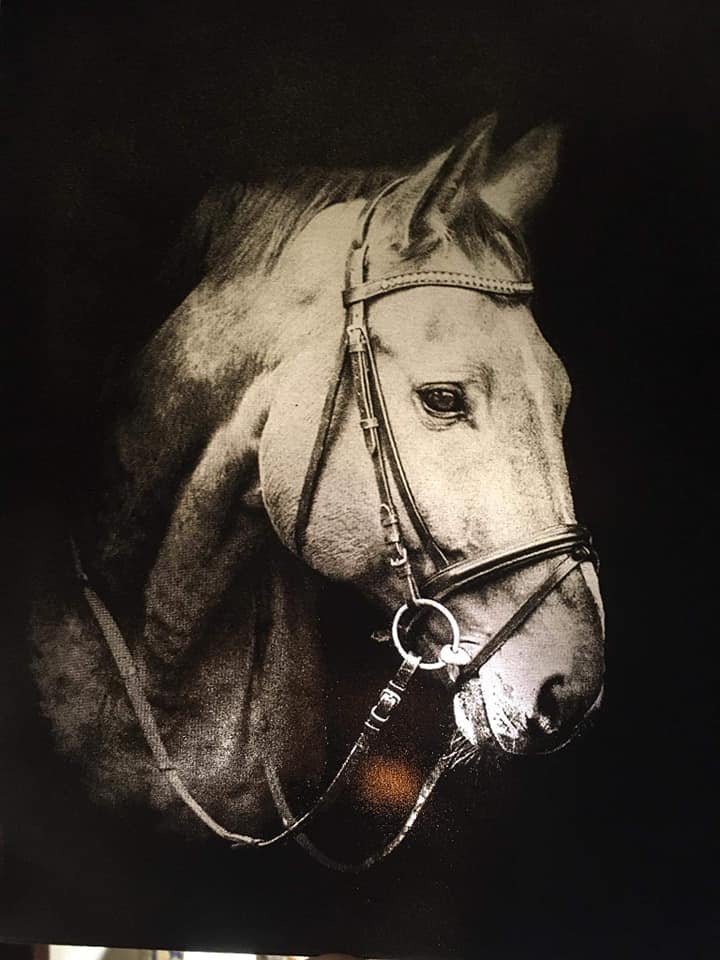
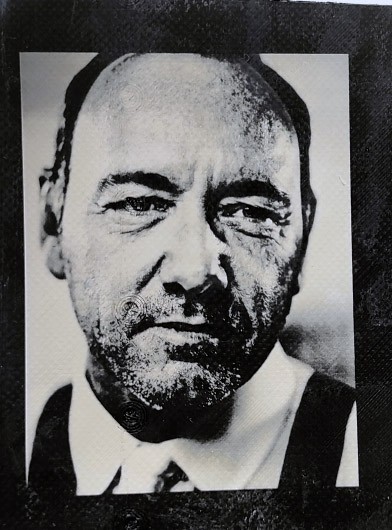
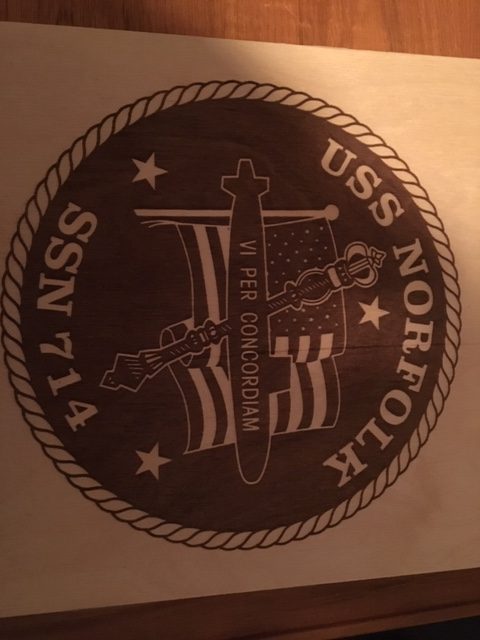
Laser photoengraving gallery
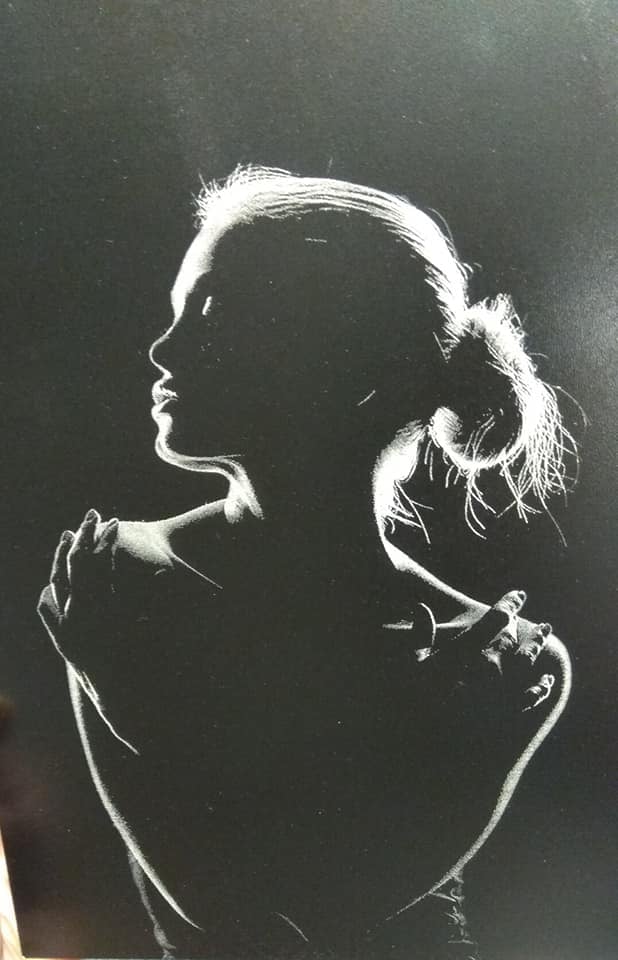
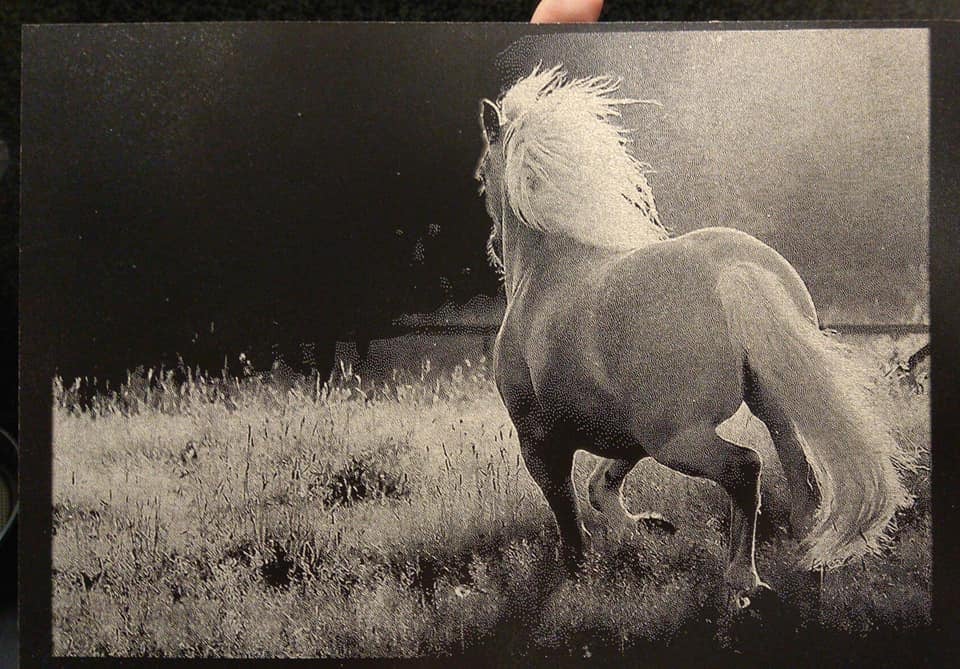
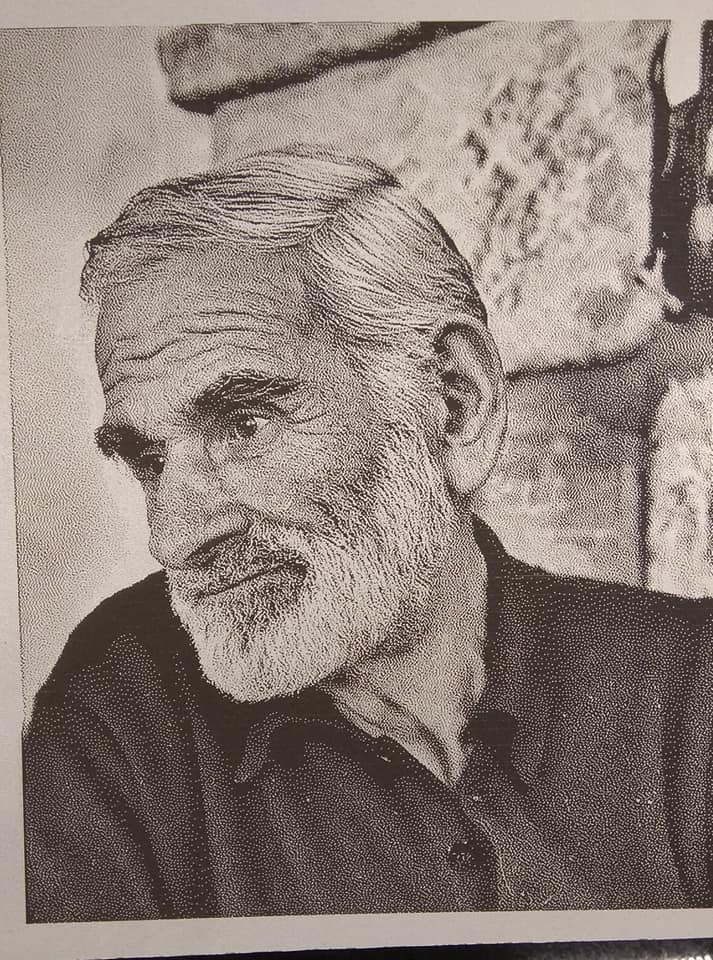
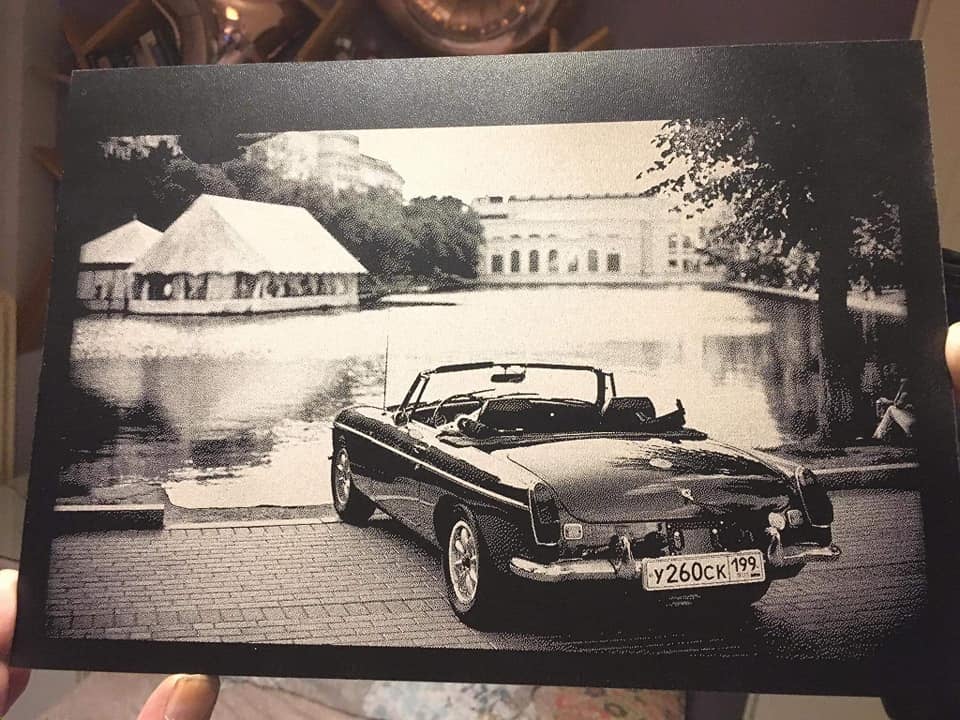


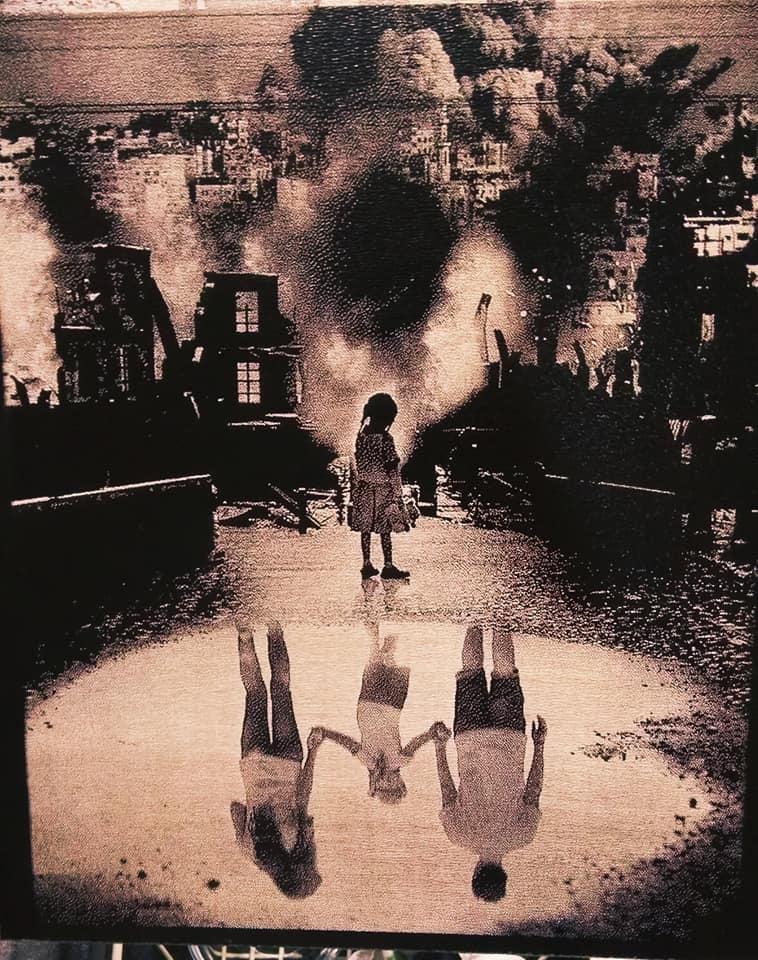

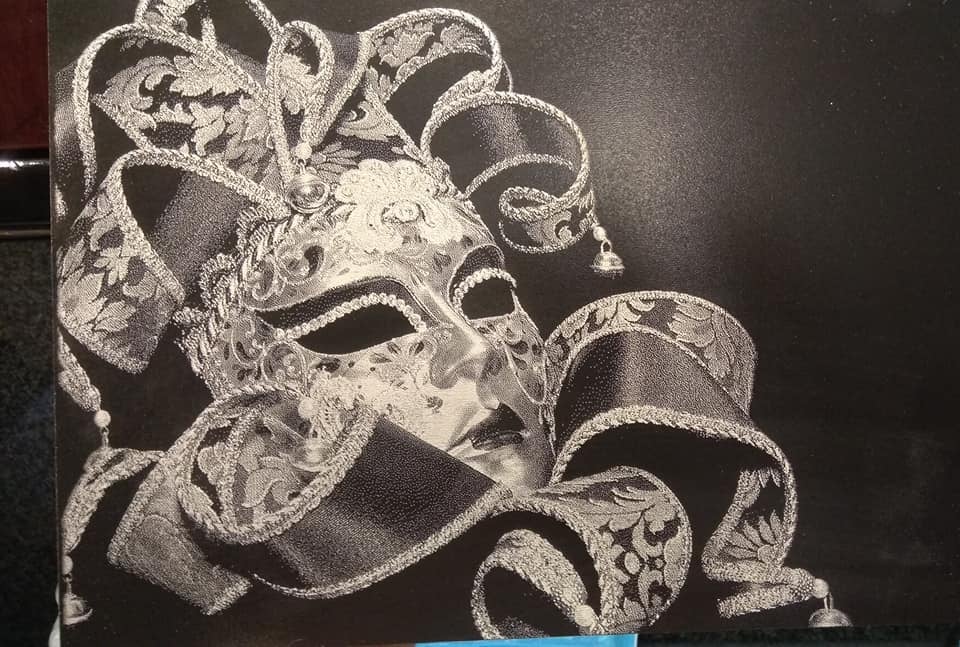
A nice photoengraving on plywood
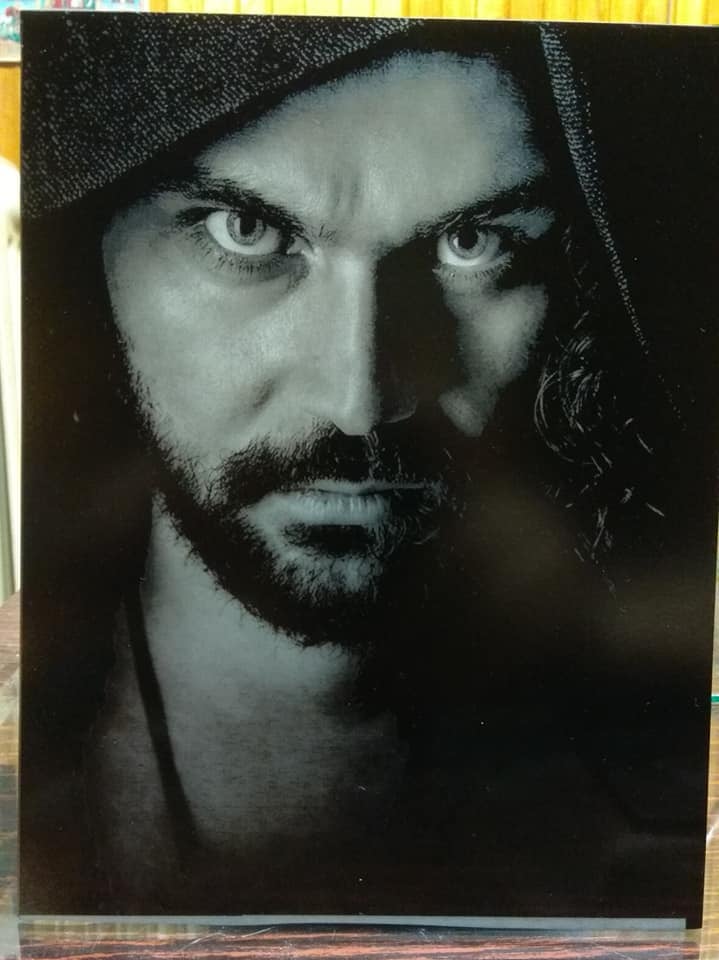
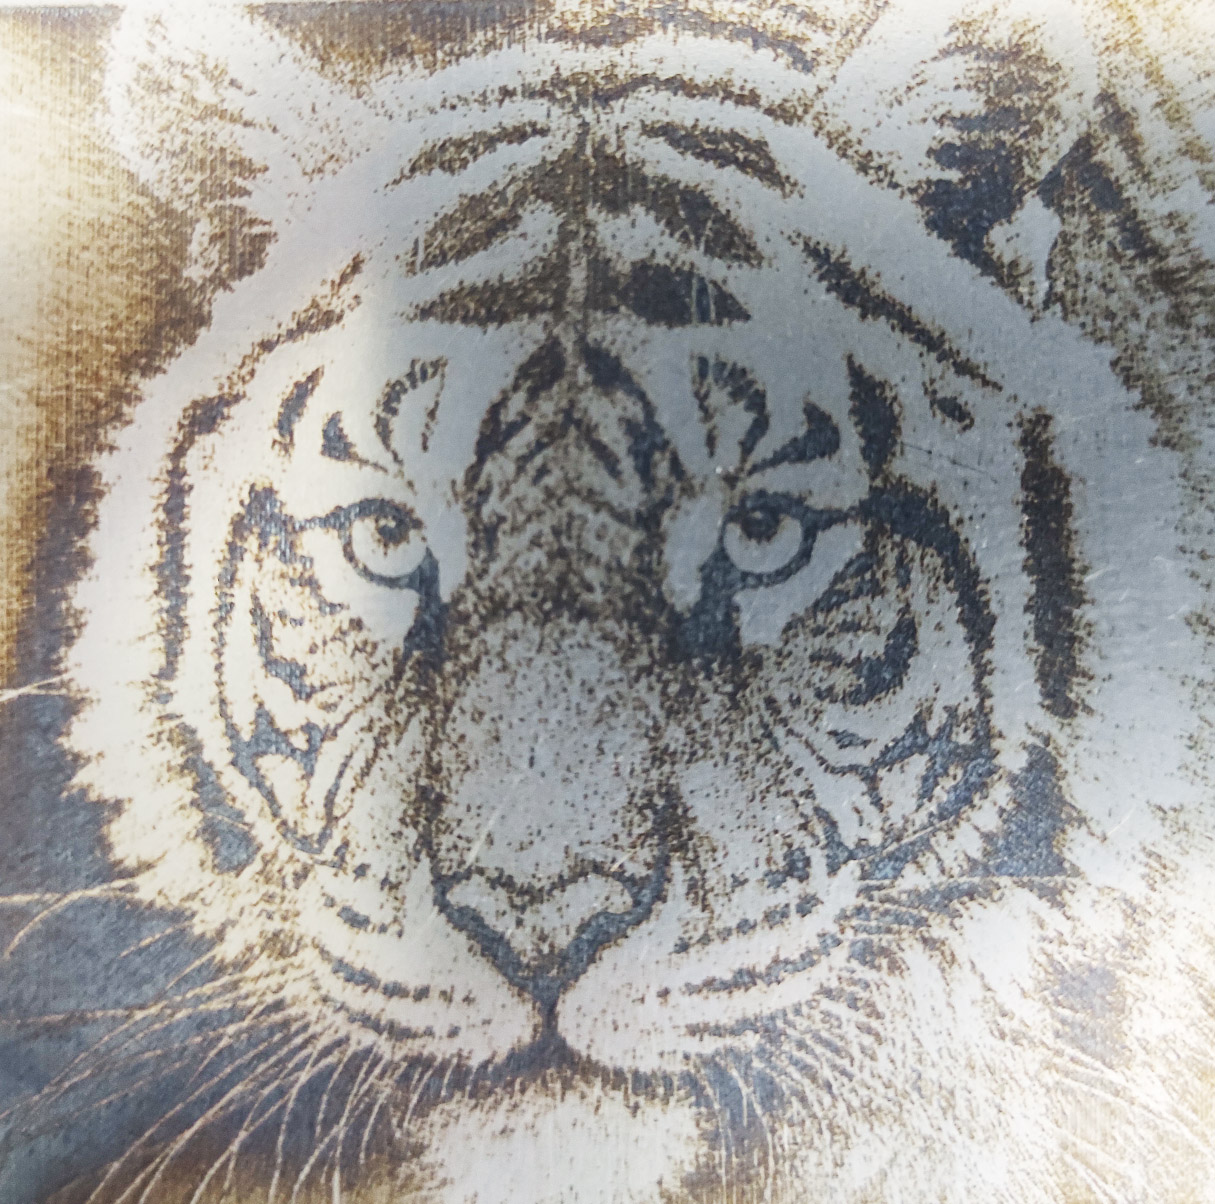
Photoengraving process using 8.5-watt diode blue laser installed on BEAMO FLUX Co2 machine
https://www.youtube.com/watch?v=QxJe1gsKwJc
Photoengraving on black slate with a 10 watt PRO laser
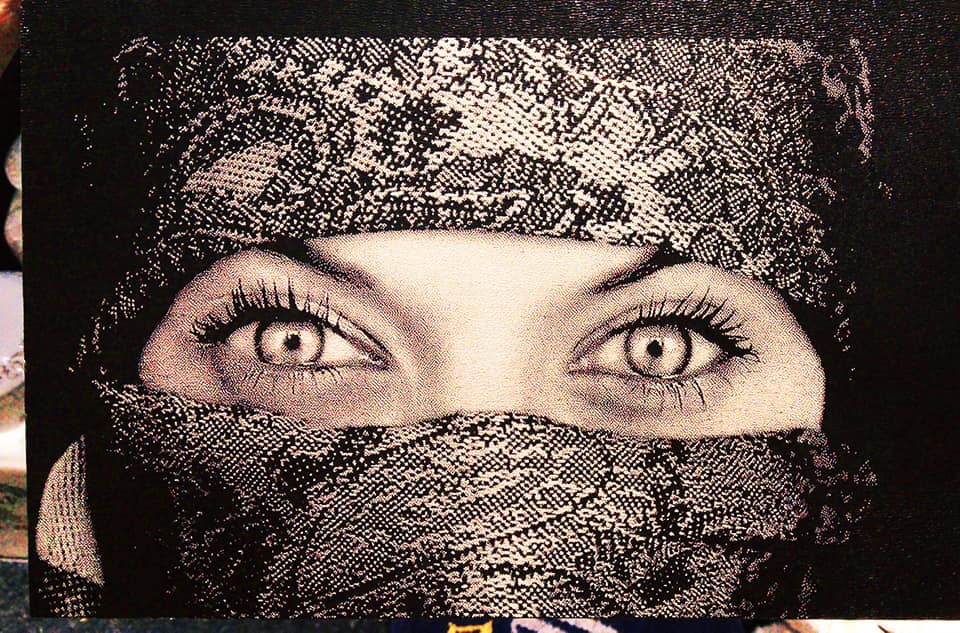
Materials for photo laser engraving.
You may do photo engraving on all types of materials including metals (copper, brass, aluminum, steel, stainless steel, silver and gold), ceramics, tile, slate, wood, plywood, cardboard, hardboard, leather, even painted glass, PLA plastics.
Photoengraving on a copper plate with a 10 watt DPSSL
Leather photoengraving
Glass photoengraving
Photoengraving using a 4 watt DPSSL installed on a DIY galvo laser marking machine
Different materials require different power, speed, and amount of passes.
In most cases to make a nice photo engraving, you do not need a high-power laser. You mainly need high engraving speed and a high-quality control board.
Most Chinese lasers do not have good boards to make beautiful photoengravings
because they have a fundamental defect in their circuits.
https://www.youtube.com/watch?v=rjxMQgi9TVQ
Patterns of laser engraved photos and their predominant features
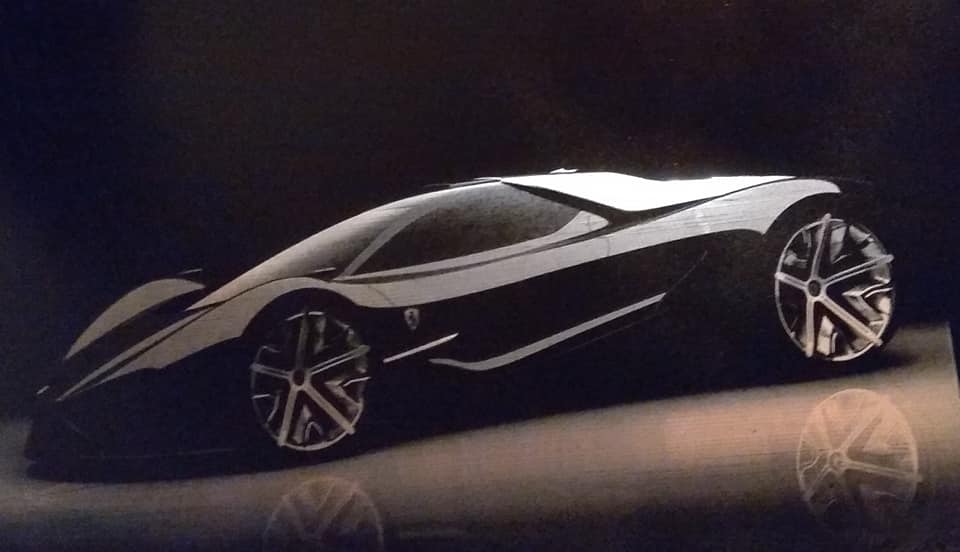
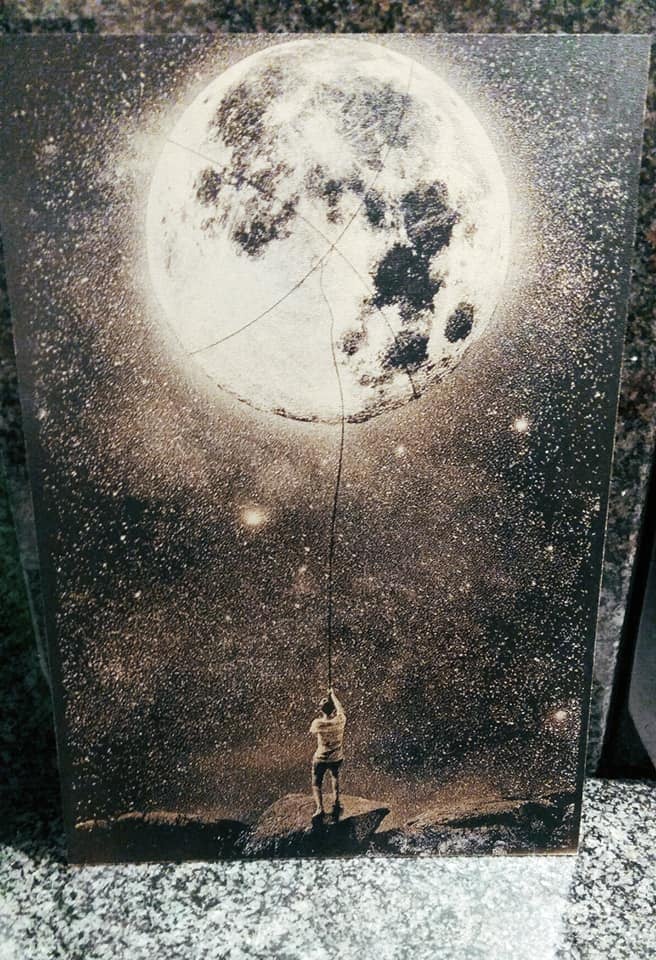
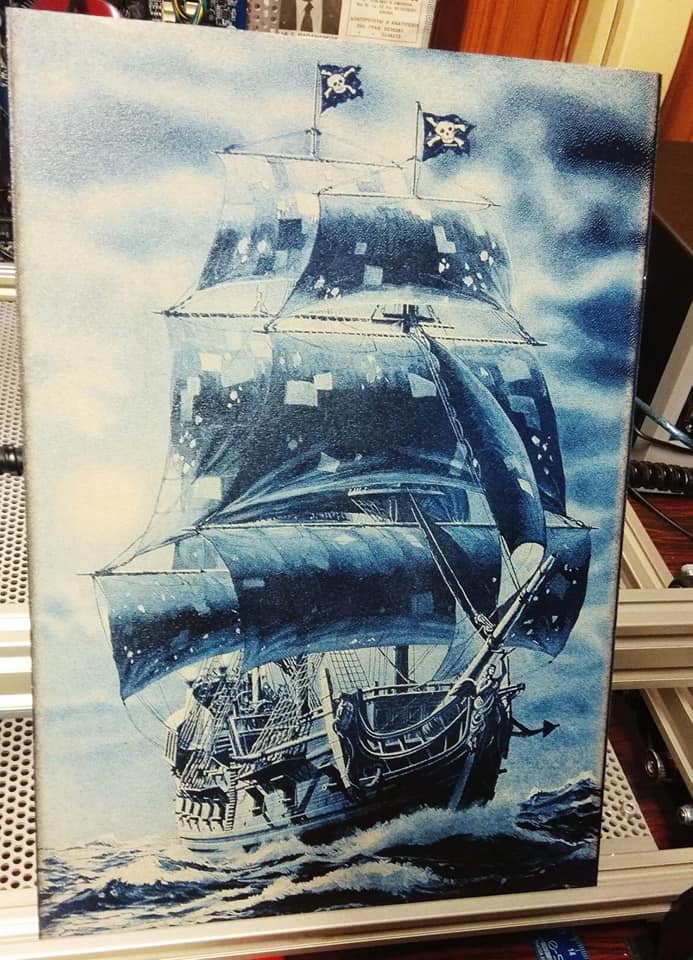
First of all, you can make photo engravings literally on any surface. Our customers make and share in our photo gallery >>>

The key advantage of making photoengravings on metal is their durability. You can keep metal photoengravings outdoors without any risk to have them damaged by weather elements.
How to do laser photoengraving (requirements and steps)
Key parameters for photo laser engraving
Speed, number of passes, laser power.
For each material you need to find the best parameters suitable for your laser. This depends on the laser power.
For example, for photo engraving on wood with a 10 watt diode laser, choose: 100% max laser power, 5% min laser power, 1500-2000 mm / min laser travel speed and only 1 pass.
For engraving on metal, with a 10 watt DPSS laser you need to setup the focus as well, sometimes it is necessary to be a little bit out of focus with a DPSS laser to reduce the laser power and make a laser beam spot bigger.
So it is very unique for different types of materials. Even if you are engraving on plywood with a diode, the color and the density of the plywood will also matter.
If you have problems with a proper laser setup – The Endurance laser team is always happy to assist and provide help in our Livechat.
Keep in mind that for high-quality laser engraving you need perfect focusing and we suggest using G2 or G8 laser lenses.
Image processing for high-quality grayscale
To get high-quality engraving with well-defined grayscale, you need to save the image in the Bitmap mode before you start the laser engraver. We used the graphics editor Adobe Photoshop CC for this.
To save the image in Bitmap mode in the English version of Adobe Photoshop, perform the following steps:
- 1. Open the image in Adobe Photoshop.
- 2. Convert the picture to the grayscale mode. To do this, go to the Image/Mode/Grayscale menu. The image will turn gray.
- 3. Convert the image to the Bitmap mode (Image/Mode/Grayscale).
- 4. In the drop-down menu select Halftone Screen and Round.
The received “grainy” image will ensure tone gradation engraving on various surfaces.
Prepare an image for laser photo engraving using T2Laser software
After becoming familiar with the simple drawings engraving, one wants to go over to printing photos with the interplay of light and shadow. Here the problem of halftones arises. The engraved photos come in black and white, without the soft interplay of light and shadow.
The specialists of the Endurance laser lab tried to solve this problem using various software for laser engravers. Today we will move away from popular programs such as Benbox or RIBS and take a closer look at Acan, a less known program for laser engraving.
On Benbox you need to setup Smin and Smax (min power and max power)
That means that you setup minimum power for the white color and max power for the black color. It depends on your engraving speed. This parameter depends on your laser power, engraving speed, and type of the material you want to engrave.
(Keep in mind that ACAN machines have their own firmware).

This program is free, runs without installation, and has all the necessary functions you need when working with a laser engraver. The main buttons that perform typical functions are standard and do not need to be explained since the user understands them intuitively.

In addition to the full version, there is a light version Acan-mini with limited options for customizing texts and images. (In the mini version we failed to add a caption to the picture).
Usually, the photoengraving speed is about 1000-2000 mm / min. However, it depends on your laser power, the speed of the PWM of your board and the quality of your frame, and the conditions of the belts.
There could be some waves and blurring if you do photo engraving too fast.

Here are the Acan functions absent in Acan / Acan-mini:
1. A wide choice of settings for writing texts.
2. Ability to set the tilt degree of an image.
3. Pictures and/or texts superimposition.
4. Work area perimeter marking before the start of engraving.
5. Two modes of operation: engraving and cutting. The mode button is at the top of the program.
6. Possibility to load the G-code.
7. The archived Inkscape, a free editor of vector graphics to create g-codes for laser cutting, in the program folder.
Prepare an image for greyscale laser engraving using Photoshop
Different methods of photoengraving in Lightburn
With Lightburn you can make nice photoengraving using build-in methods.
Tips for best results when laser engraving a photo
5 tips you need to follow:
- Get the image you want to do a photoengraving
- Make sure it has enough contrast and light (it is not too dark or too bright)
- Make a small test to find out proper parameters like speed, max/min laser power, amount of repeats (usually 1 repeat is enough)
- After the test – make a photoengraving
- Enjoy the result!
Important pillars
Keep in mind that sometimes you need to prepare an inversed image. For example, if you want to engrave something on a black surface by removing the paint then the image has to be inverted.
We have a lot of community members on our Facebook page helping with photo-engraving.
Photo laser engraving on wood, plywood. How to make it yourself.
The interface buttons of the Acan program have images of the actions, they perform when activated, which makes the program easy to use. Acan-mini has buttons with captions in Russian or Chinese, which makes it difficult for other language speakers to use the program.
Both programs perform their functions but have a number of drawbacks that manifest themselves when you use the programs. One of them is the problem with accurate image dimensioning.
However, both versions allow engraving gray tones.
Here you can watch a video where the Endurance laser lab specialists demonstrate the work of the version of Acan-mini and engrave a picture with various gray tones.
Both versions of the Acan program are available for downloading on the Endurance laser lab website. Visit our Download center
Prepare an image for greyscale laser engraving using Photoshop
Was done with 10 watt Endurance laser and T2Laser software

More g-code examples
Laser Engraving & cutter projects – photo and files – best ideas
All you need to know about photo laser engraving: testing your board and your firmware
Acclaim Crafts – Photo Engraving with a 10 Watt Endurance Laser (Read a full PDF guide)
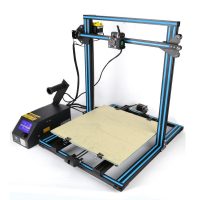
Increasing 3D printer output with cutting and engraving capabilities from Endurance Lasers
High-quality standard
Multi-level testing system.
Industrial components.
Ultra reliable
The guaranteed duration of the continuous operation ~48-72 hours.
True continuous power output
Our products have the rated power output as advertised – unlike Chinese analogues.
TTL mode
Can be turned on and off with 3.5-24V.
Variable power output.
Plug and play
Universal and compatible mount.
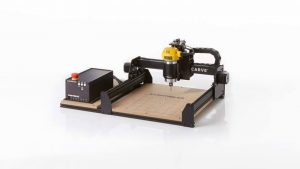
Compatible with most 3D printers and CNC machines.
Friendly return policy
Do not like the laser?
Simply return within 30 days and get a full refund.
Real-time advice
We assist and give advice by Phone / Email / Facebook messenger / Telegram / Whatsapp / Viber.
Professional support
We help to install and tune the laser. We offer qualified after-sales support.
Everything you need
We ship everything you need in one parcel to get started.
Immediate delivery
We ship all units within 4-24 hours. DHL express delivery allows you to get the package in 3-5 days.
Lifetime warranty
All our lasers are tested and could work up to 10000 hours.
Upgrade option
Do you have an old model? Upgrade your unit with more powerful one.
