
How to change firmware on your Eleksmaker Mana (a universal laser engraver) board into GRBL (LaserGRBL compatible) and back to Benbox
Firmware is a special code that is being recorded on your board (usually Arduino or Arduino compatible) to make your machine work. That code depends on what circuit do you have, what motors do you operate, what is the wiring circuit for the laser. That code can be universal like most machines have like Ortur, SainSmart and others but it could be very specific like LaserAxe or ACAN. That means that your Acan or LaserAxe machine will only work with its own firmware.
For example, Endurance MakeBlock XY 2.0 plotter also works with Benbox only. That means that you have to have a Benbox firmware. By replacing the board you may upload or reupload any firmware you want.
We recommend using GRBL 1.1H or 1.1F.
Most machines are fully compatible with it. You may upload that firmware on different boards and run them. Some older boards like CNC Woodpecker only support GRBL0.9 version and it works fine if you only do CNC milling. GRBL 1.1H has a dynamic PWM option that allows you to have a very nice greyscale and do photoengraving.
Once you upload a new firmware you might need to configure it.
A lot of parameters like end-stops, return home, image inversion, can be configured there.
GRBL is very easy to configure for most machines including Eleksmaker, Ortur, SainSmart, Neje, Atomstack and others.
An important things you need to know about GRBL parameters, firmware settings
Watch a video about how to change firmware on your laser engraver board
DOWNLOAD GRBL Firmware (zip file)
Benbox software abilities
We have already described the T2Laser software for controlling a laser machine with the GRBL firmware. Today we are going to acquaint you with another software that allows you to control a laser machine with the BenBox firmware.
This program makes it possible to:
– engrave vector images,
– engrave raster images (using grayscale),
– create simple vector images,
– upgrade your machine firmware.
BenBox work window
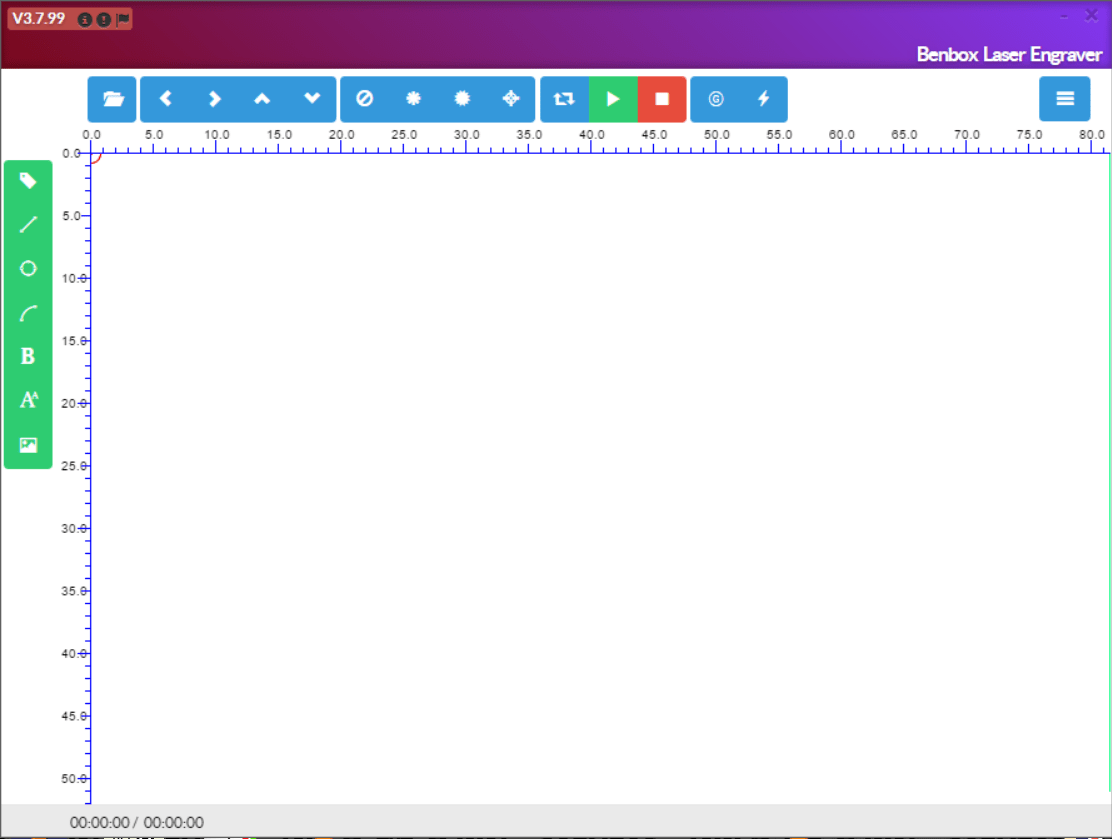
There are all necessary elements in the main window. The toolbar is at the top.


– image import (vector and raster)

– these buttons are responsible for the machine head movement
– 1. Turn off the laser
2. Low light – turn on the laser at minimal power.
3. Intensity – maximal laser power (for our lasers 1000).
4. Short pulse (can be used to determine the exact laser location).
1. Frame (the laser beam will follow the frame around your image)
2. Start
3. Stop
1. G-code preview
2. Machine firmware upgrade

– move the object along the work field
– draw a line
– draw a circle
– draw an arc
– draw Bezier curves
– paste text
– paste image
That’s it about the main elements.
Machine connection
At the first start it is necessary to connect the machine and adjust the machine settings. 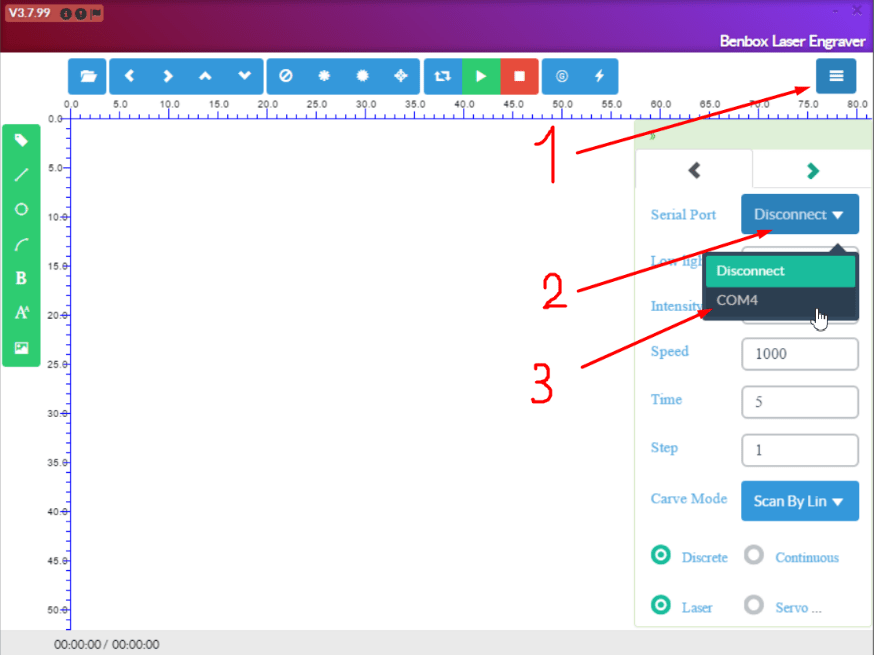
1. To do this, we open the side menu in the top right-hand corner.
2. Open a dropdown list.
3. Select a port.
The machine is connected!
In this window we can set up the laser parameters:
Low light (minimal power) — the setting of the lightest spot in the image.
Intensity (maximal power) — the setting of the darkest spot in the image.
Speed – the setting of the X/Y movement speed.
Time – duration of the laser exposure per spot.
Number – number of laser passes. 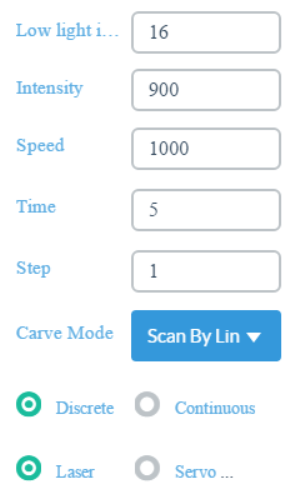
Carve Mode – selection of fill mode.
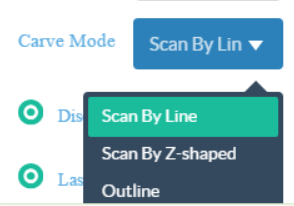
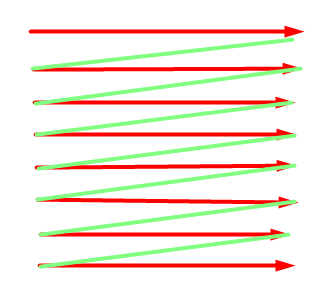
Scan by line – the laser will move according to the following way:
Red arrows – laser on,
Green lines – laser off.
Scan by Z-shaped –
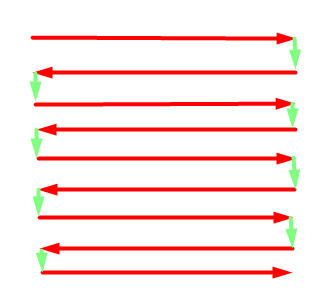
Outline – outline engraving mode.
The program control is user-friendly. All the tools and settings are displayed on the main screen. That’s why you will easily adjust engraving laser parameters after you import an image.
You will only have to change the speed and set up the minimal and maximal power for grayscale engraving.
As for the work with raster images, it should be pointed out that this software version (3.7.99) makes it possible to
– change the image size,
– select the engraving mode (grayscale or black-and-white),
– invert color,
– mirror horizontally.
But there is no option of image processing, particularly, to adjust brightness and contrast. The engraved image may not look exactly like the computer original.
COLOR INVERSION. Some materials require converted image engraving. Anodized aluminum is an example. Image conversion is necessary for those materials, on which the laser trace is white. (To make it clear: when hitting black anodized aluminum the laser beam burns away the paint exposing the metal beyond it. That is why laser engravings on anodized aluminum are white.)
Work with vector images. In the program version as of November 2021, it appears impossible to work with vector .dxf. files.
After import, they are presented on screen incorrectly, and the engraving start fails.
Below, there are screenshots of the same file in BenBox and in CorelDraw.
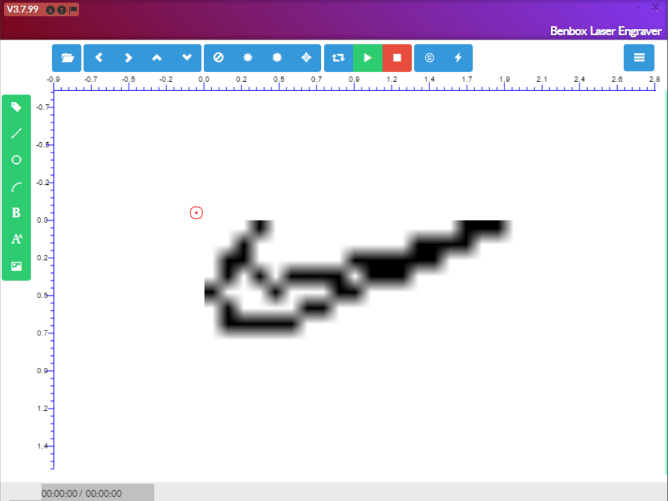
We were unable to fix the problem. So, we are waiting for an upgrade from the manufacturer.
In general, the software is user-friendly and easy-to-learn.
It has the following benefits:
- a nice design. This is not important, for sure, but it’s always better to deal with a beautifully designed software;
- the convenient location of all the available functions on the main screen. Due to their modest number, they do not crowd the screen;
- a limited but sufficient set of functions to do simple tasks;
- easy connection to the machine. This program is designed for work with firmware of one manufacturer, that is why the configuration is very simple.
On the negative side:
– The program is far from ideal. Today, it is impossible to work with .dxf files;
– its main drawback, in our view, is a limited set of functions. But it’s up to you to consider it as a minus or a plus. It’s designed to do simple tasks, not complicated projects, by default.
LaserGRBL firmware
If you want to update the GRBL version installed on your engraver to have all the advantages of the latest v1.1 version, or if you need to re-program it after some error, of if you want to move a Benbox engraver to GRBL, LaserGRBL allows you to do this by installing from a list of selected firmware.
Recommended boards by LaserGRBL
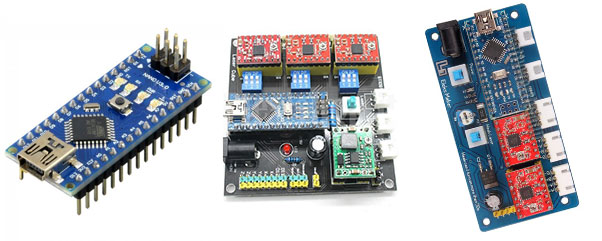
Here you should select your Arduino board.
Arduino UNO is the big one. Usually, you can find it in a sort of “sandwich” with a motor driver CNC shield.
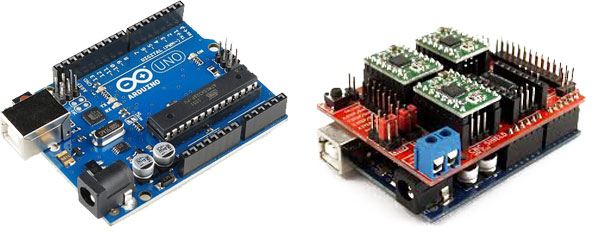
Arduino Nano is the small one. Usually, you can find it embedded on the top of a motor driver board.
Keep in mind that some older laptops do not have an Arduino driver that will not allow you to connect to the board from your computer
You need to download an Arduino driver first
Once you can connect – follow these steps to upload a new firmware
- Step 1 – Download XLoader
- Step 2 – Download Latest GRBL Firmware.
- Step 3 – Unzip Downloaded GRBL Firmware.
- Step 4 – Install Grbl Firmware Uploader into Arduino Interface using XLoader
- Step 4 – Backup your GRBL Settings (just in case).
- Step 5 – Flashing New Firmware to the board.
- Step 5 – Confirm Upload.
Sometimes your board might not be able to record a new firmware. That can happen if your board is damaged or burned.
Keep in mind that some boards only work with Marlin Firmware, like 3D printers.
If you have any questions – you are welcome to ask in our LiveChat.
We recommend Lightburn software for laser cutting and laser engraving. An ultimate tool for makers and professionals!
LightBurn Tutorial & a real story. Laser engraving / cutting software
GRBL compatible MakerBase MKS DLC ver 2.0 board. Uploading GRBl 1.1f firmware.
Getting started with Lightburn software – settings and parameters.
Universal laser engraver setup (software)!
Uploading firmware on different boards: GRBL / Marlin. Settings, parameters.