A personal story about installing a 4 watt DPSSL Endurance laser to CNC 3018
Getting started

Infrared light emitted from this laser is very powerful and goggles should always be worn for protection safety. Although the light is faint, it still poses a risk to the eyes.
The DPSS can engrave on multiple surfaces that a diode laser cannot. This includes a range of metals (stainless steel, copper, brass, aluminum, tin, gold, and more) The DPSSL can also engrave on plastics
The installation consists of mainly the mounting and the wiring.
CONNECTING TO CNC 3018
- First, begin by carefully removing the DPSSL out of the box. The wires are all prewired and connected and should be handled with care. The large yellow wire brings the power to the Laser and it should be carefully handled.
Out of the box, you will find the module, the power supply. - Turn your attention to your CNC 3018. What you will need to do is remove the spindle or laser currently installed from the GRBL board and gantry.
- You can now connect the PWM and GND from the DPSS to the GRBL board.
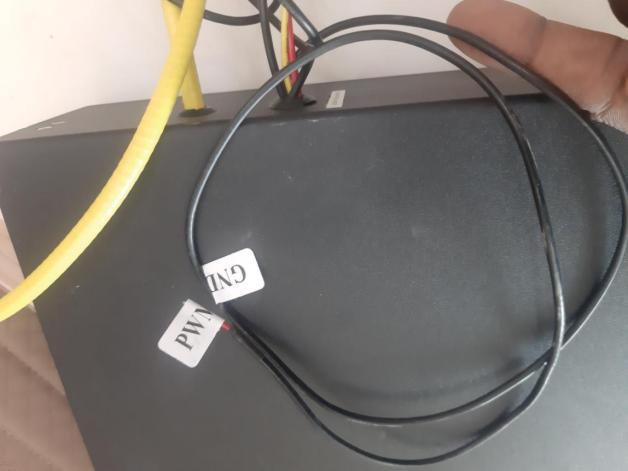

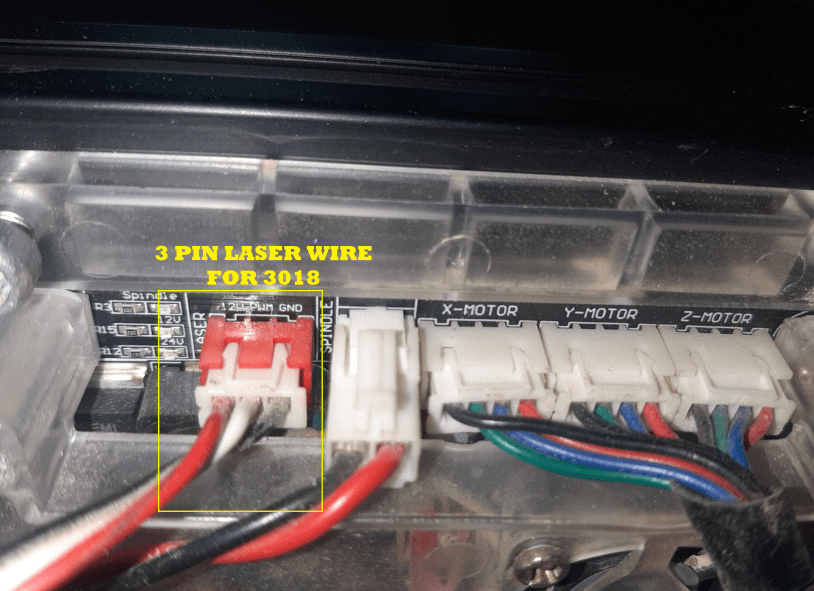
- For this installation, you will use the 2 pin JST 2.5 cable highlighted in the picture. This cable comes free with your DPSSL. The 2 pin will be connected onto the 3 pin laser wire on the 3018 GRBL board. You do not need to remove or replace your 3018 Laser pin.
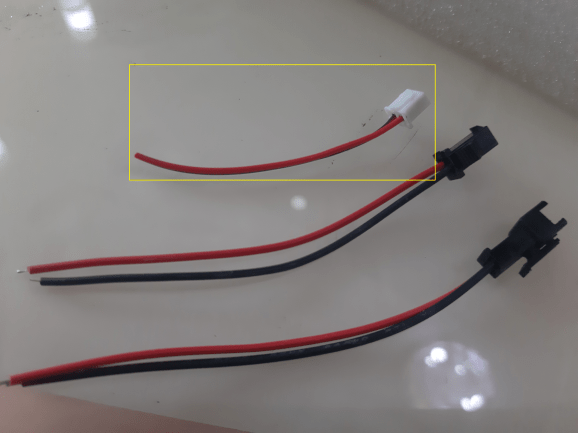

- You will need to use a male connector and add the JST cable provided to the red (PWM) and black ( GND) connections coming from the GRBL board. You will not need all 3 PINS on the board. You will connect JST (BLACK with module wire BLACK and RED with module wire WHITE).
- On the GRBL board, you will find a 3 pin slot for 12V, PWM, and GND.

- Use the two-pin JST to connect the PWM and GND from the Laser box. Do this by taping or soldering the wires from the laser box to the end of the two-pin.
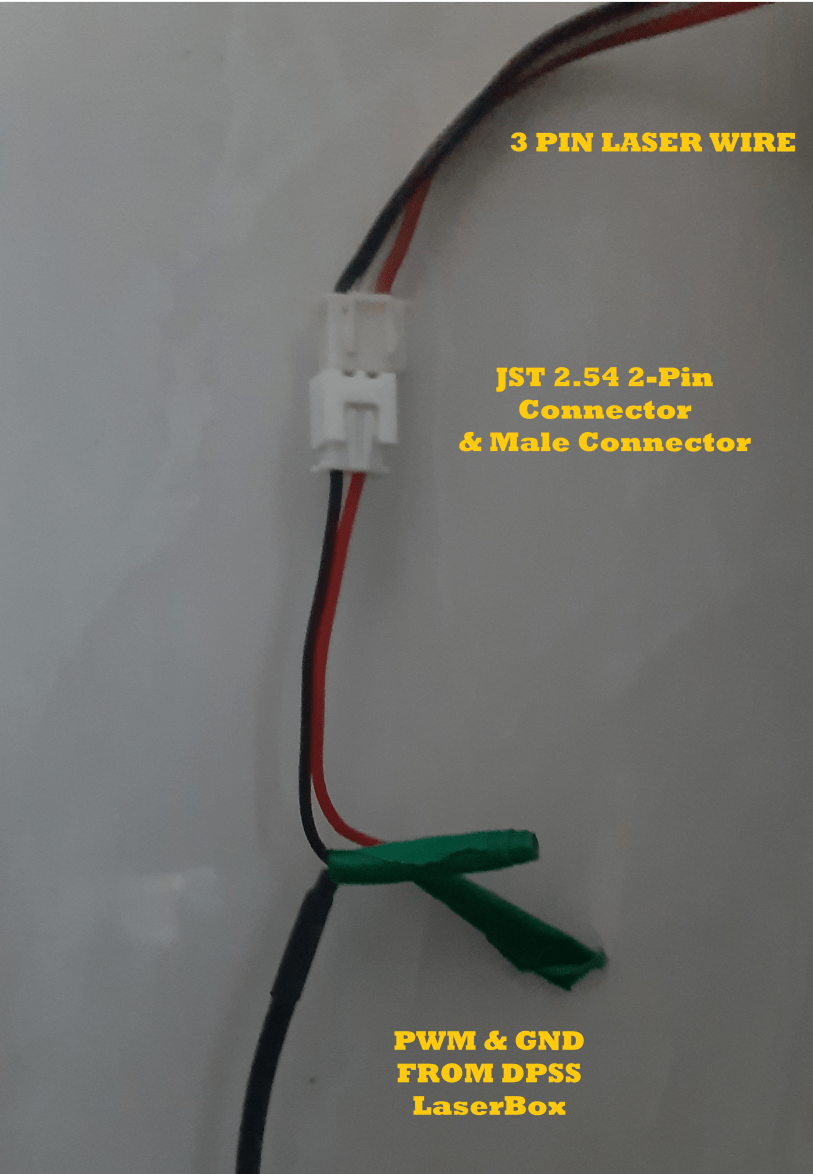

- Next, connect the PWM and GND from the two-pin JST together with the 3 pin connection from the board. You can use the male head connector. Make sure to connect the BLACK with BLACK and red with WHITE.
- Once connected, look at the wiring and make sure the wires are securely connected, do not let the pin on the board be loose.
- You are now ready to power your DPSSL!


Testing in Lightburn
For the purpose of testing the movement of your module in Lightburn, you can check the movement and see how it responds to your controls and set parameters. Set the distance and movements to slow increments so you do not get a JAM on your Gantry, especially if you mounted your laser already.
- Open Lightburn>CUT/LAYERS>SELECT MOVE TAB>
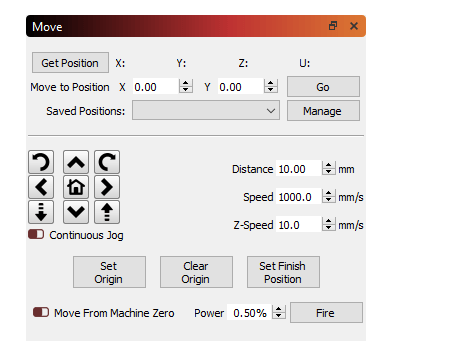

- Make sure you can move the bed and Z-axis. To test the movement, set your distance to 2mm, speed 5,000, and Z-Speed 500mm. You can adjust as you like and move to see if everything is okay. You can also wear your goggles and press that FIRE button at a low percentage.
FOCUSING
Adjust your focal range to be between 10-30MM. The focal range will be important to assure you get the finest focus for great results.
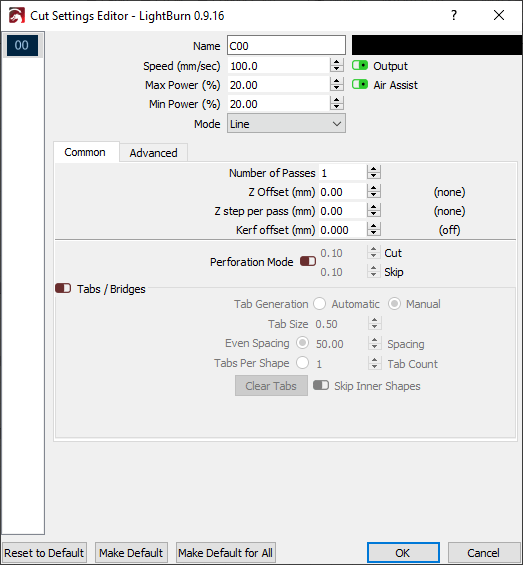
The black card that comes with your DPSS can be used to focus. In your design space in Light burn, use line/cut to write anything within the card to test the power, speed, and focus of the DPSSL. At first, you may have to Reverse the image in Light burn.
Adjust the parameters to get a very fine line on the card and you may even hear a sound coming from the laser.
Laser beam focusing. All you need to know how to make the best laser beam focus!
LightBurn Tutorial & a real story. Laser engraving / cutting software
MOUNTING
This installation uses a L-shaped connector to connect the advanced DPSSL mounting plate and 3018 Gantry together.
- To mount the laser module onto the CNC 3018, we will use an L-type laser mount and an advanced mounting bracket.
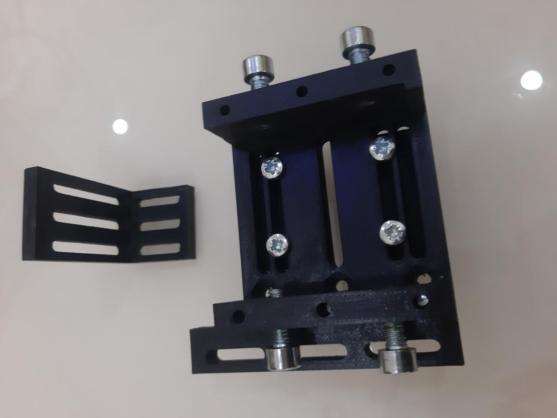

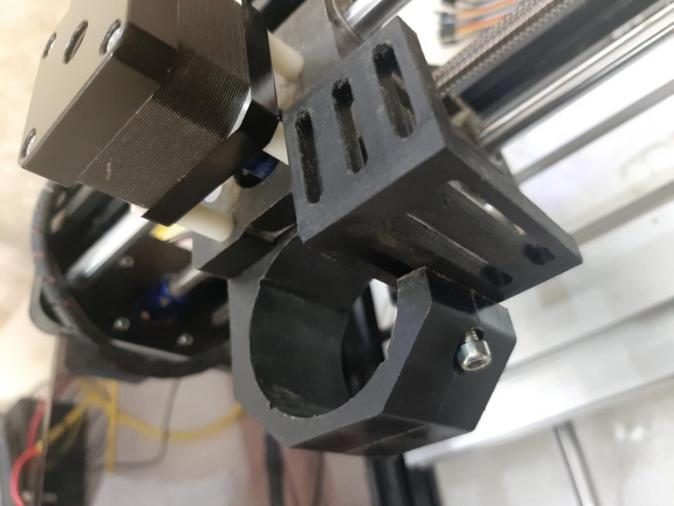

- The L-type laser mount can be inserted inside the 3018 Gantry. The 3018 gantry screw can be inserted between any of the L bracket slots to connect the L type laser mount and gantry. It should be tightly screwed.


- Next, the advanced mounting bracket will connect to any of the two slots of the L-type laser mount. Pay attention to the direction of the bracket. There is a small pocket indention to hold the DPSS.
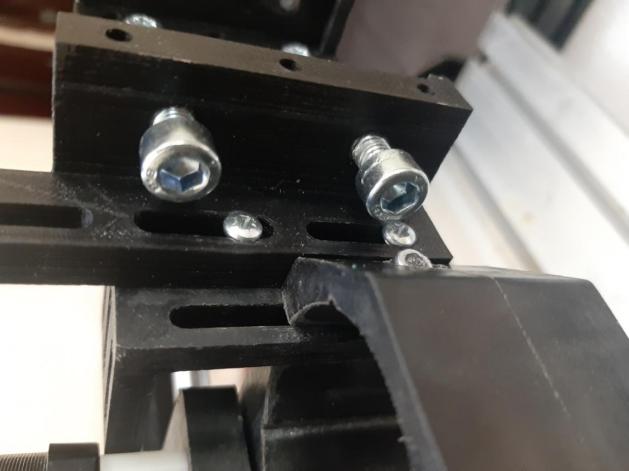

- These screws will be tightened with an Allen wrench to secure the DPSS module. The laser can be set closer to any side within the advanced mounting bracket and the screws can be tightened with an Allen wrench to secure it and make it straight.
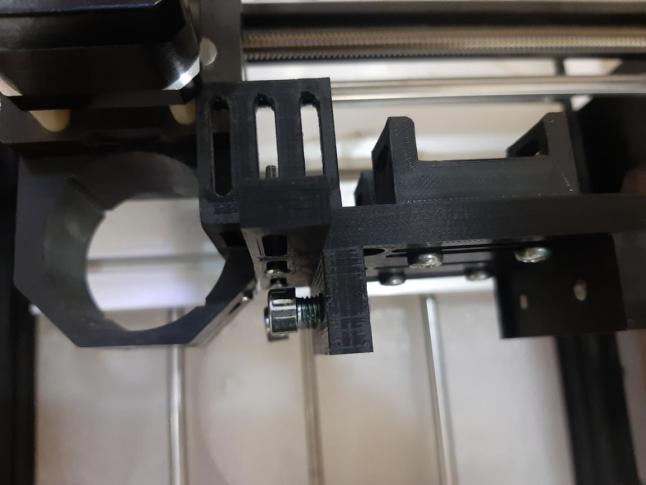


Mounting the DPSSL is fast and easy with the advanced 3D printed plate provided by Endurance. This method can be modified further with different 3018 Gantry’s, frames, extenders, etc. Although the spindle was removed from the Gantry, you may keep it depending on your current 3018 setup to keep your Spindle or diode-connected
Written by Yerima Medugu