
3D printers and laser engravers are very similar in their core functions. They both have a tool head that is moved in relation to a workpiece or build plate. This means that if you already have a 3D printer, you can simply add a laser diode to it and get a laser engraver without paying for the mechanics again. It is also a great option if you have limited space in your workshop. The Sidewinder X1 is especially well suited for this kind of conversion as it has a spacious build plate, allowing you to engrave quite large items. It also has electronics that are directly compatible with modern laser software without any modifications.

Installing a laser on Artillery Sidewinder X1 3d printer (3D printer upgrade)
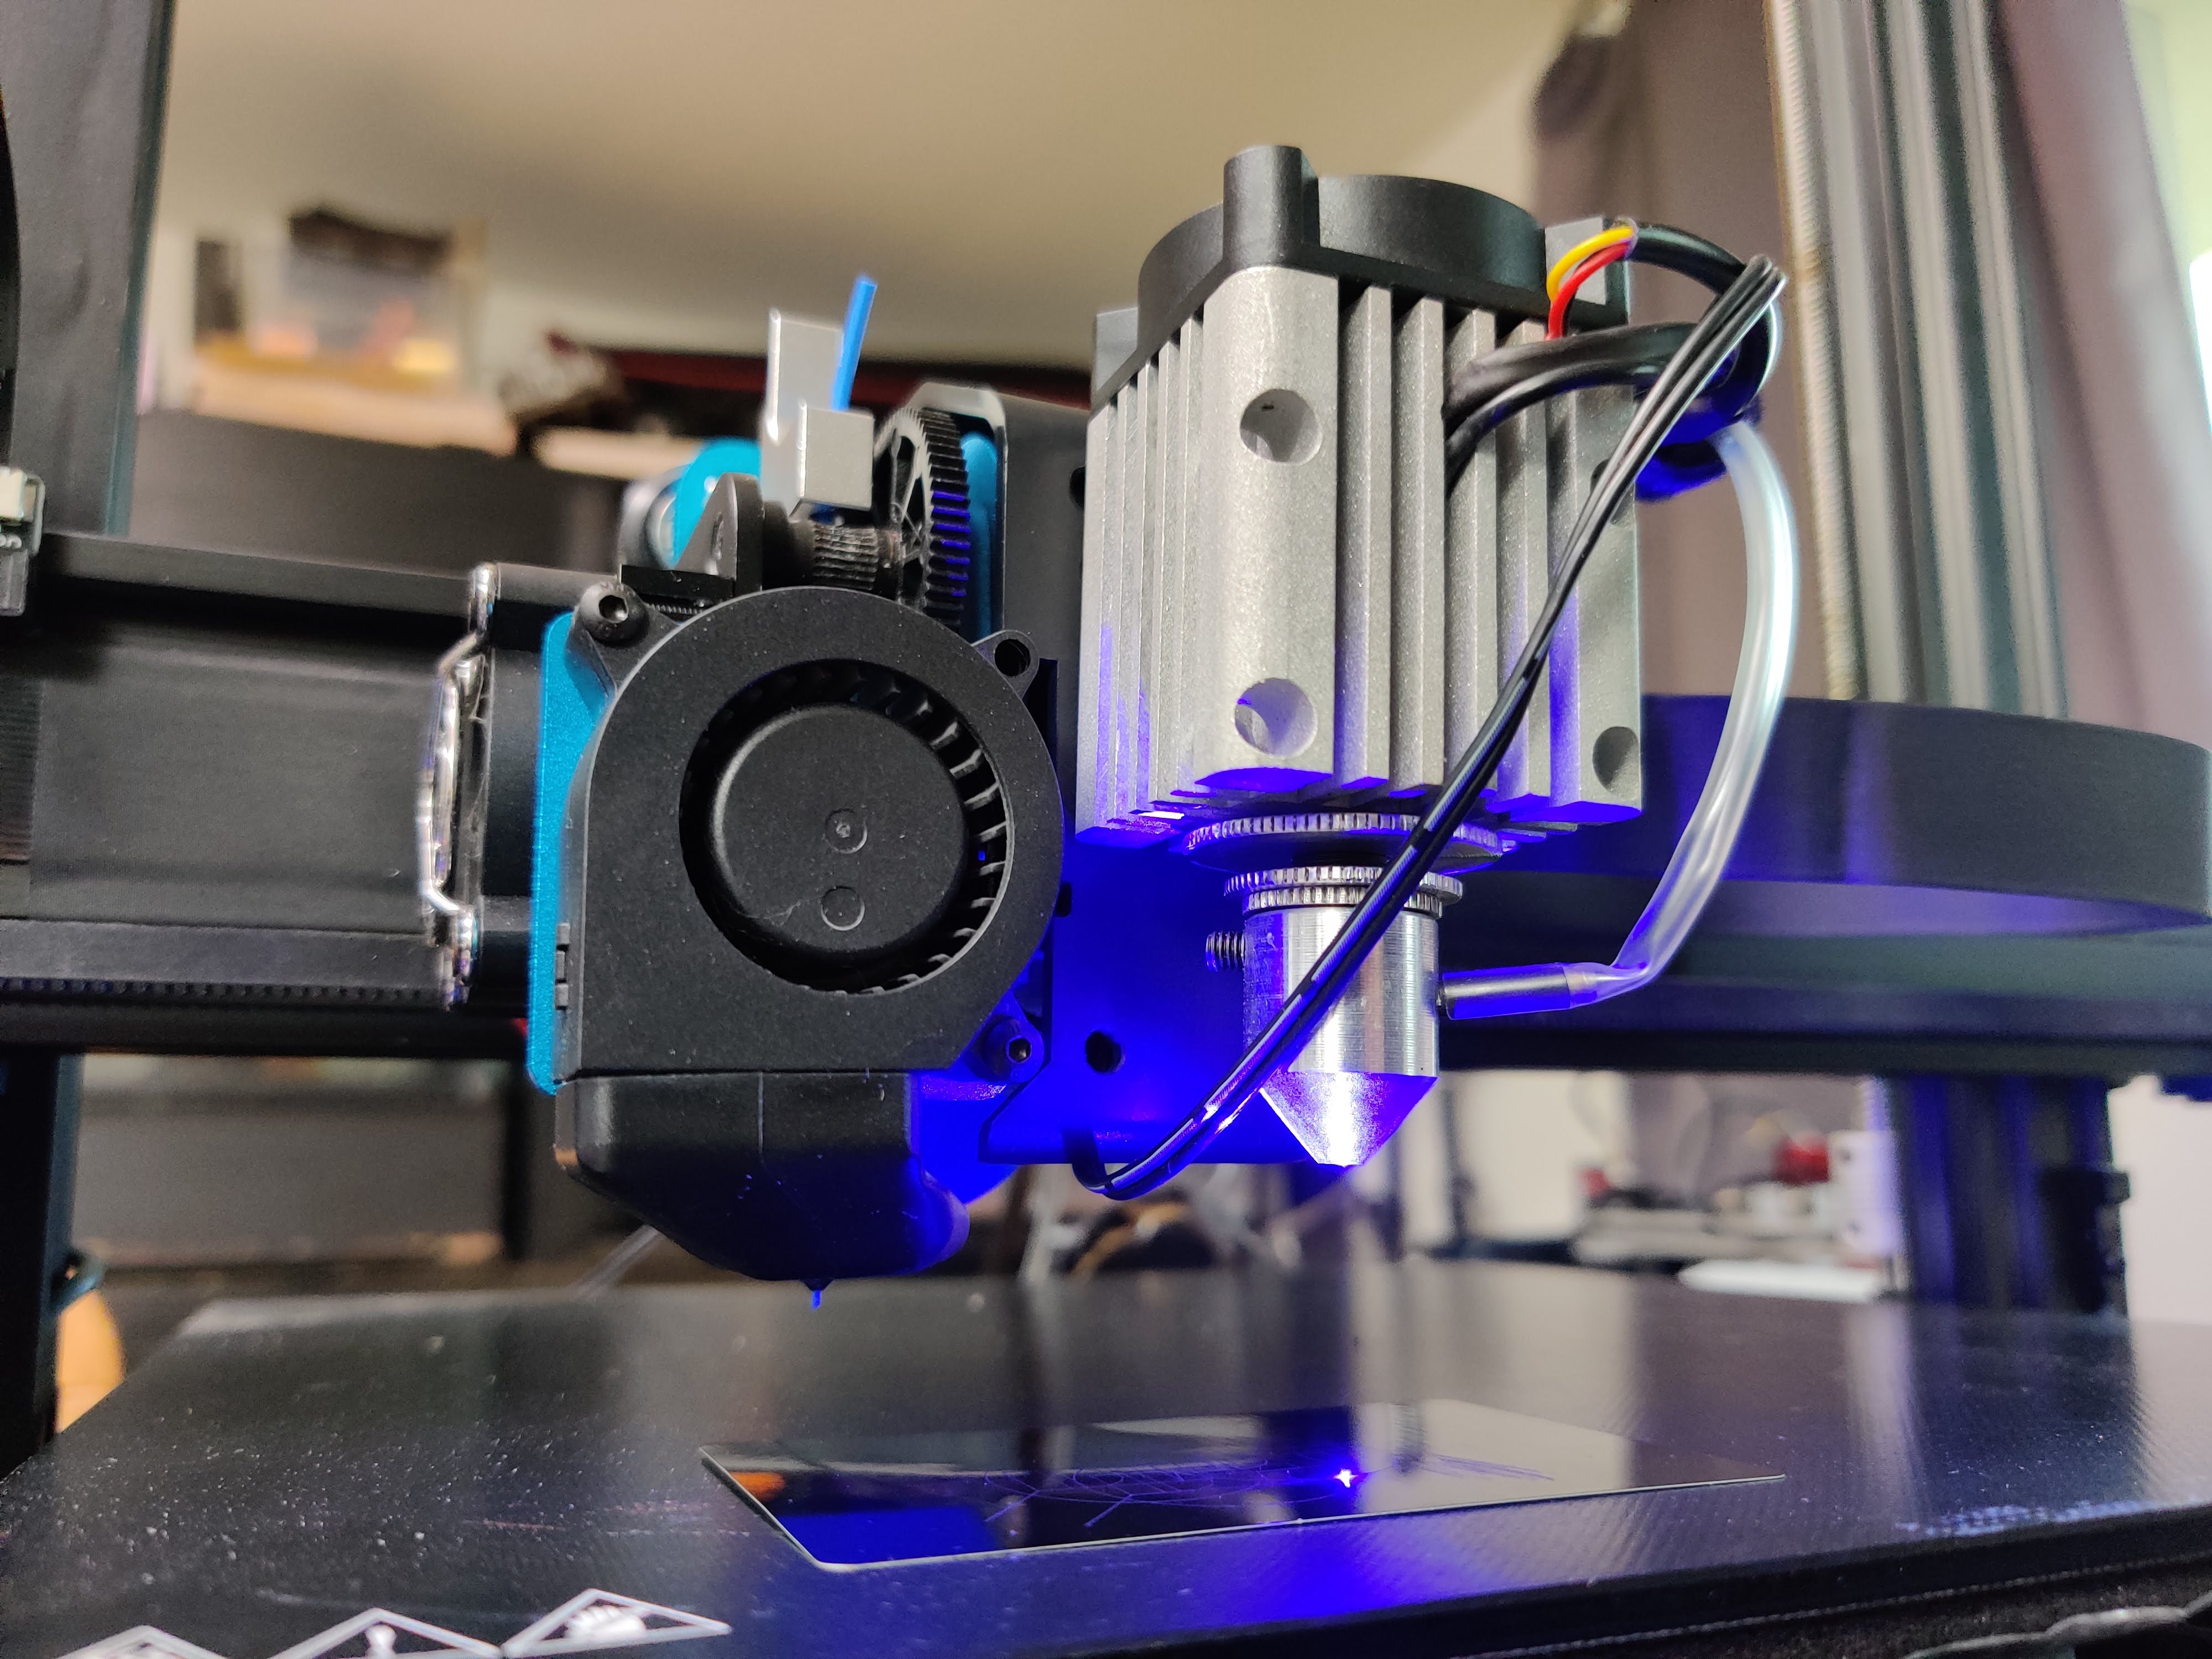
Mounting the Laser
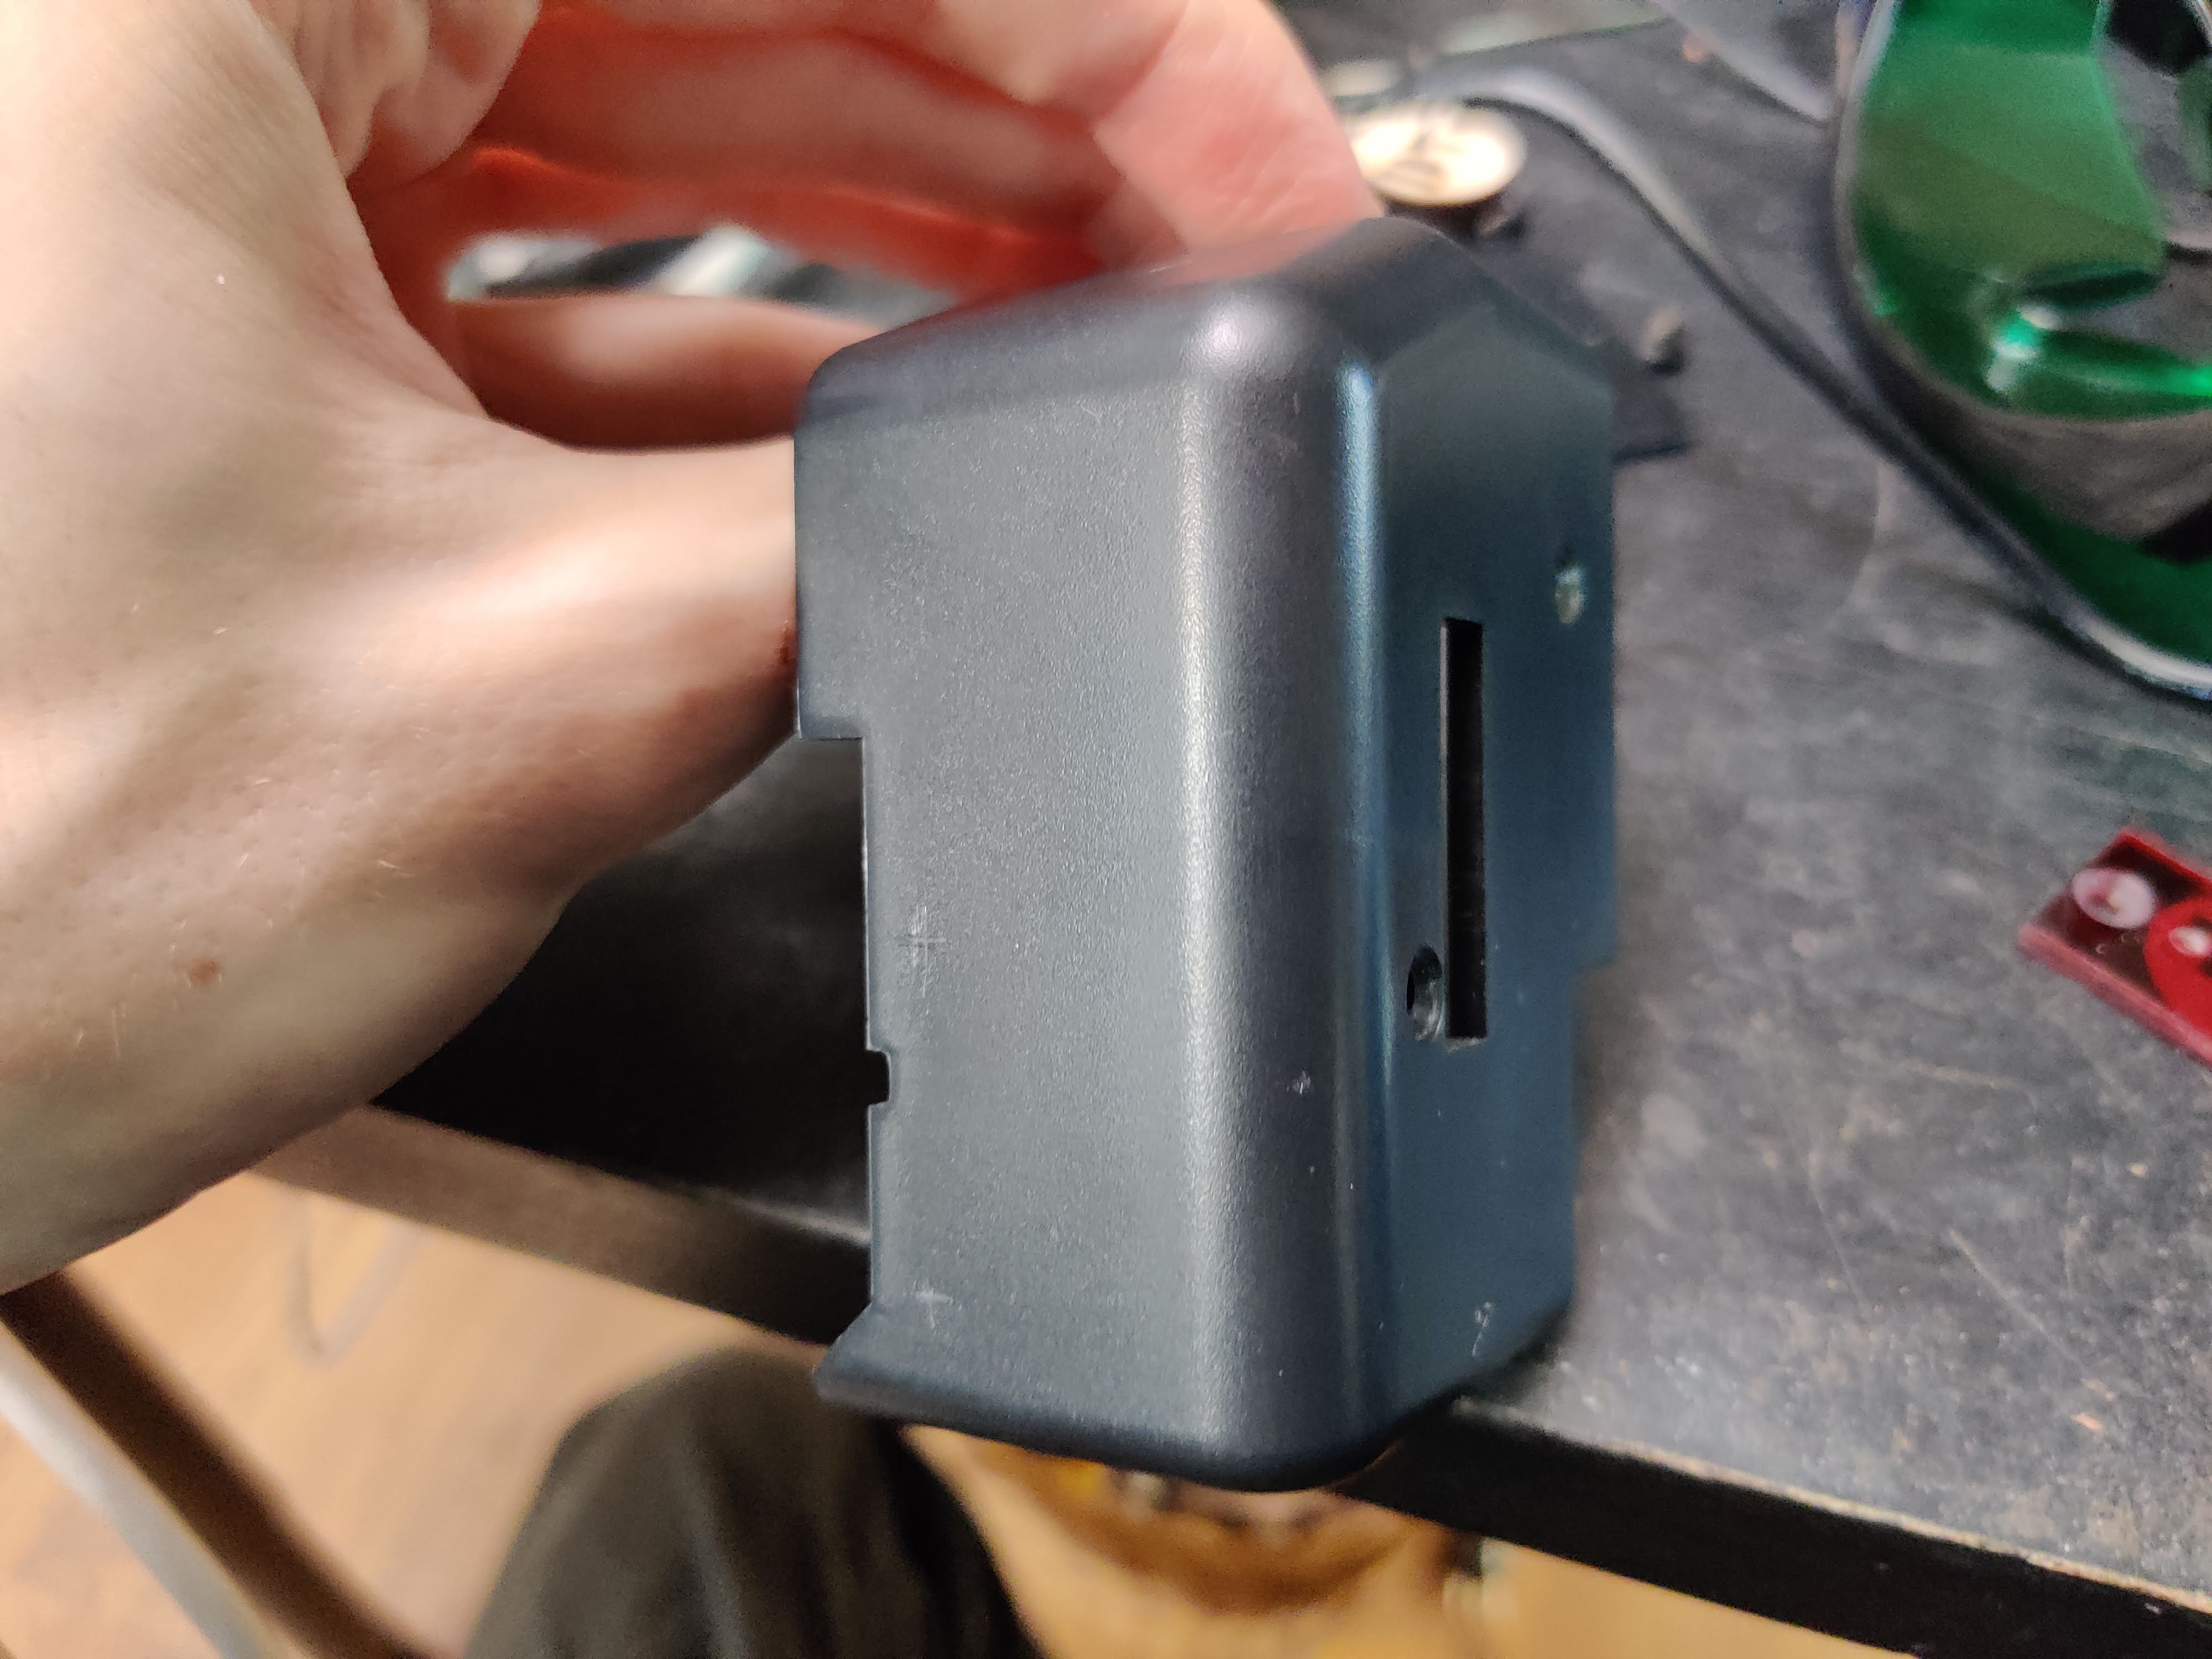
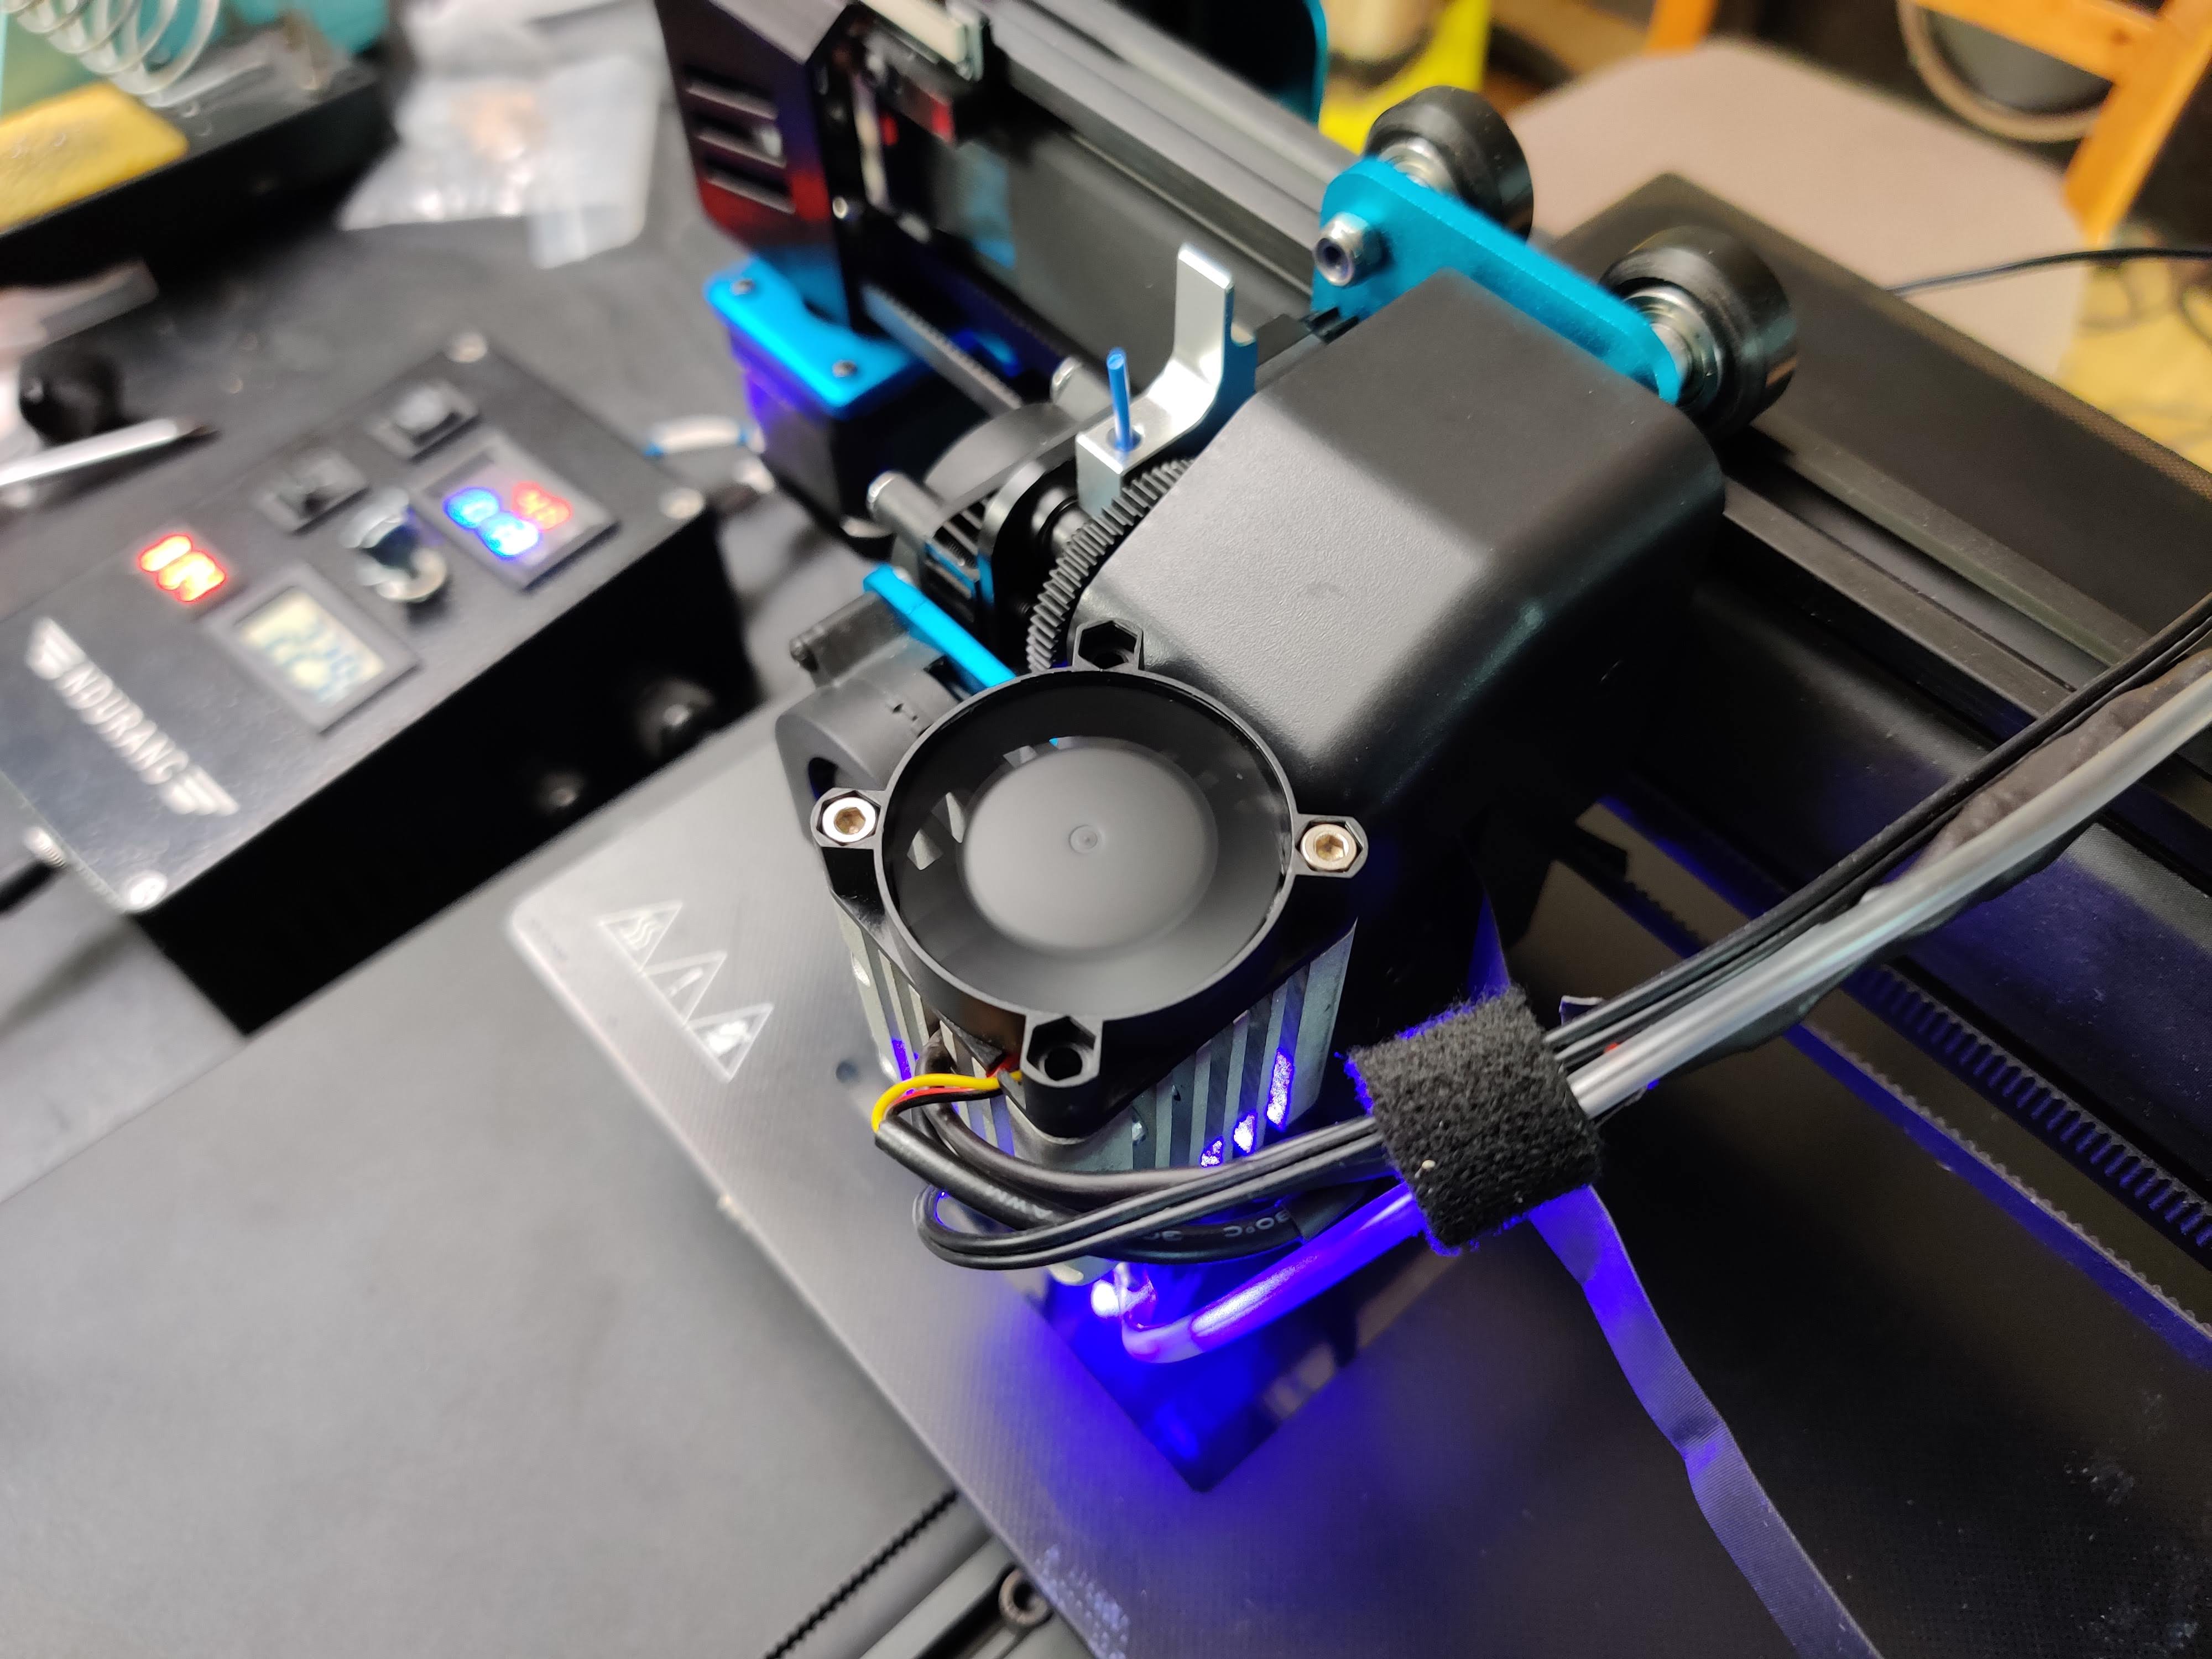
Obviously, Artillery didn’t add a convenient spot to mount a laser, but with just some small modifications that can be easily changed. If you don’t want to modify your printer at all, you could design a custom bracket that uses some of the existing bolts to mount the laser. However, simply drilling two small holes in the plastic cover on the side of the extruder makes mounting the laser much easier. If you want to continue using the 3d printer without having to remove the laser attachment, make sure to place it high enough, so it does not interfere with the print. At the same time, you also want to have it low enough so your hotend doesn’t interfere with the parts you want to engrave.
The black plastic cover on the right of the extruder is held in place with two screws. After taking those out, you also have to carefully unplug the ribbon cable to be able to remove the cover. To mark the hole spacing precisely you can hold the laser diode up to the plastic part and then mark the locations for the bolts. Using a 3mm drill bit you can create the holes and use some bolts to fasten the Endurance Laser.
Electronics – wiring the laser
To control the laser power we will be using the PWM signal from the part cooling fan. This is the ideal choice, as there are convenient G-Code commands to control it, and every 3d printer supports them. If you are quite comfortable with electronics, you can solder some wires directly to the controller board of the printer. This will allow you to neatly manage them out of the way.
However, there is also an easier way. After you have removed the black plastic cover of the extruder, you will see that the part cooling fan is plugged into a small PCB there. If you don’t intend on using the 3d printer any longer, you can simply unplug the fan and use a cable with the same connector to connect to the black PWM input of the Laserbox.
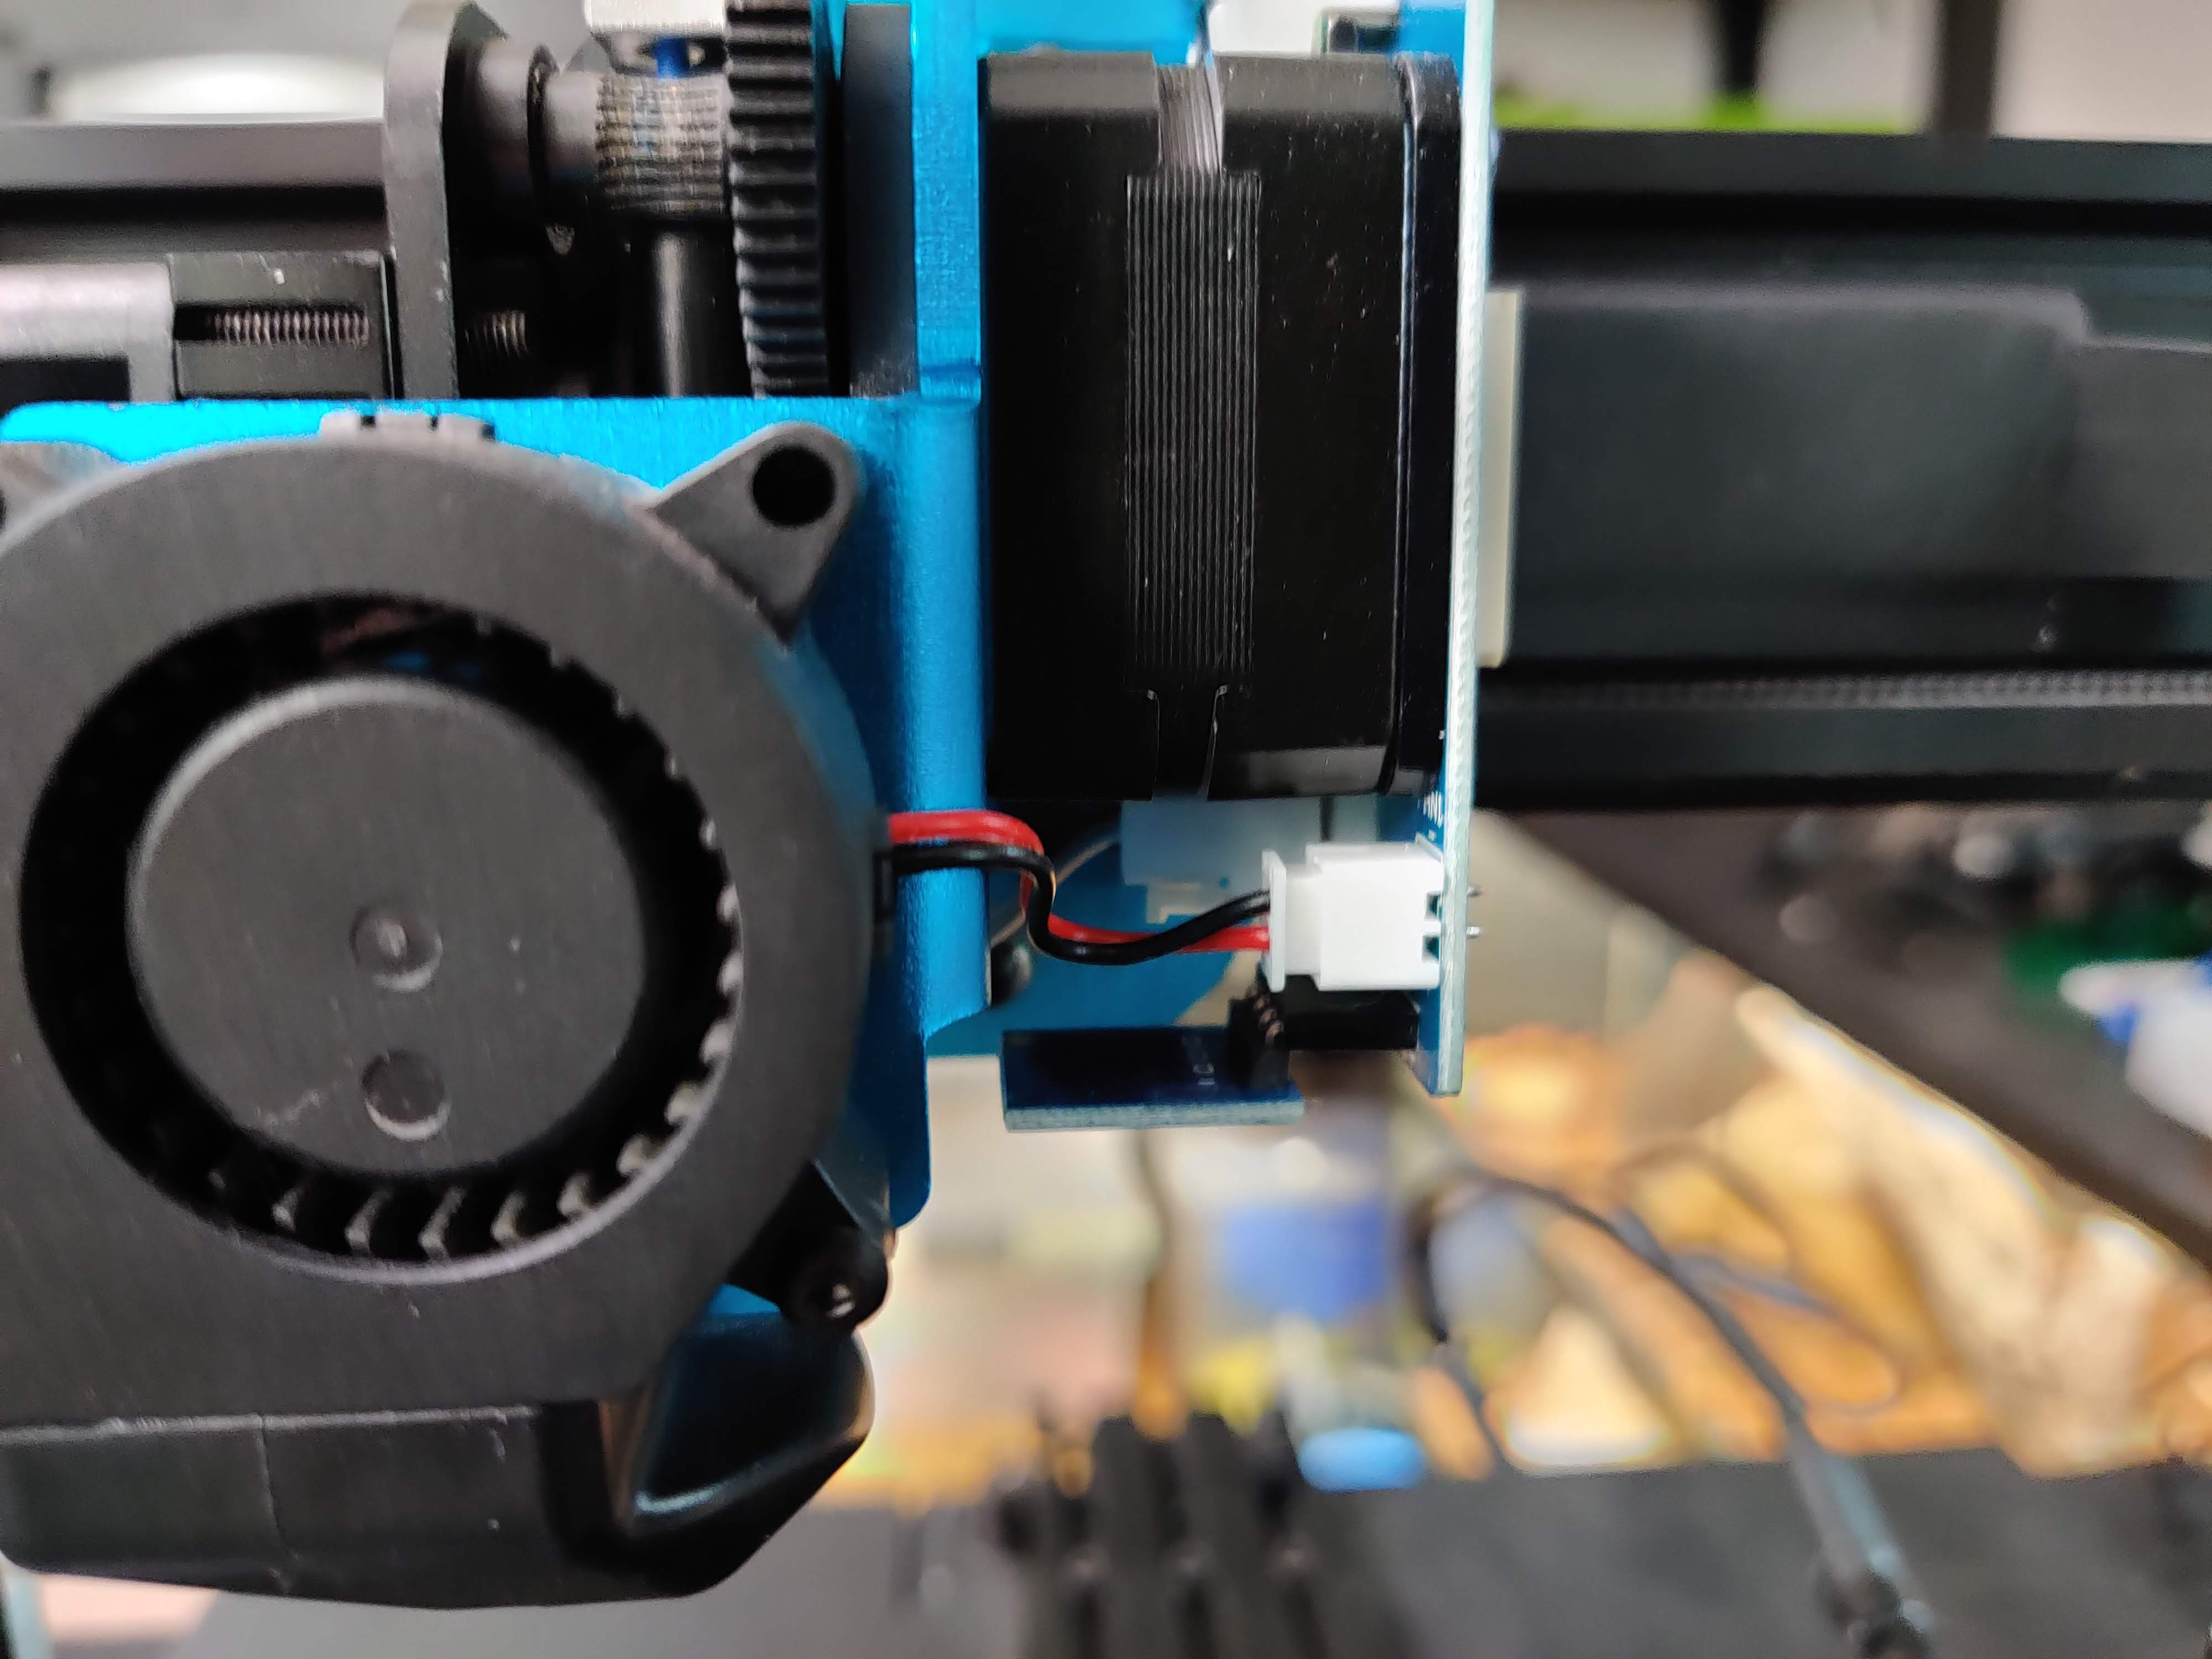
To preserve the functionality of the part cooling fan, you will have to either solder some wires to the back of the PCB where the plug is or make a Y splitter for the fan and the PWM input of the Laserbox. This means that the fan will also spin when you are using the laser, but that shouldn’t be an issue.
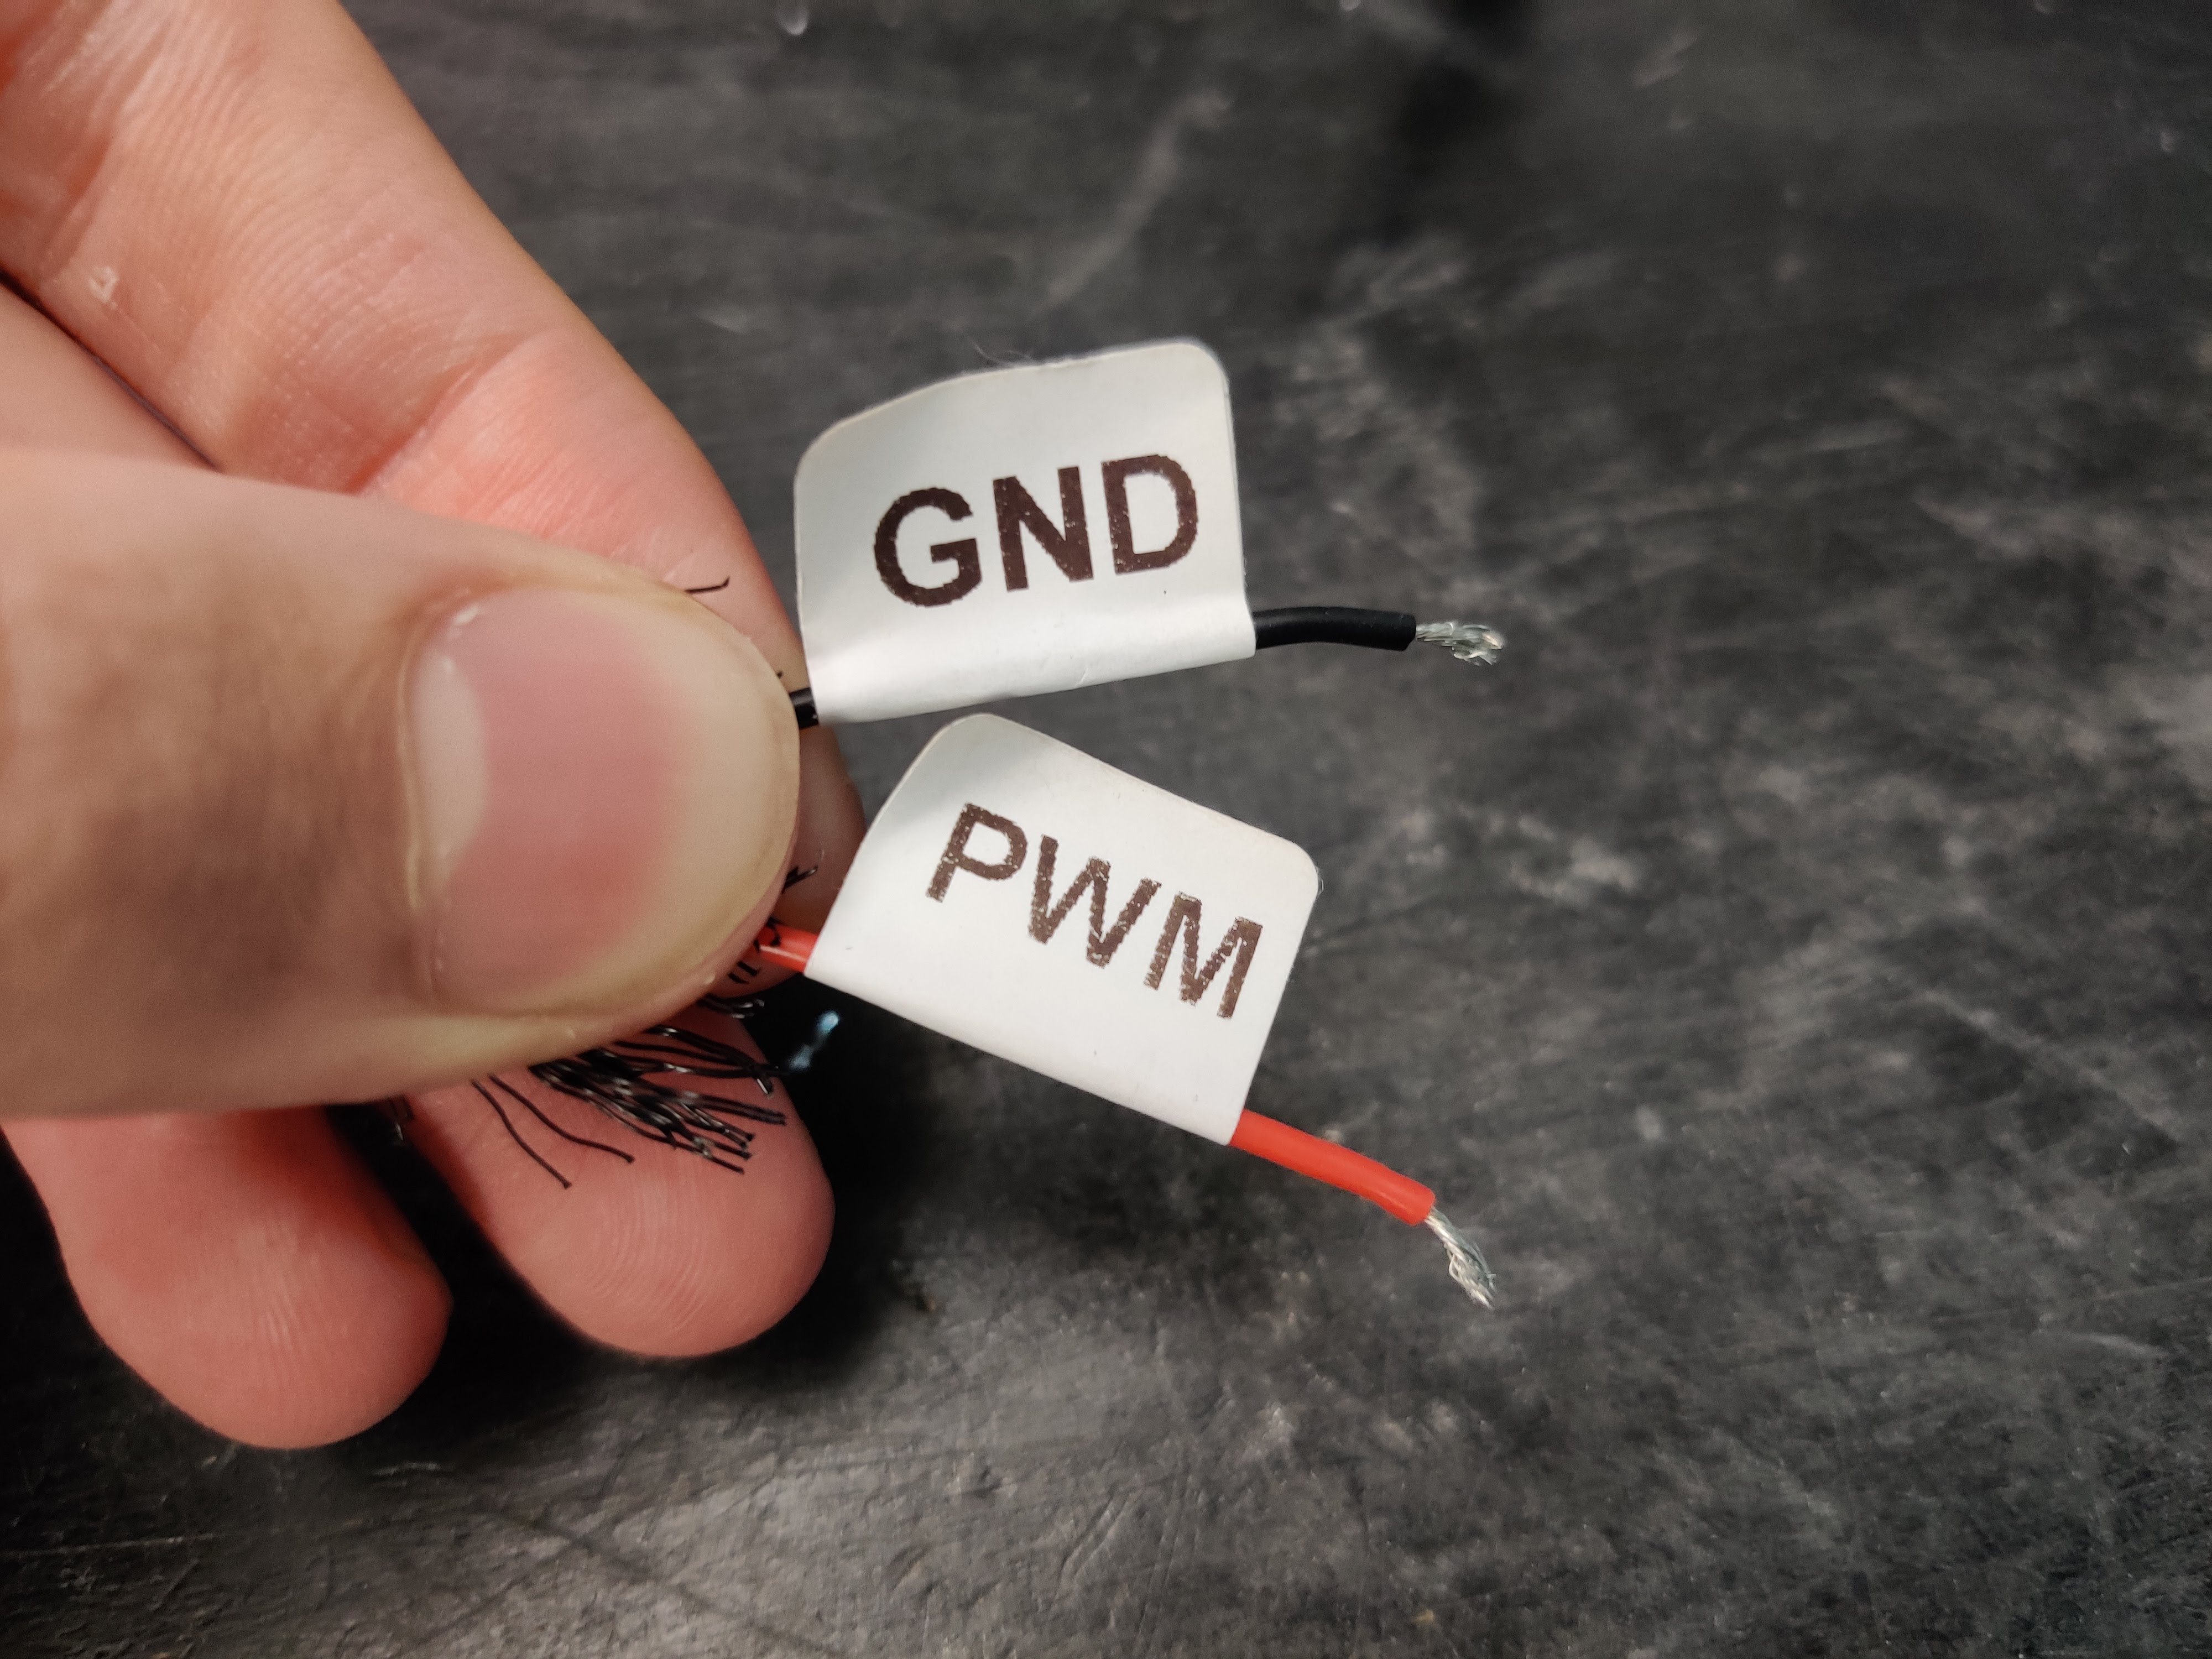
On the Laserbox you want to use the black PWM input (not blue) with the red and black wires going to the red and black wires of the fan respectively. Then lastly you want to make sure the selection switch of the Laserbox is set to the middle position to use PWM mode. Just make sure you have the Laserbox turned off whenever you are using the printer to 3d print so that the laser doesn’t blind you.

Getting started with Endurance diode lasers – focusing, settings, parameters, misc
Software
Sadly the slicer you have been using to control the 3d printer does not support laser engraving. This means that you will have to use a different piece of software. There are various options, but here we will use Lightburn as it has the most features at a very low cost.
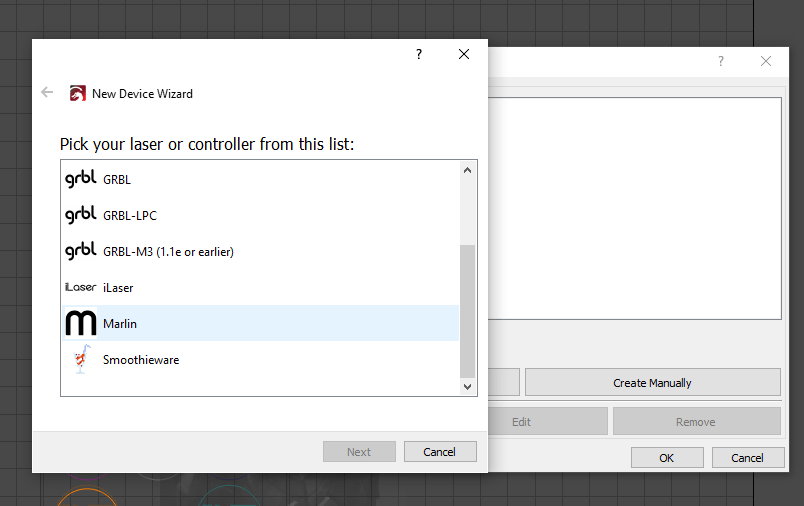
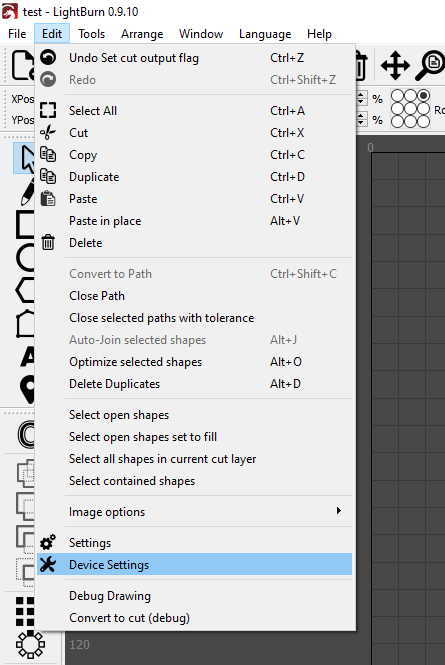
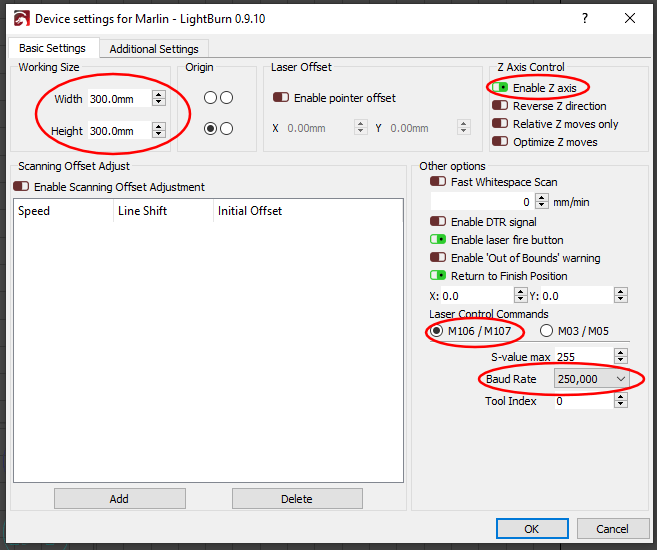
You want to start by adding a new device and selecting Marlin as the controller. This will ensure that Lightburn knows what flavor of gcode to use with the 3d printer. After that, you can enter the dimensions of the bed and finish adding the device. Before we can connect the printer, we still need to change some further settings, for which you can click on “Edit”->”Device Settings”. In the window that pops up, make sure that all the settings are configured as you can see in this picture.
G-code examples and images for laser engraving and laser cutting
After this, you should be able to connect the printer to your computer with a USB cable and connect to it in Lightburn by selecting the newly created device and the port your printer is connected to. To confirm everything is working correctly, you can try to move the printer with the movement commands.
Finishing up
Lastly, you have to focus the Endurance laser, by turning it on at low power (maybe 5%) and turning the lens element until you get a perfect point focus. A trick to find the focus more easily is to use one of these black-painted metal cards. They are included with many lasers, or you can buy them very cheaply online. They let you see the laser spot more easily, and if you move them around you can hear if the laser is engraving. If you have the power set low enough, you will only hear it hissing when the laser is perfectly focused.
Instead of changing the focus by turning the lens, you can also use the up and down movement commands to move the z-axis in small increments to find the perfect focal distance.
If you want to use the air assist, which is recommended if you intend on cutting wood, you can also hook that up at this point. Some good air sources would be an air pump or a hobby air compressor for airbrushing. Both of these options should be easily obtainable online from a local reseller.
By following these steps you should be able to convert your Artillery Sidewinder X1 to using an Endurance 7000/8000/8500 mw 7/8/8.5 watt laser in no time. If you get stuck at any point, have another look at the pictures here, or feel free to contact us here at Endurance with the LiveChat.