
It was early in the Covid_19 pandemic when I found myself sitting around, completely bored with the little bit of time I had off work being considered an “essential worker”. I knew I was looking for a new hobby, but nothing really piqued my interest.
One Saturday afternoon, I was surfing around YouTube and stumbled across some great videos from Zachary Phillips’ channel called Southern Smoke Engraving. I immediately knew this was something I could get into. After watching nearly all his very informative videos, three things stood out the most to me. The first was how easy he made it look with a tabletop laser and two software programs. The second was how well he described the processes involved (I just naturally thought that the people that do this would be secretive about their process). Lastly, was the high-quality work he was achieving on all the different substrates.
It wasn’t long after that before I purchased my first Ortur Laser Master 2 and a Lightburn license key. I don’t consider myself a very technologically savvy person so the day my laser arrived; I was a little hesitant to even open the box. After mustering up the confidence to open the box, and to my delight, I successfully assembled the laser and got it working. I had all the basic beginner issues like homing issues and grinding stepper motors but with a little help from some great people in some well-known Facebook laser groups, it wasn’t long before I was ready to see what I could achieve.
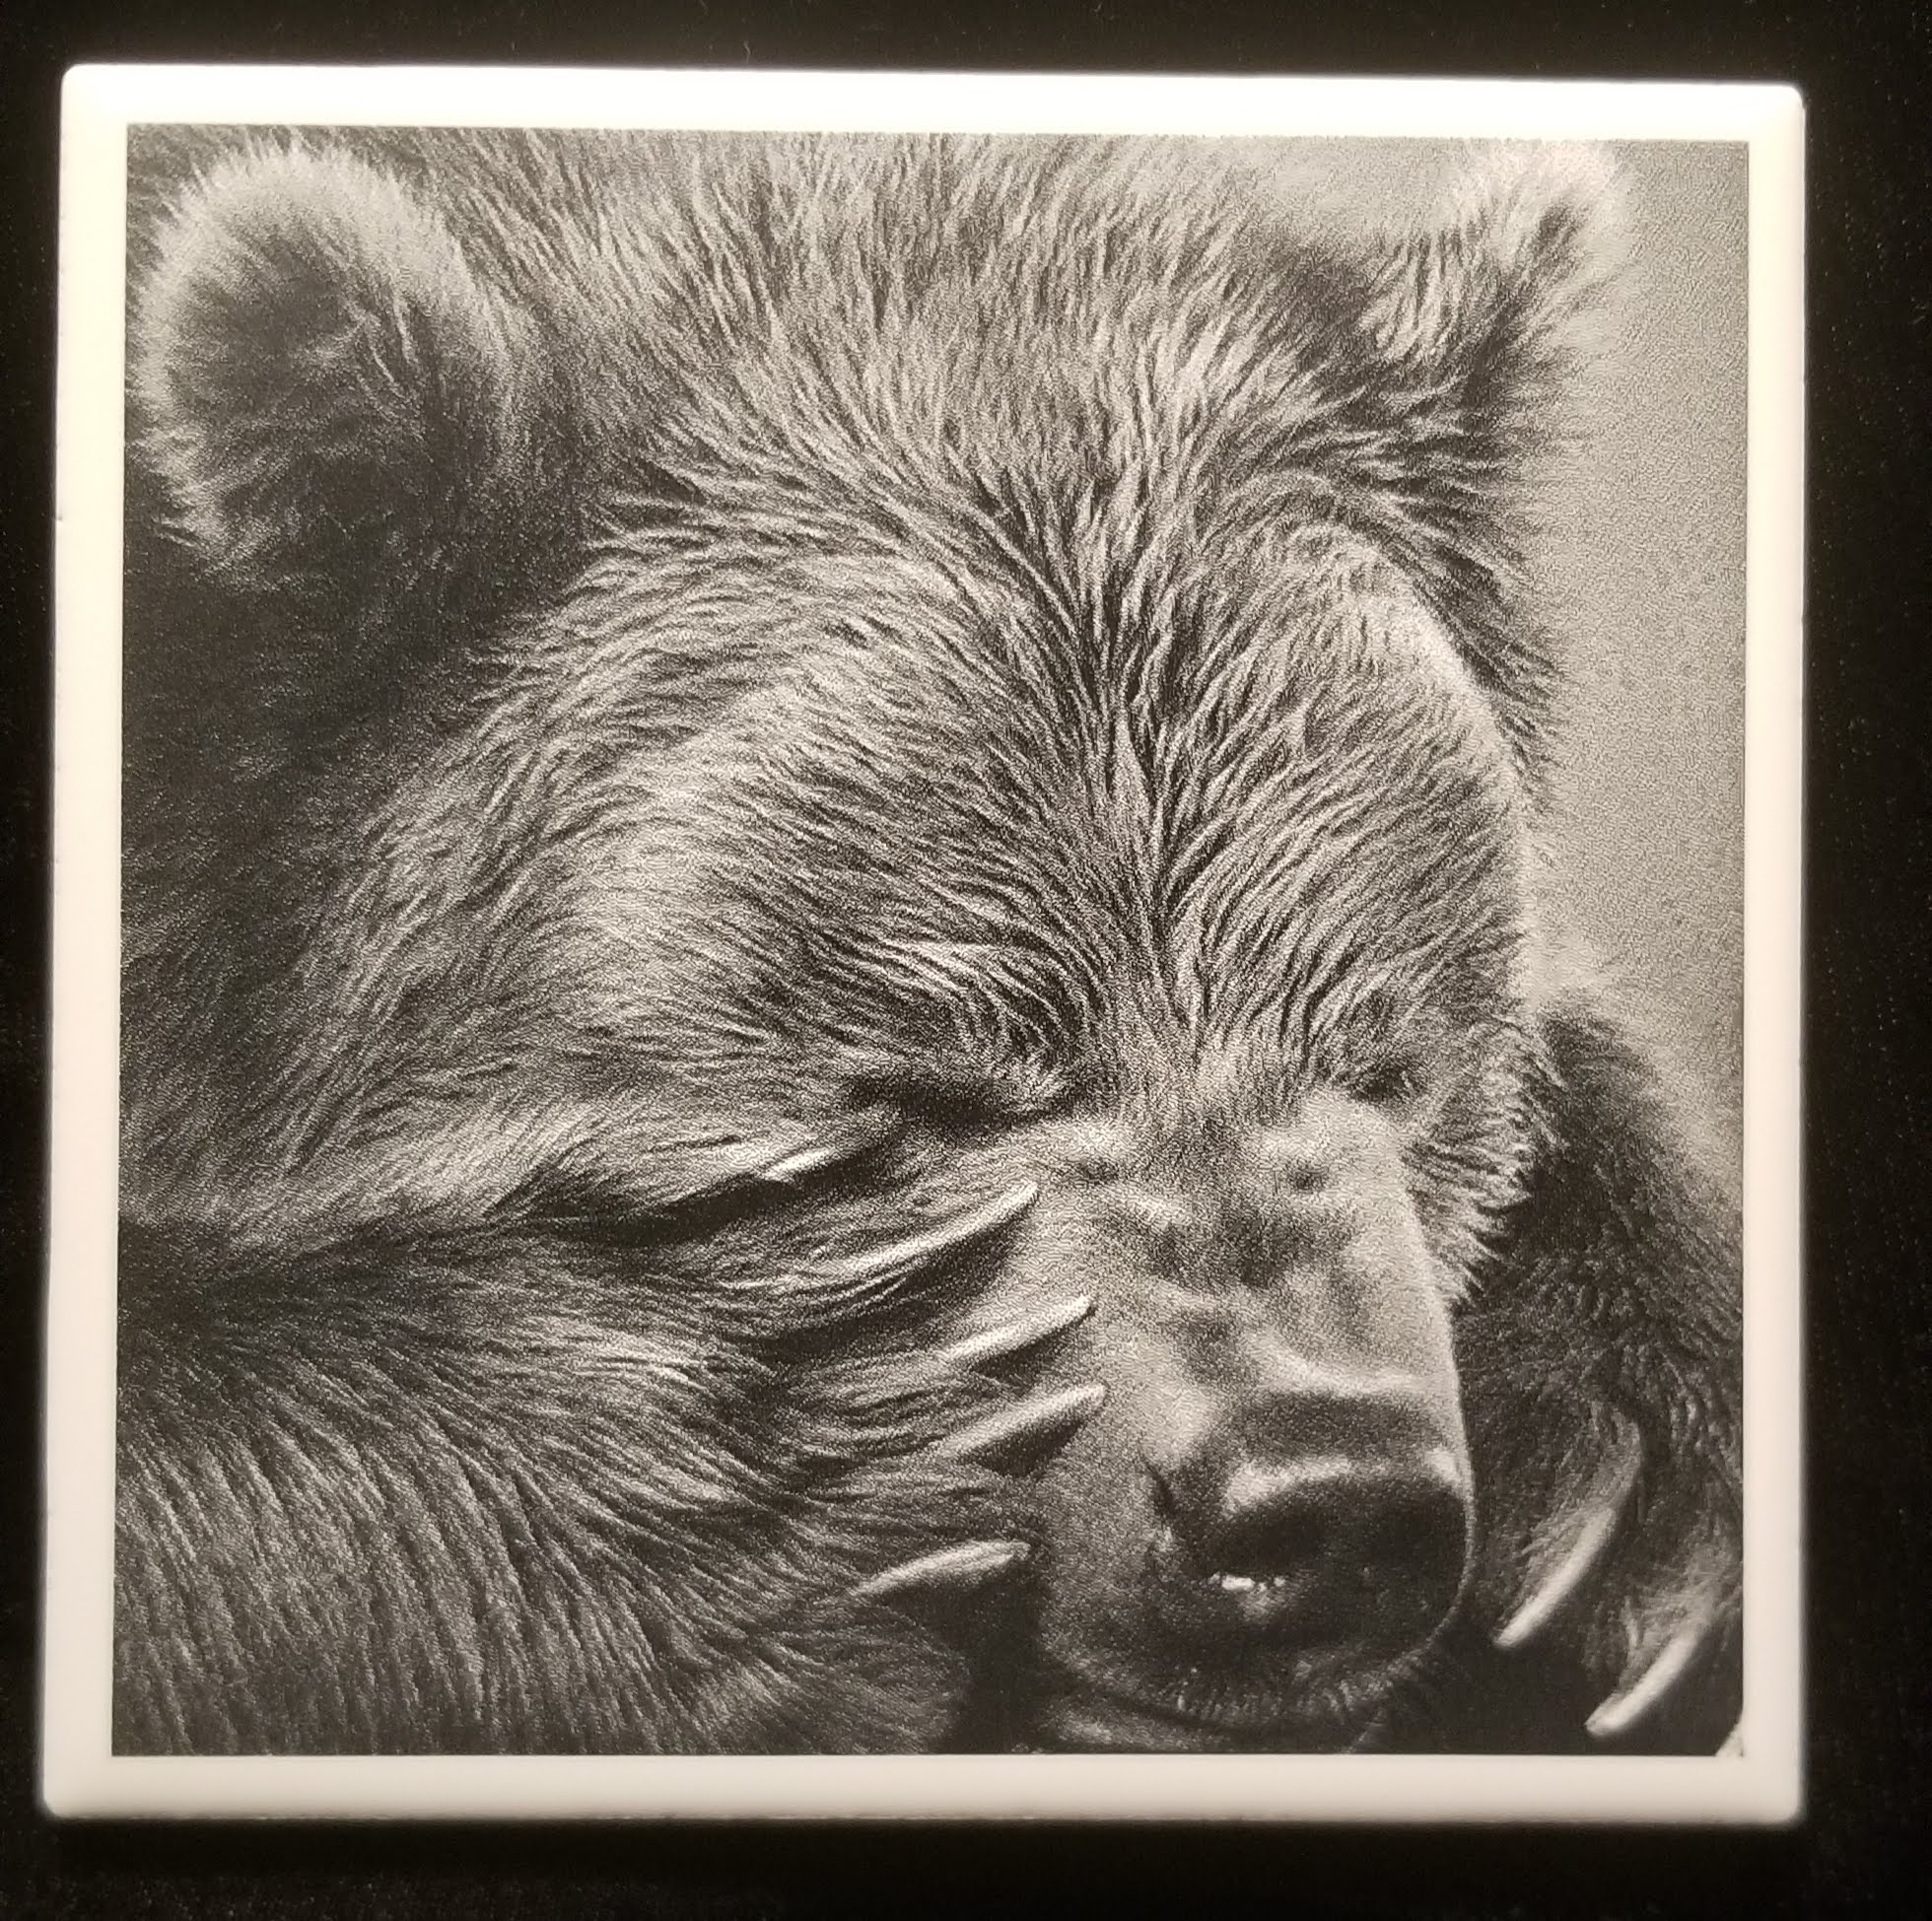
I started with something basic and what I was seeing on YouTube and the Facebook groups, painted tiles. Preparing the tiles was the easy part. Clean with acetone and a base coat of gloss white spray paint with a coat or two of gloss black on top. I wasn’t familiar with Lightburn yet, so I chose my setting off the similar settings being used in the Facebook groups. After loading everything and having my tile ready to go, I pressed start. It was all completely new to me. The sight, the sound, and the smell. I was actually taken back by the odor. I wasn’t prepared for it nor did I expect it. It wasn’t mentioned in anything I had seen or read. Not knowing about that, I had my laser set up on a table in the far corner of my garage. I immediately relocated it to as close to the garage door as possible and added a fan to blow the fumes outside. So, if you’re considering purchasing a laser, a well-ventilated area is a must. After about 45 minutes, my first tile was done. It was a picture of my beloved rescue greyhound, Minka. My initial reaction was “could be worse, but could be much, much better”.
After finally getting everything up and running and a little more comfortable, my confidence was a little bit higher, and I started experimenting and trying to hone my process because I knew it could be better. I prepped a bunch of painted tiles and started playing with different settings such as dithers, dpi, speed and power. Some looked great, others not so great. I was eventually able to find the settings I needed to achieve what I was aiming for and my tiles slowly started to improve.
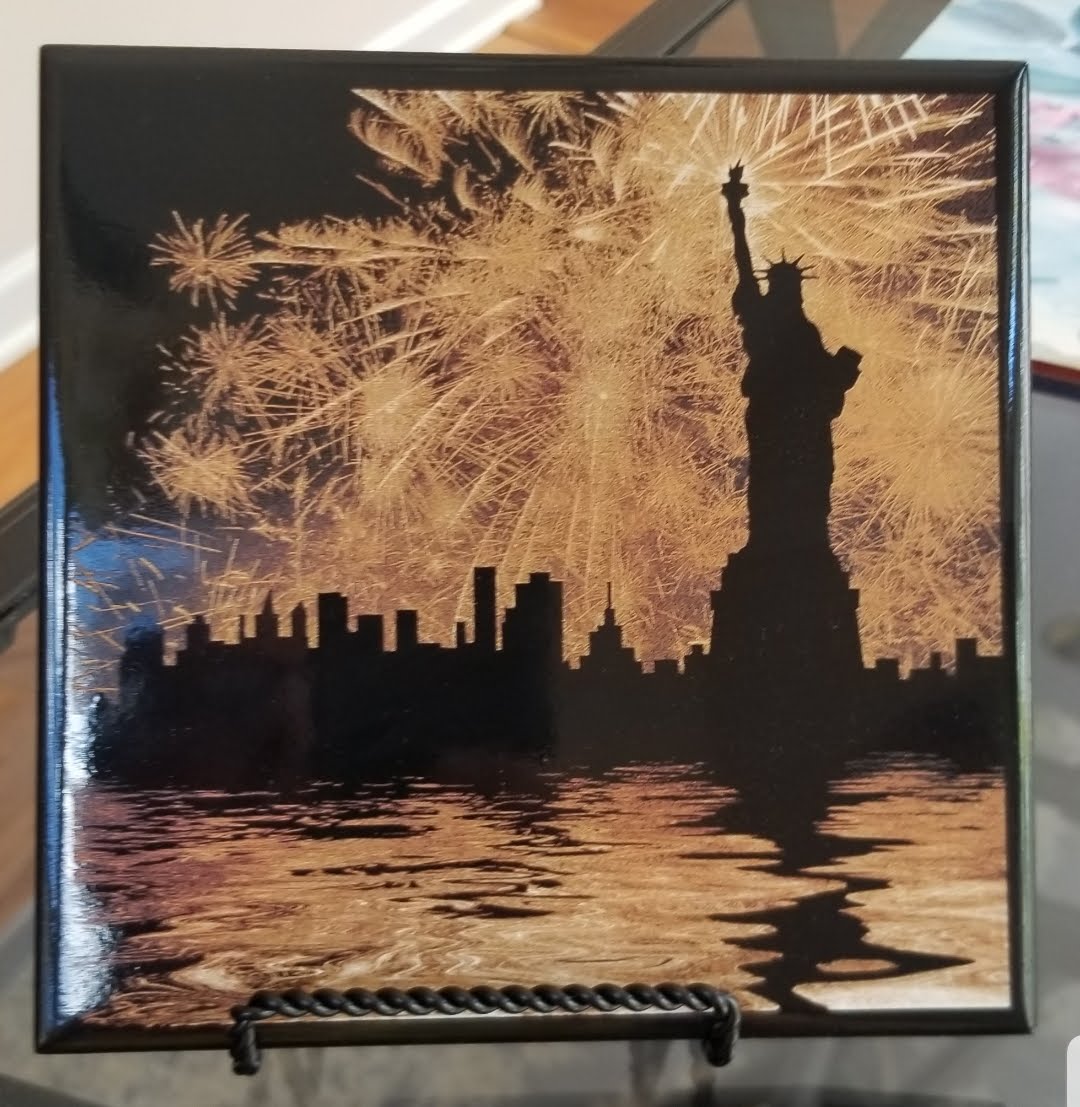
Having been pleased with the results I was getting with the painted tiles, I figured it was time to delve a little deeper and start experimenting with some other techniques. The very next technique I tried was tiles painted with different colors. I had a great picture I was planning on etching. It was a picture of the Statue of Liberty. I knew it couldn’t be too overly complicated due to the nature of the picture. The picture was red and yellow fireworks going off, reflecting off the water with the silhouette of the Statue and New York City in black. I first painted the tile white, yellow, red then black. I entered my settings, framed my tile and started the burn. To my surprise, the tile turned out magnificent. It was my best tile to date. After a bunch of successful multicolored tiles, I wanted to broaden my horizons a little more. Next up were painted canvas which are basically the same as painted tiles and once you get your settings dialed in, you can get pretty much any image you want to look good, so I won’t get into that.
Six weeks after my first laser purchase, Ortur released their Laser Master 2 Pro. Of course, I had to have one so I ordered one right away. I figured with a faster engraving speed and smaller dot, I’d be able to improve my quality of work. It took me no time to assemble the machine and get it up and running. Before I knew it, I had both machines running at the same time getting one good burn after another. Since I basically mastered painted tiles and canvas, I had a go at slate coasters which turned out to be much easier than the tiles and canvas. Just a quick coat of matte varnish to make it pop, and proper settings and they look great.
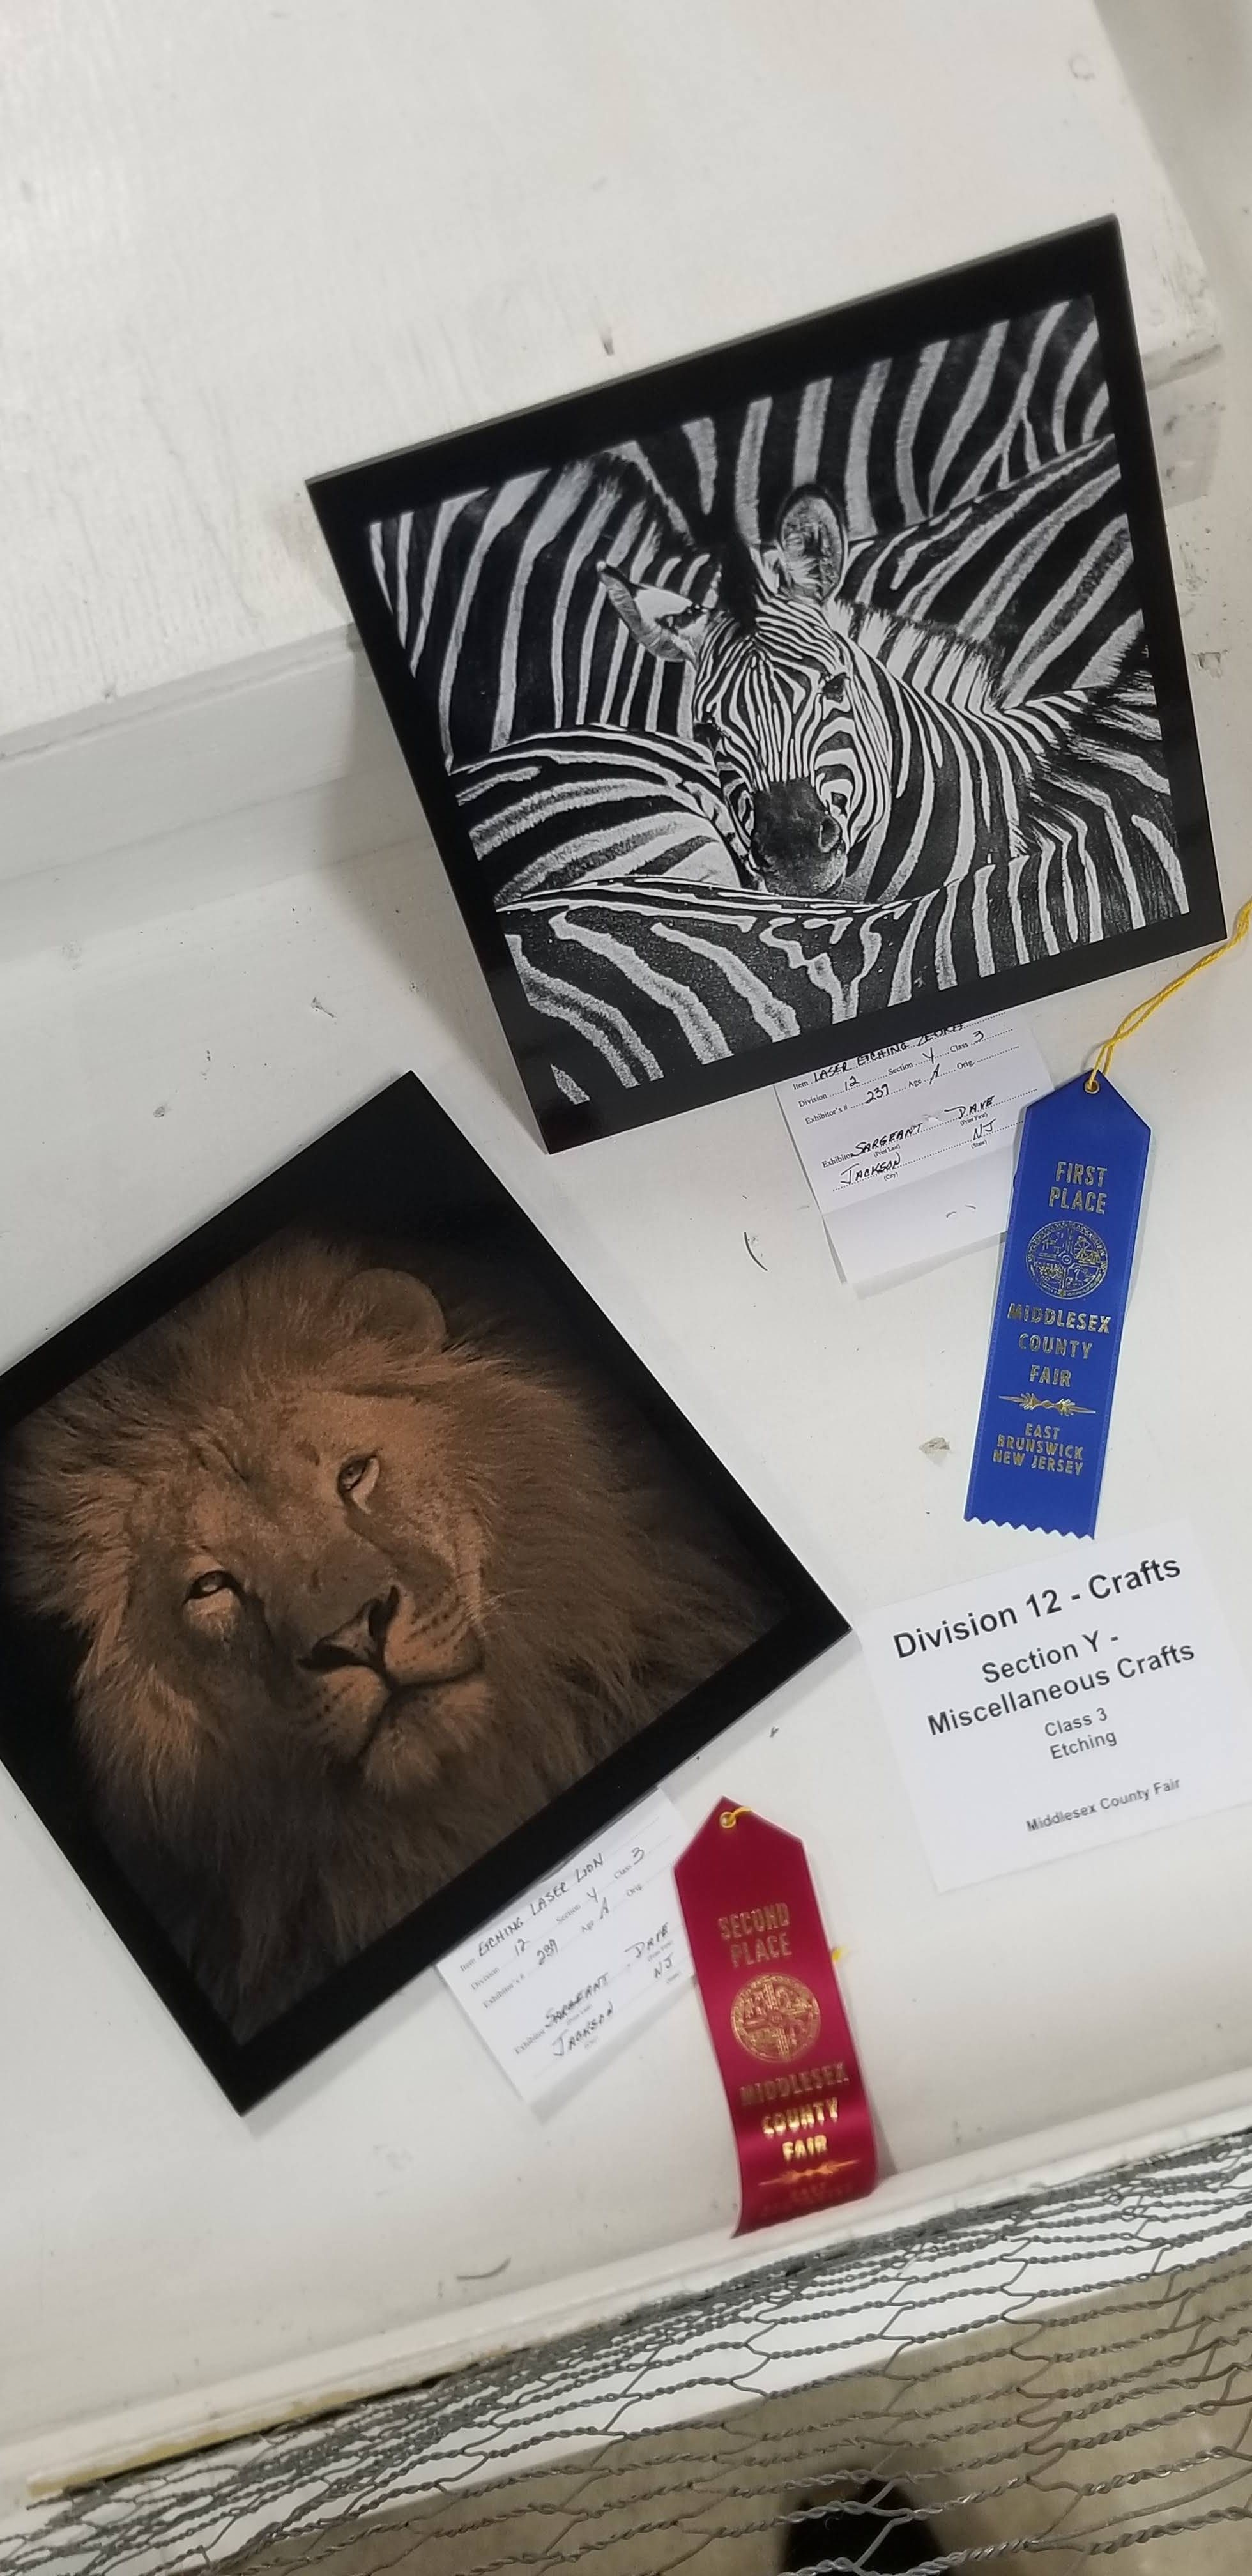
After seeing some posts of some small mirror etchings, I wanted to give them a try. I knew if I could get my settings right, these could be some of the nicest things I’ve made. With some experimenting, and a few bad mirrors. I was astonished with my first successful mirror. It was a tricky set up, having to flip the image horizontally and use negative image but once I got them down, every mirror was better than the previous one. I would then add some led lights and a nice shadowbox and boy do they look good. I entered a few mirrors and even a few other pieces in 2 local county fairs and won multiple 1sts, 2nd and 3rd place ribbons.

Later, I randomly joined a Facebook group called “Nortons Den of Lasers”. I couldn’t believe the quality of diode laser work I was seeing in there and the unbelievable work. It’s a process called the “Norton White Tile Method” named after Nicky Norton who discovered the technique. I was completely unfamiliar with most of the technique, terminology, and upgrades. Thankfully though, there were some very knowledgeable, informative, and friendly people willing to help me out. After lots of questions being asked and answered, I decided it was time to retire mt OLM2 Pro and start with a fresh build and focus on NWT. I got a good deal on a new Eleksmaker A3 Pro. This is now my dedicated white tile machine. With lots of help from Timothy Rothman of Laserupgrades.com, I now have his famed Black and Blue Nano control board, 16 tooth sprockets, Laserupgrades.com acrylics for an added Y axis stepper motor and a few other trinkets. I have a few different laser modules I use for NWT but I get the best quality with an Oxlaser 2.5w.
Paint application and laser removal to obtain a beautiful image – Norton method.
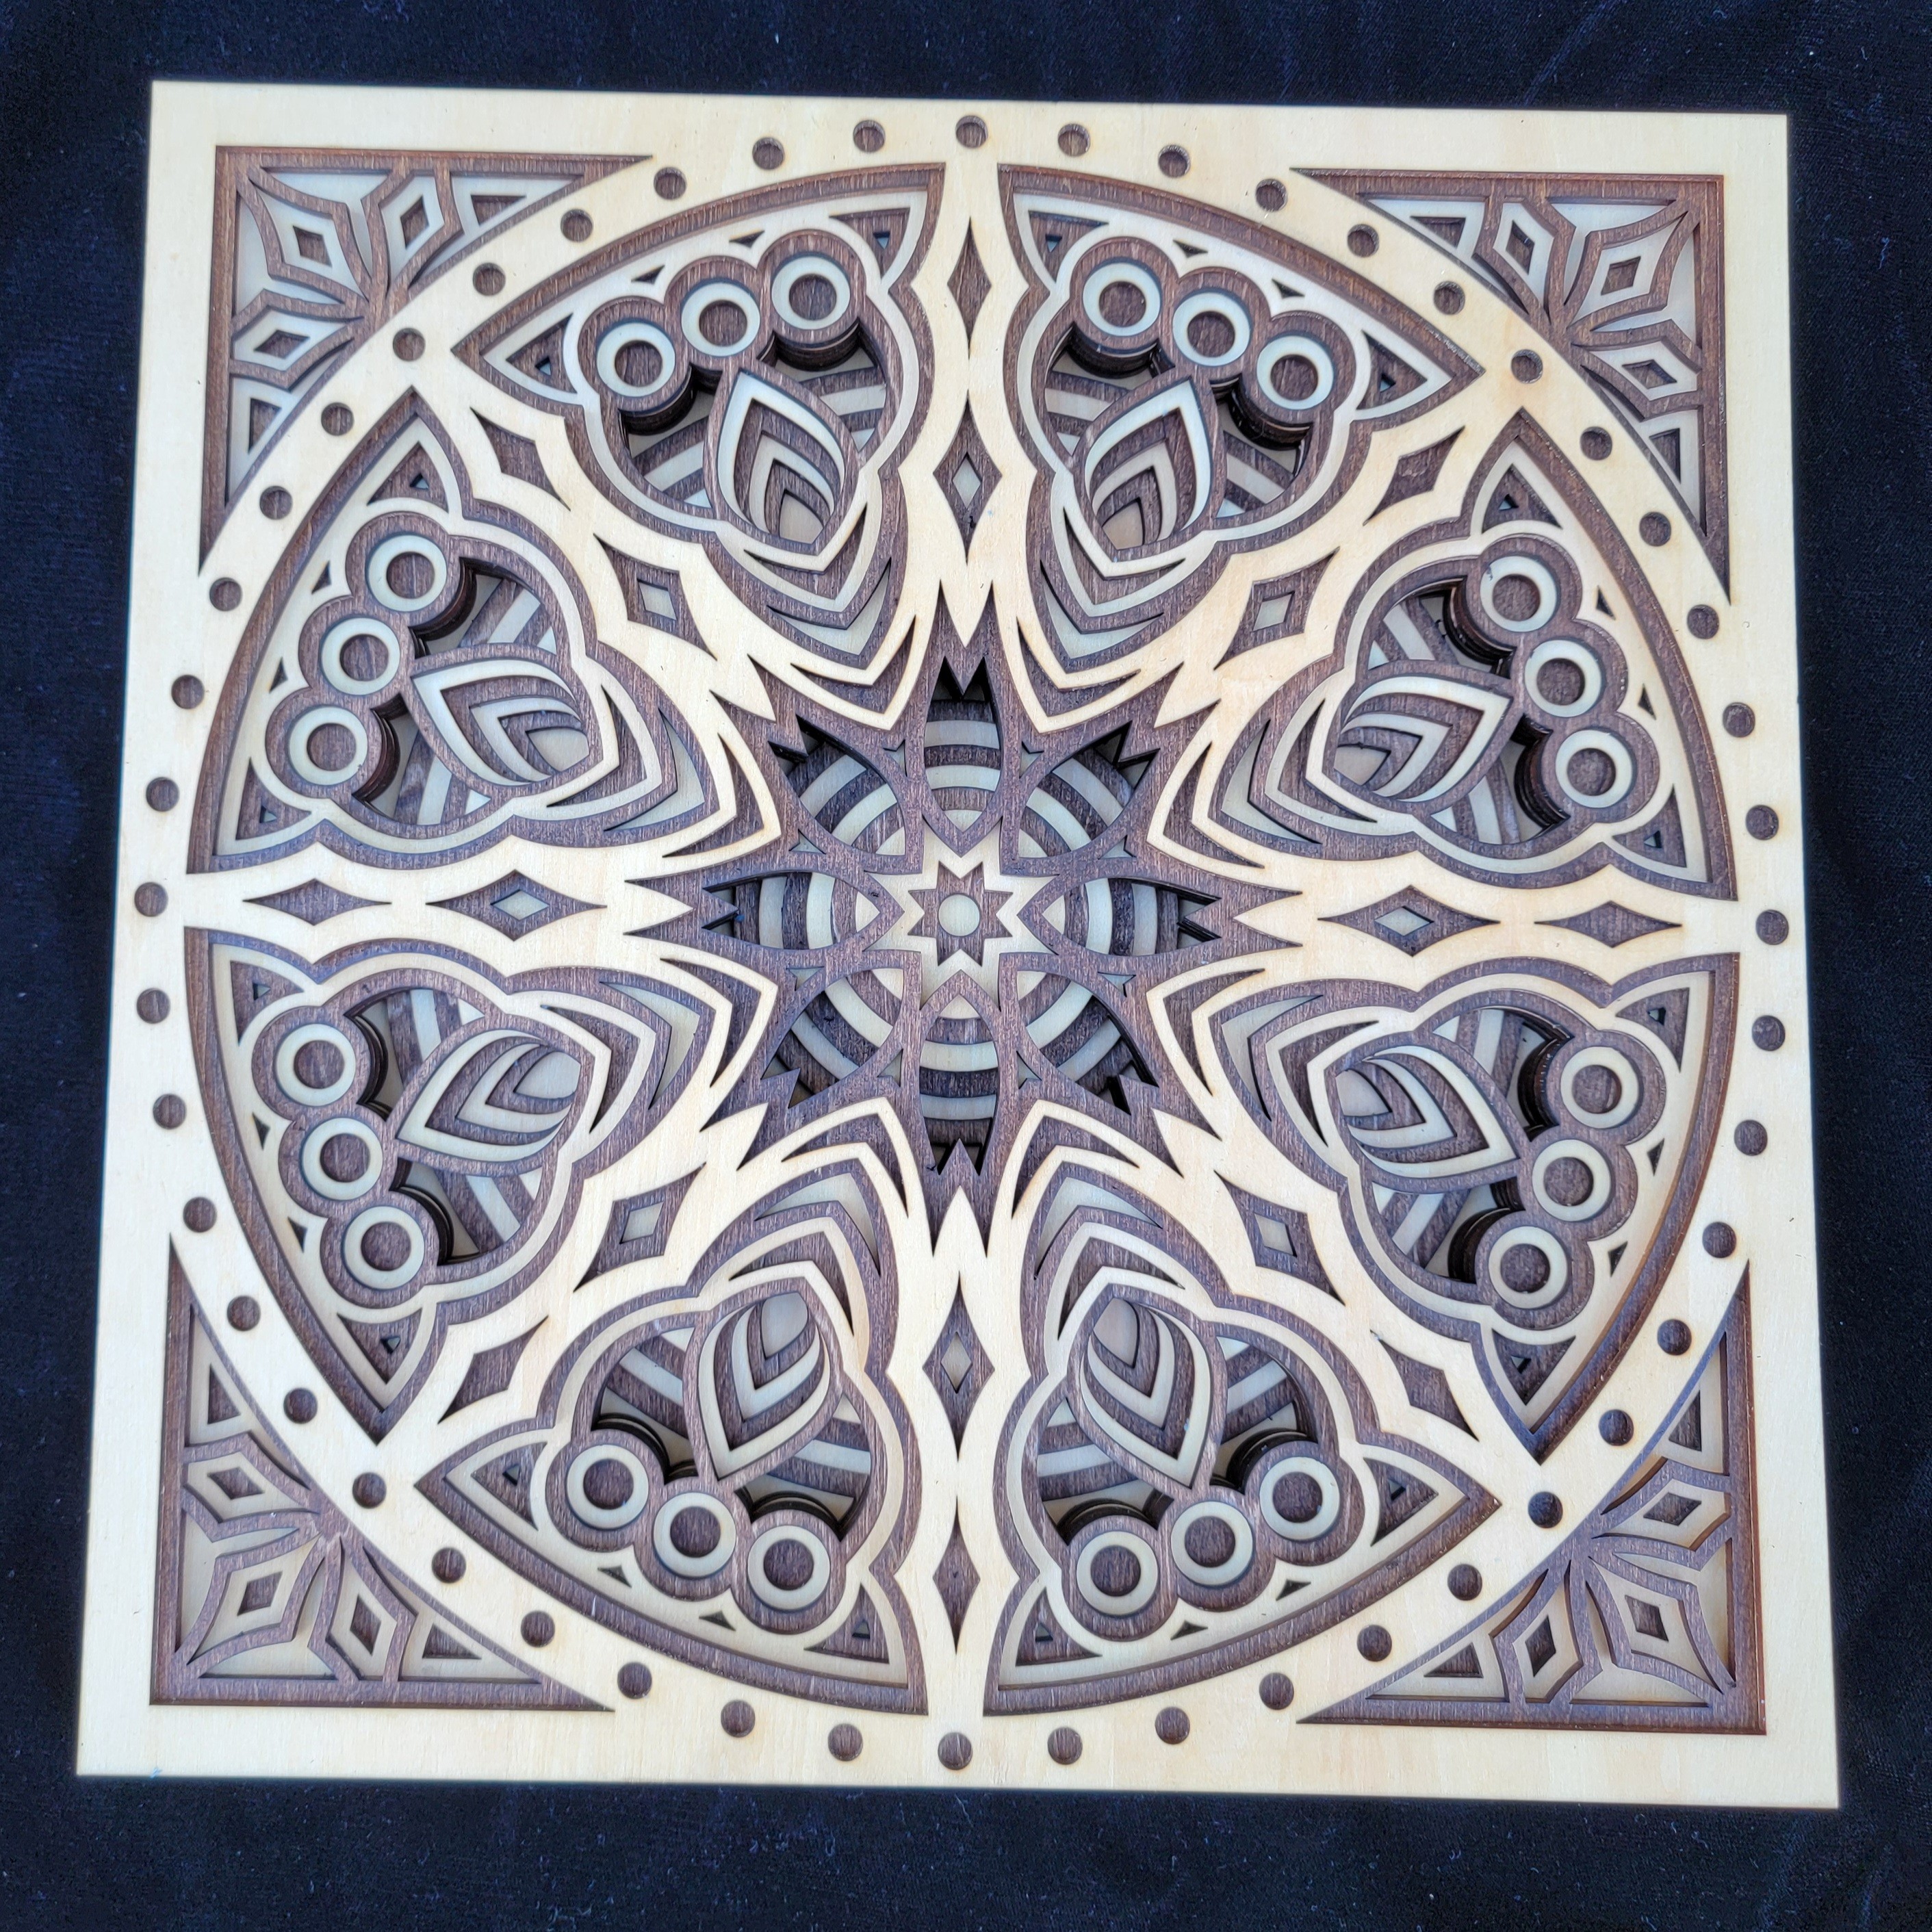
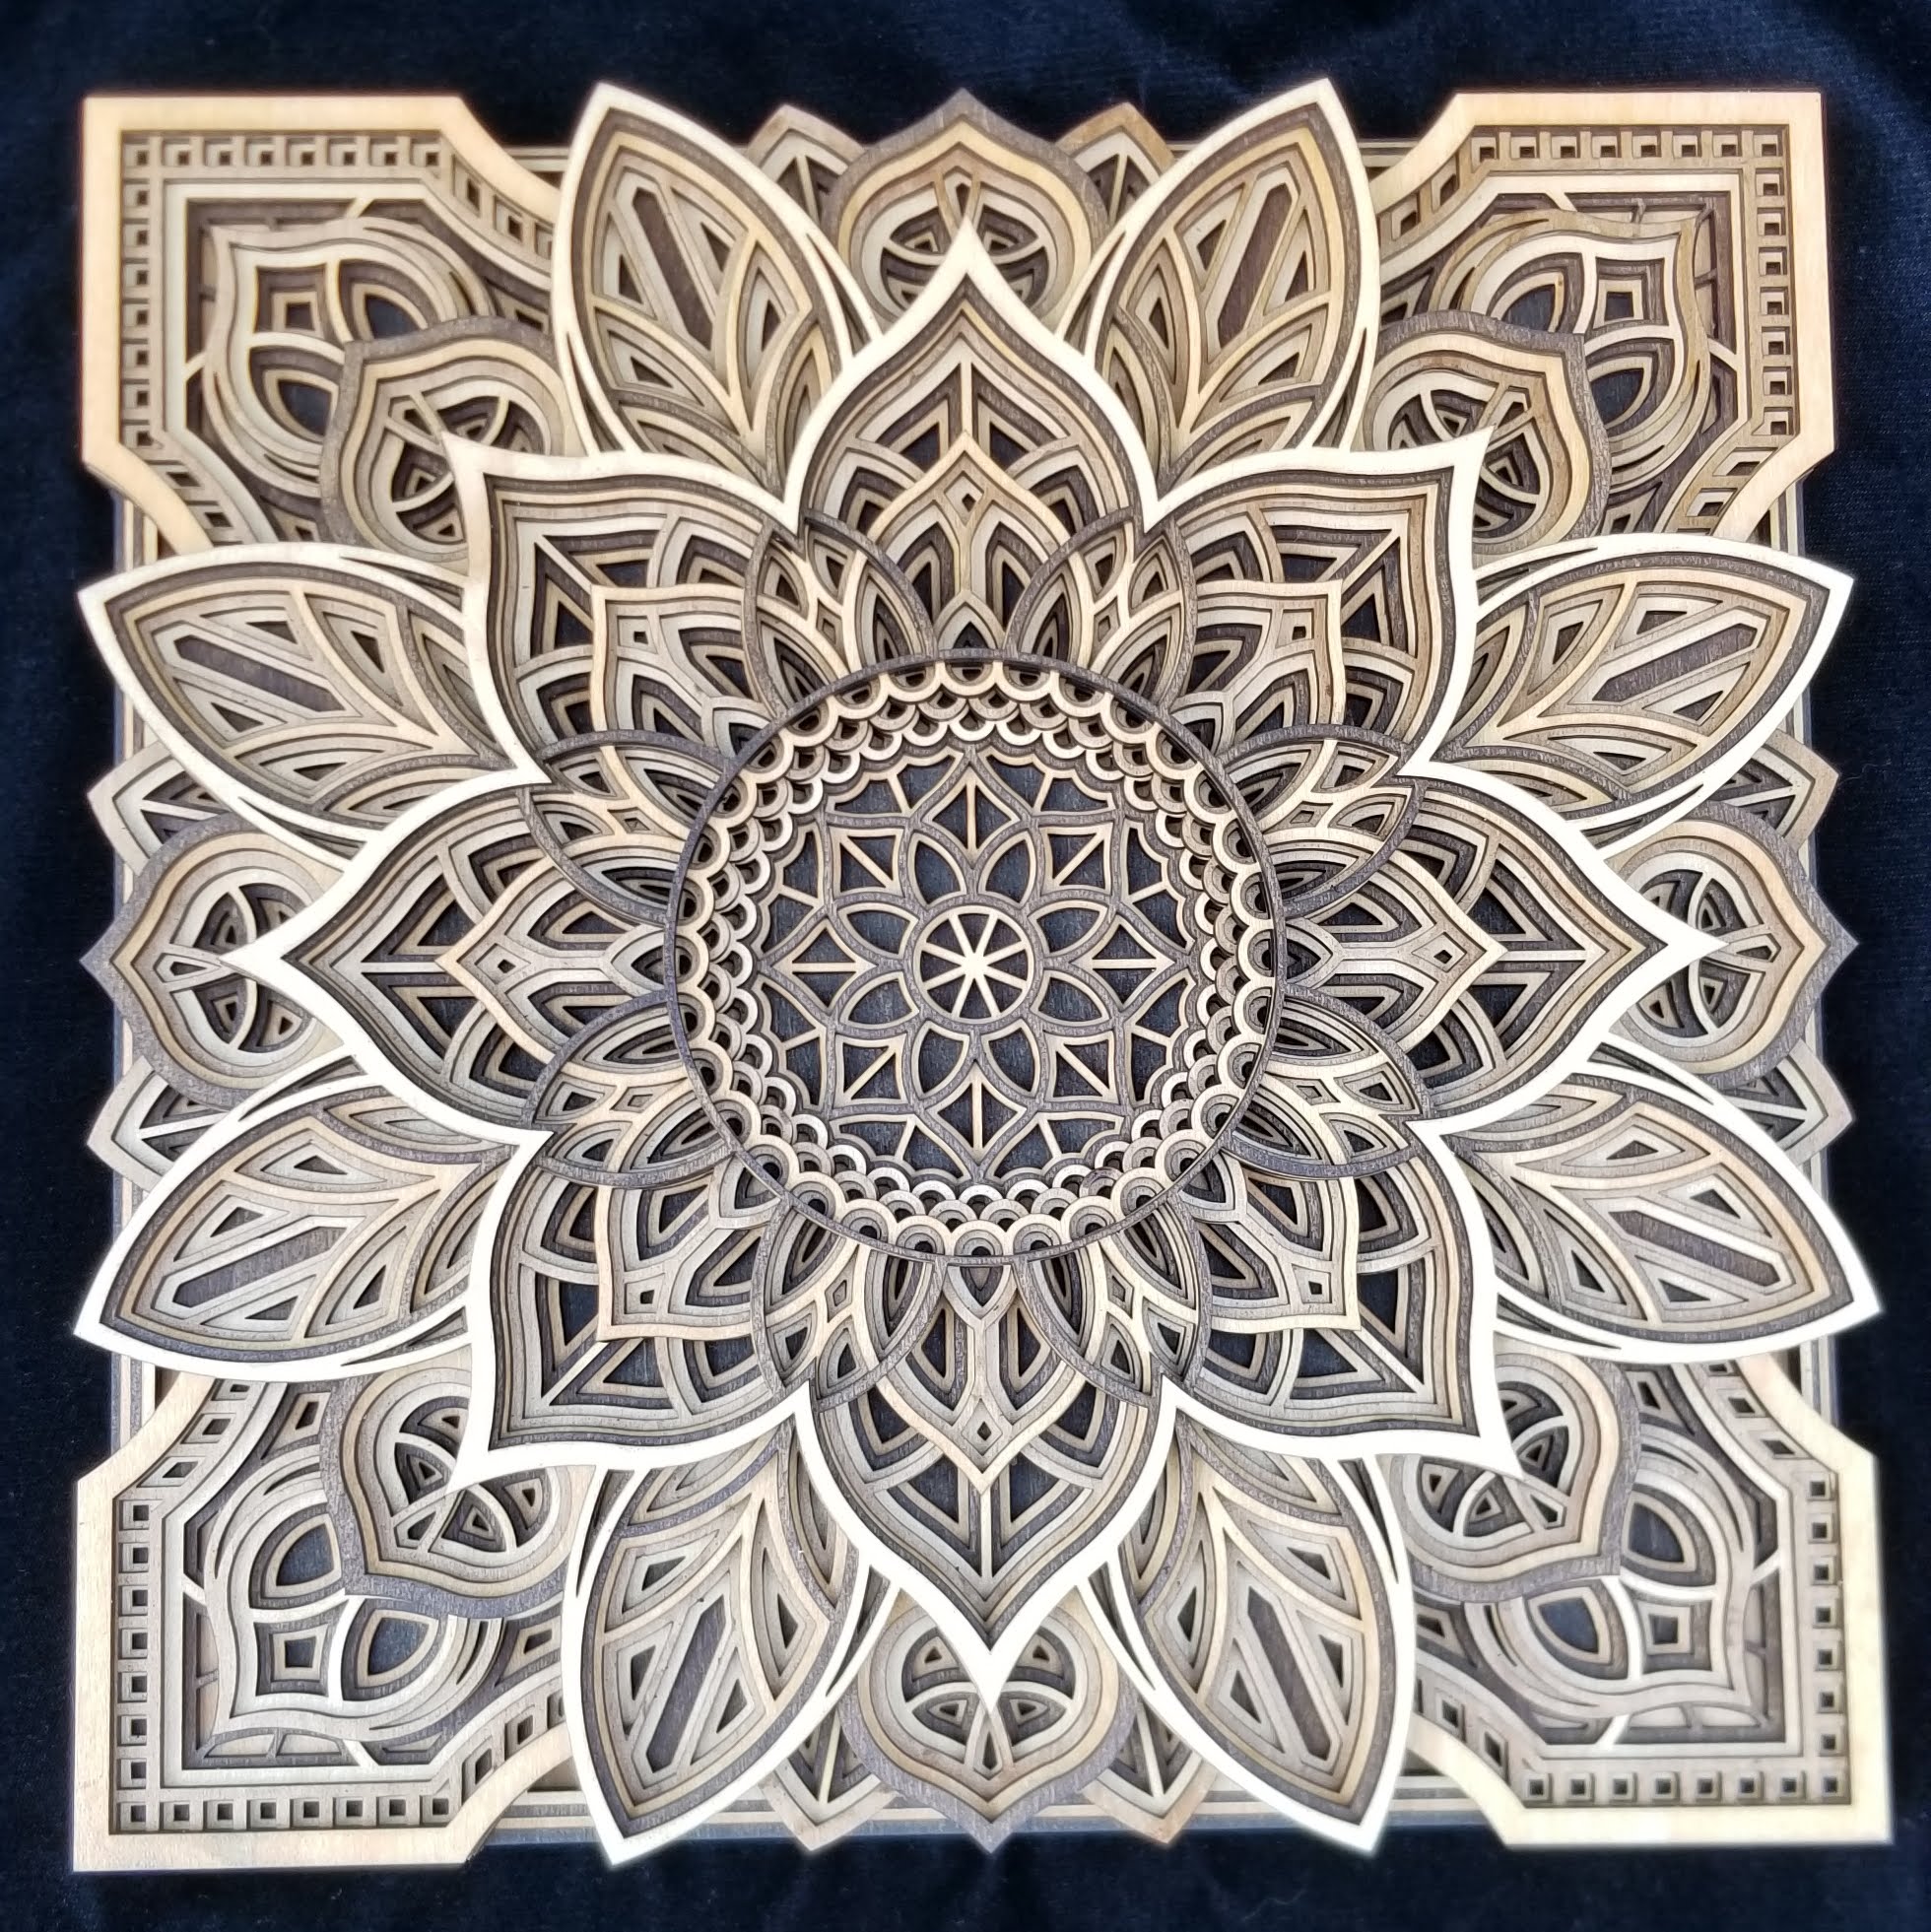
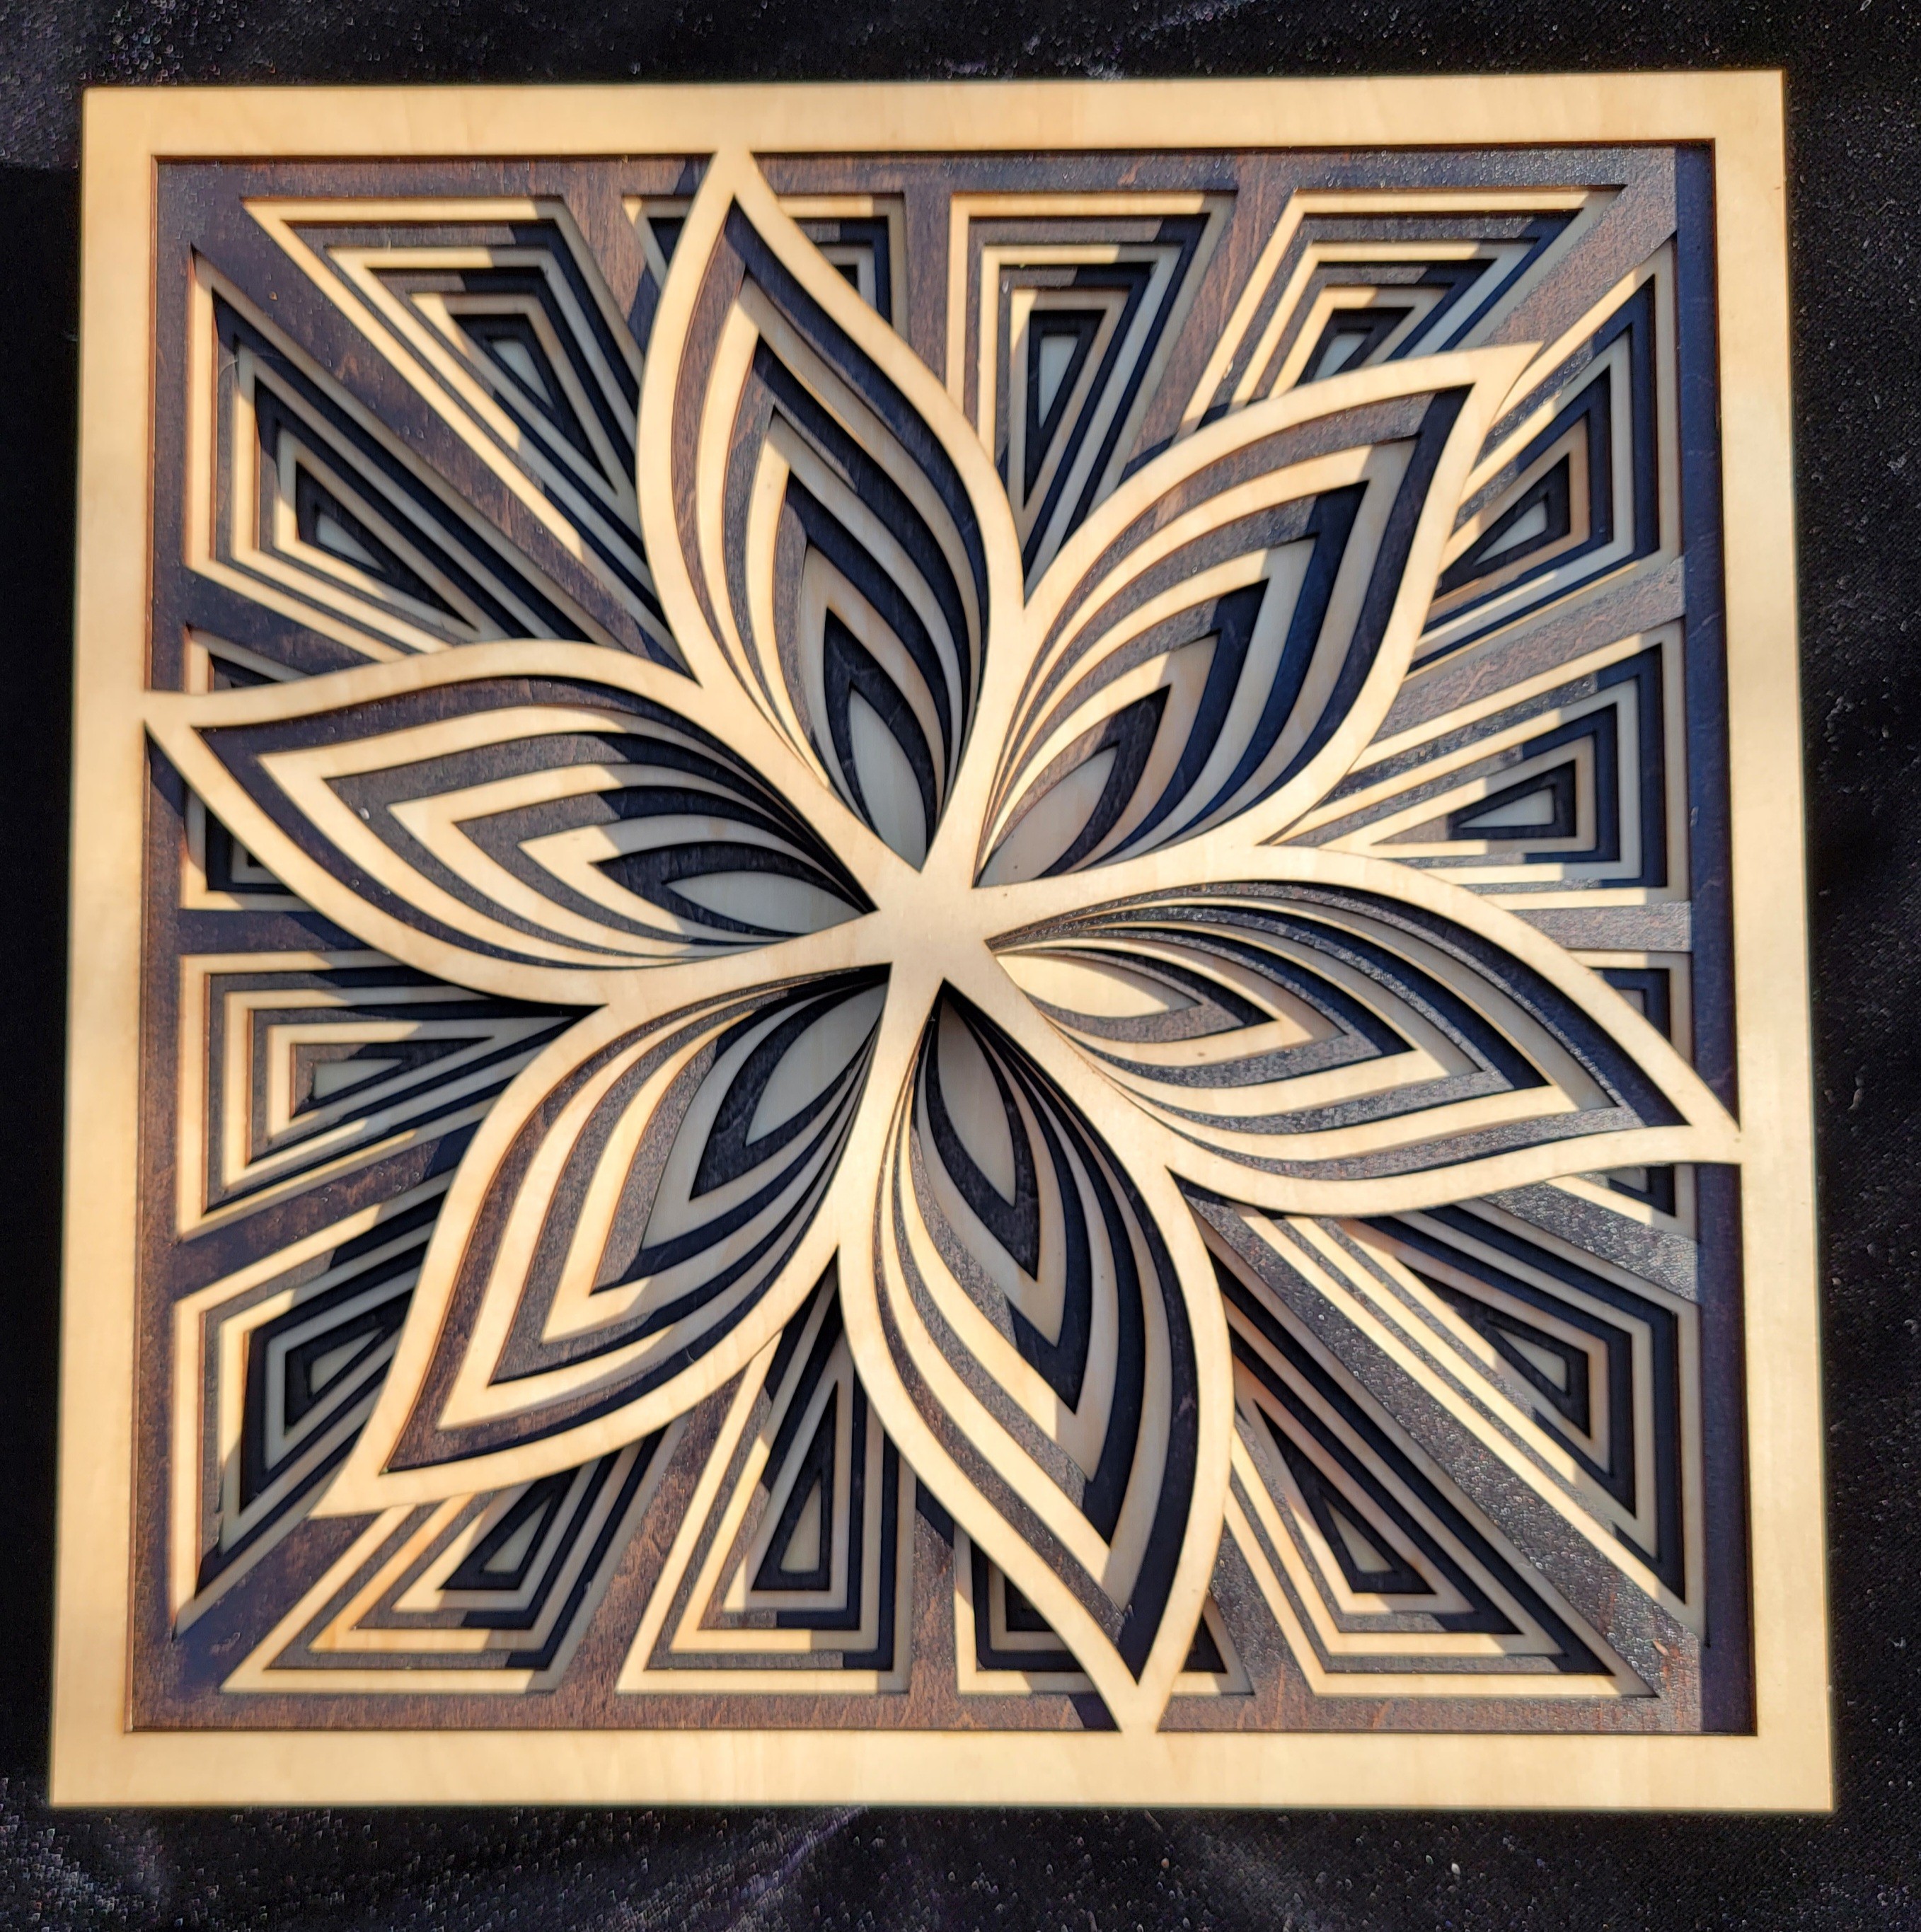
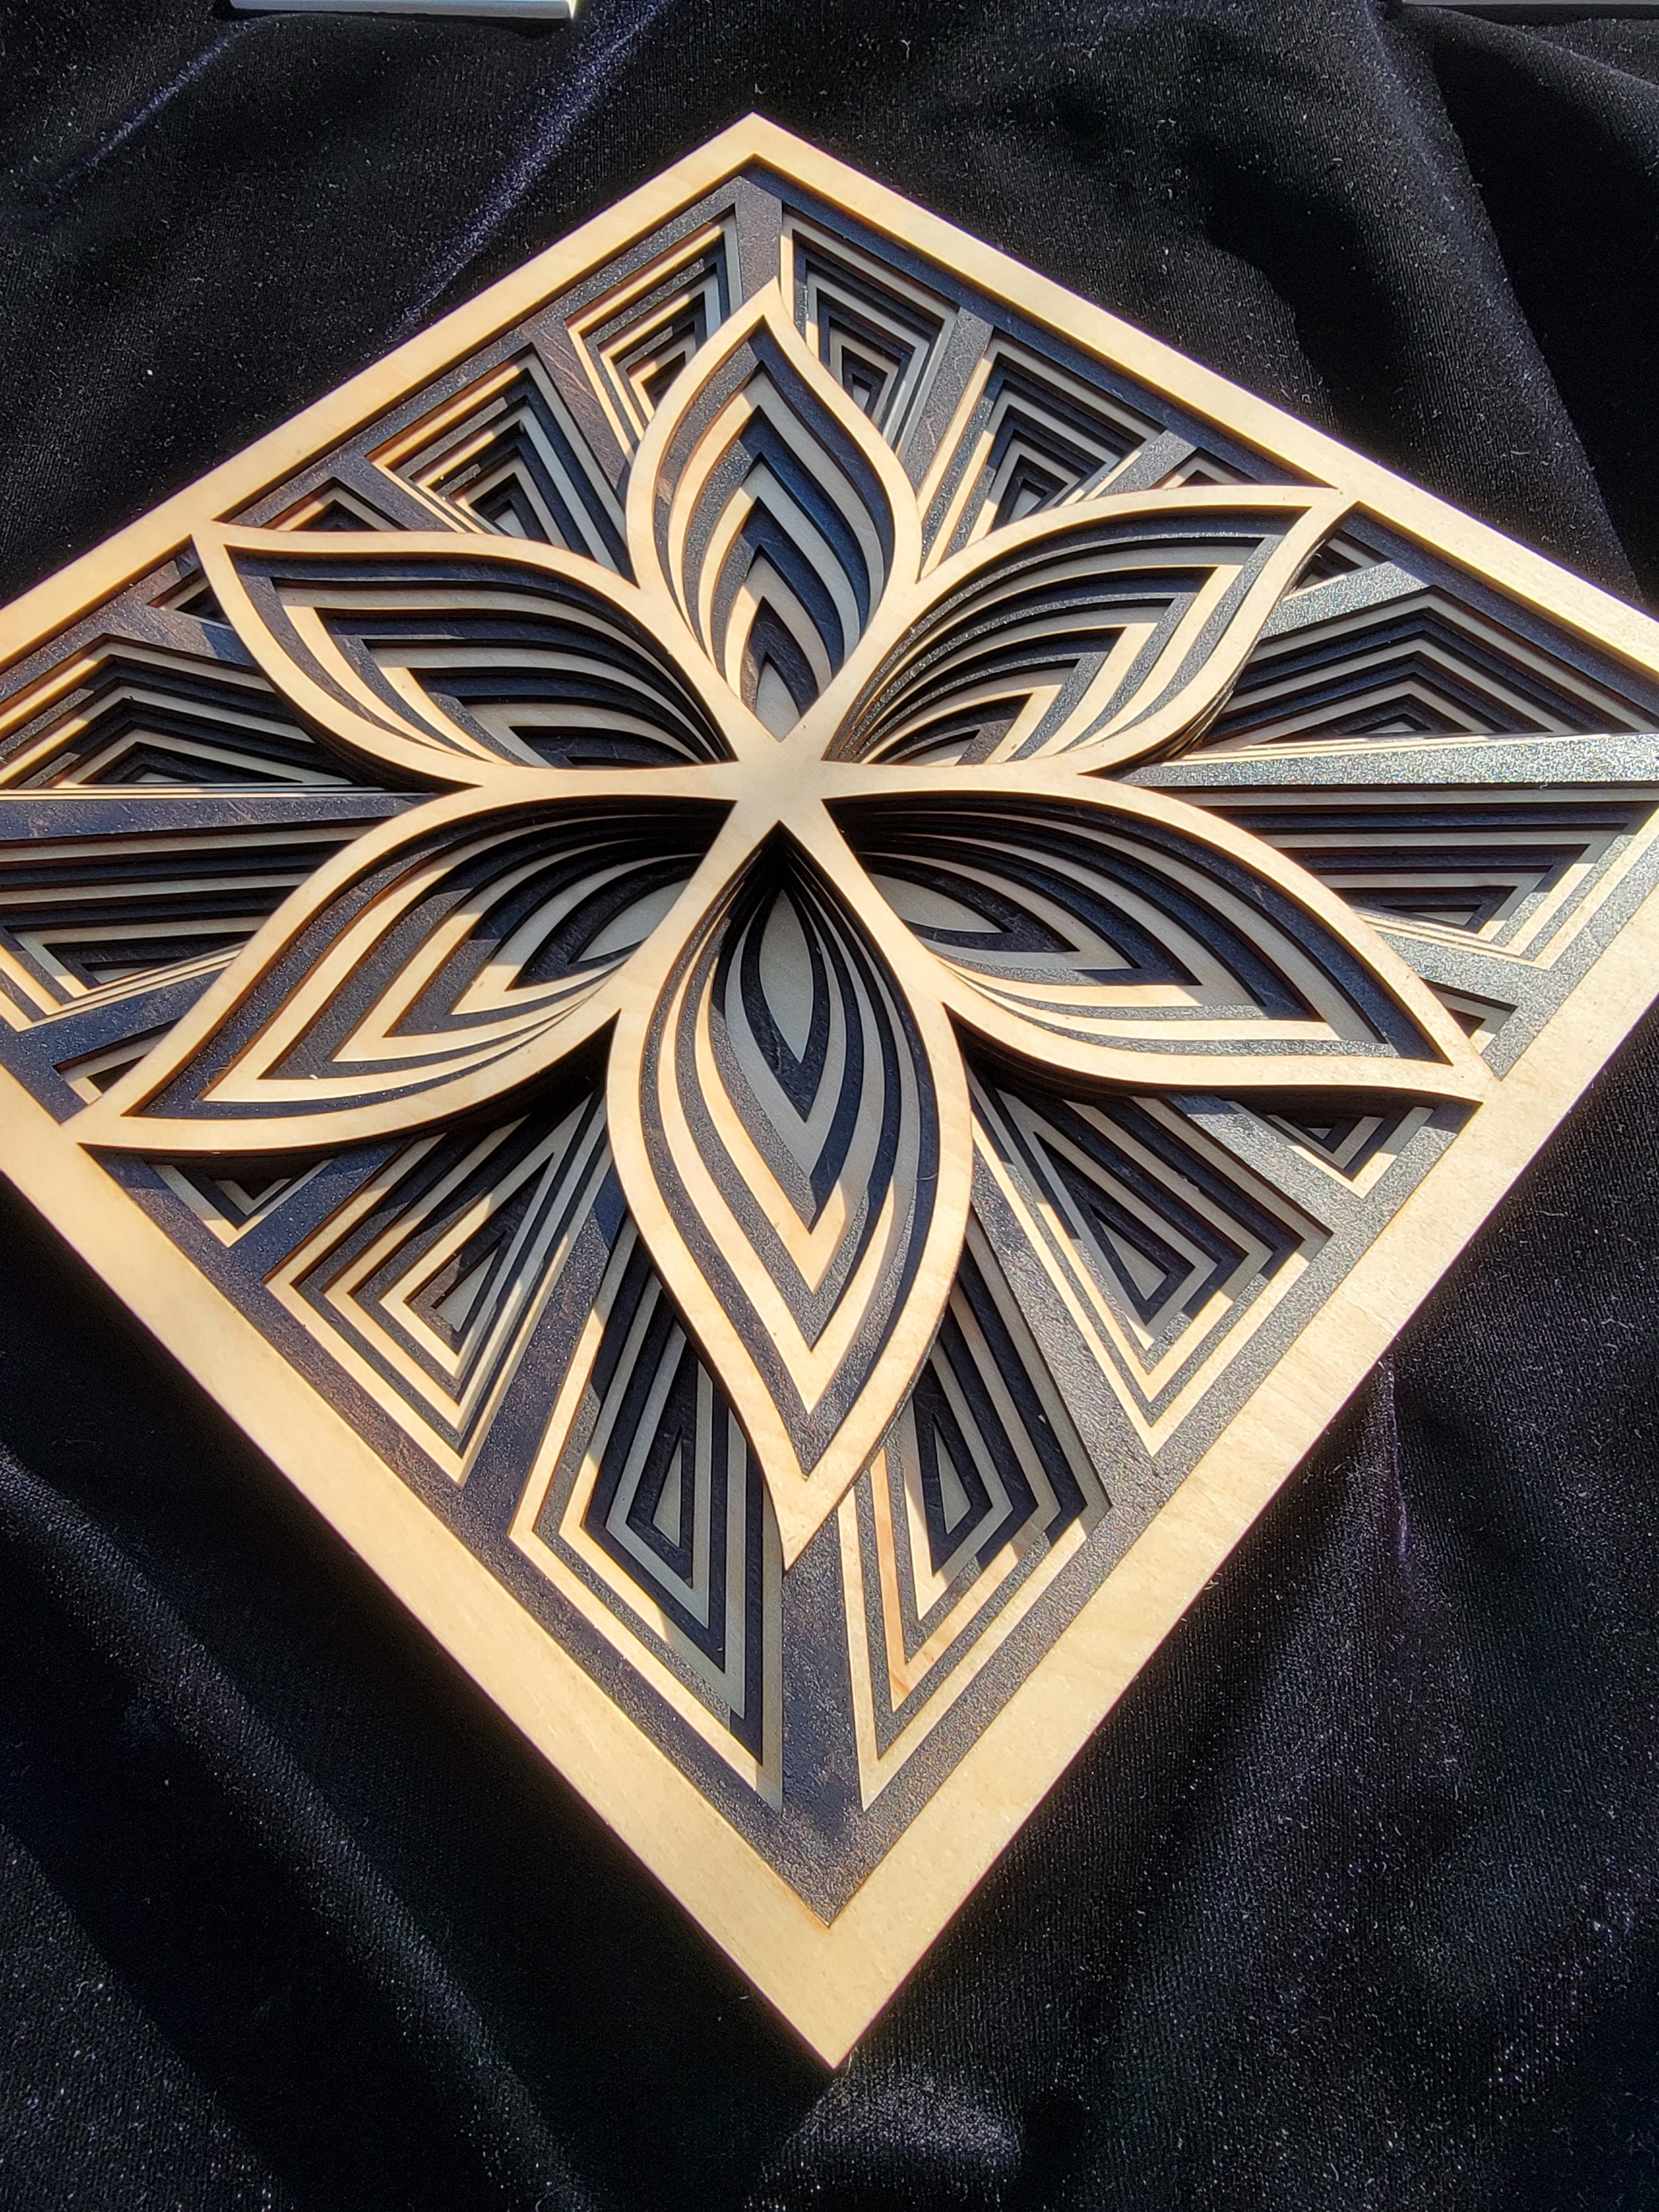
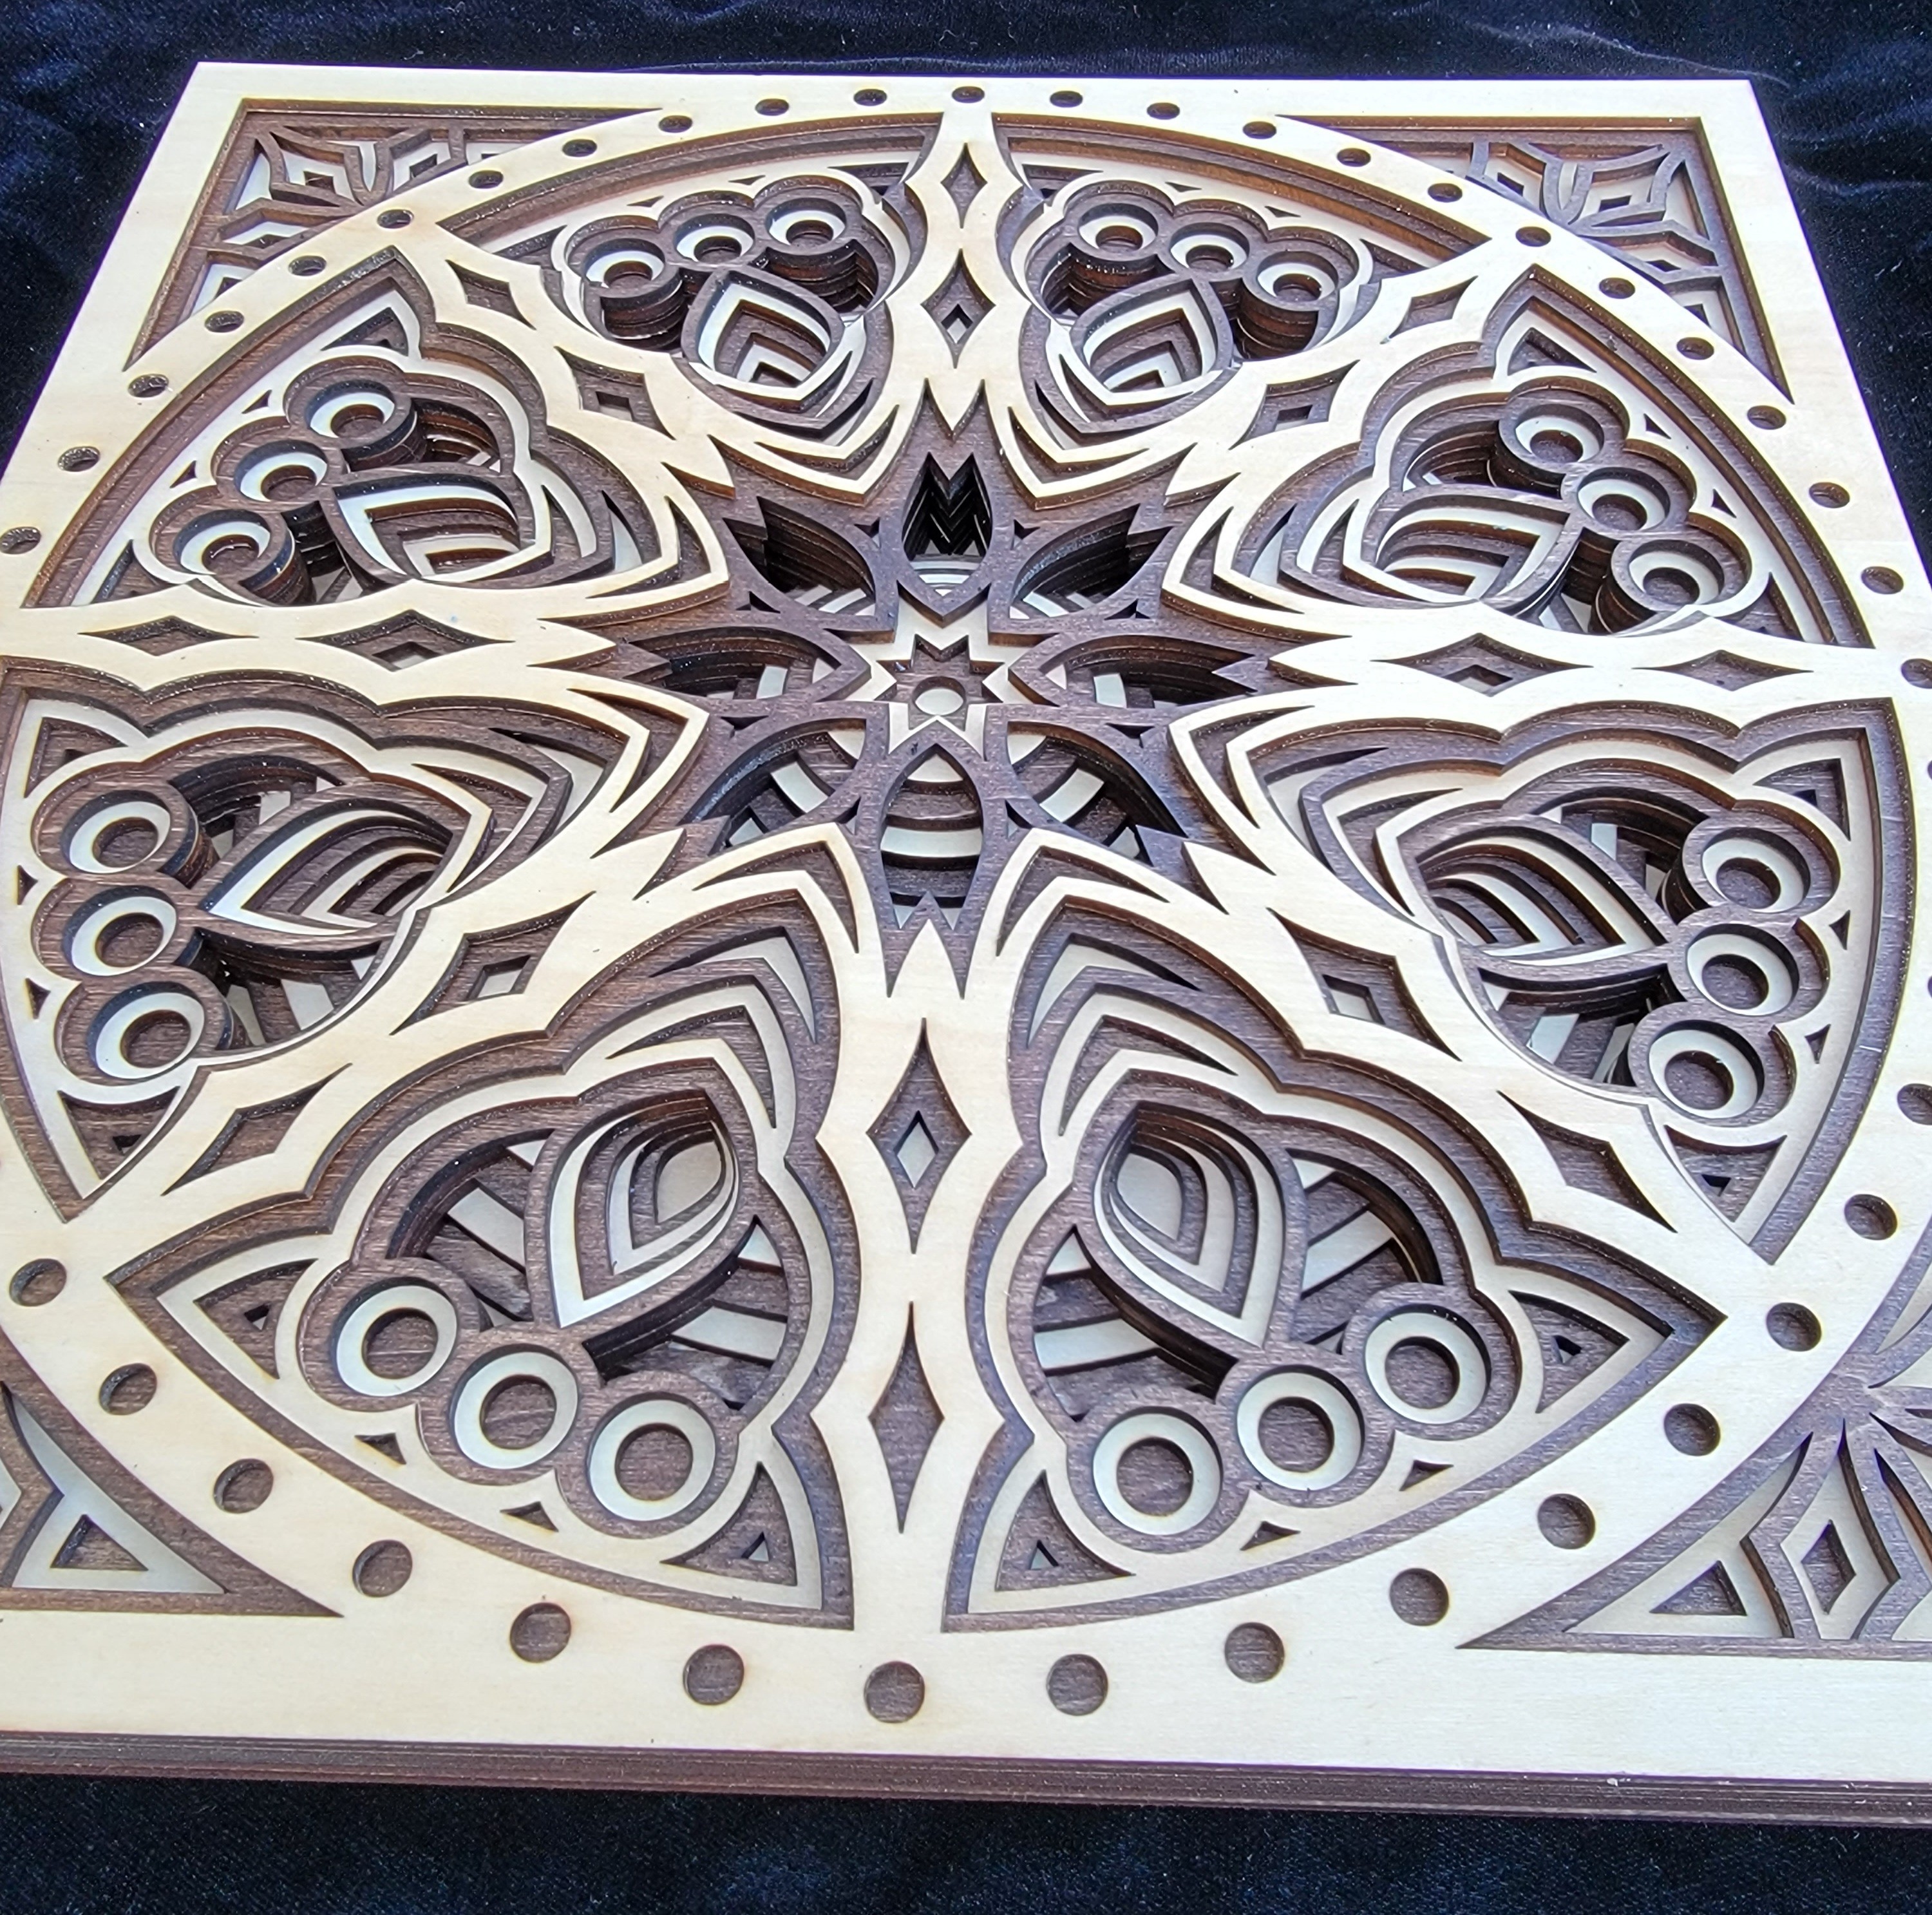
Unfortunately, though, the cooler winter weather has arrived here in the Northeast U.S. and nwt is unachievable in temperatures under 50F. With my lasers still being in a non-climate-controlled garage, I won’t be doing any NWT until the warmer weather decides to return. In the meantime, I had some scrap wood laying around and threw a piece on my OLM2 Pro, I never attempted anything on wood before and was pleasantly surprised with the results. I purchased a few layered mandala files online and tried a few. They are coming out amazing. I even have a few in a local art consignment shop and plan on making more. They can be challenging but completely worth it when done.
How to make a color image on white tile with the laser (Norton method)
I’d like to thank you for taking the time to read this. I’ve never been asked to do anything like this and would like to thank George Fomitchev from EnduranceLasers.com for the opportunity. I would also like to encourage anyone considering lasering as a hobby to give it a shot. It can be both very rewarding and also very frustrating. But you’ll never know if you don’t try. Until next time, be well everyone,

Written by David
TOP-20 3d printing ideas you can use this Christmas and New Year 2023