Creation of Souvenir Products and Other merchandise (merch) Using a Diode Laser (Endurance 10 Watt Plus Pro, with a G2 Short-Focus Lens).

Creation of color patterns on T-shirts and glass. A new one-and-only method
Today, we’ll tell you about amazing things that you can create with your own hands using a diode laser installed on a CNC 3018. We plan to create nothing less than a color pattern on a T-shirt and a stained glass composition.
Off we go!
Making an image on a T-shirt using Norton method
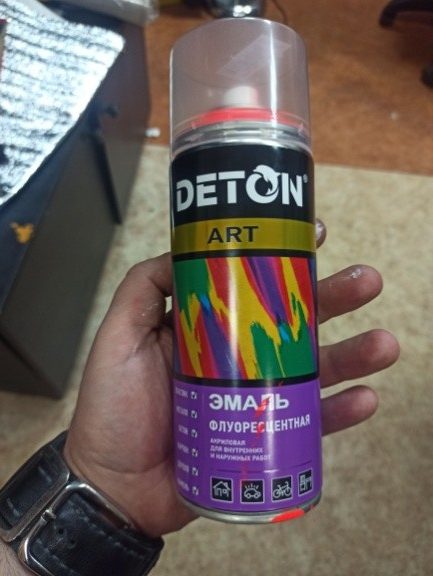
For the work with textile (cotton fabric), we’ll need paint. The best option is fluorescent acrylic paint spray (let it be an orange color). We’ll also need acrylic glue to be used as a ground coating.
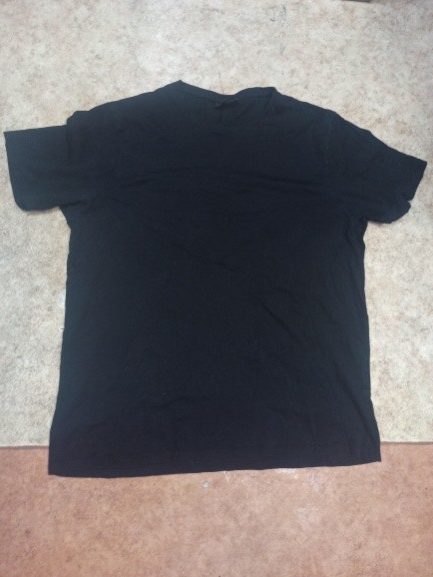

Before we start we iron the T-shirt, then spread it out on an even surface, smooth it well and cover the area of the future pattern with acrylic glue. It is important that no dust or other tiny particles get there.


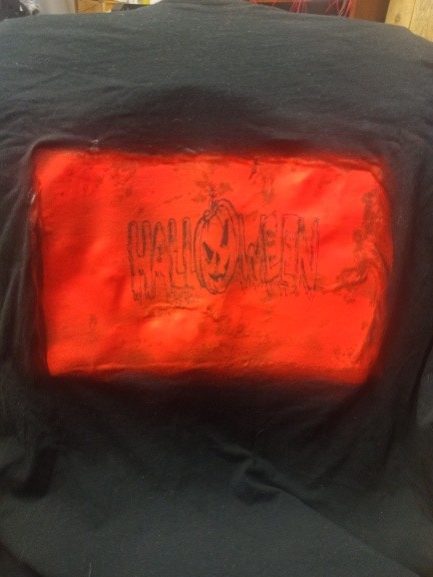
As soon as the grounding coating has dried (around 20 minutes), we cover the same area with an even layer of paint and leave the T-shirt to dry in a well-ventilated room (it takes about 1 hour depending on the paint type).

The next step is preparion of the image for the T-shirt. A raster or vector format will fit the task. So, we open the image in LightBurn and choose the following laser parameters: processing speed 1200 mm/min, power 50%, number of passes 1, focus 40 mm, interval 0.2 mm. Then we place the T-shirt onto the worktable and smooth it out well. The painted area should not have any folds or fine lines.

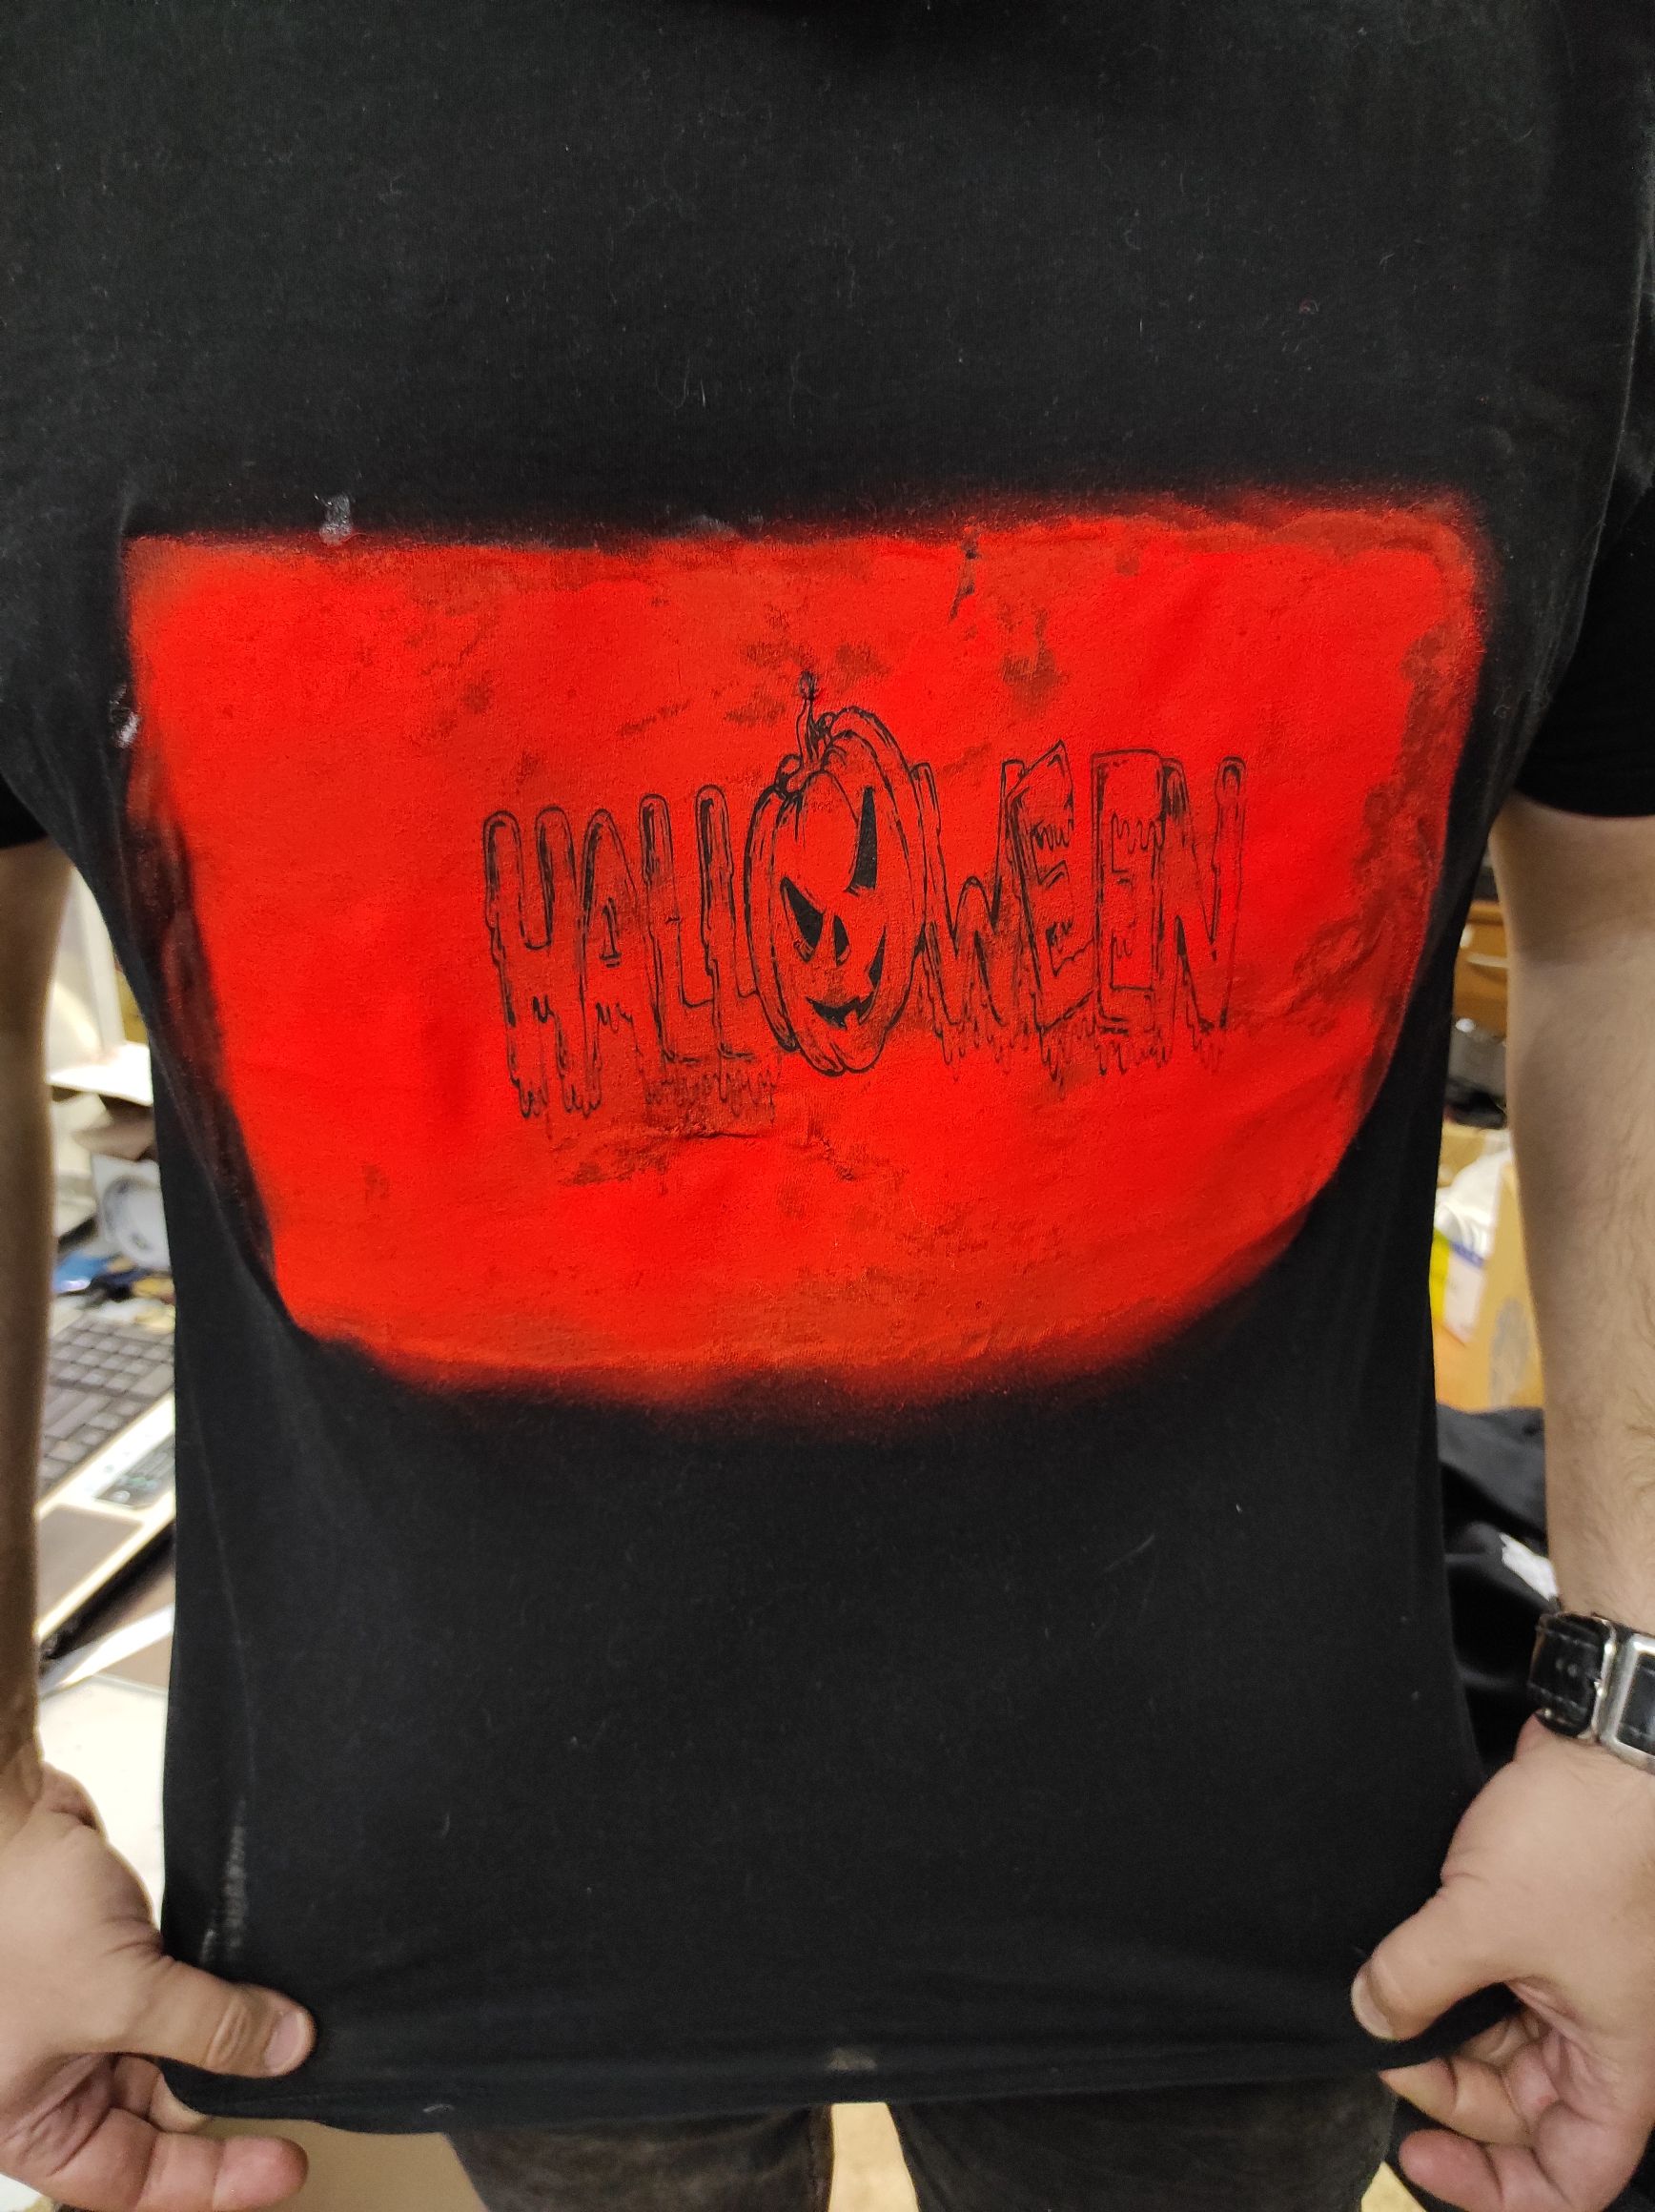
Then we run the laser. It takes about 40 minutes to engrave a pattern of 180mm x 100mm in size. When the engraving is done, we get a T-shirt with a pattern, the quality of which does not differ from the ones industrially manufactured. It is resistant to mechanical stress and exposure to laundry detergent. You have no fear to spoil the pattern when washing it.

Stained glass. Glass patterning using the Norton method
How to make a color image on white tile with the laser (Norton method)
The process of glass staining does not differ from glass engraving.
The only difference is the used material. Here, we’ll work with simple flat glass.
We start with glass degreasing. Alcohol or acetone are good for this task. Then we frame the working area on the glass with a rectangular template fixing it to the work table with sticky tape. Further on, we cover the area inside the frame with several layers of paint. Each layer will have its own color. We use white, blue, red and black paint. The black paint plays a special role in this project. Here is our scheme of paint application: we spray the right and left sides of the framed rectangle with blue paint, the white goes to the center and the red around the center. We apply each paint layer in succession with a 10-minute interval, letting the applied paint dry. At the end we paint black the entire area in the frame and leave it to dry.


When everything is ready, we open the selected image in a graphic editor and invert the colors. Then we export the image to LightBurn and adjust its size according to the frame size, set up the following processing parameters: speed 1200 mm/min, power 15%, number of passes 1, focus point on the surface of the workpiece.

The last but not the least thing to do is the laser start, after which it remains only to wait for the result. During the operation process the laser removes the paint according to the color intensity of the chosen image. In some areas the laser removes all the layers of the paint, in some areas it removes only the black paint baring a color image below it. The engraving time is around 40 minutes.
The resulting stained glass shows a beautiful Halloween picture. You can use this piece of art as an interior decoration in combination with diode lights or candles placed behind it.


Laser paint removal on a smartphone case
Engraving on the painted surface of a smartphone case using a diode laser (Endurance 10 Watt DPSS Laser Nd: YAG, 1064 nm, F = 30mm) [Norton Method].
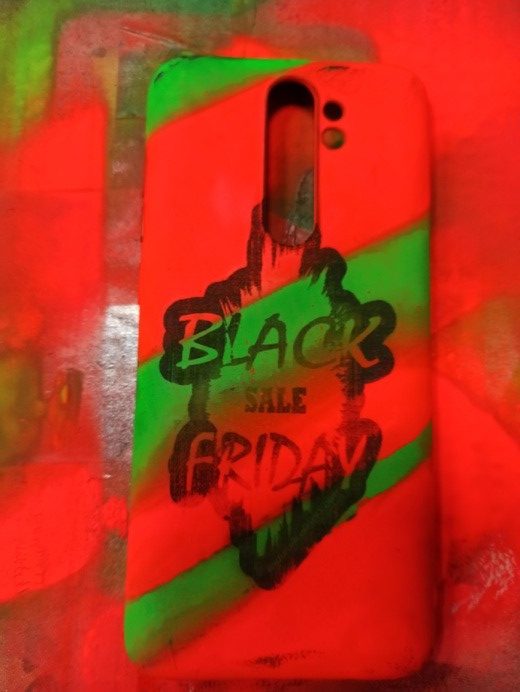
This time, our goal is to make a color image on a smartphone case.
Here’s how you can do it:
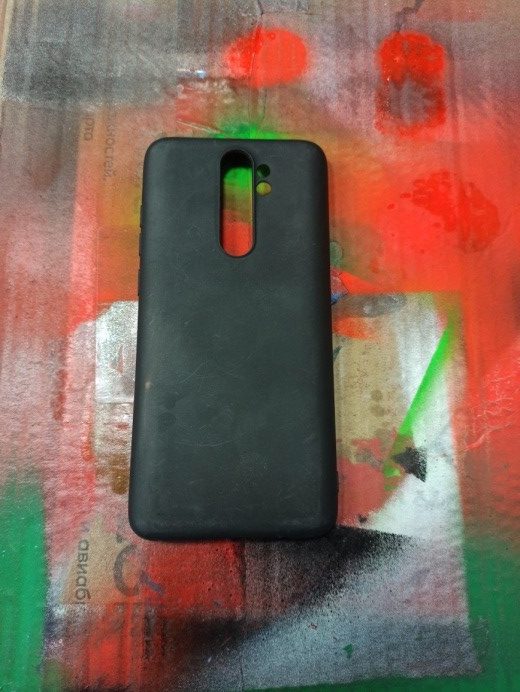
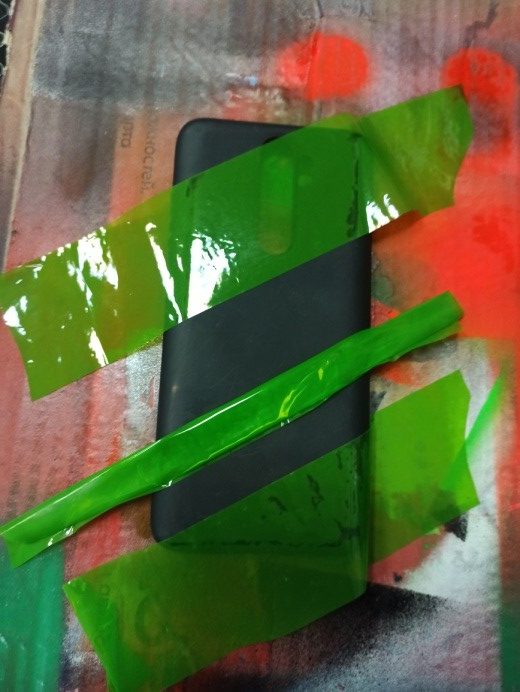
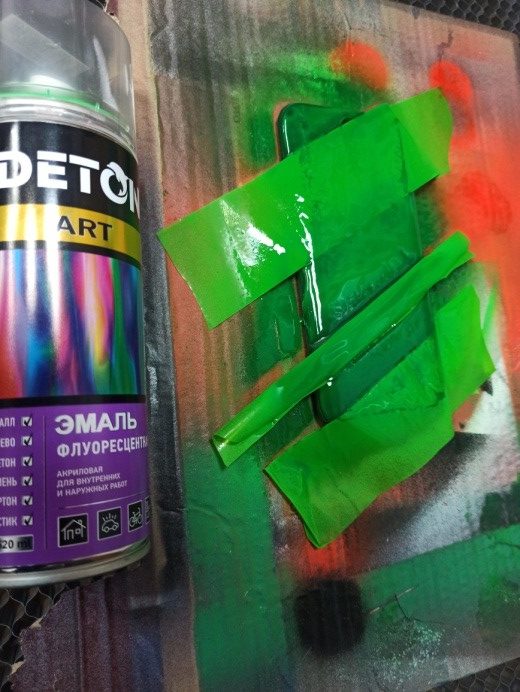
Preparatory painting
We cover the silicone case of the smartphone with alkyd fluorescent paint of different colors randomly and wait for the paint to dry completely.
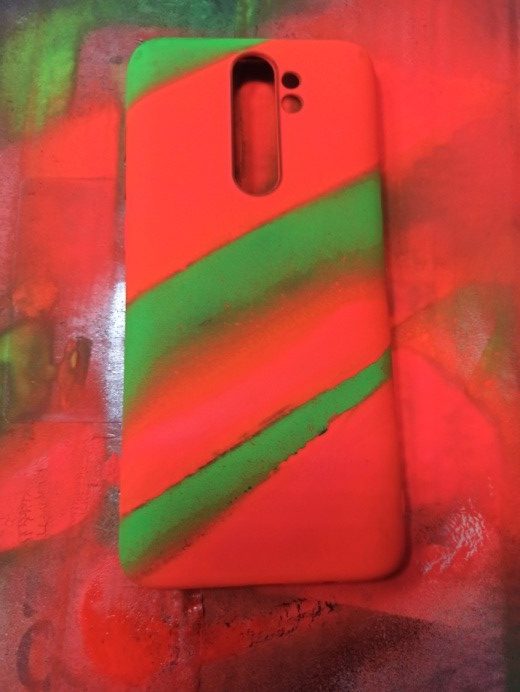
Setting up the laser and preparing a template for engraving
We open a vector image of the “Black Friday” logo in LightBurn and select its size according to the size of the case. Then we set the following engraving parameters: processing speed 1200 mm / min, laser power 17%, number of passes – 1, fill density 0.1 mm, focal point on the surface of the workpiece.


Start and the process.
After selecting the required parameters, we start the laser. The processing time for a 100mm * 60mm image is approximately 40 minutes.


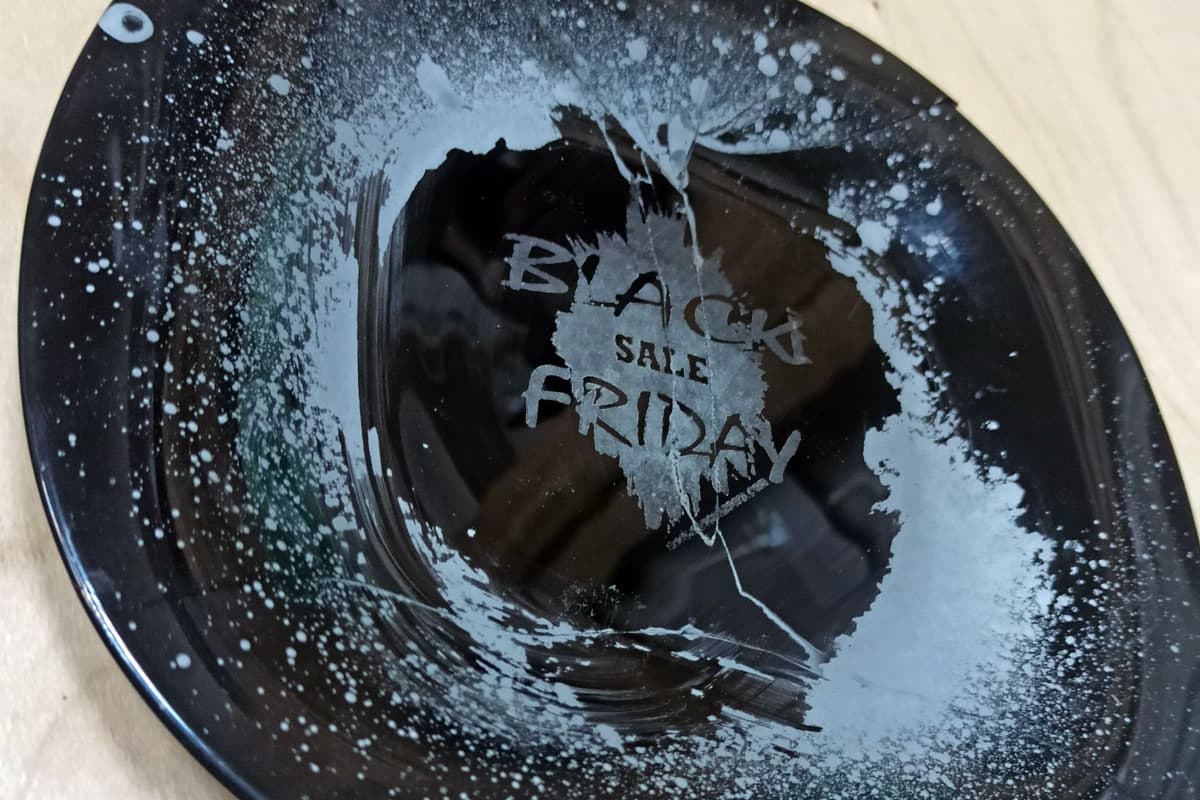
Laser paint removal from a dish plate
Black Friday is just around the corner, today we are working with black glass.
We have a black glass plate and we are going to decorate it with a Black Friday logo.
And here’s how we do it:
Painting with the liquid zinc
We cover the inner surface of the plate with a thin layer of liquid zinc and let it dry for 10 minutes. After the zinc layer has completely dried, we place the plate upside down on the laser work table and fix it with adhesive tape.


Preparing the image
Next we open an image of the Black Friday logo in LightBurn, mirror the logo vertically using the tools of the program, and select the following processing parameters: processing speed 1200 mm / min, laser power 99%, number of passes – 1, filling density 0.1 mm, focal point on the surface of the workpiece.


Laser paint removal process
When we run the laser, the laser beam passes through the glass (even black), according to the logo template, making zinc fuse into the glass surface. Thus, a silvery image is formed on the laser processed surface of the dish. What is left of the zinc coating must be removed with a solvent.
https://endurancelasers.com/laser-engraving-on-glass/
To see more examples of stained glass creation using a laser go to:
Laser paint removal on a glass. Applying non-removable color with the laser.
How to make a DIY cardboard puzzle with the laser (Halloween)
Halloween 2022 – best DIY Stickers and Magnets Made of Painted Acrylic