

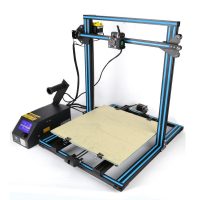
So, you have your first laser. Now what?
- Software
- Learning your machine
- Test patterns
- Test Projects
- What to engrave
- Where to get your material
- Your first project
Software
The two most common software are Laser GBRL and Lightburn. Laser GBRL is free software, it comes with most machines. It is a G-code writer only; it is not a photo processing software. You have another program to process your pictures so that they are ready for engraving.
Lightburn is a full-function software. It is not free. You get a free 30-day trial. You can edit and process photos for engraving.
The most common photo editing software is Gimp, which is free. Correl has a free 30-day trial. Photoshop gives you a free 30-day trial.
Learning your machine
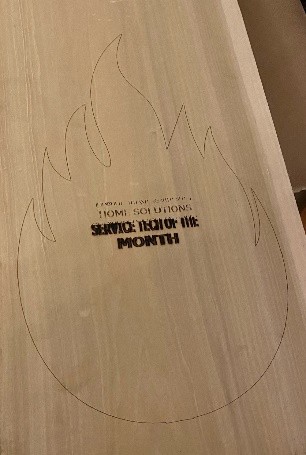
Now that you’ve put it together, and you have your software installed, you can start by doing test patterns on different materials to see how your machine reacts with each material you want to engrave. All materials are different and will take different settings to get the best outcome. I do test patterns on every different material that I work on. I use the test patterns for reference i.e., tile, wood, mirror stone….
![]()
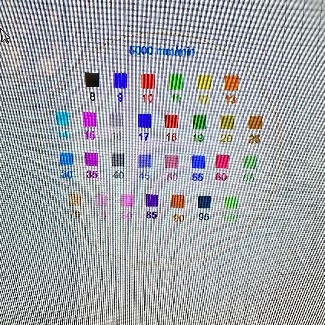
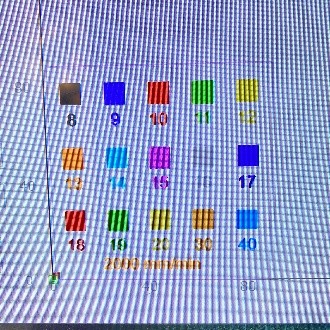
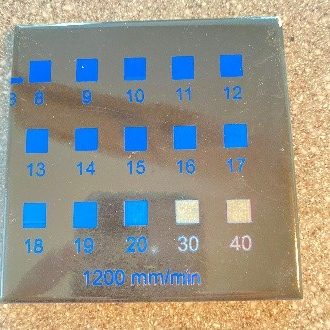
Test Patterns
What are test patterns? Test patterns use different squares at different power settings at different speeds that you want to run your machine at. IE 500mm/min., 1000mm/min., 1500mm/min…
For each speed, I set up the pattern as such. I start with 5% to 100% in 5% increments. Then for each material, I find the “sweet spot” where the material is starting to engrave and where it starts to overburn. Then I do a test pattern at 2% increments in the sweet spot for the best results. Then I use this as my reference point for that kind of material.
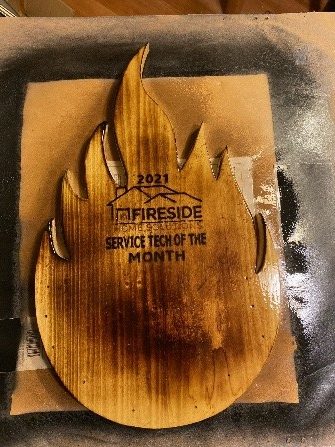
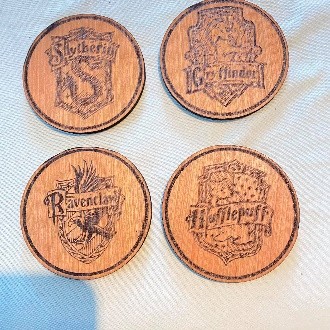
What to Engrave
Laser engraving of halftones & greyscale. How to do a laser print of a beautiful photo.
For diode lasers a power output of 3.5w, 5w, 15w you can do wood, tile, stone, plastic, and mirrors.
Endurance lasers: all about cutting and engraving abilities of diode, DPSS, fiber, Co2 lasers.
For each kind of wood, you will need different settings as darker wood absorbs more light than lighter wood and allows for faster engraving at a lower power.
If you’re going to use stain, you want to stain and lightly sand the wood prior to engraving.
There are many methods for engraving tile. The most common is the Norton method, where you paint the tile black and engrave a negative image. The white paint method where you engrave a regular image and then use paint thinner to clean the tile where it was not engraved. And there are many different variations on both methods.
For engraving stone or slate, you must do a negative image as the engraved part will show lighter than the rest of the stone
For plastic you will have to mark the back of the plastic with a permanent marker in the are that you want to engrave. The image will have to be mirrored as you engrave the back of the plastic as opposed to the front. This way when you look through it, it will show correctly. Then after the engraving, you can clean it off with a microfiber cloth and 91% rubbing alcohol to remove the marker.
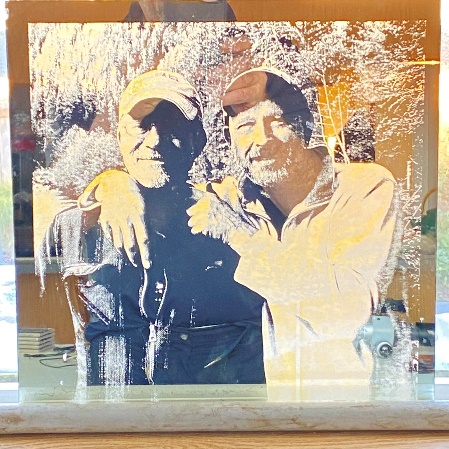
There are two ways of doing a mirror. One is to have the picture show without light and the other is to have the light show through the picture. For the first process, to have the picture show without the light, you mirror the image and do not invert it. And for the second process, having the light show through the picture, you invert the image and then mirror it.
(AD)
Where to get your materials
The best place I’ve found for craft projects is the Dollar Store. For plywood, Home Depot or Lowe’s has Lexan sheets and 3/16 plywood in 4’x8’ sheets relatively inexpensive. Then I cut them down to 2×2’ squares to do my projects on. For stone or slate, I go to the countertop stores, and they will usually give you their remnants for free. For the mirrors, I get them on Amazon in packs of 10, relatively inexpensively.

Test Products
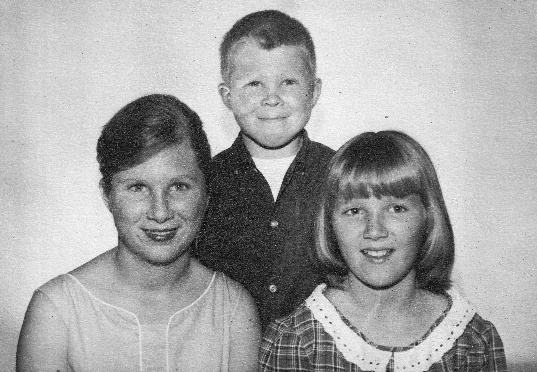
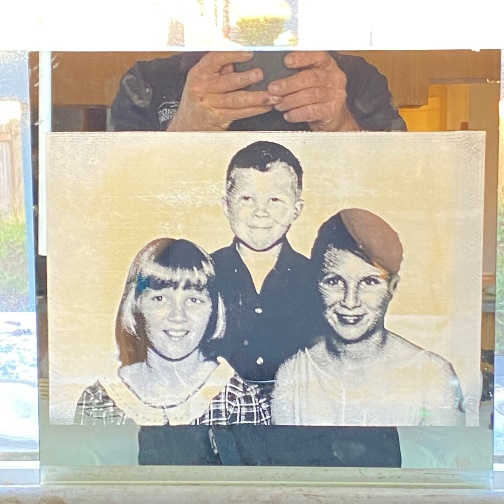
Now that you have your machine and your material and you know what your machine can do, it’s time for your project. When I first started, I went to the clip art galleries, got black and white images, and started doing small projects. Then I worked my way up to more intricate pictures and portraits.

Now you are ready to dive into the world of engraving.
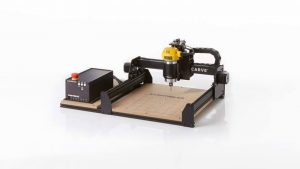
Getting started with a DIY engraving machine: Eleksmaker, CNCC LaserAxe, Wainlux, Neje, Atomstack, Ortur.
How to work with Endurance DIY desktop laser machine
What you need to do first and how to prepare to start working with the engraver
Endurance DIY engraver
0. If you did not buy in Endurance, then you will need to assemble the machine.
If you bought it from us, then the machine is already assembled.
1. Check the completeness: engraver itself, power supply, USB cable, goggles and the laser

2. The laser should be installed and connected to the board. How to connect the laser: the laser must be powered by 12 volts and the laser control wire (TTL+) with the Engraving board.
3. Connect the USB cable to the engraver and the other end to the computer.
4. Download the CNCC LaserAxe, Benbox, GRBL controller, Lasermaster, Eleksmkaer Evolution CAM program (depends on your firmware)
5. If the program is not installed – install Microsoft FrameWork (there is on the site) and change the language and regional standards: the location of the United States
6. Connect the power adapter with the engrave and to the 110/220 Volts socket.
7. Turn on the red button on the controller board, it should the red LED light up and the cooler on the controller board should rotate. The engraver is ready to work.
8. Launch the software.
9. Click “Connect” or “Autoconnect” if do you not know the port number.
10. After it is written that “Connected”, you can start working. As described in the instructions for using the program: but before switching on the laser, you must wear glasses to observe the safety procedure.
High-quality standard
Multi-level testing system.
Industrial components.
Ultra reliable
The guaranteed duration of the continuous operation ~48-72 hours.
True continuous power output
Our products have the rated power output as advertised – unlike Chinese analogues.
TTL mode
Can be turned on and off with 3.5-24V.
Variable power output.
Plug and play
Universal and compatible mount.
Compatible with most 3D printers and CNC machines.
Friendly return policy
Do not like the laser?
Simply return within 30 days and get a full refund.
Real-time advice
We assist and give advice by Phone / Email / Facebook messenger / Telegram / Whatsapp / Viber.
Professional support
We help to install and tune the laser. We offer qualified after-sales support.
Everything you need
We ship everything you need in one parcel to get started.
Immediate delivery
We ship all units within 4-24 hours. DHL express delivery allows you to get the package in 3-5 days.
Lifetime warranty
All our lasers are tested and could work up to 10000 hours.
Upgrade option
Do you have an old model? Upgrade your unit with more powerful one.
The first launch of an Endurance DIY 10 watt machine on an Eleksmaker MANA board (GRBL compatible)
A DIY engraving machine assembling process – full video lesson
Endurance DIY getting started – full video
Lens focusing – all you need to know to focus your laser
How to use CNCC LaserAxe software – full lessons.
Laser cutting examples video
Laser engraving demo process
Endurance DIY machine. Adding Z axis.
Endurance DIY machine first launch with BenBox software
(sorry for the mess on the table)
Subscribe on our Youtube channel and do not miss our news and guidance.
If you are not able to watch our video – let us know. All video are free for Endurance customers. We have more than 500 video guidance and tutorials.
