")
In this article, we’ll describe point by point the process of stamp manufacturing. For a stamp basis, we’ll use rubber and 3D-print all the other elements of the item. We’ll also make a stamp box out of plywood to keep an ink pad for the stamp to be ready for work.
A full video guide of how to make your own DIY stamp with a laser and a 3D printer!
How to make a stamp basis
The stamp size is 50x10mm
To make the stamp basis we use Inkscape.
This is what we need to do:
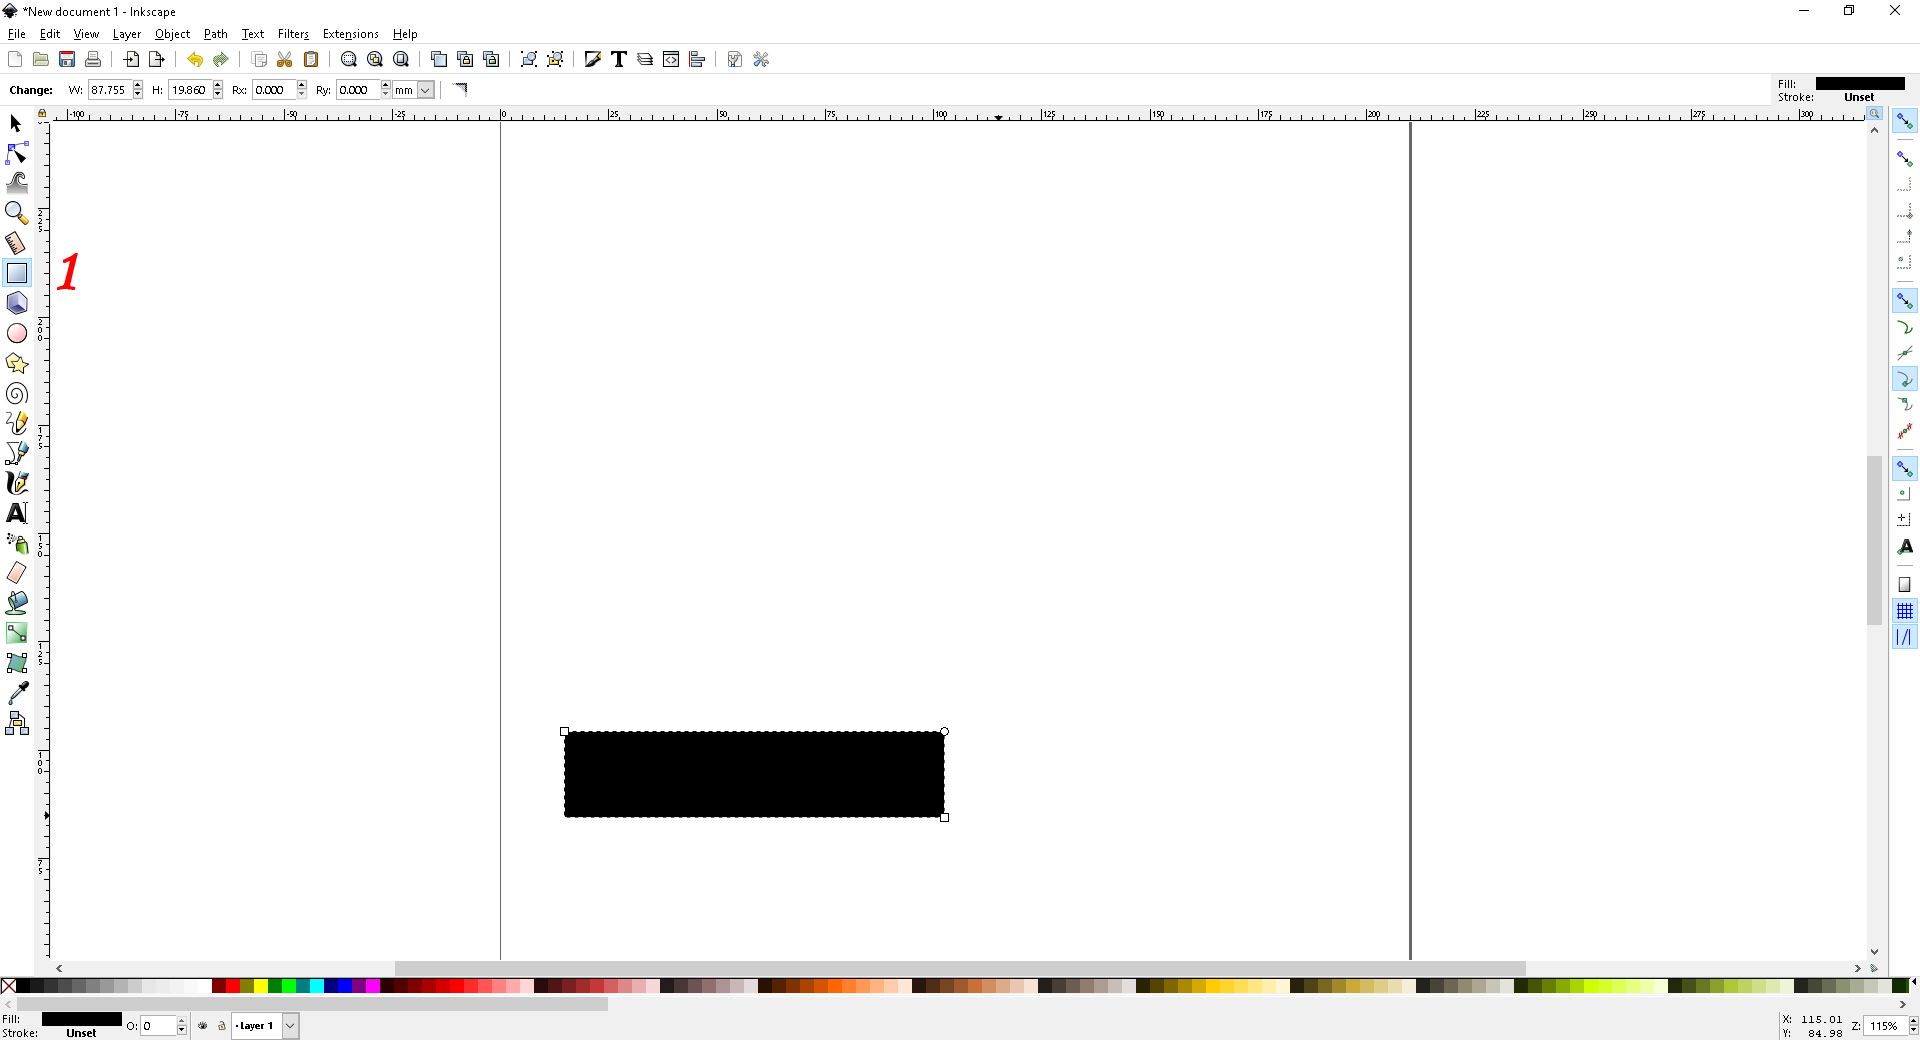
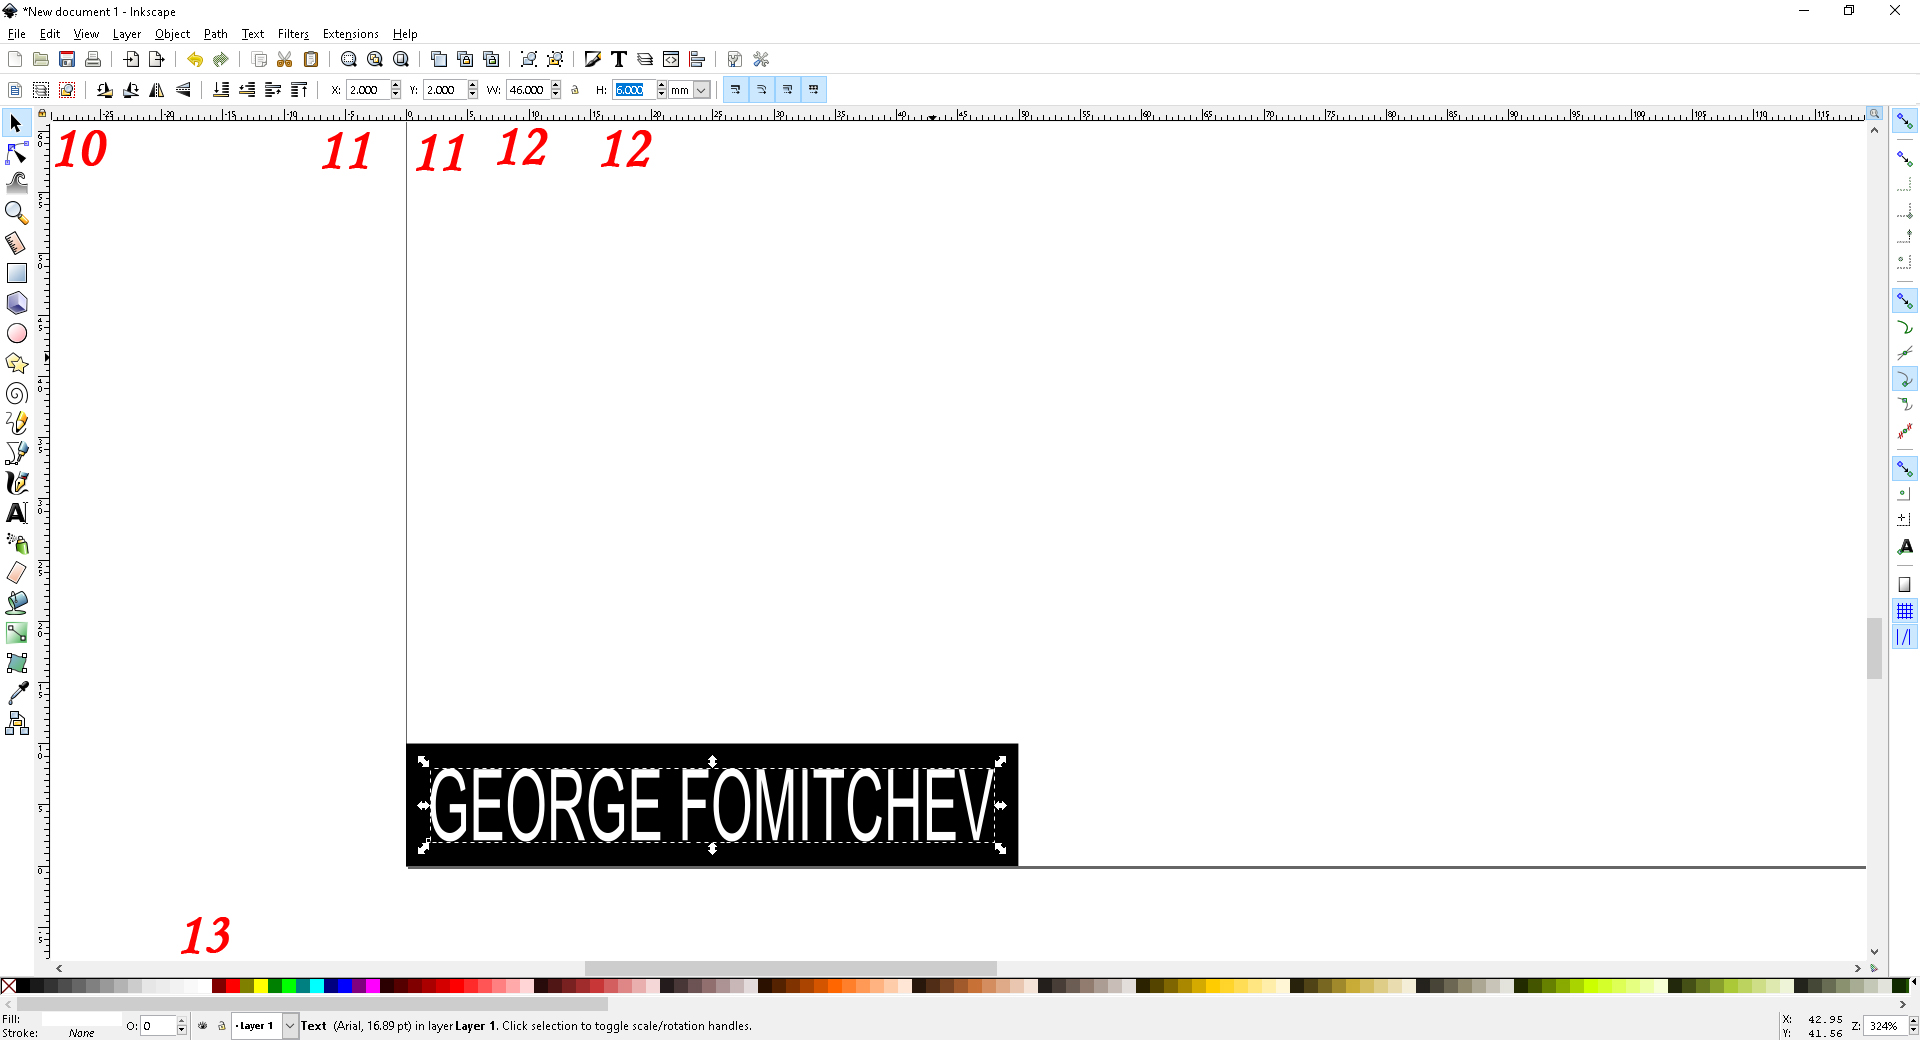
- Click the tool «Create rectangles and squares».
2. Then «Select and transform objects». If the rectangle is not selected, we click it with the left mouse button (LMB).
3. Set the initial coordinates of the rectangle at: x – 0; y – 0.
4. Set the measurement units in mm.
5. Saving proportions must be disabled.
6. Indicate the rectangle size: W – 50: H – 10.

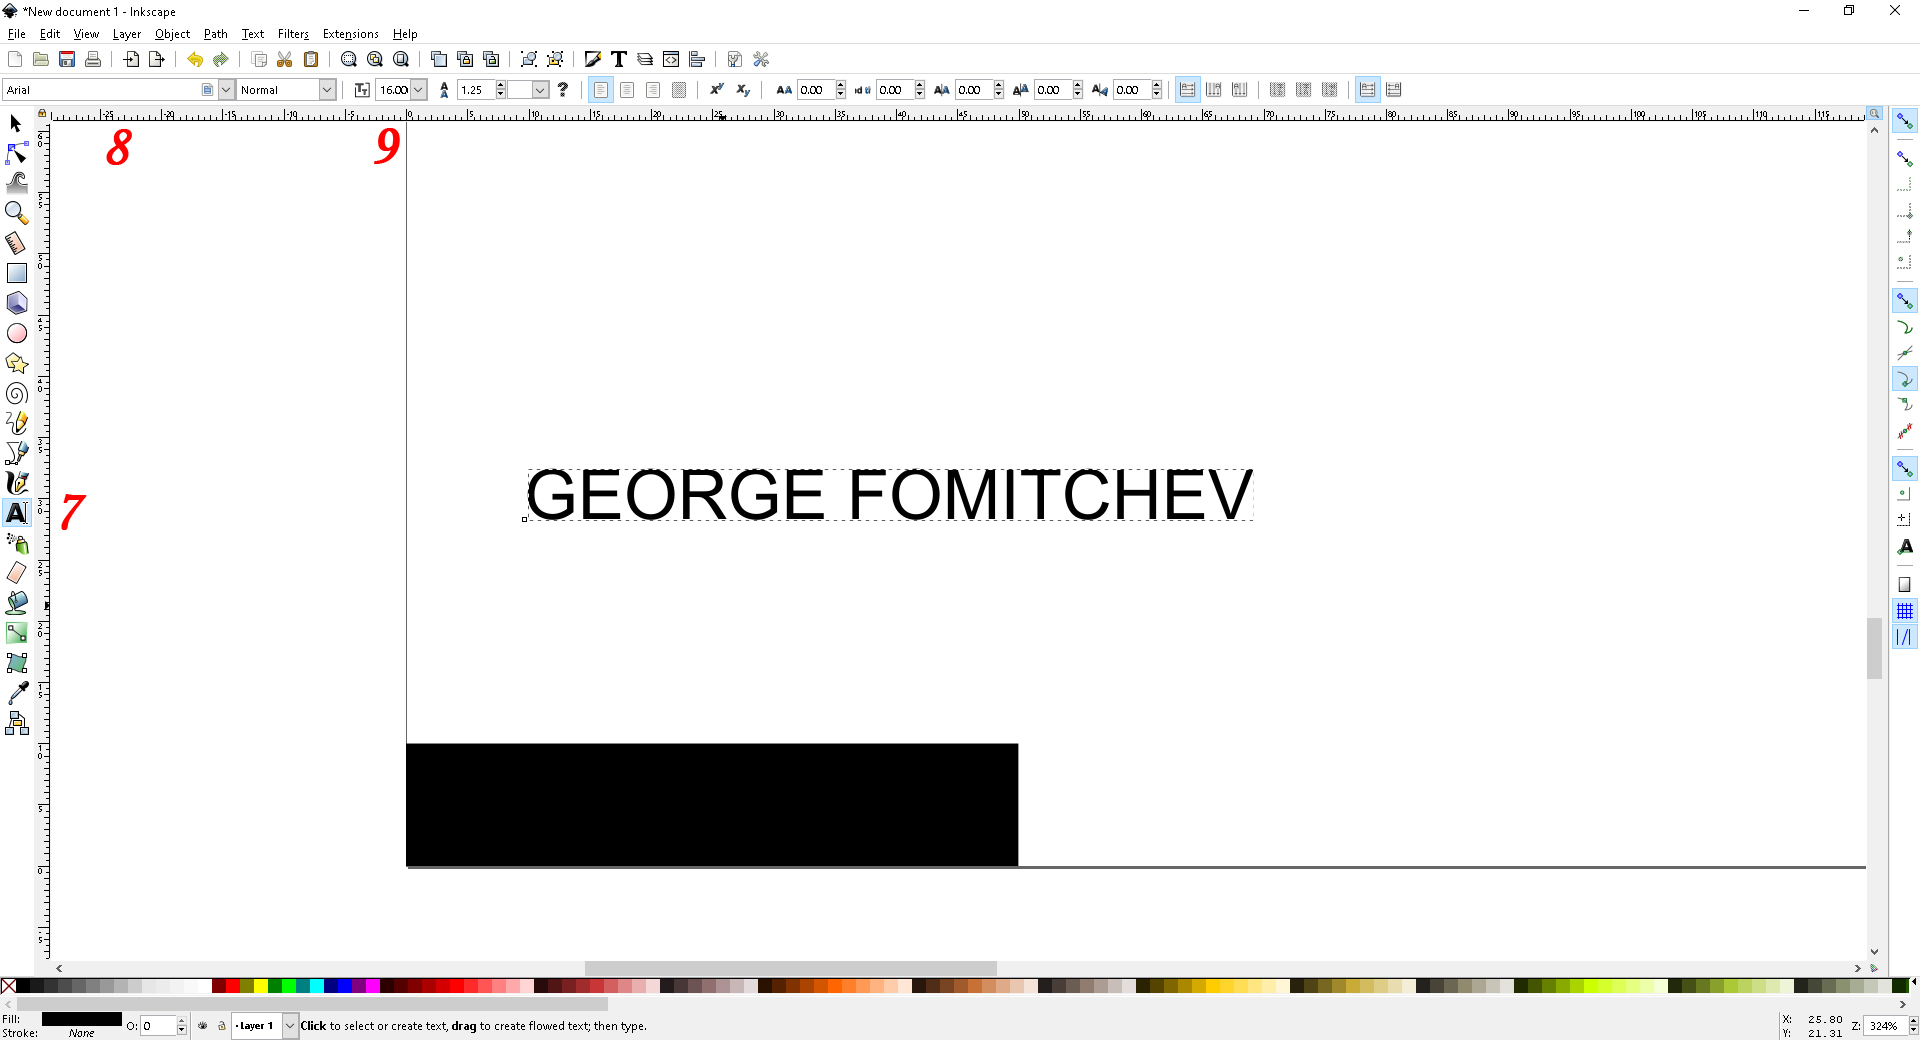
- Using “Create and edit text objects” create the stamp text.
8.Font “Arial”.
- Font size 16.
- Use the “Select and transform objects” tool to select the text. If it is not selected select it with the LMB click.
The text should be smaller in size than the rectangle. The text inset is 2 mm.
- Set the initial text coordinates: x – 2; y – 2.
- Set the text size: W – 46; H – 6.
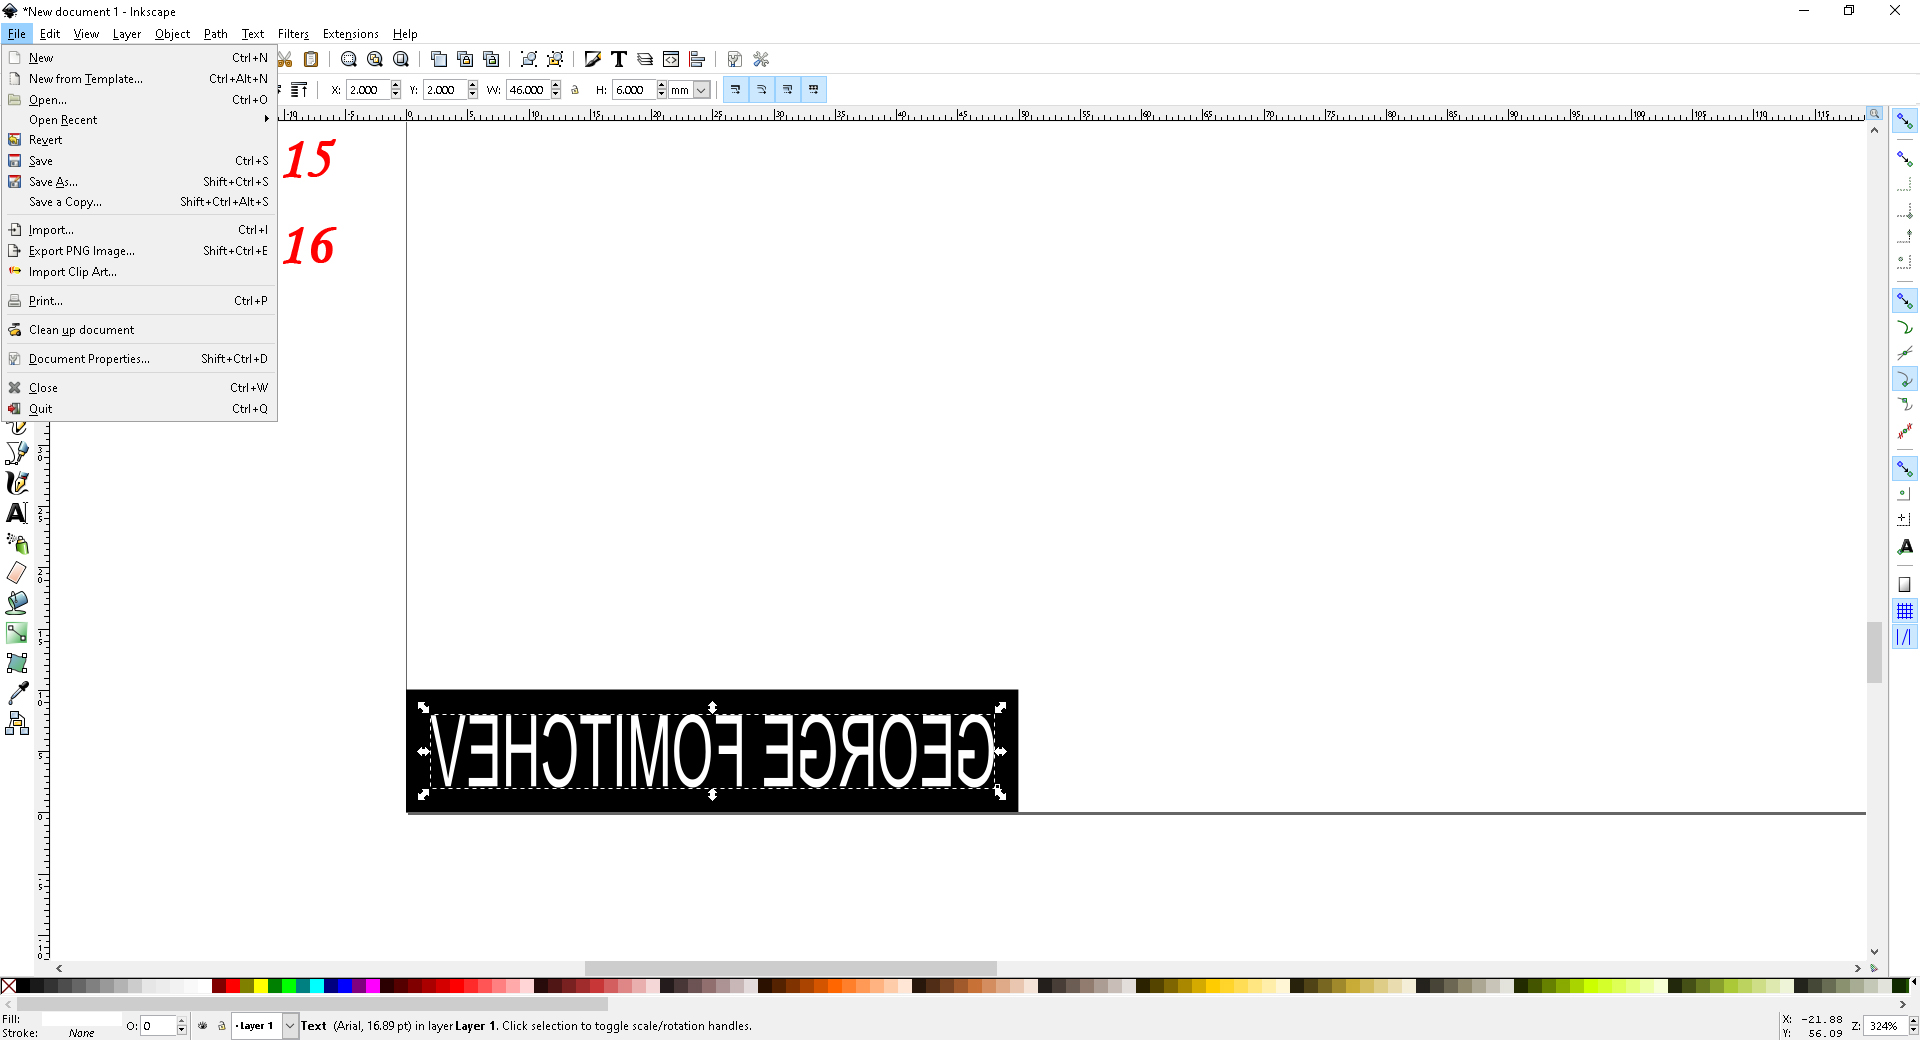
13. Change the text color for white.
14. For the correct impression of the stamp, its text should be mirrored horizontally. (“Flip selected objects horizontally”).

15. Save the project («File->Save»).
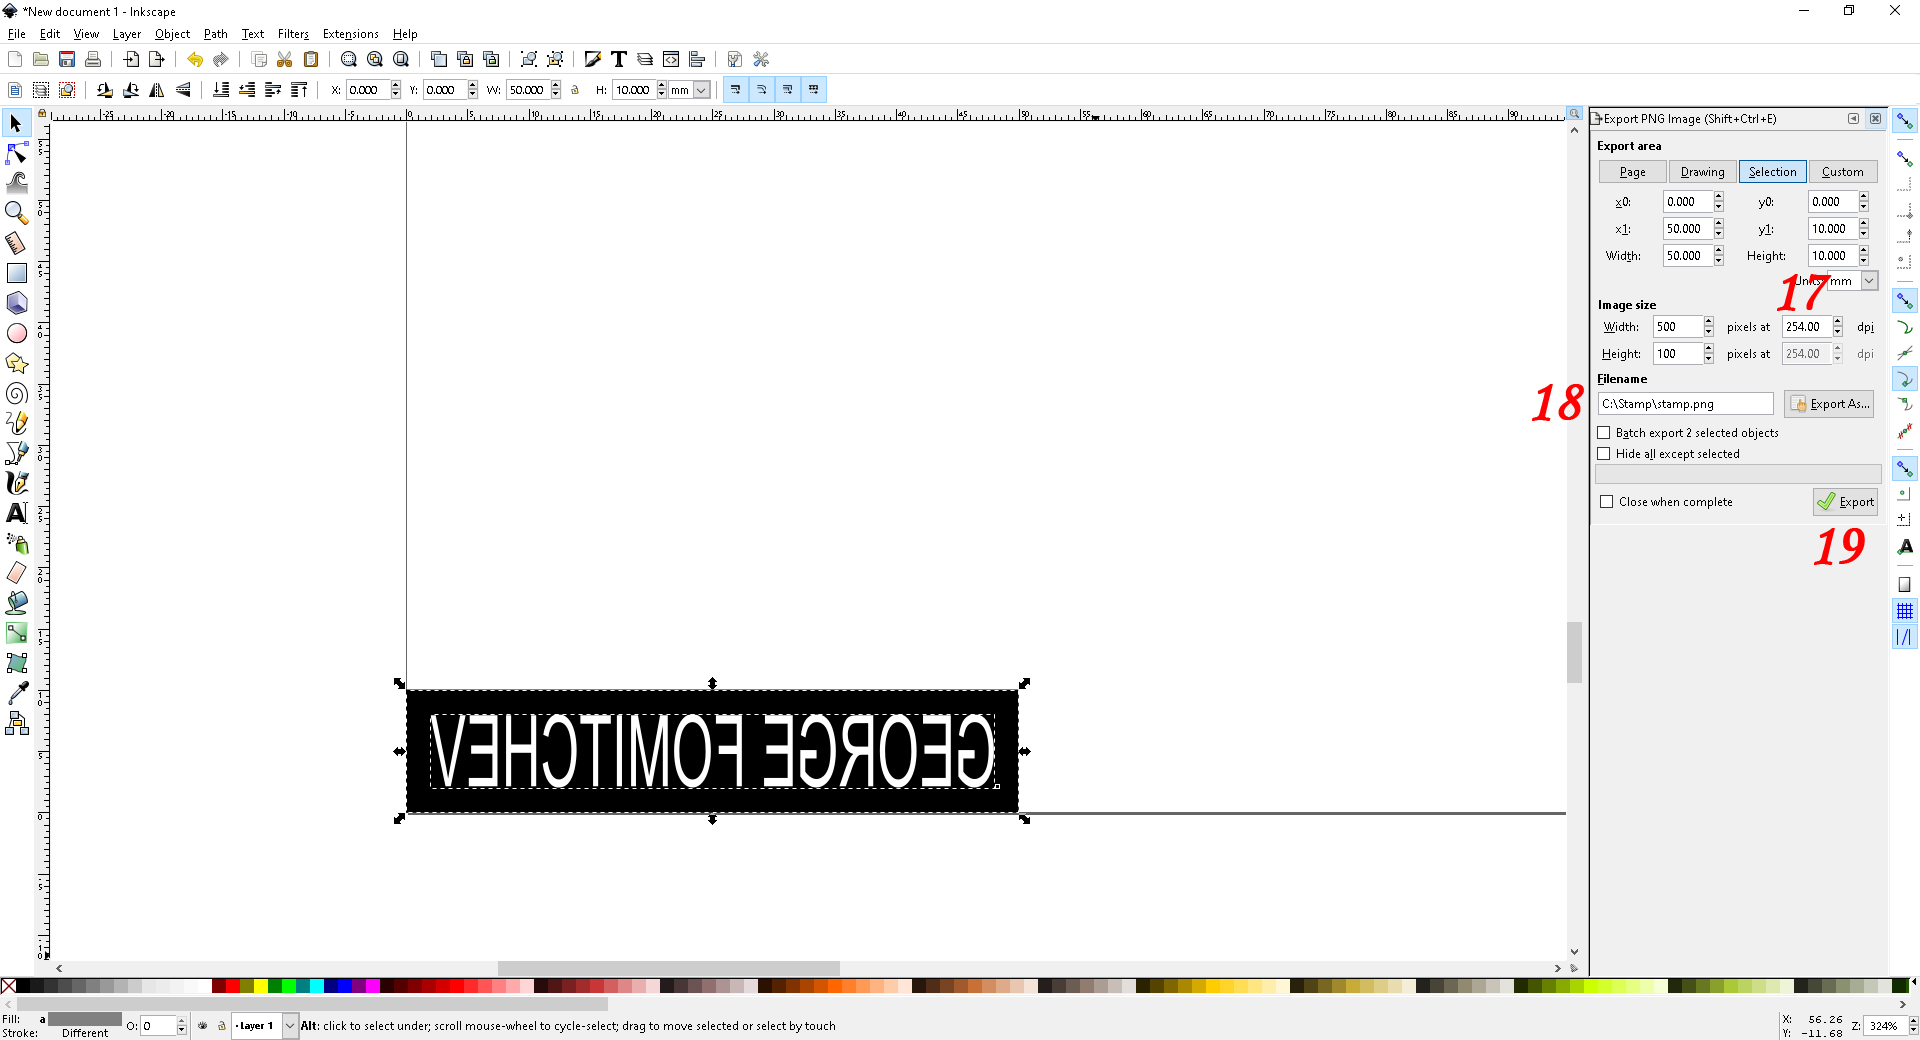
16. Export the project to the PNG-image («File->Export PNG Image…»).
Before exporting, select the stamp area (both the rectangle and text).
- Indicate the resolution 254 dpi (corresponds to 0.1mm of the laser)
18. Specify the path and name of the exported file.
19. Export.
Links to the saved files (ZIP download >>> stamp):
Stamp.svg
Stamp.png
How to make a stamp basis
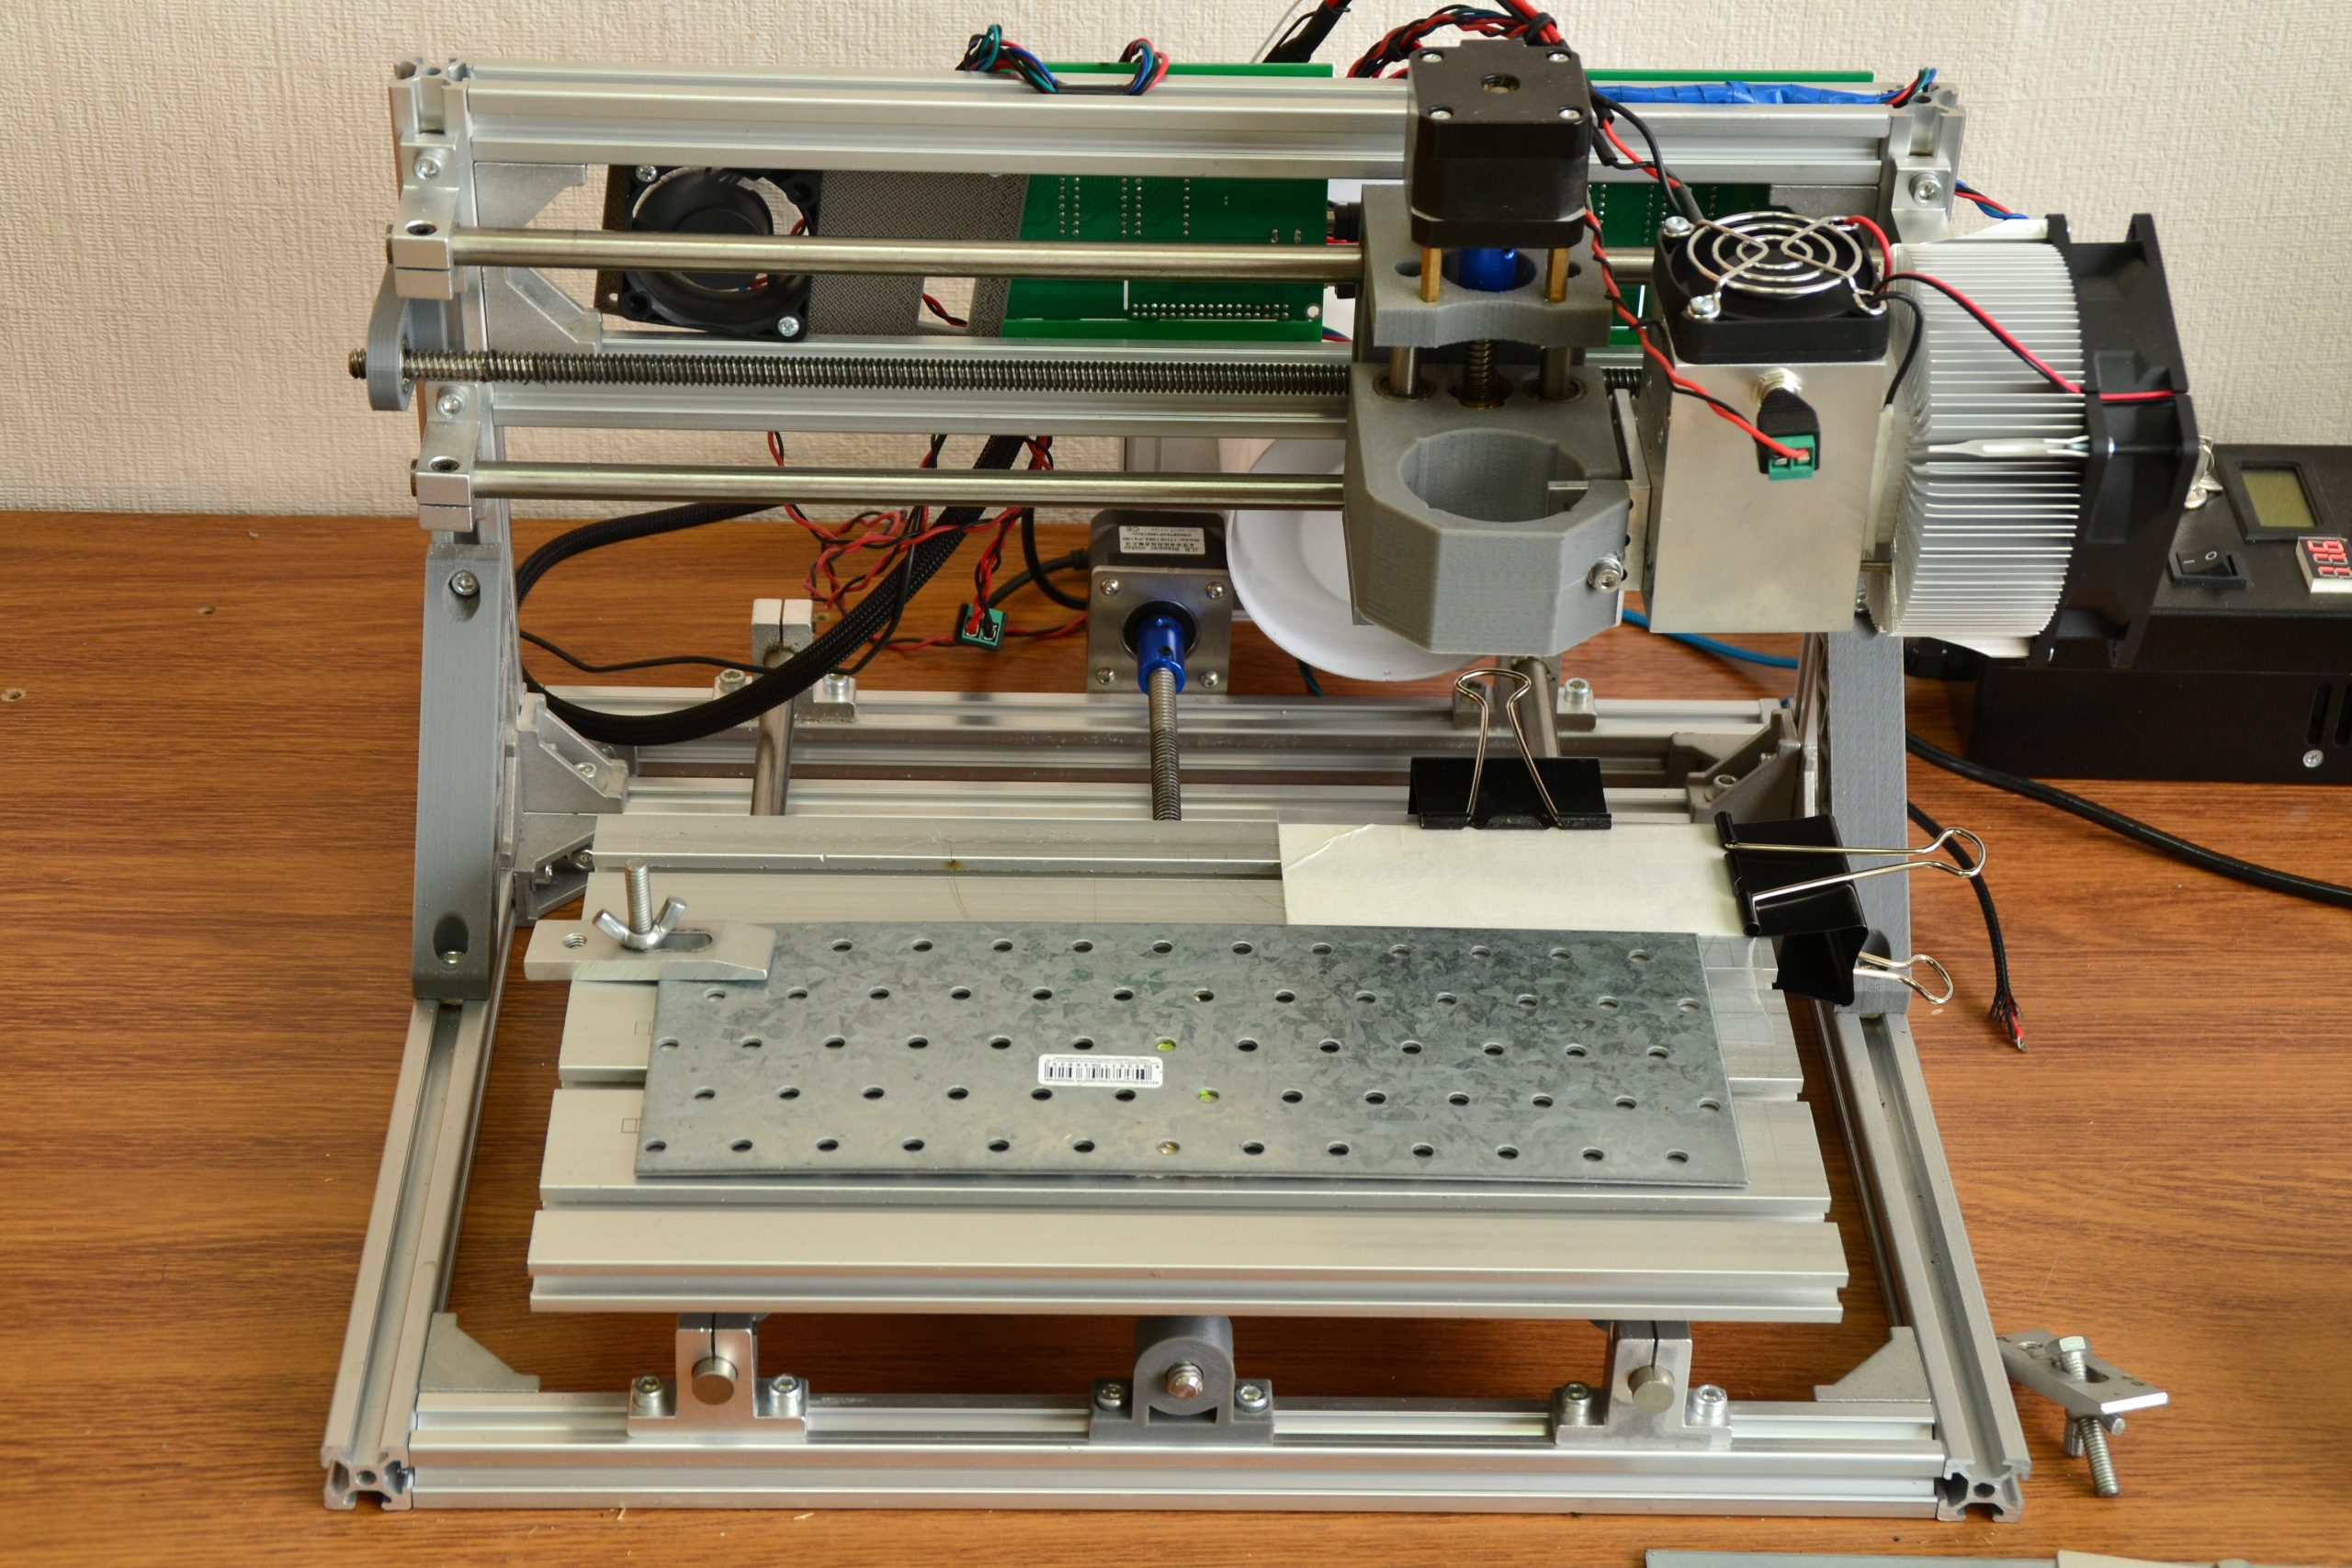
We’ll make the stamp basis out of rubber, 2.5 mm thick, using a CNC machine CNC3018 equipped with a 10 W laser.

Parameters:
Laser power – 75%
Speed – 500 mm/min
Passes – 1
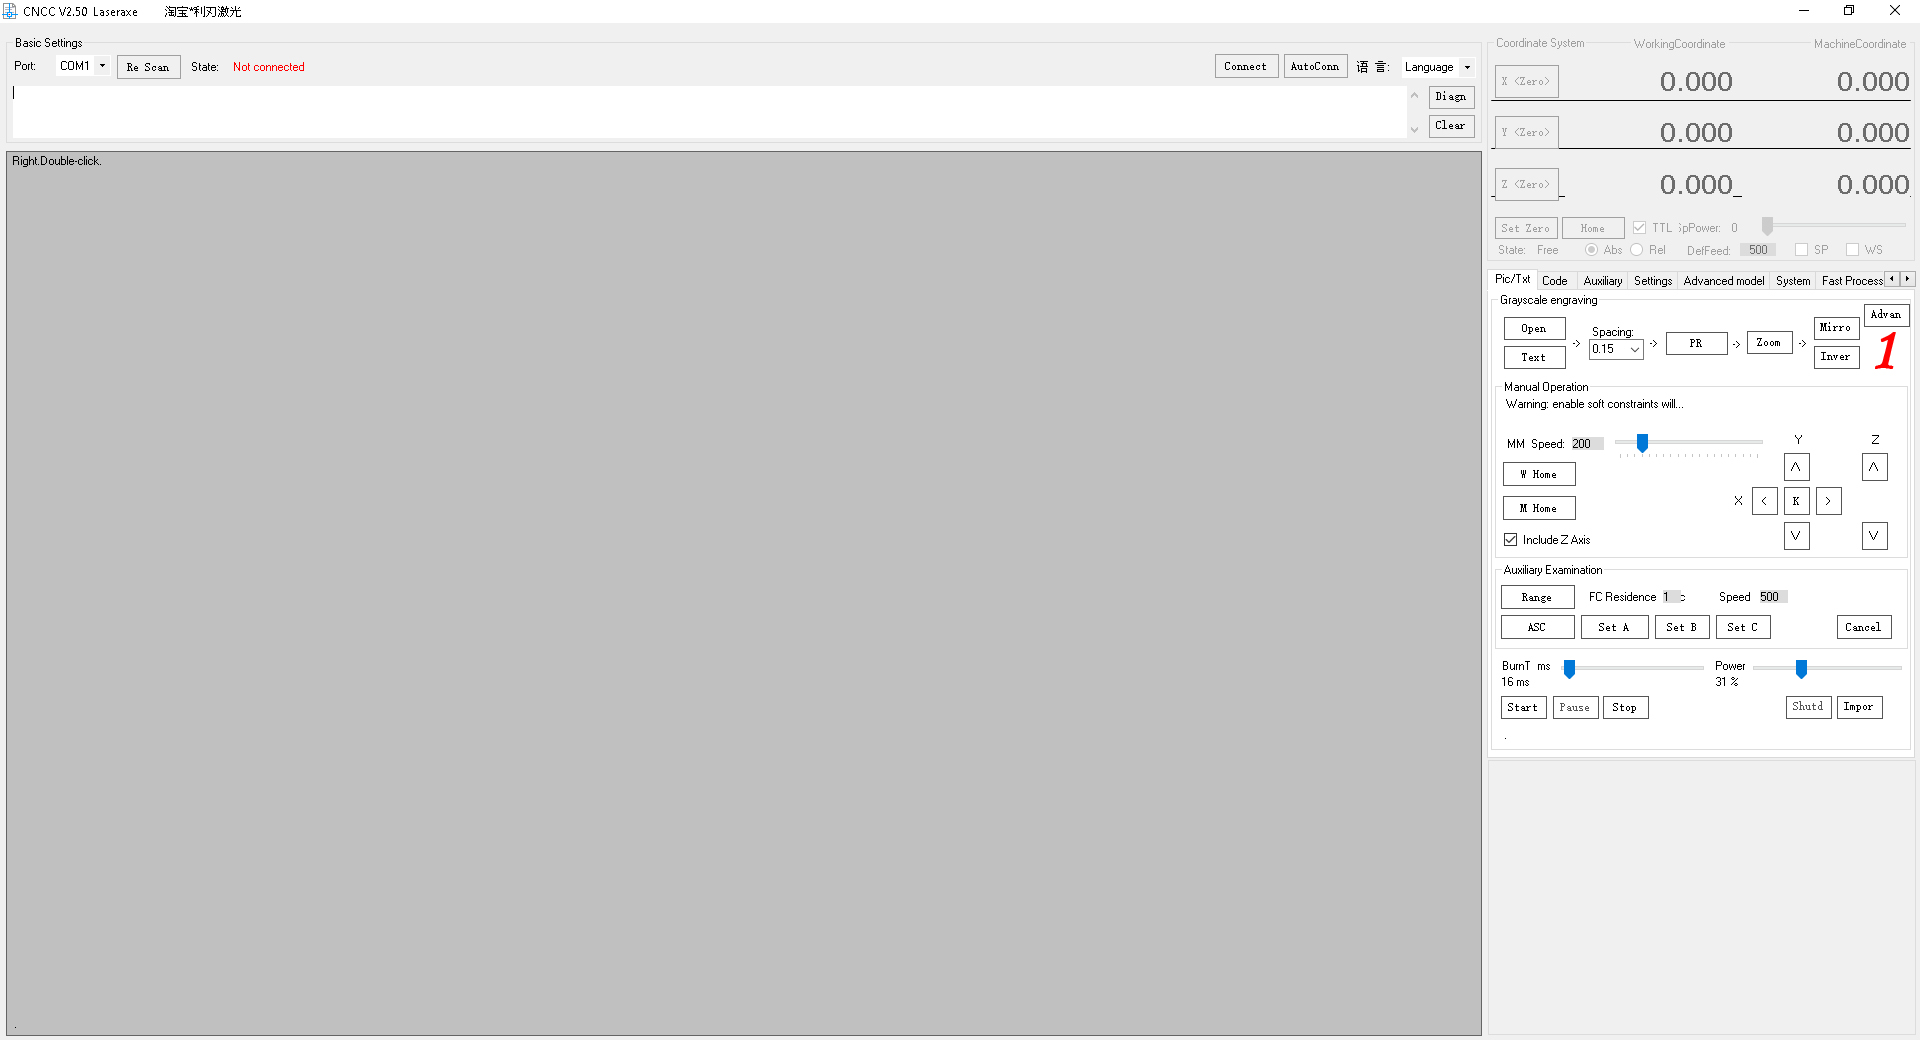
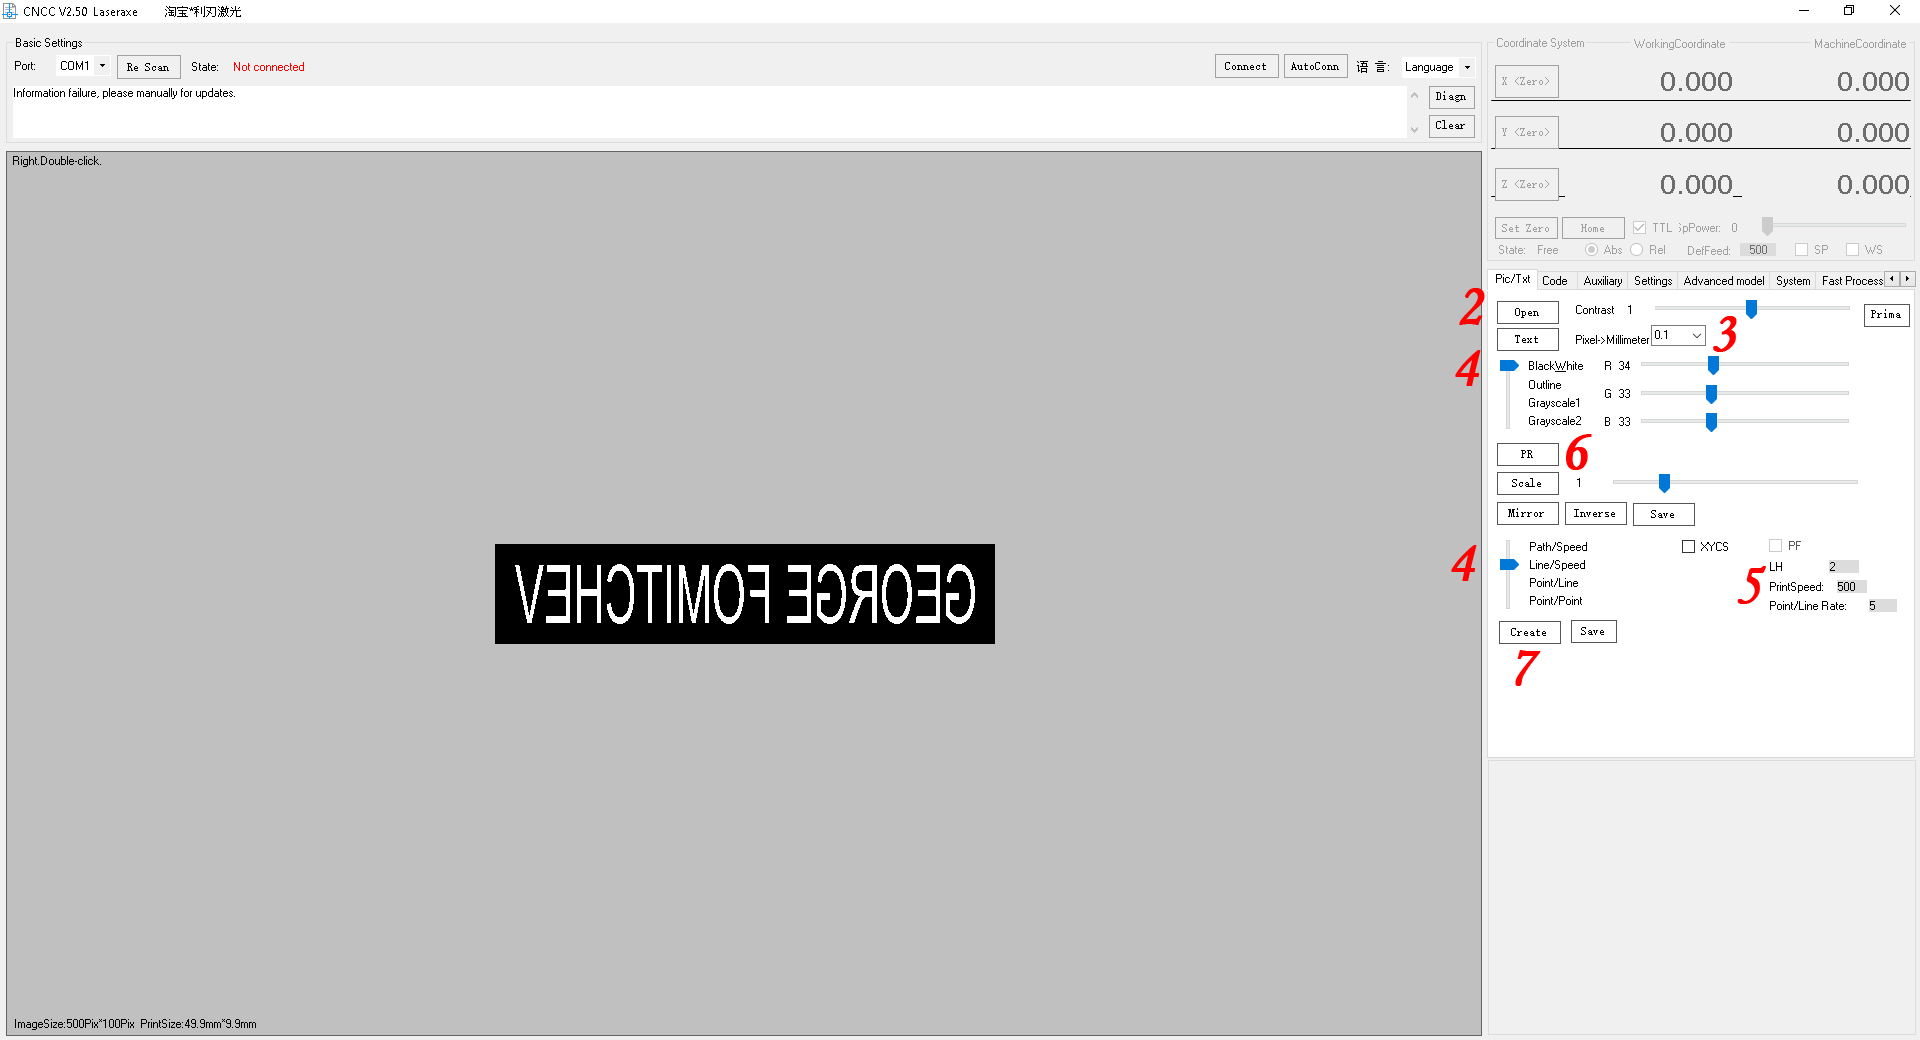
To create a G-code we use CNCC.
- Click «Advanced model».
2. Open the exported PNG-file («Open»).
3. Set the accuracy «Pixel->Milimeter» – 0.1.
- Select the processing mode: «BlackWhite» и «Line/Speed».
5. Set the speed – 500.
- Run «Photo processing».
7. Create the G-code.
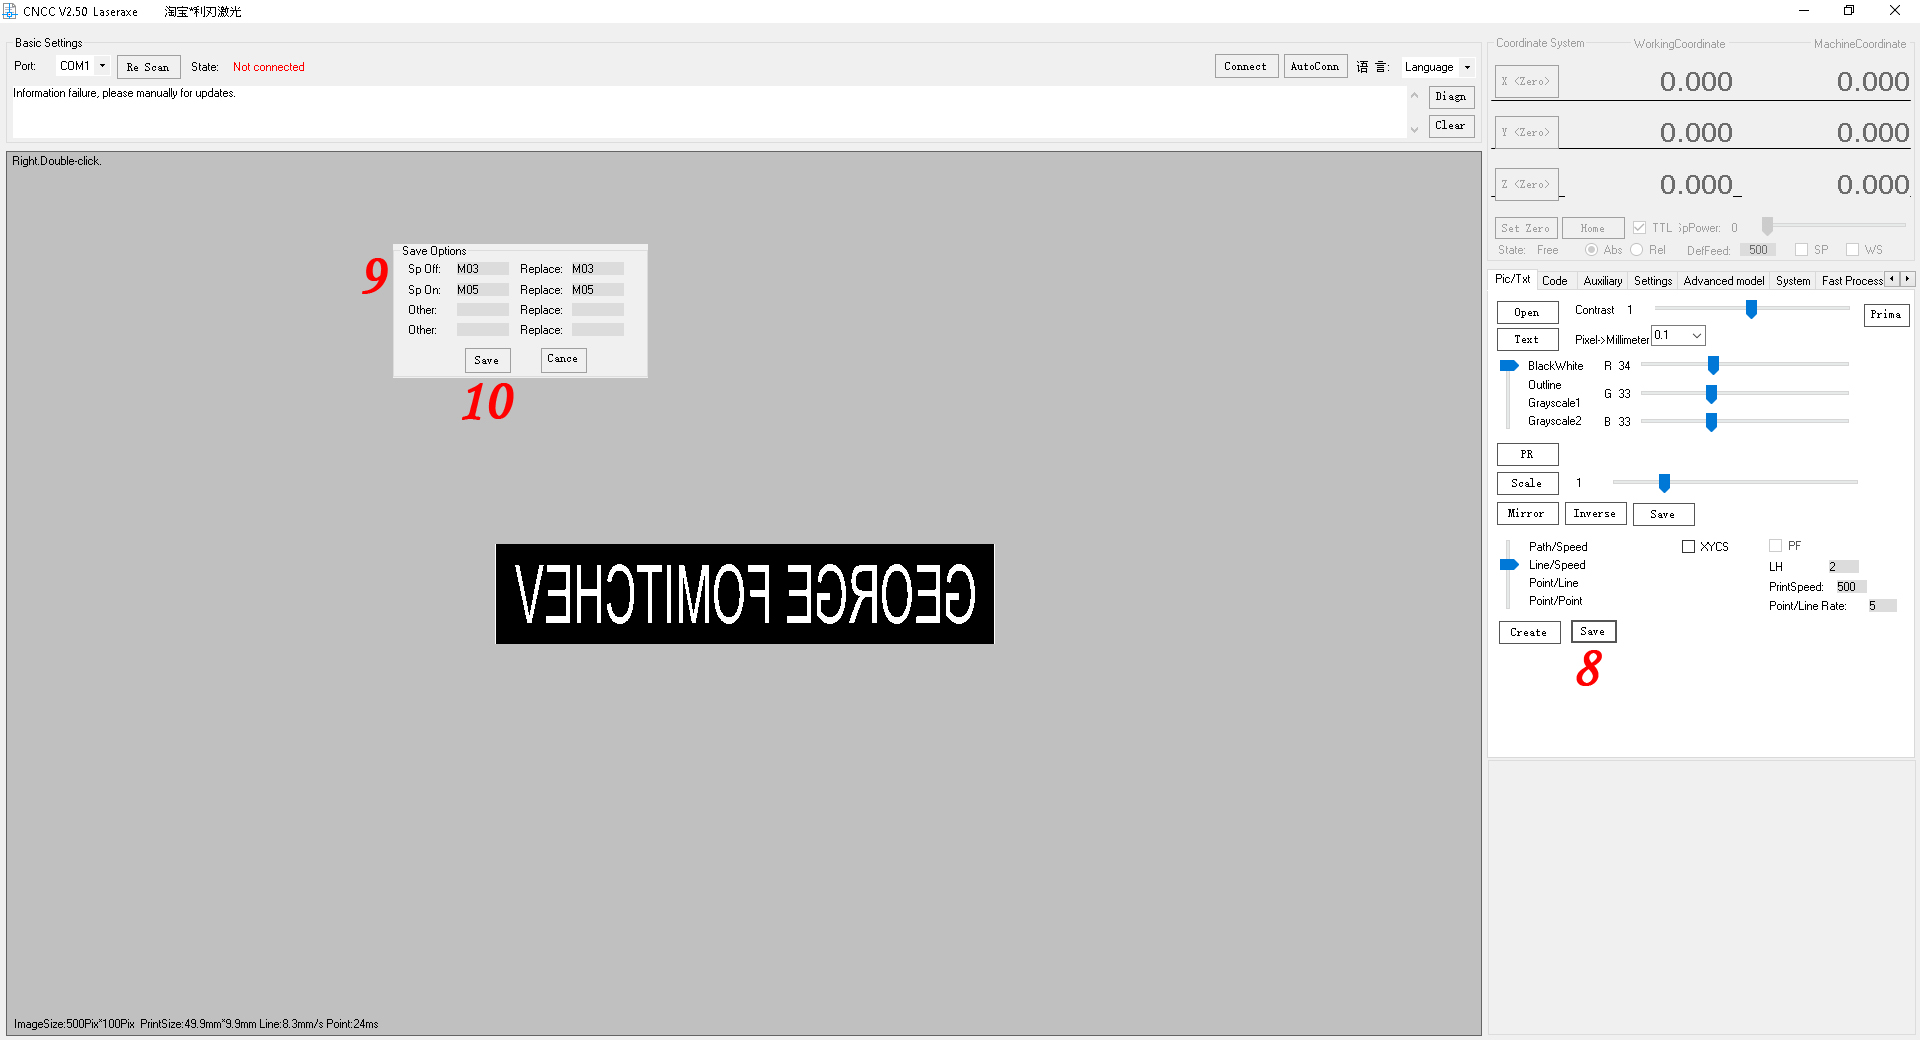
When the G-code is ready, the program reads “Whether the code into the code page?” (проверить правильность фразы). Select “No”.
- Save the G-code («Save»).
- Prior to it set the commands to turn on the M03 and turn off the M05 of the laser.
10.«Save».
Now we need to correct the created G-code using Notepad.
- Check the speed. At the beginning of the code we have “F500”.
- We need to set the laser power. As it is in the range of 0-1000 in our CNC machine, where 1000=100%, we set it to 75%. Next to the speed we enter “S750”.
3. The body of the created G-code consists of the following alternate commands “G1” and ”G0”, where “G1”is the laser movement in an operation mode (when the laser is on), “G0” is the idle movement when the laser is off at the max. speed. Some machines and their management programs automatically turn on/off the laser when they get these commands. Our machine doesn’t do that. That is why using automatic text replacement we change the “G1” command for ”M03 G1”, and “G0” for “M05 G0”.
4. At the beginning of the G-code (after “G90” and “G21”) we add “G0 X0 Y0 Z0”. This line at the beginning of the work positions the laser at the original coordinates. This line is not necessary. We add it for convenience. The program GrblControl controlling our machine enables to visually display our G-code as well as its virtual performance without turning-on the machine. In this way we can visualize and correct any errors and faults in the program. This is why we add this line with transition to the initial coordinates in all axes. This line doesn’t affect the machine operation in general.

Link to the ready G-code (download ZIP stamp-nc):
Stamp.nc
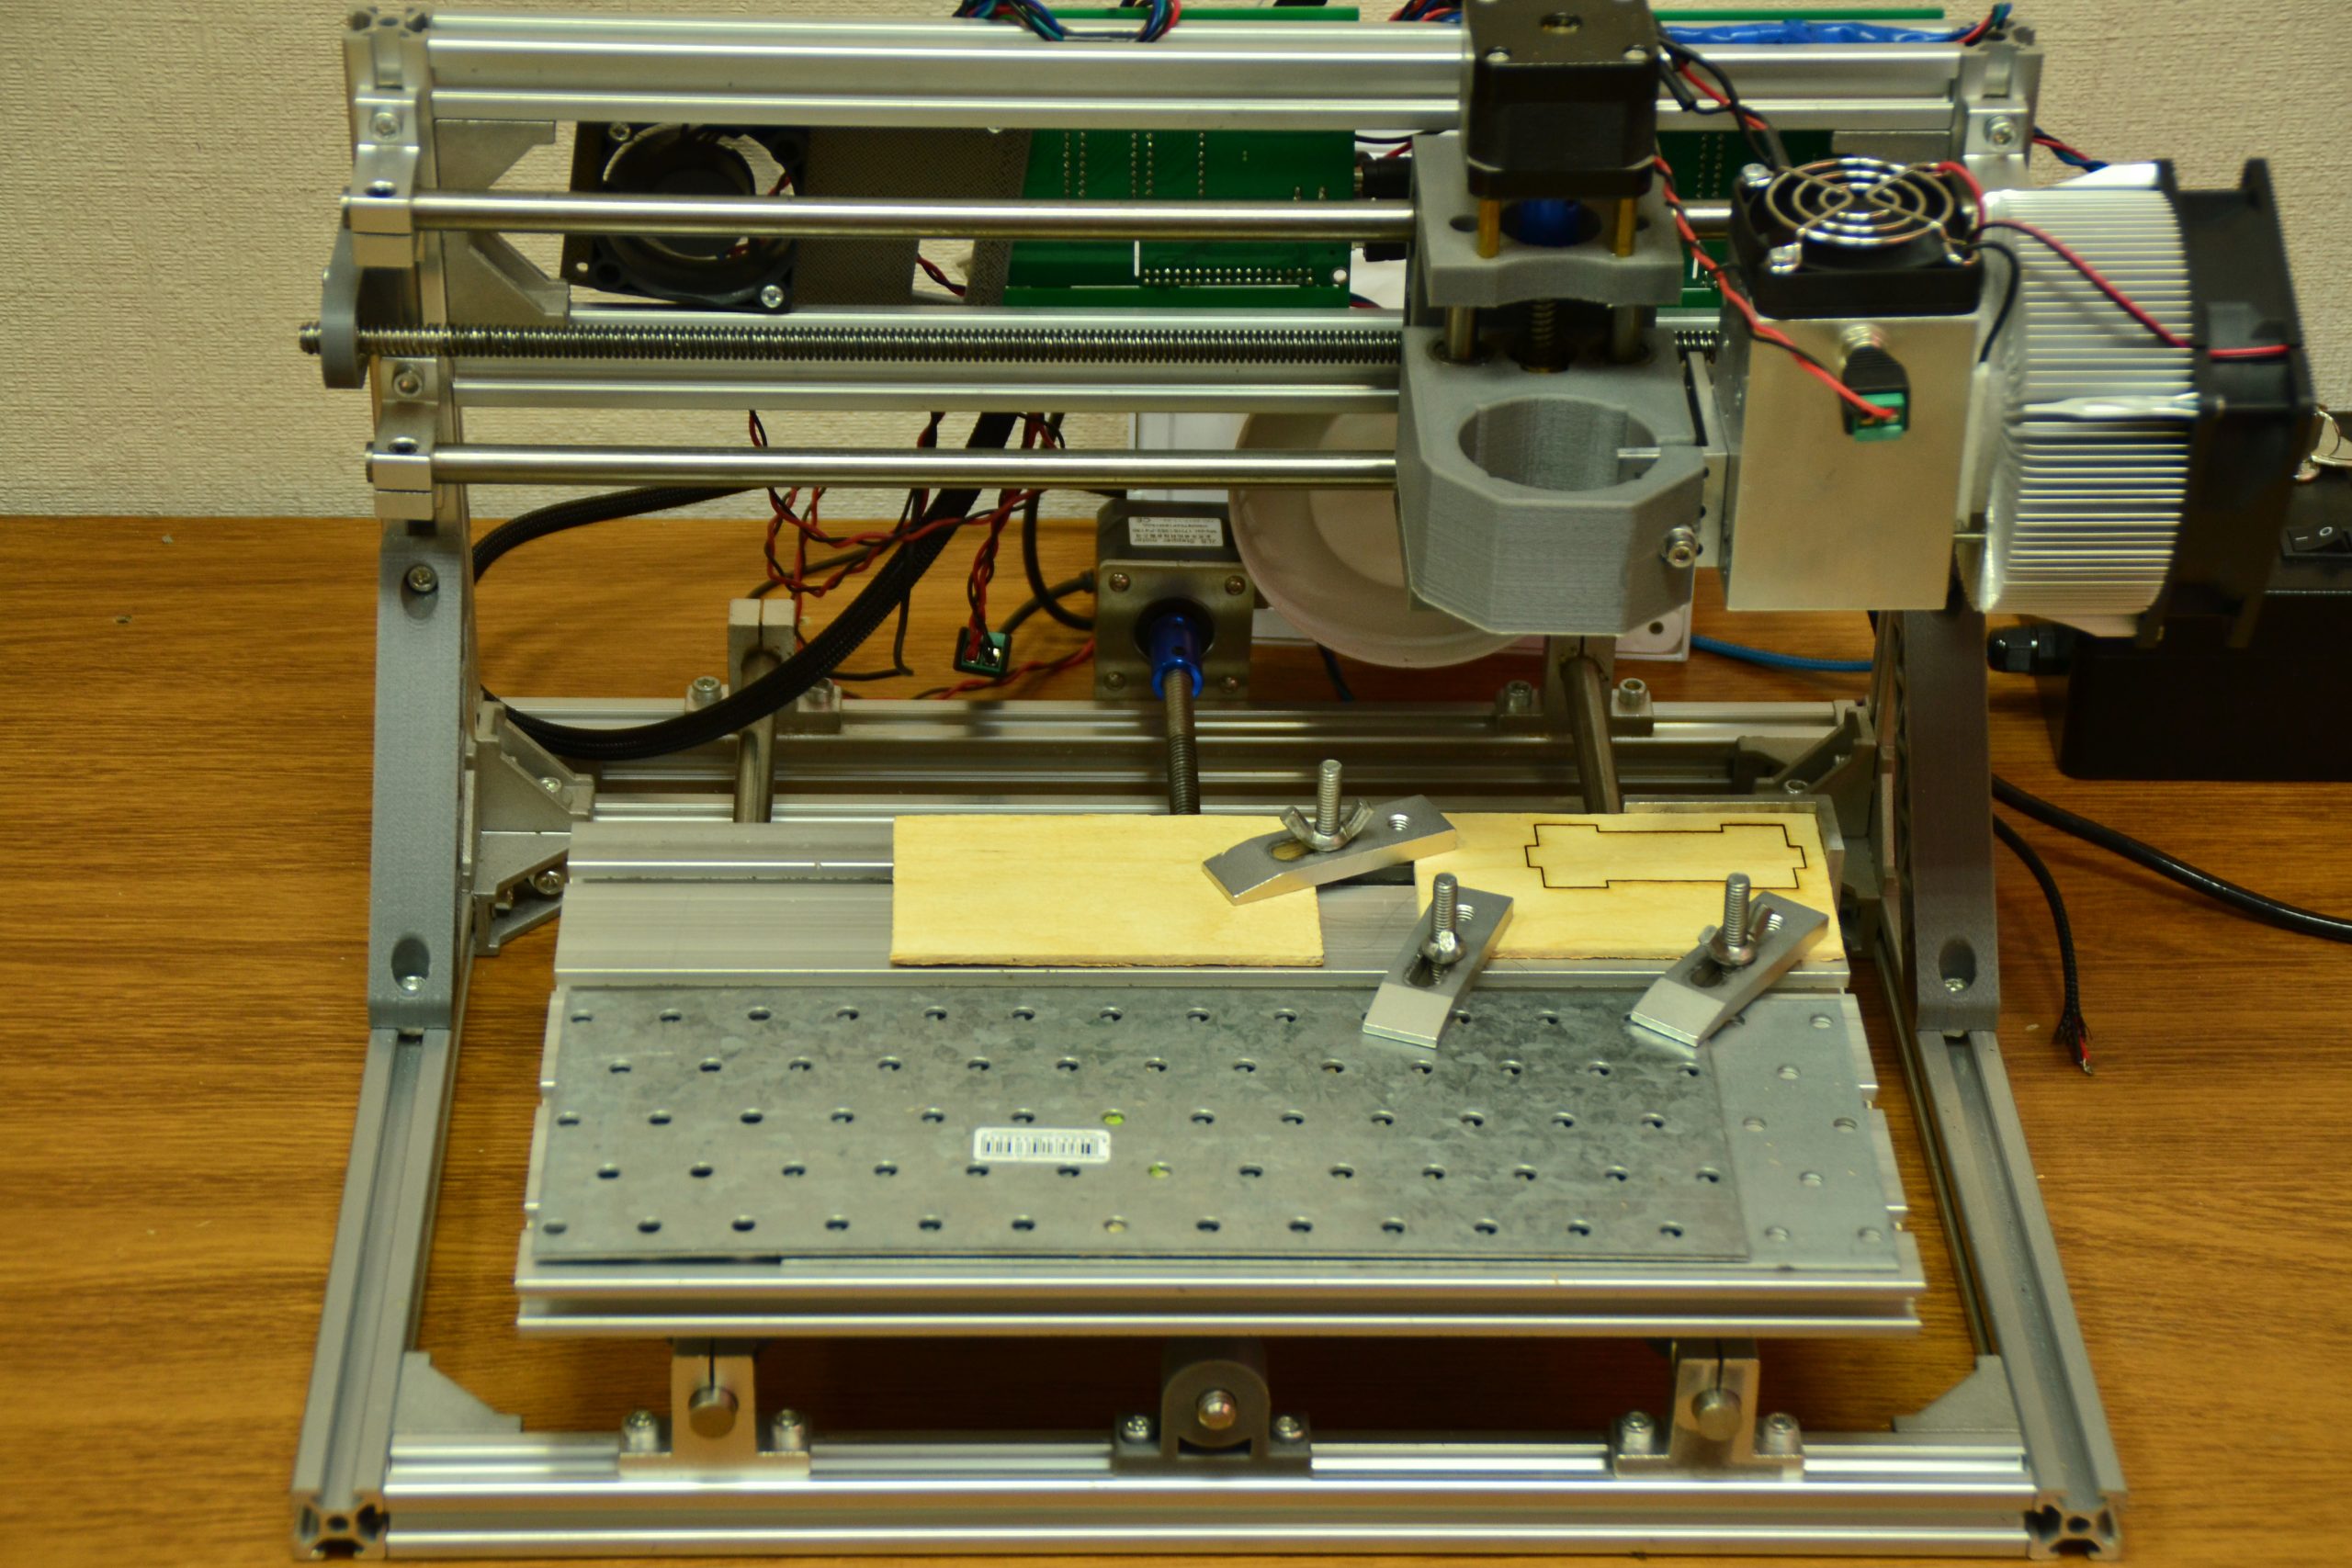
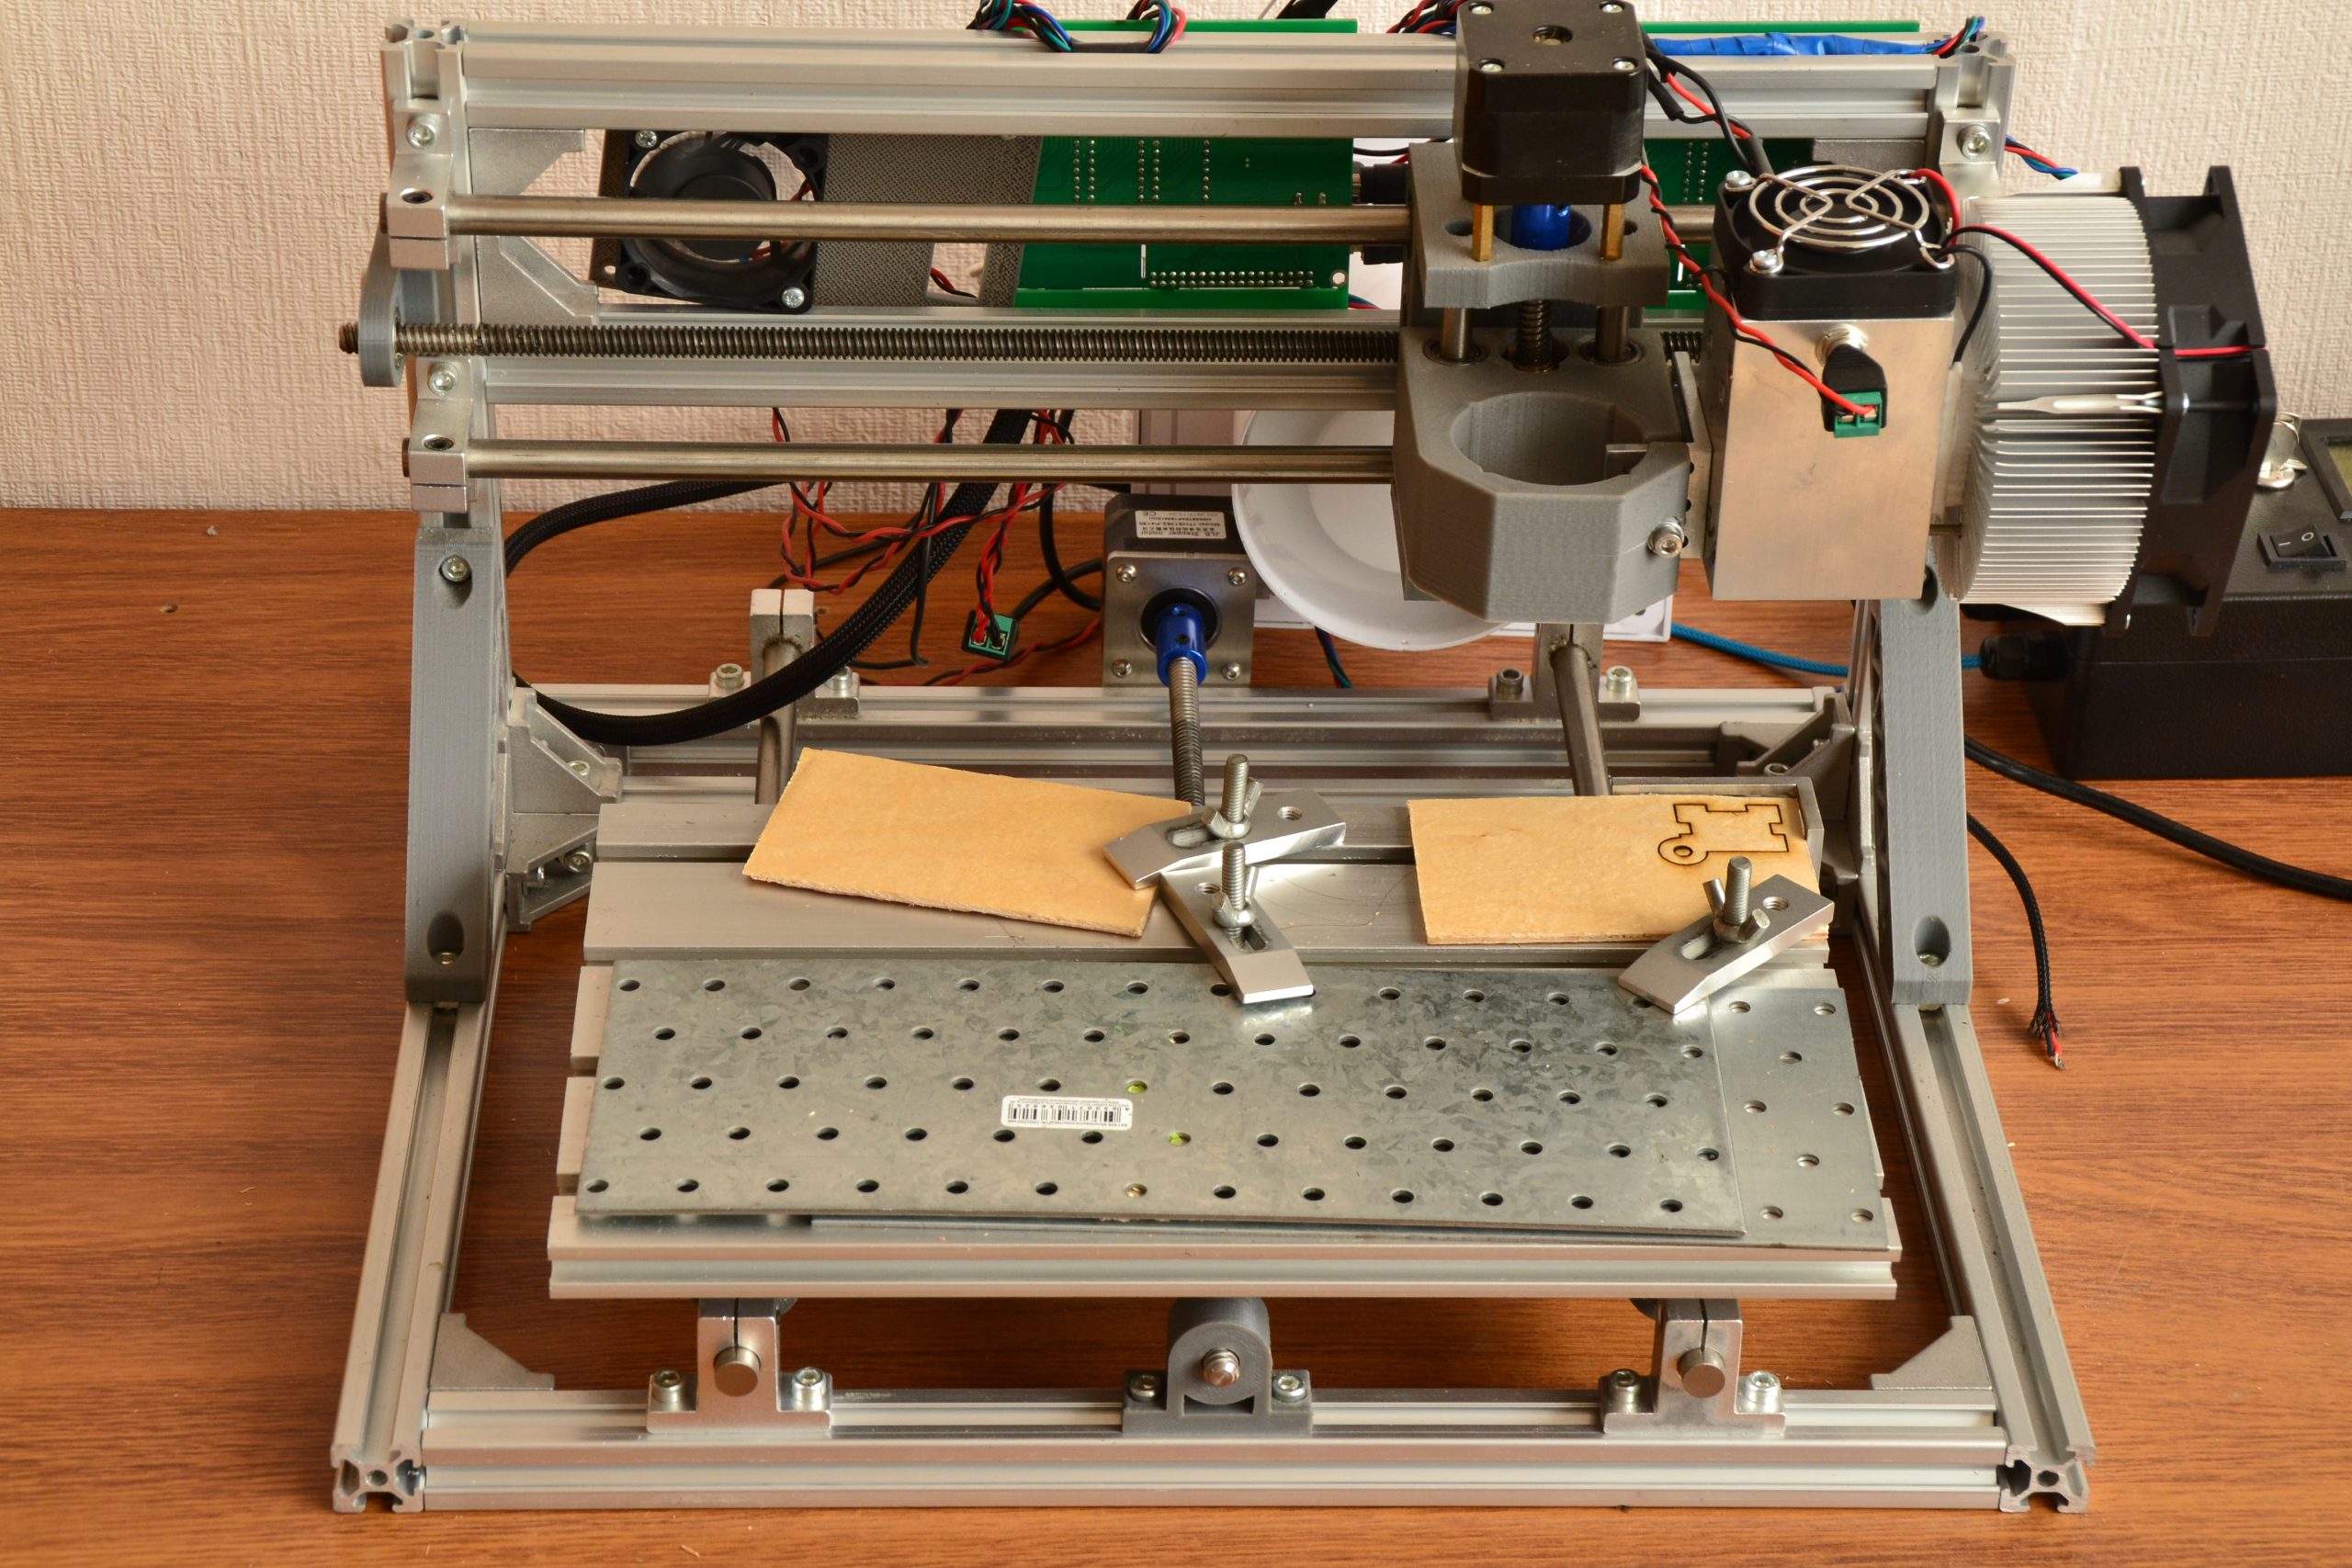
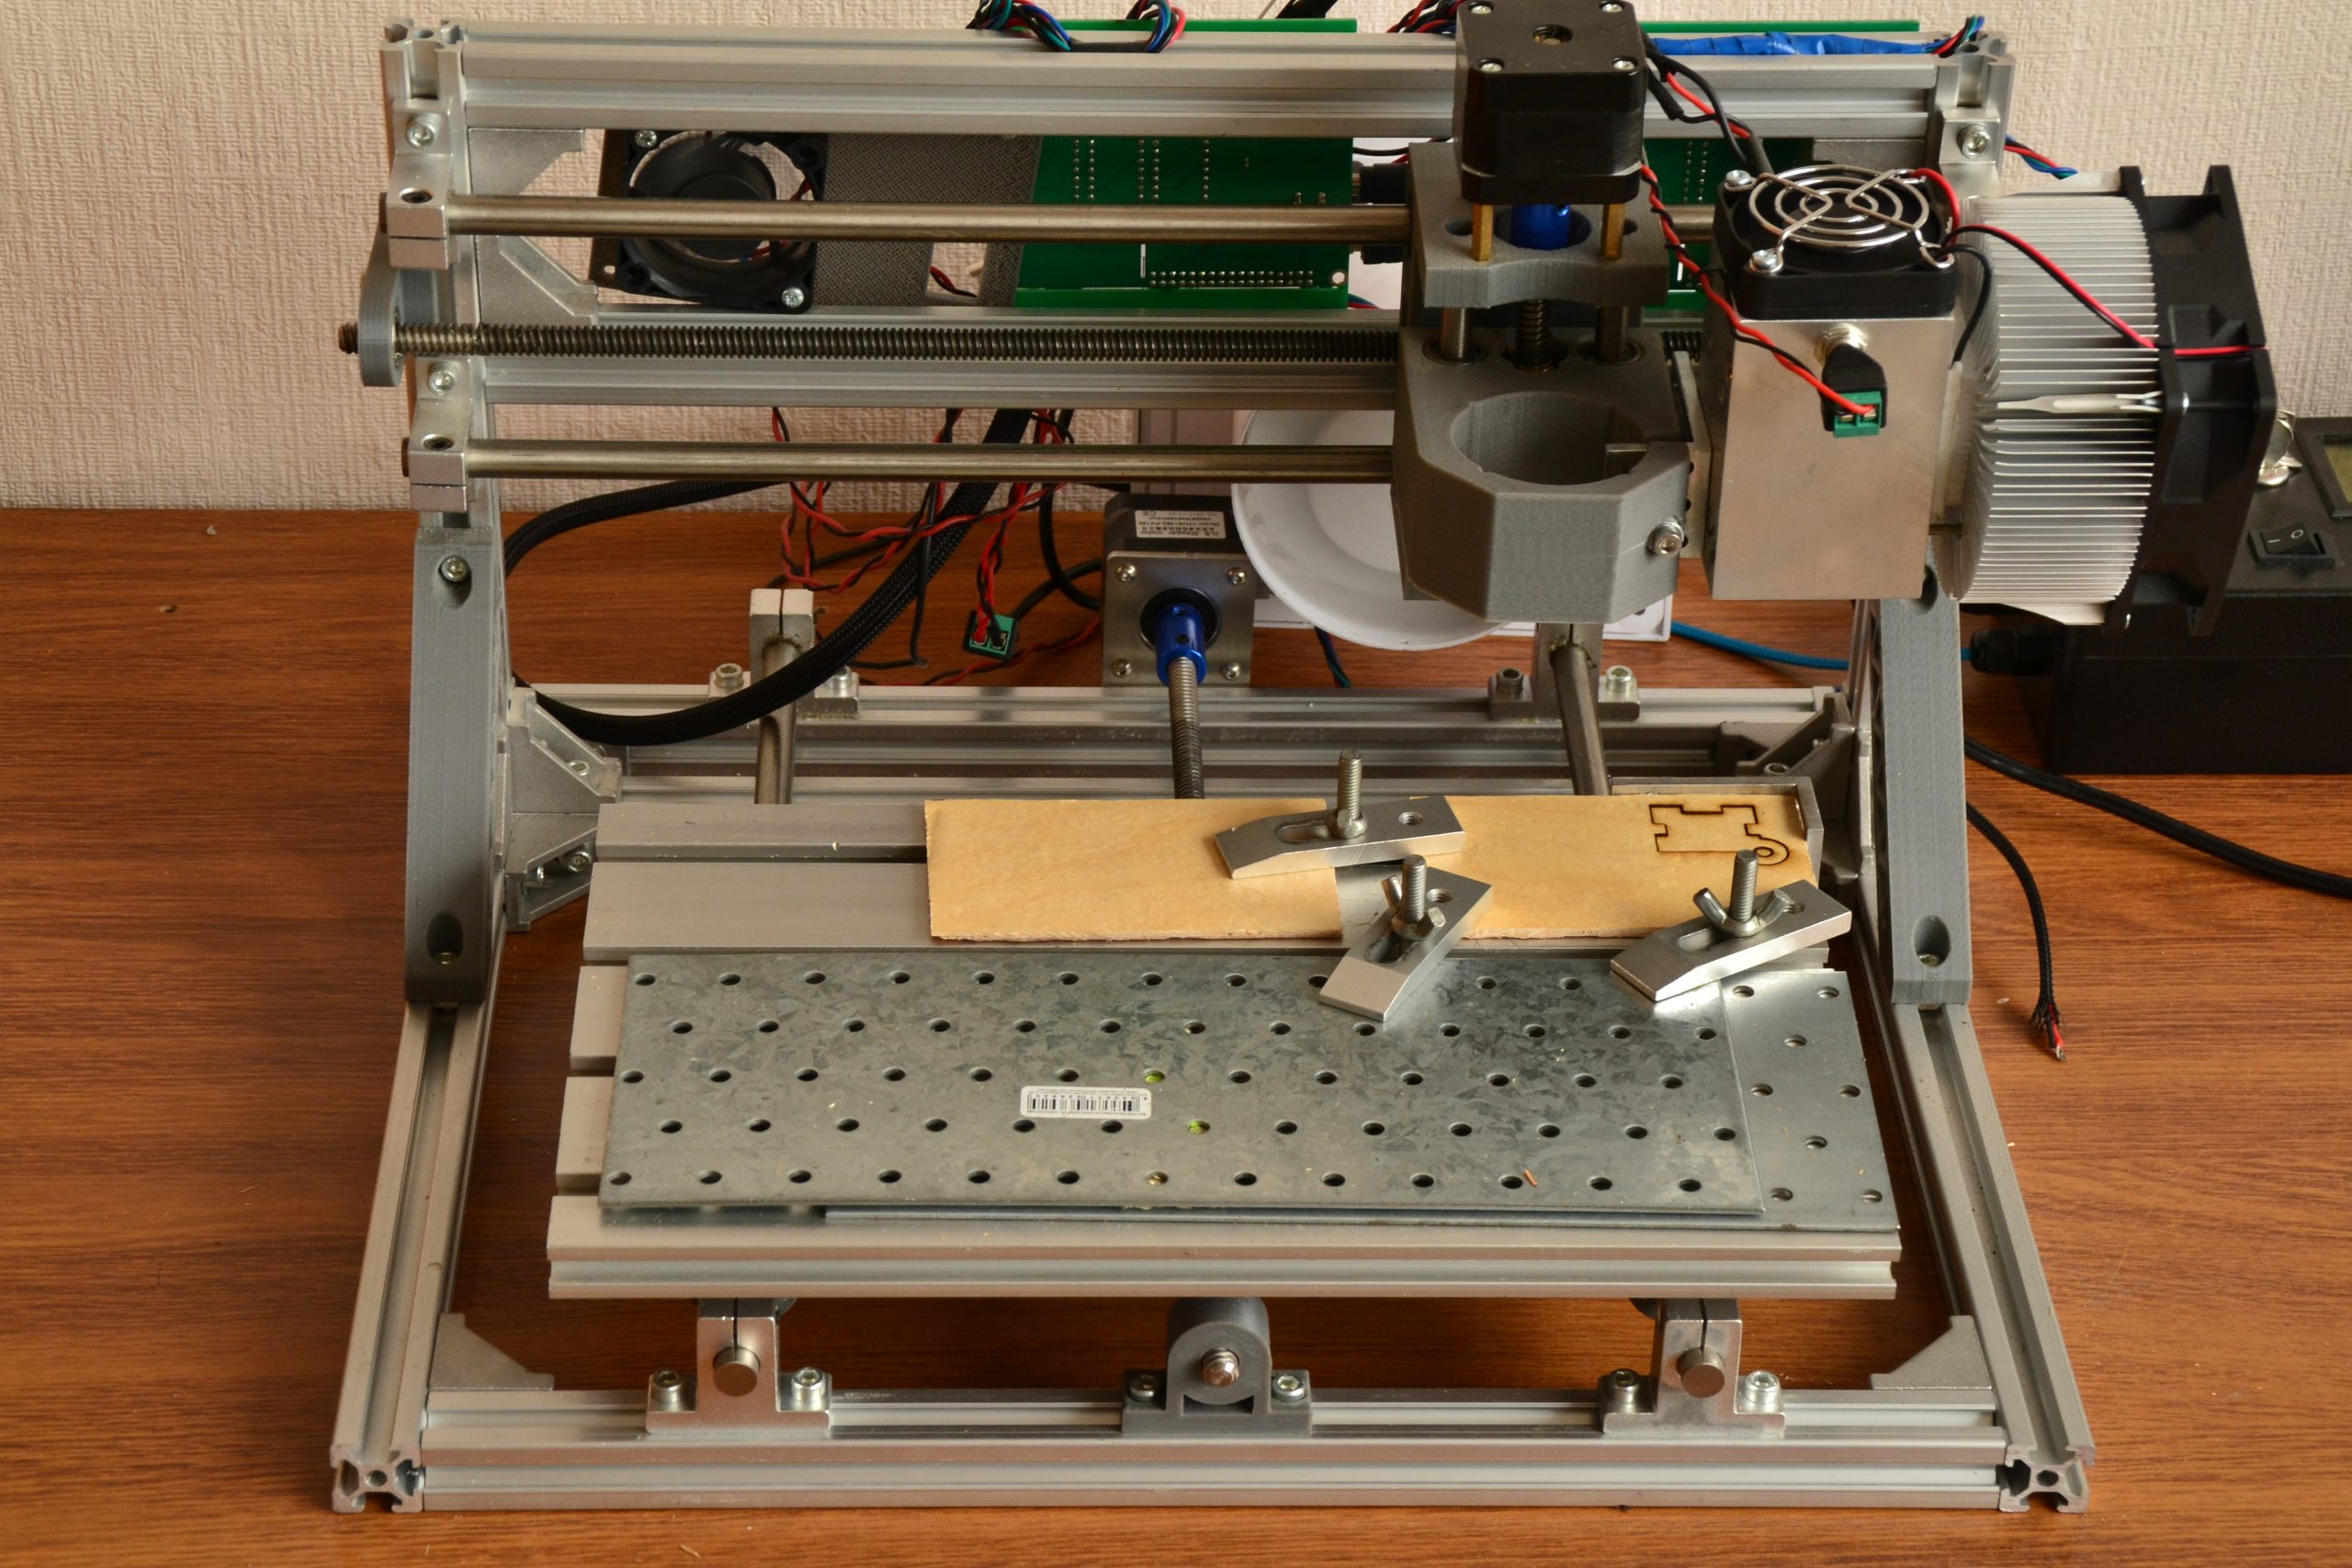
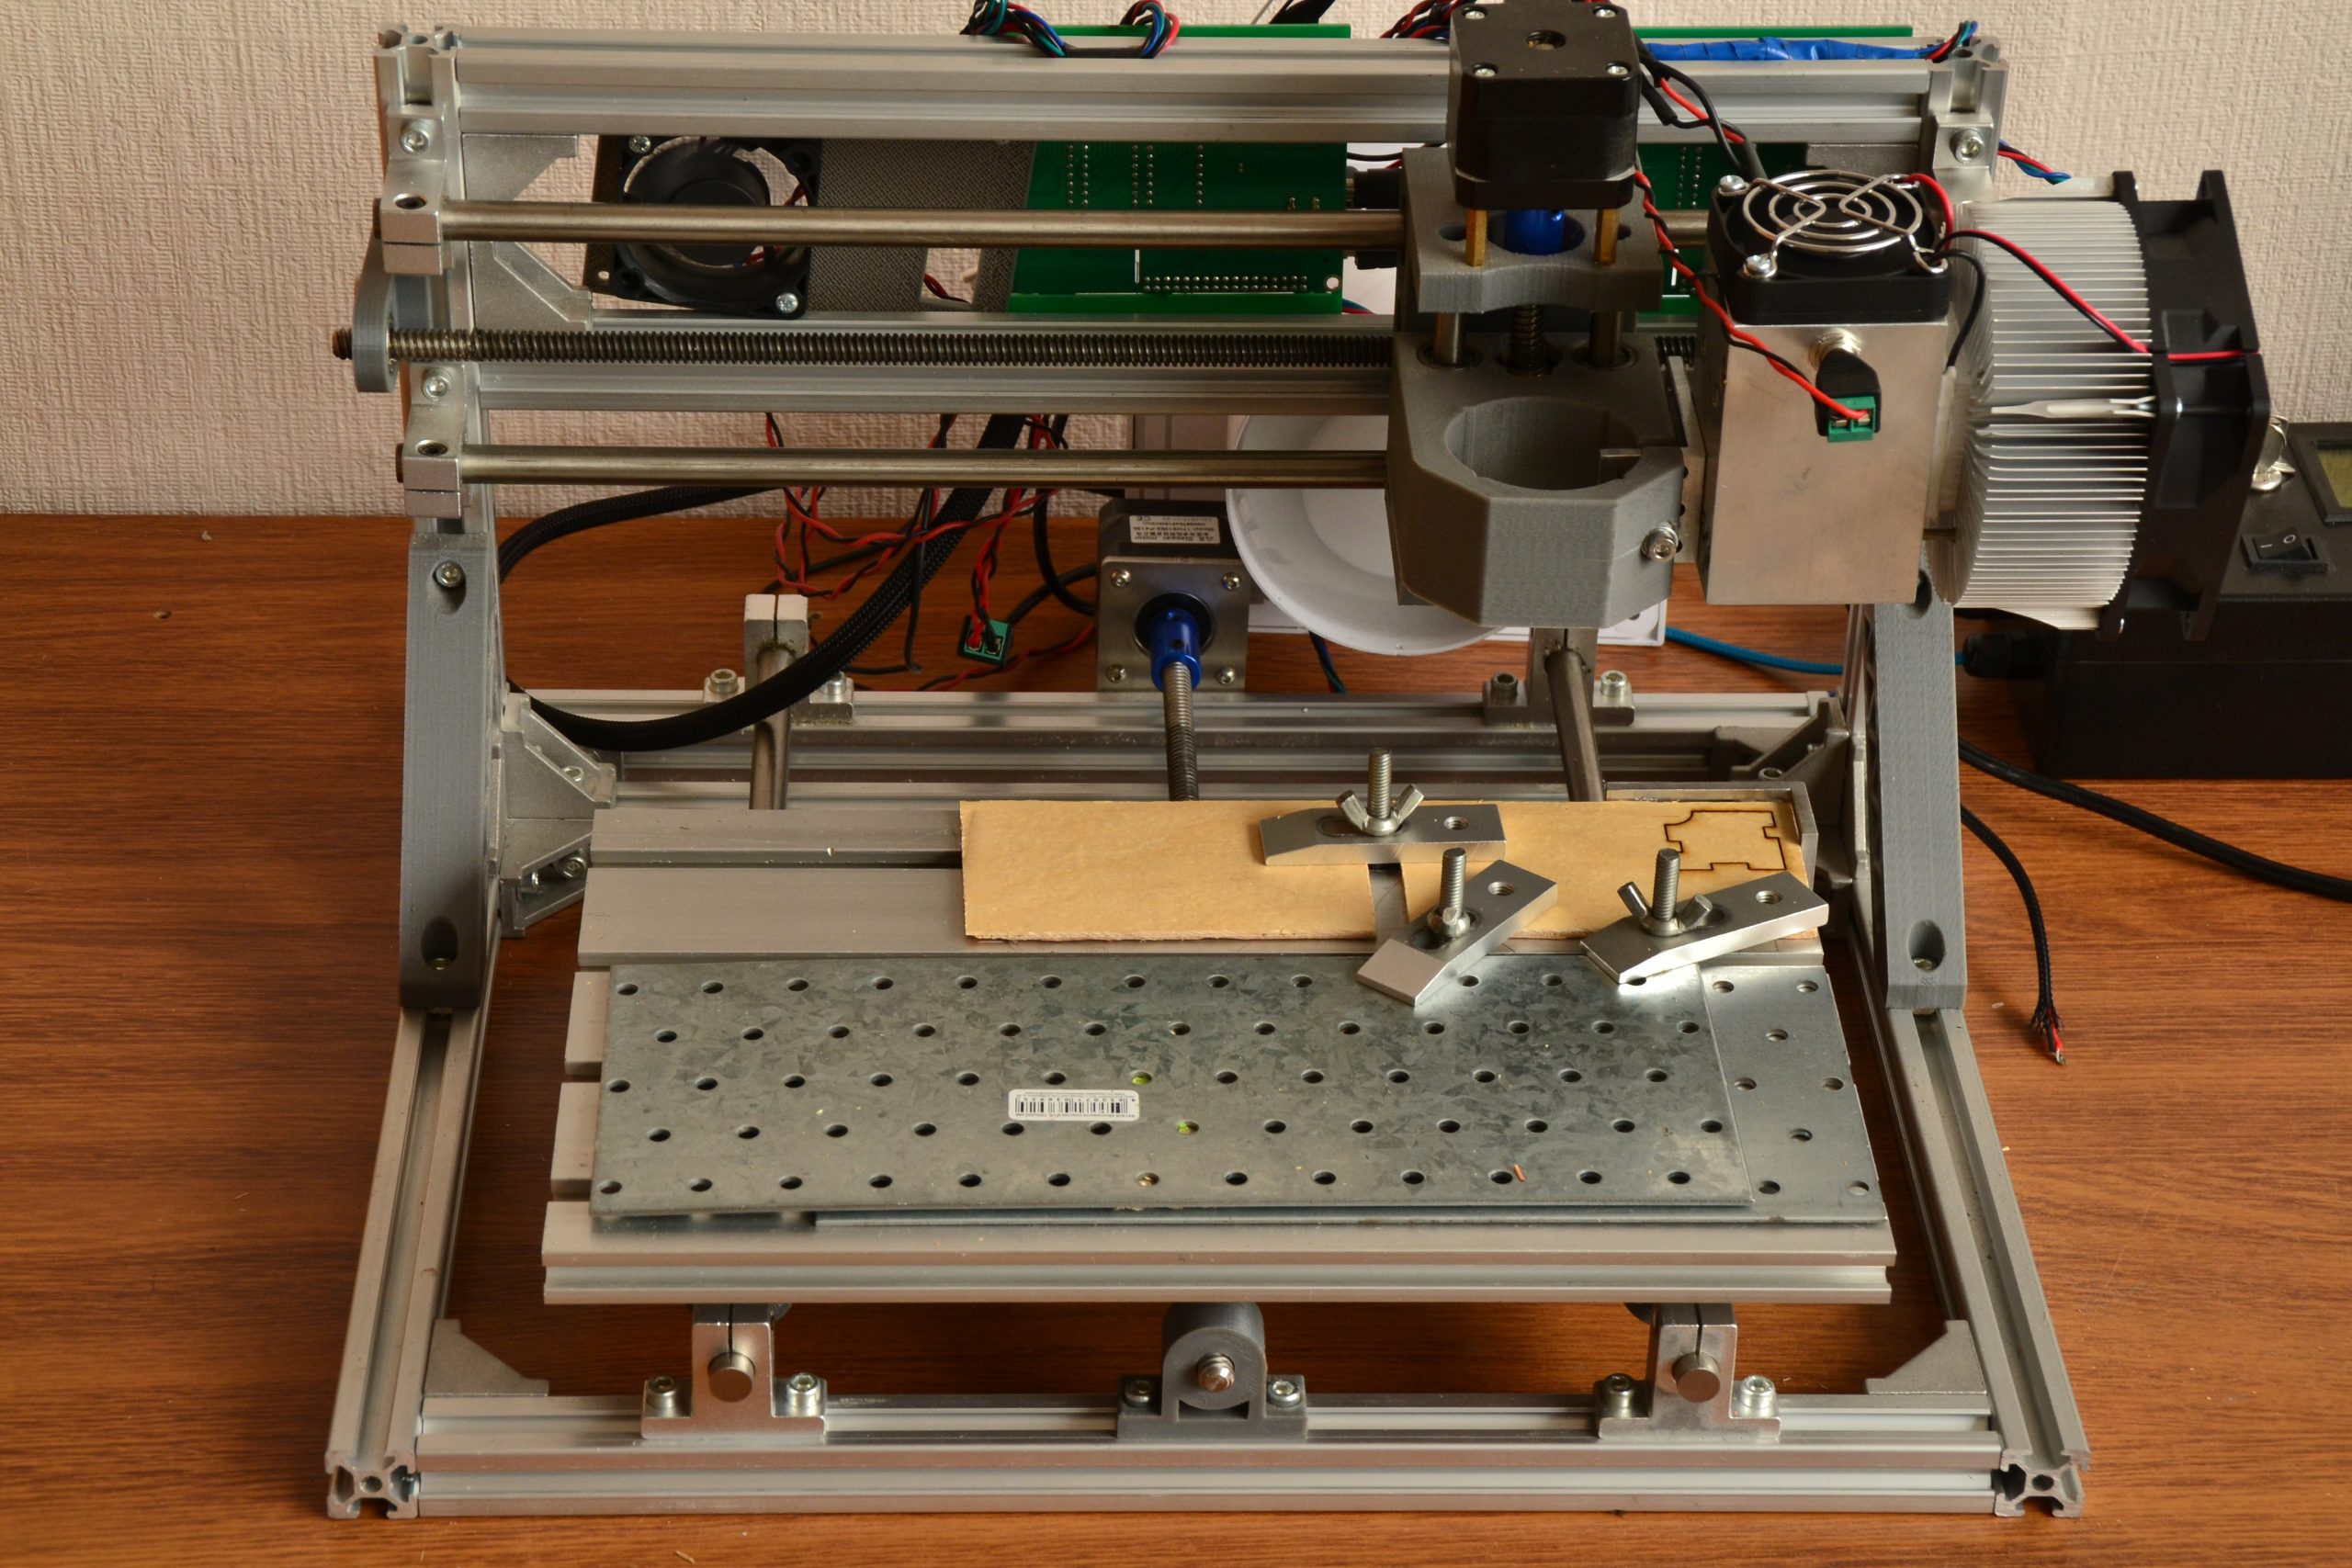
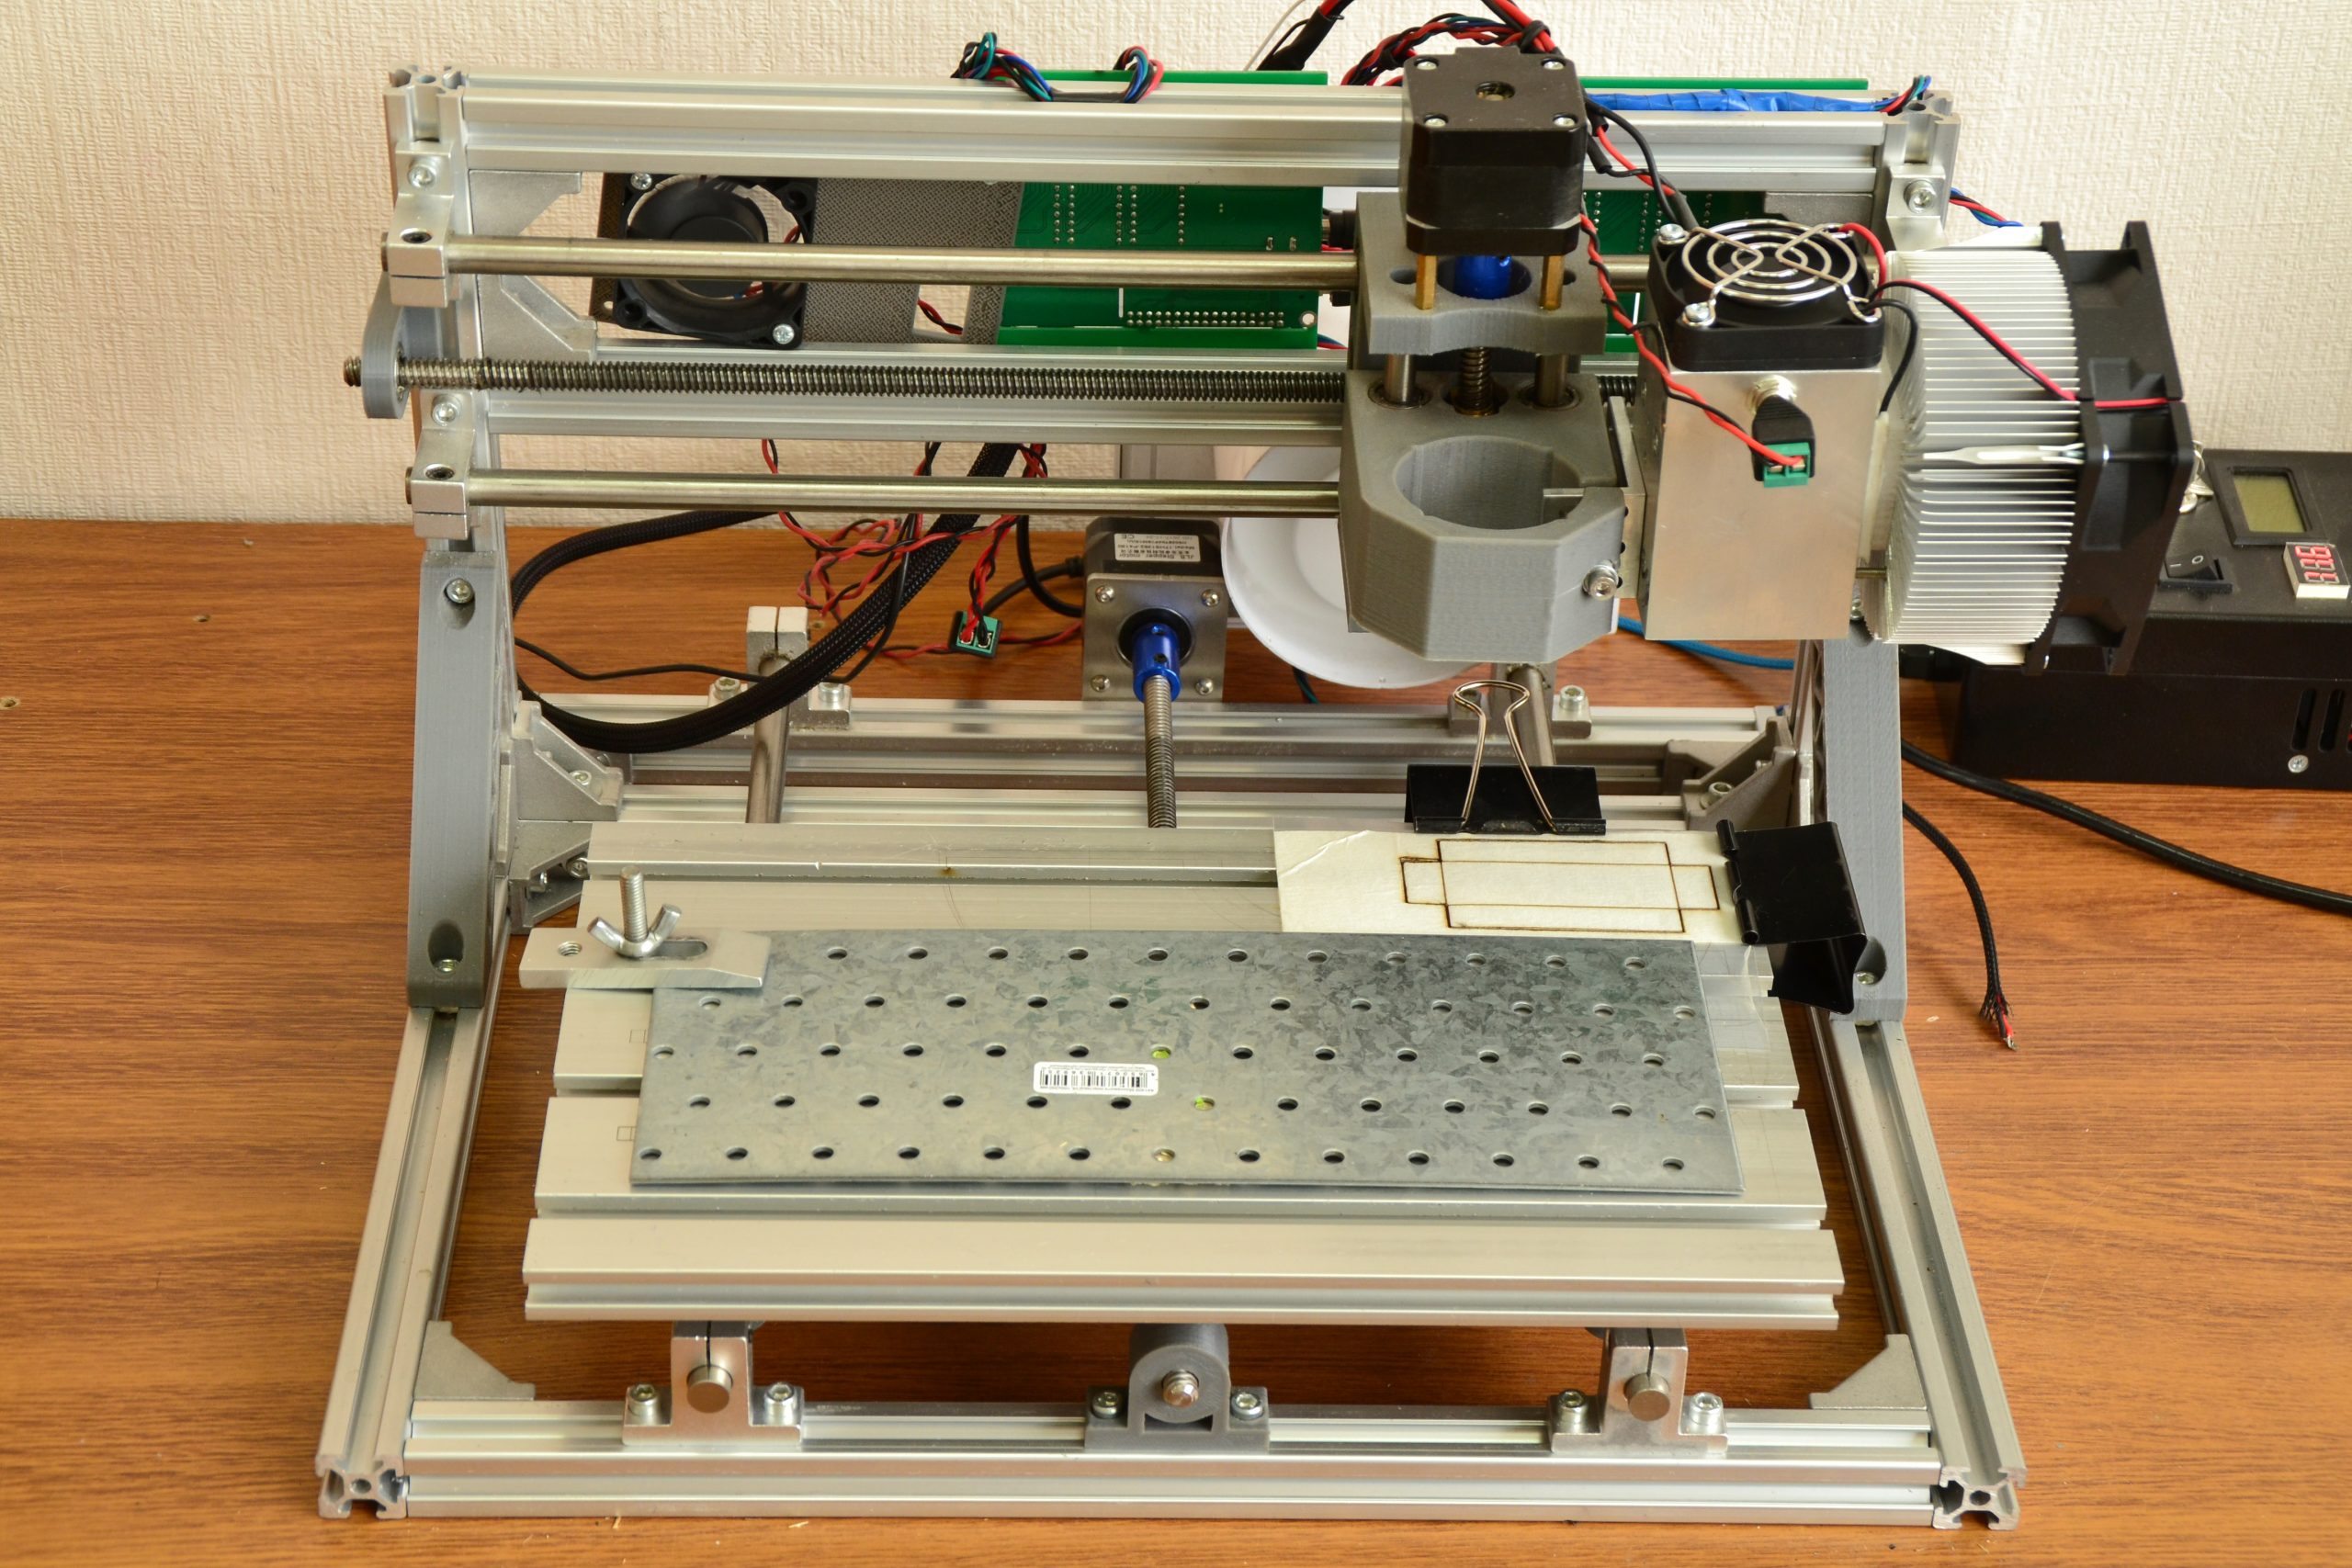
As our worktable is movable, we fasten our rubber seal basis to it with clips and run the G-code.

While working we remember to comply with safety provisions: wear safety goggles and ensure room ventilation.
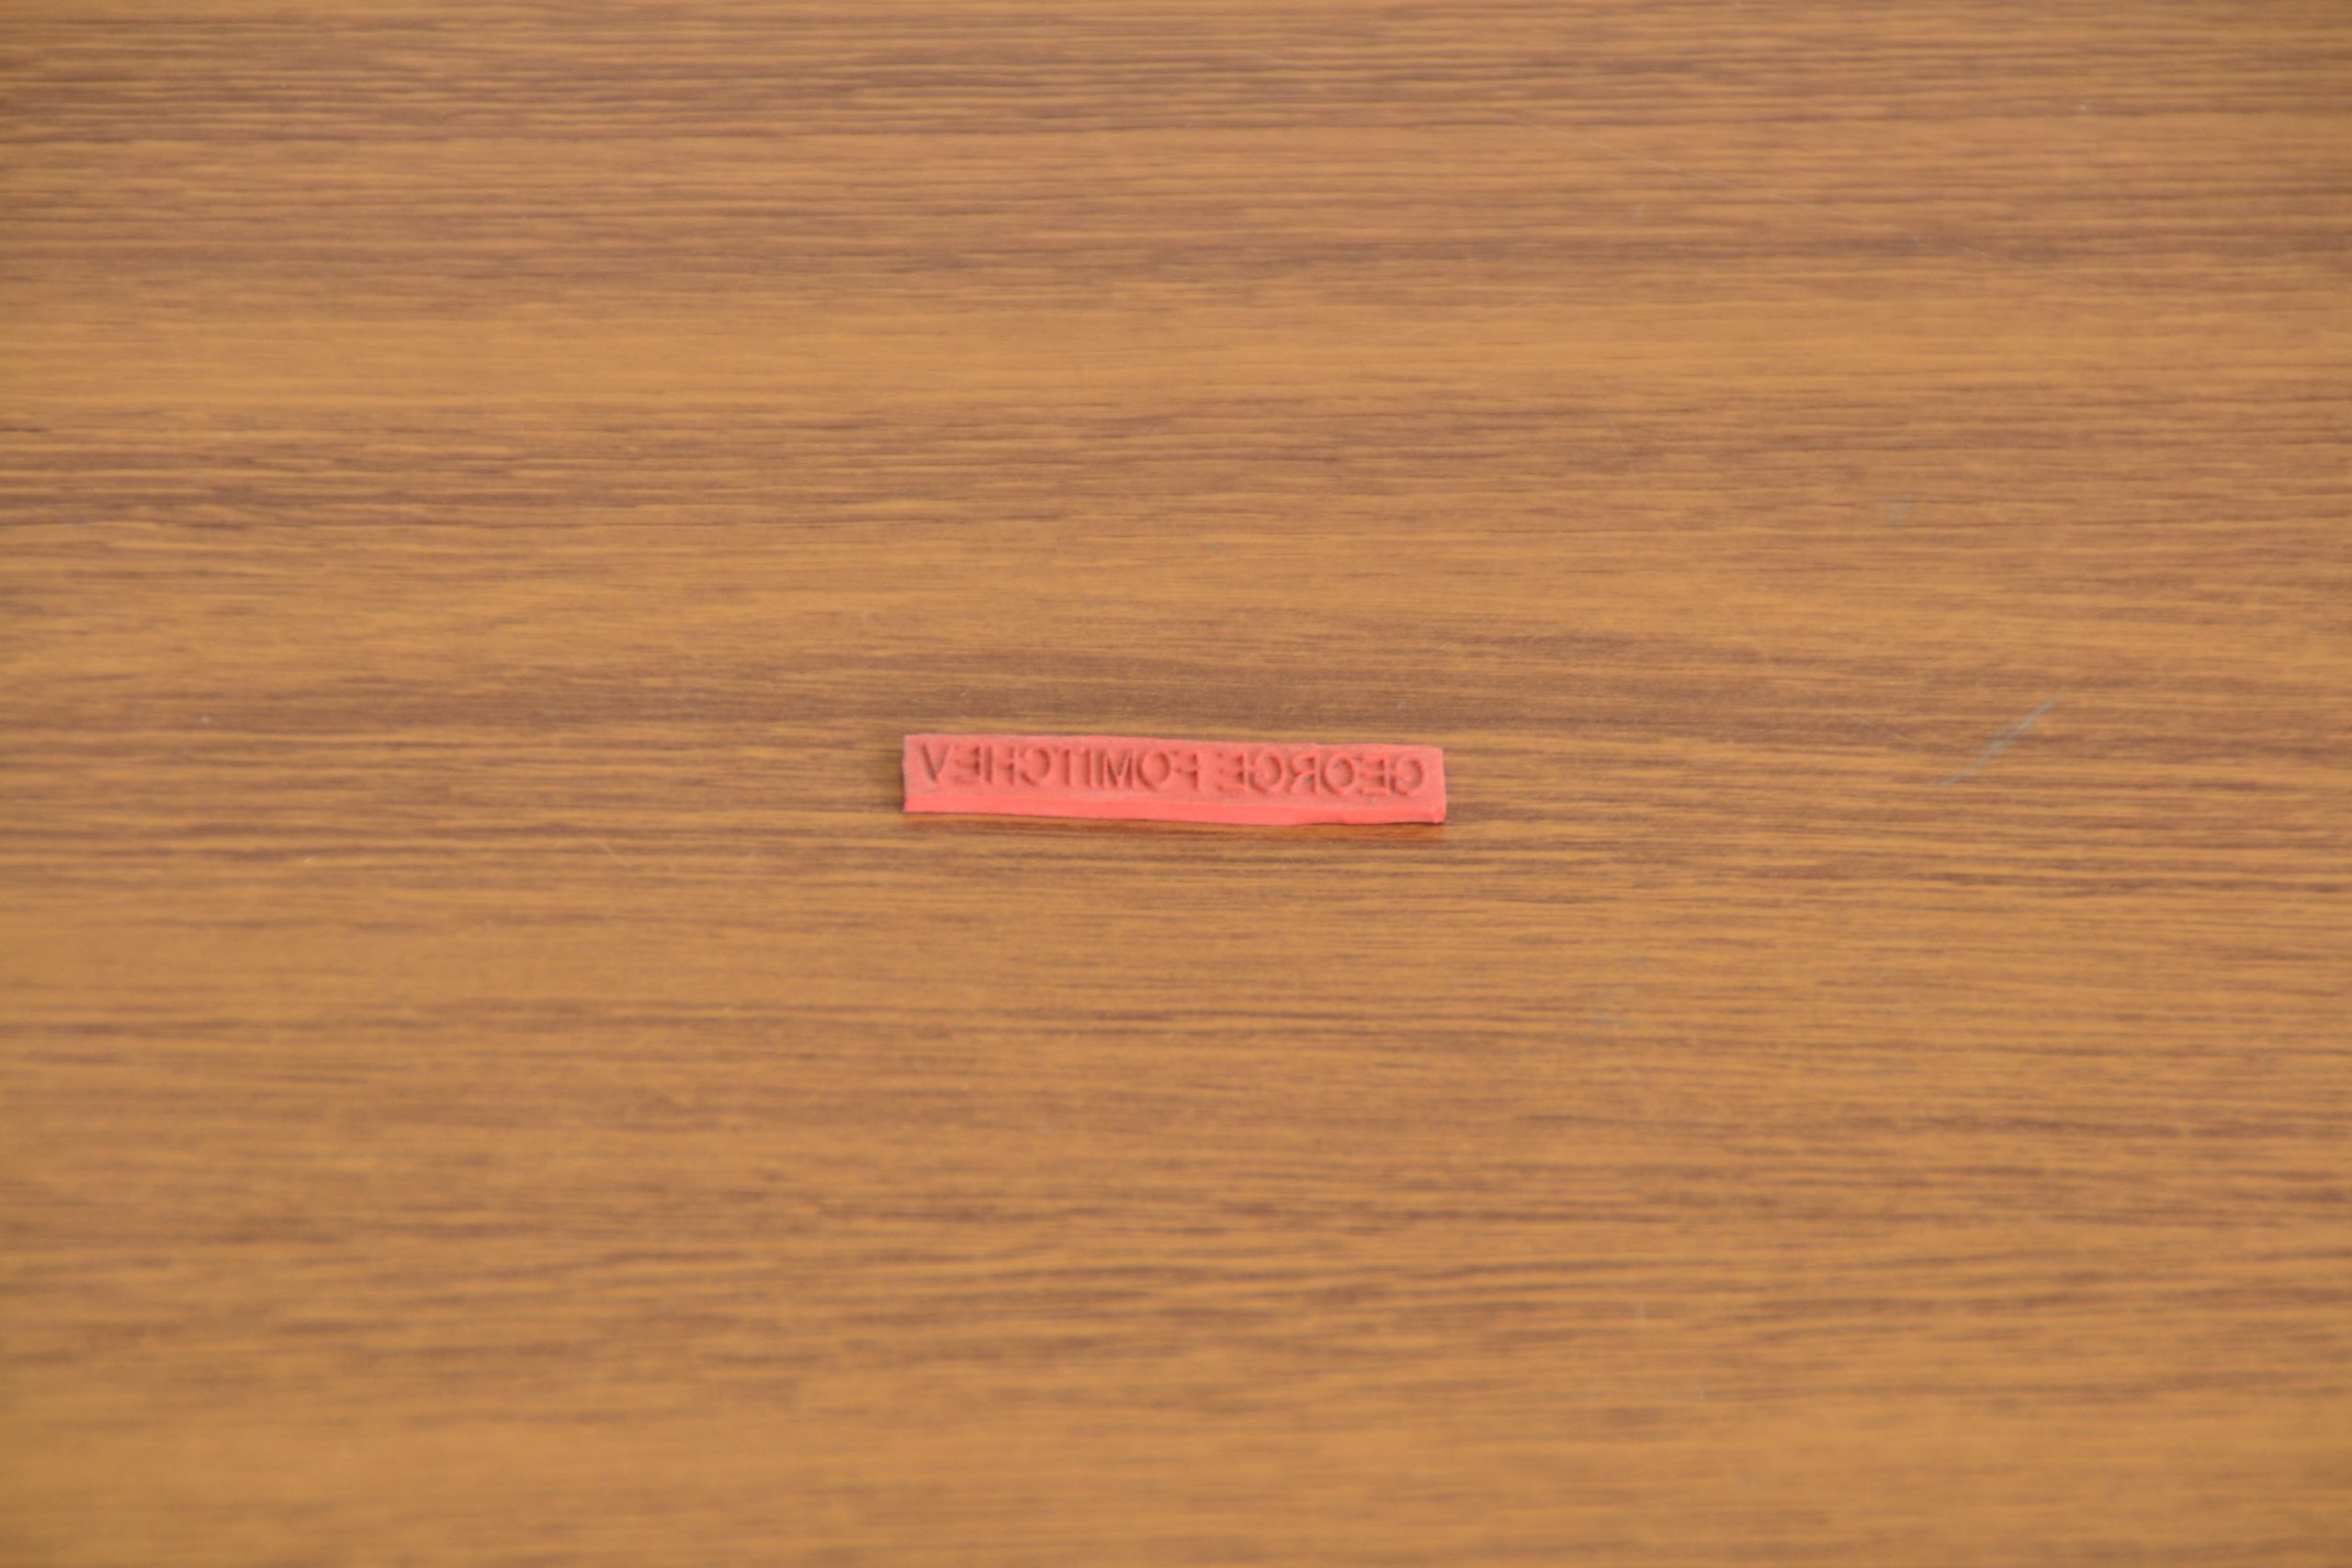
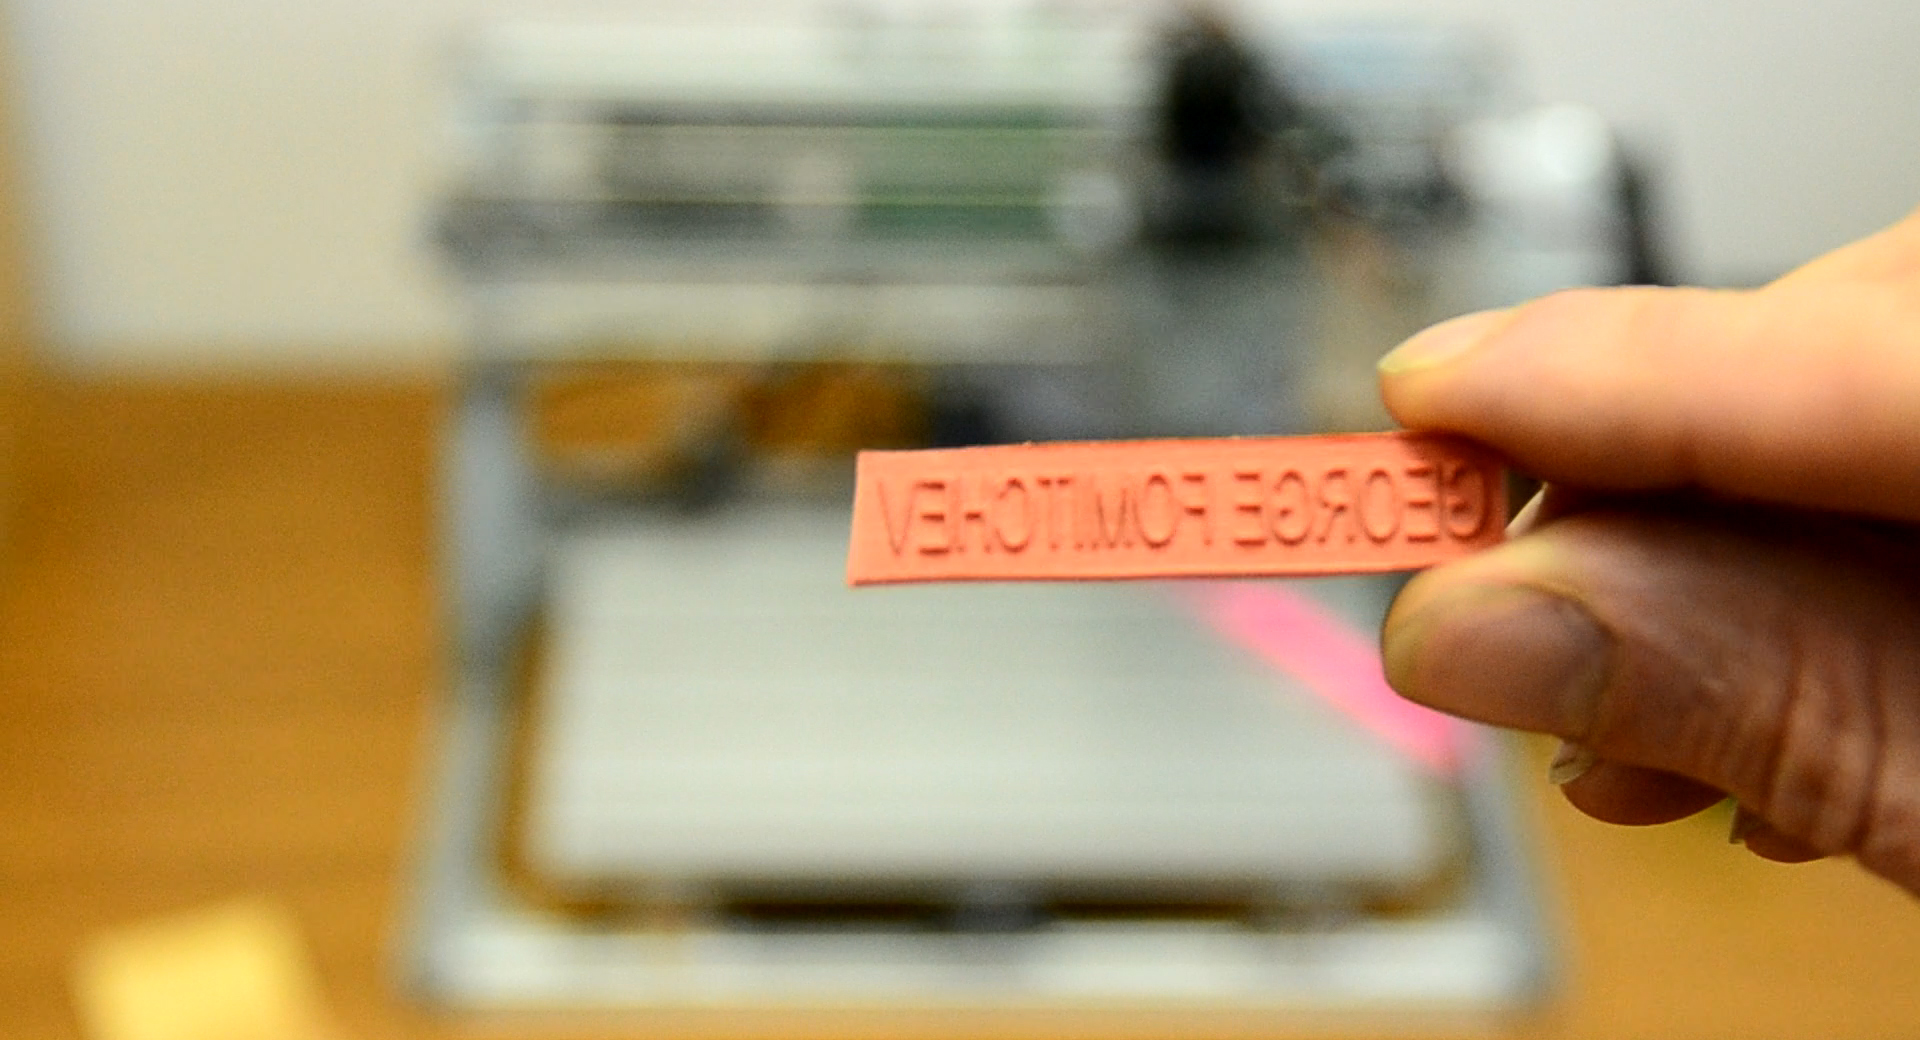
The result of the G-code performance

To get rid of the black powdery coating we wash the seal with soap and water and clean hard-to-reach places with a toothbrush. Then let it dry up and cut the stamp out with scissors.
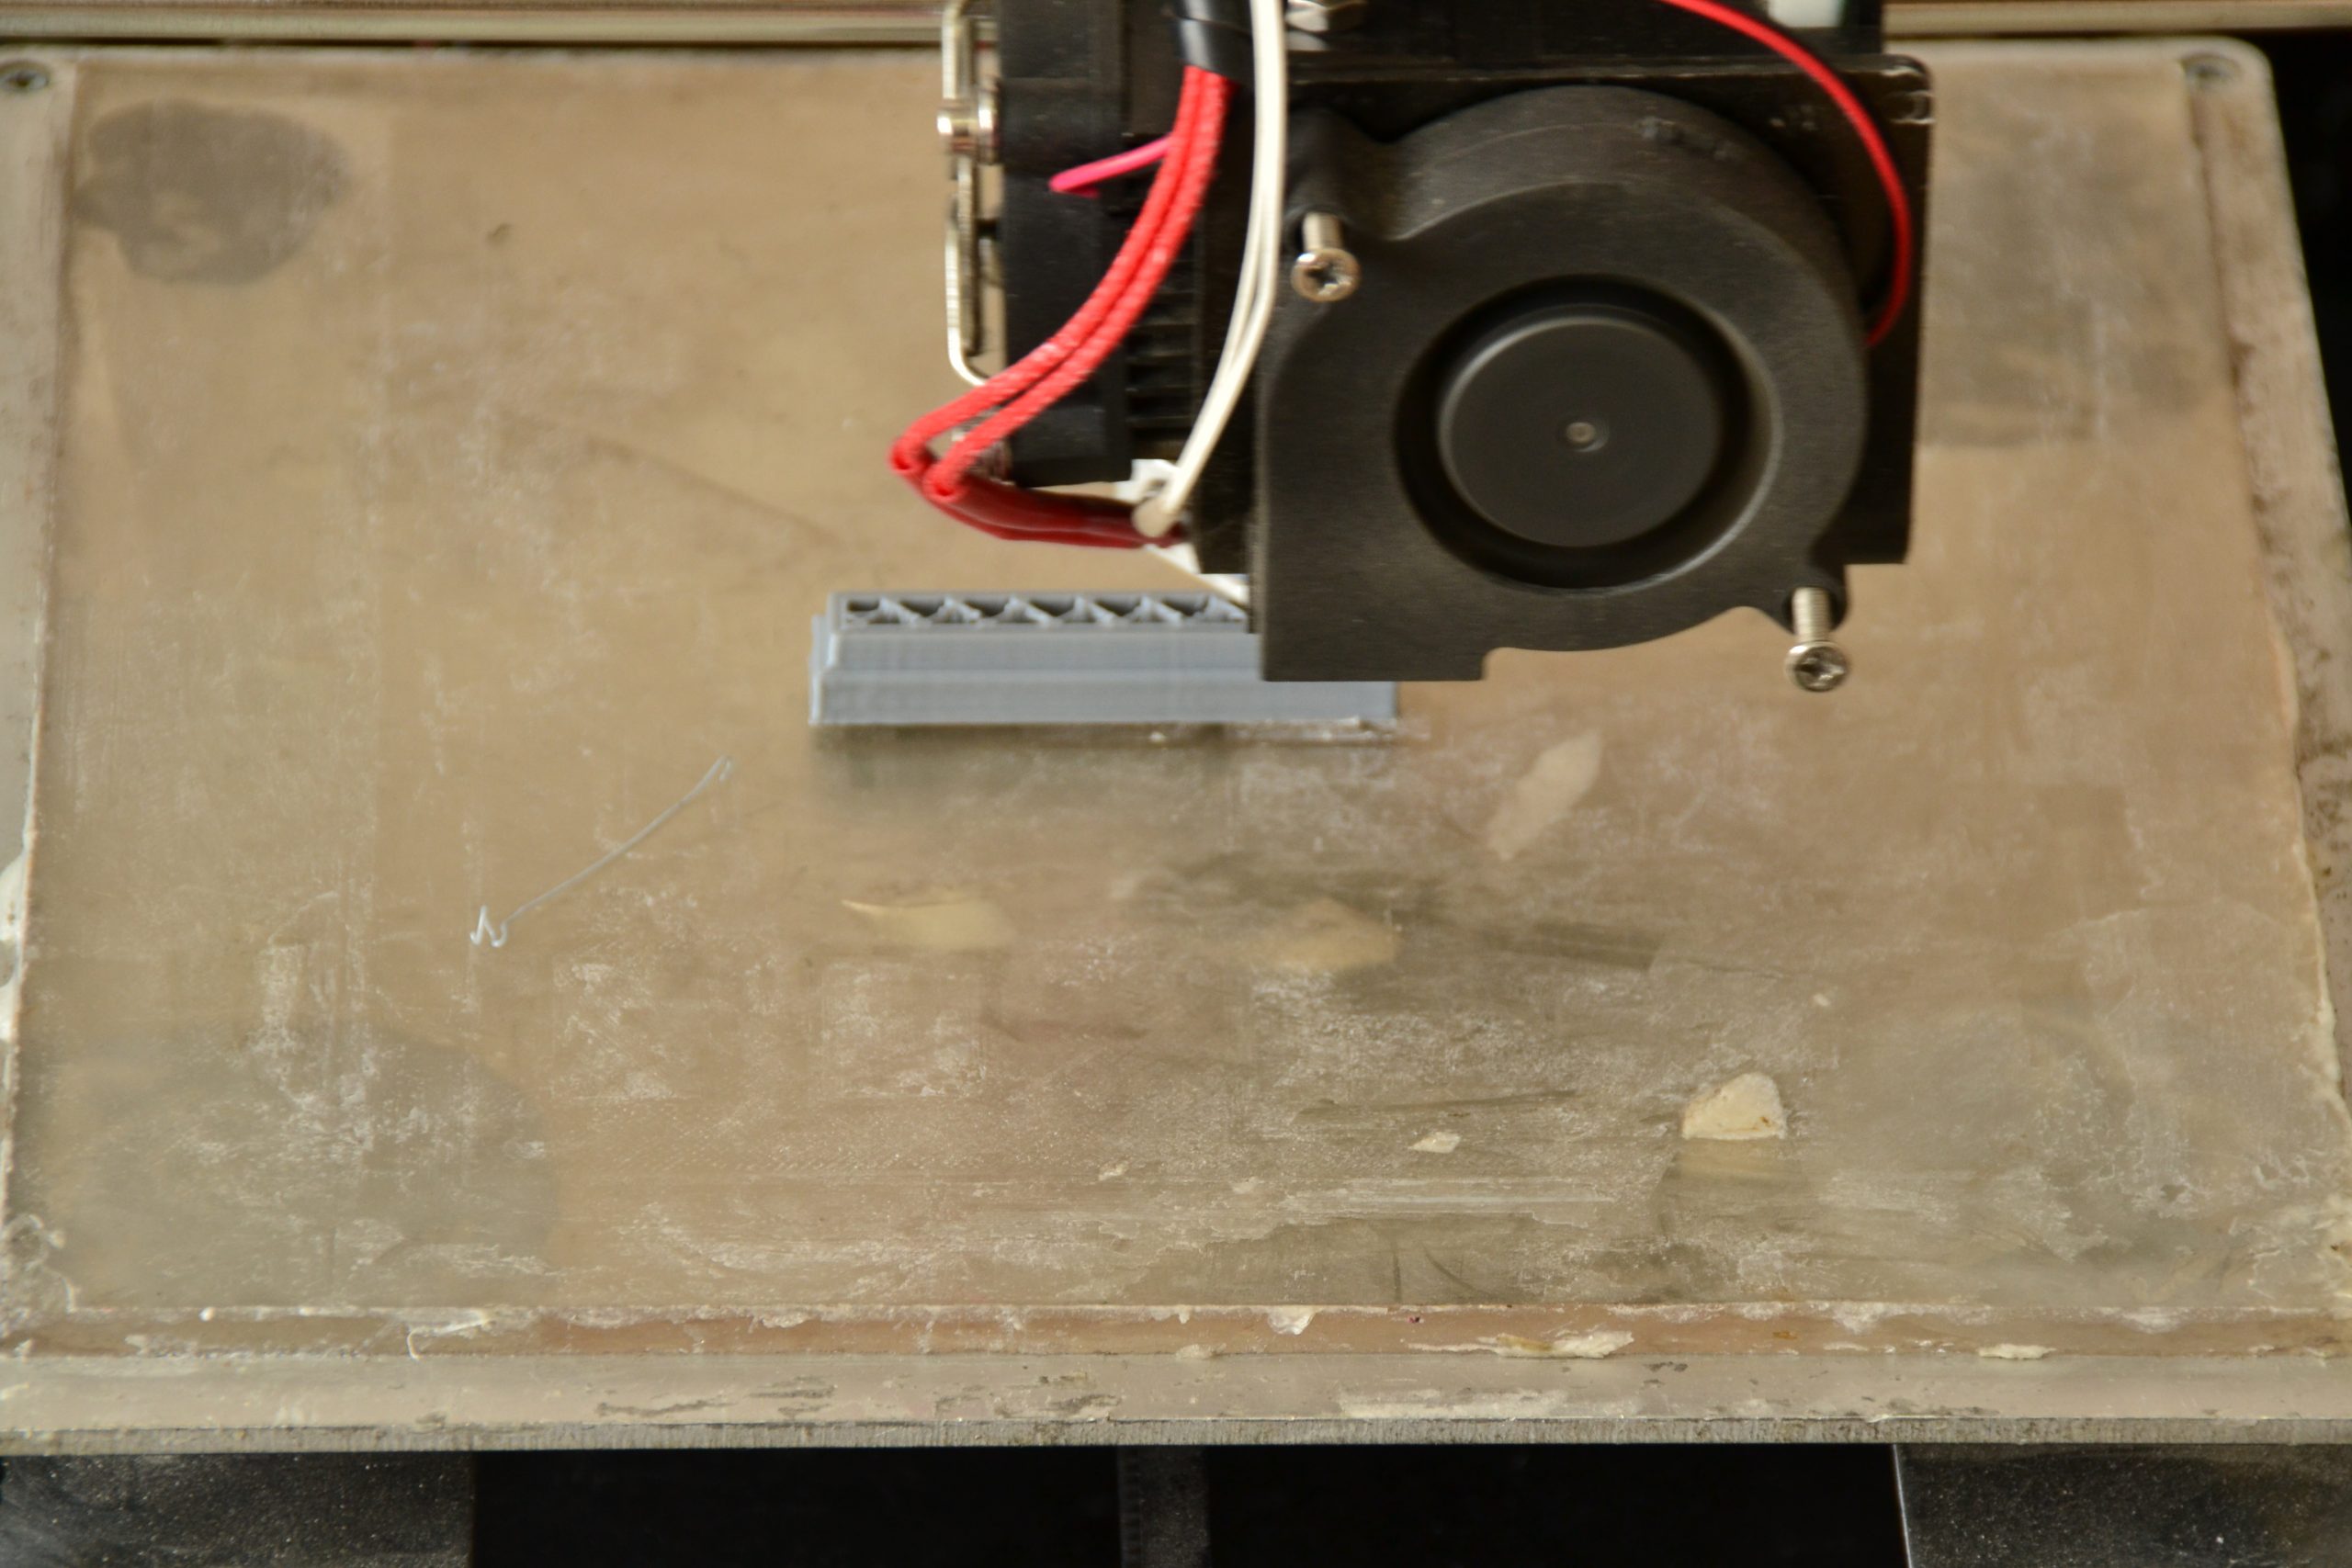
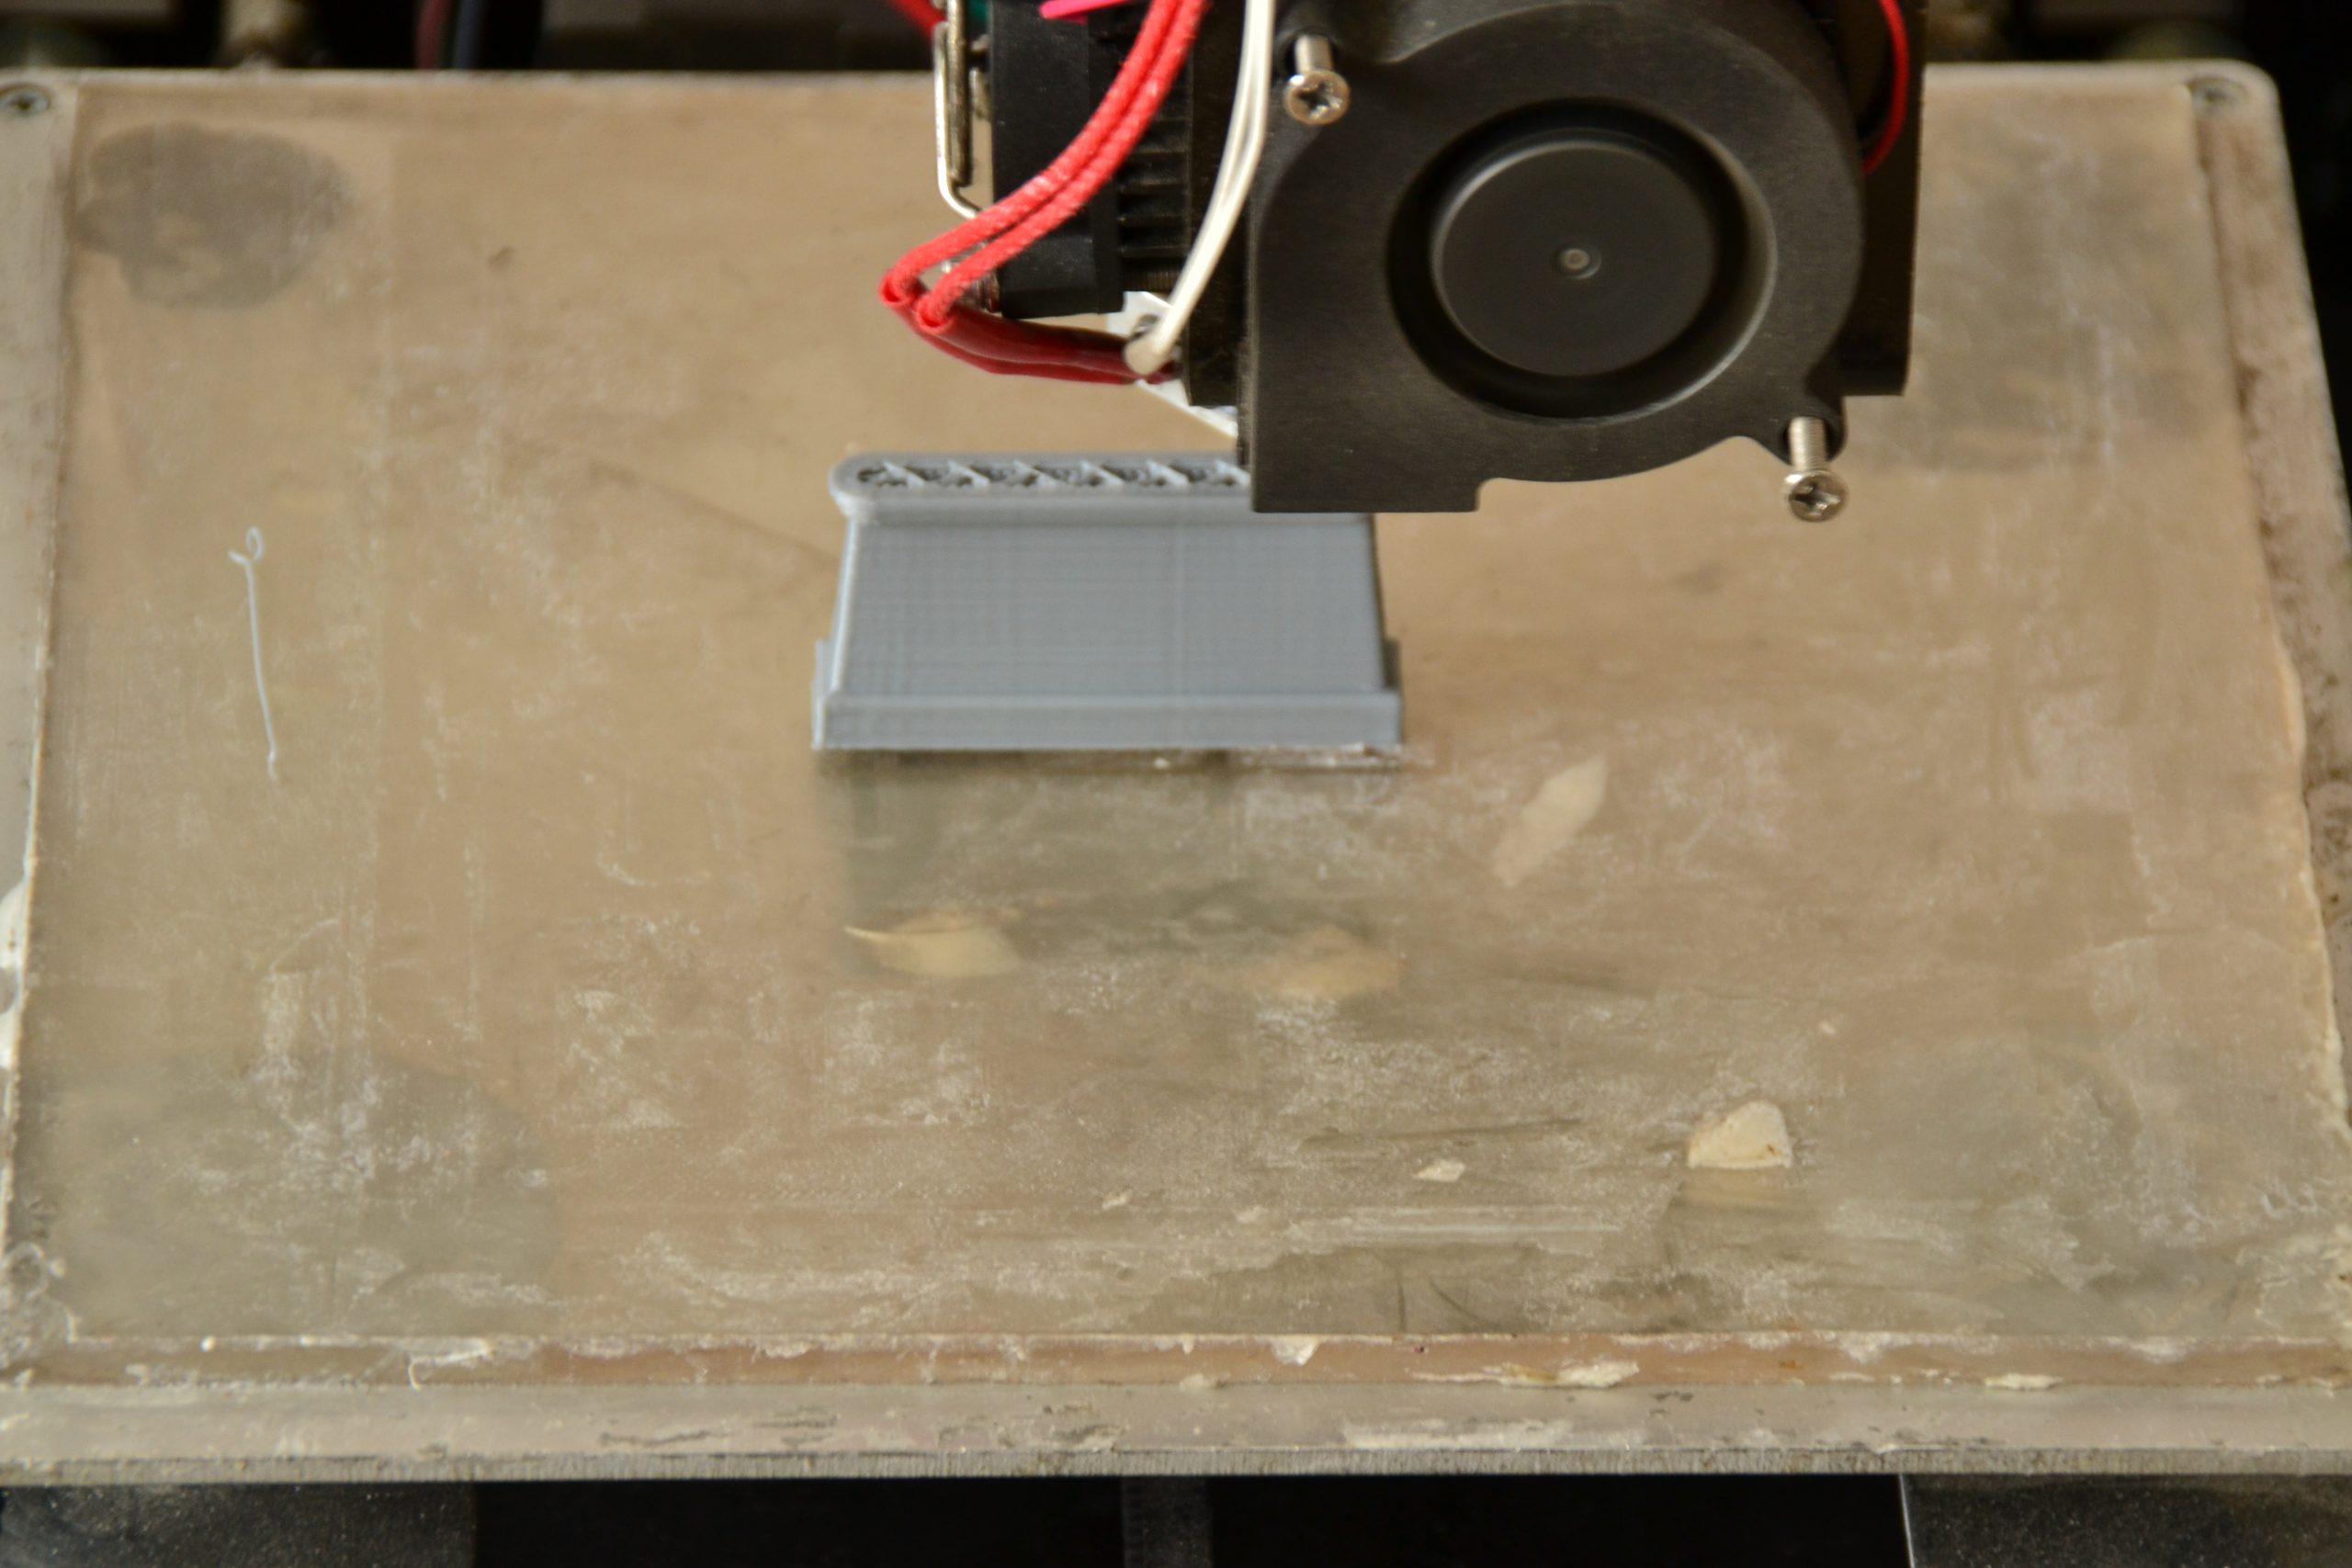
How to make a handle
The size of the handle – 50x10x30mm.
We make a handle draft.

Then on the basis, if the draft we make a 3D-model as an STL-file and 3D-print it.
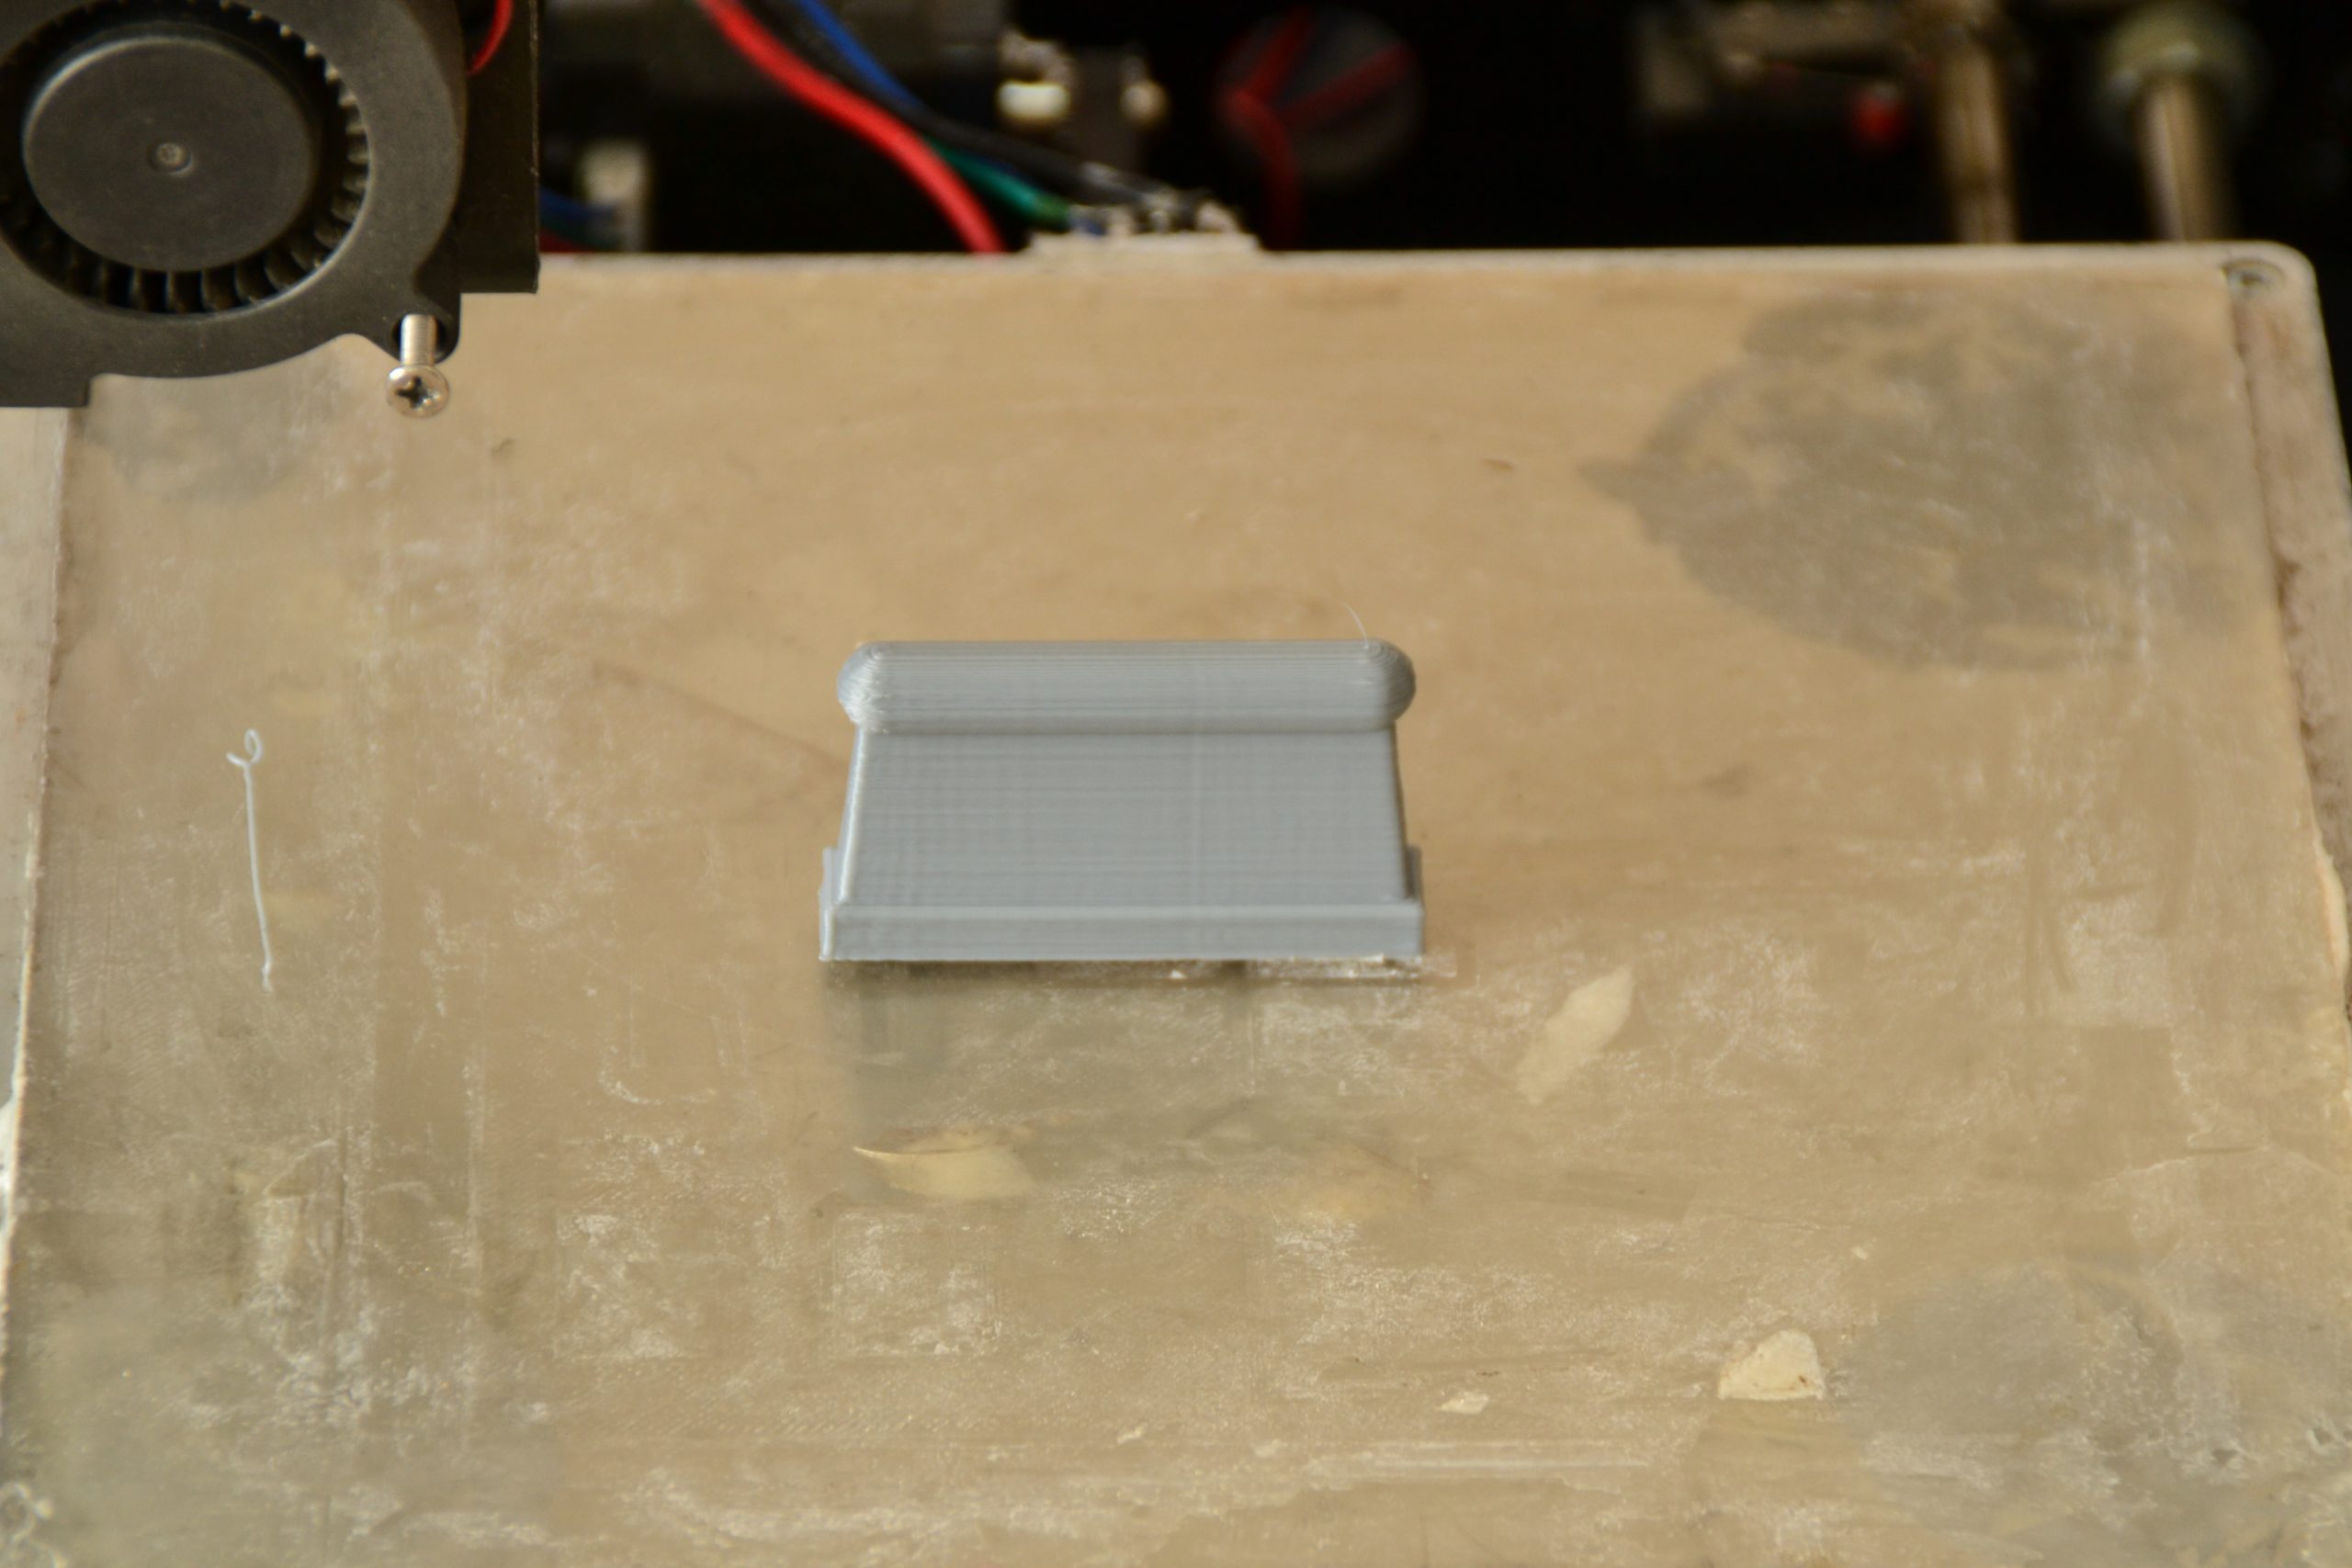
Link to the STL-file (download ZIP stamp_equip):
Stamp_equip.stl
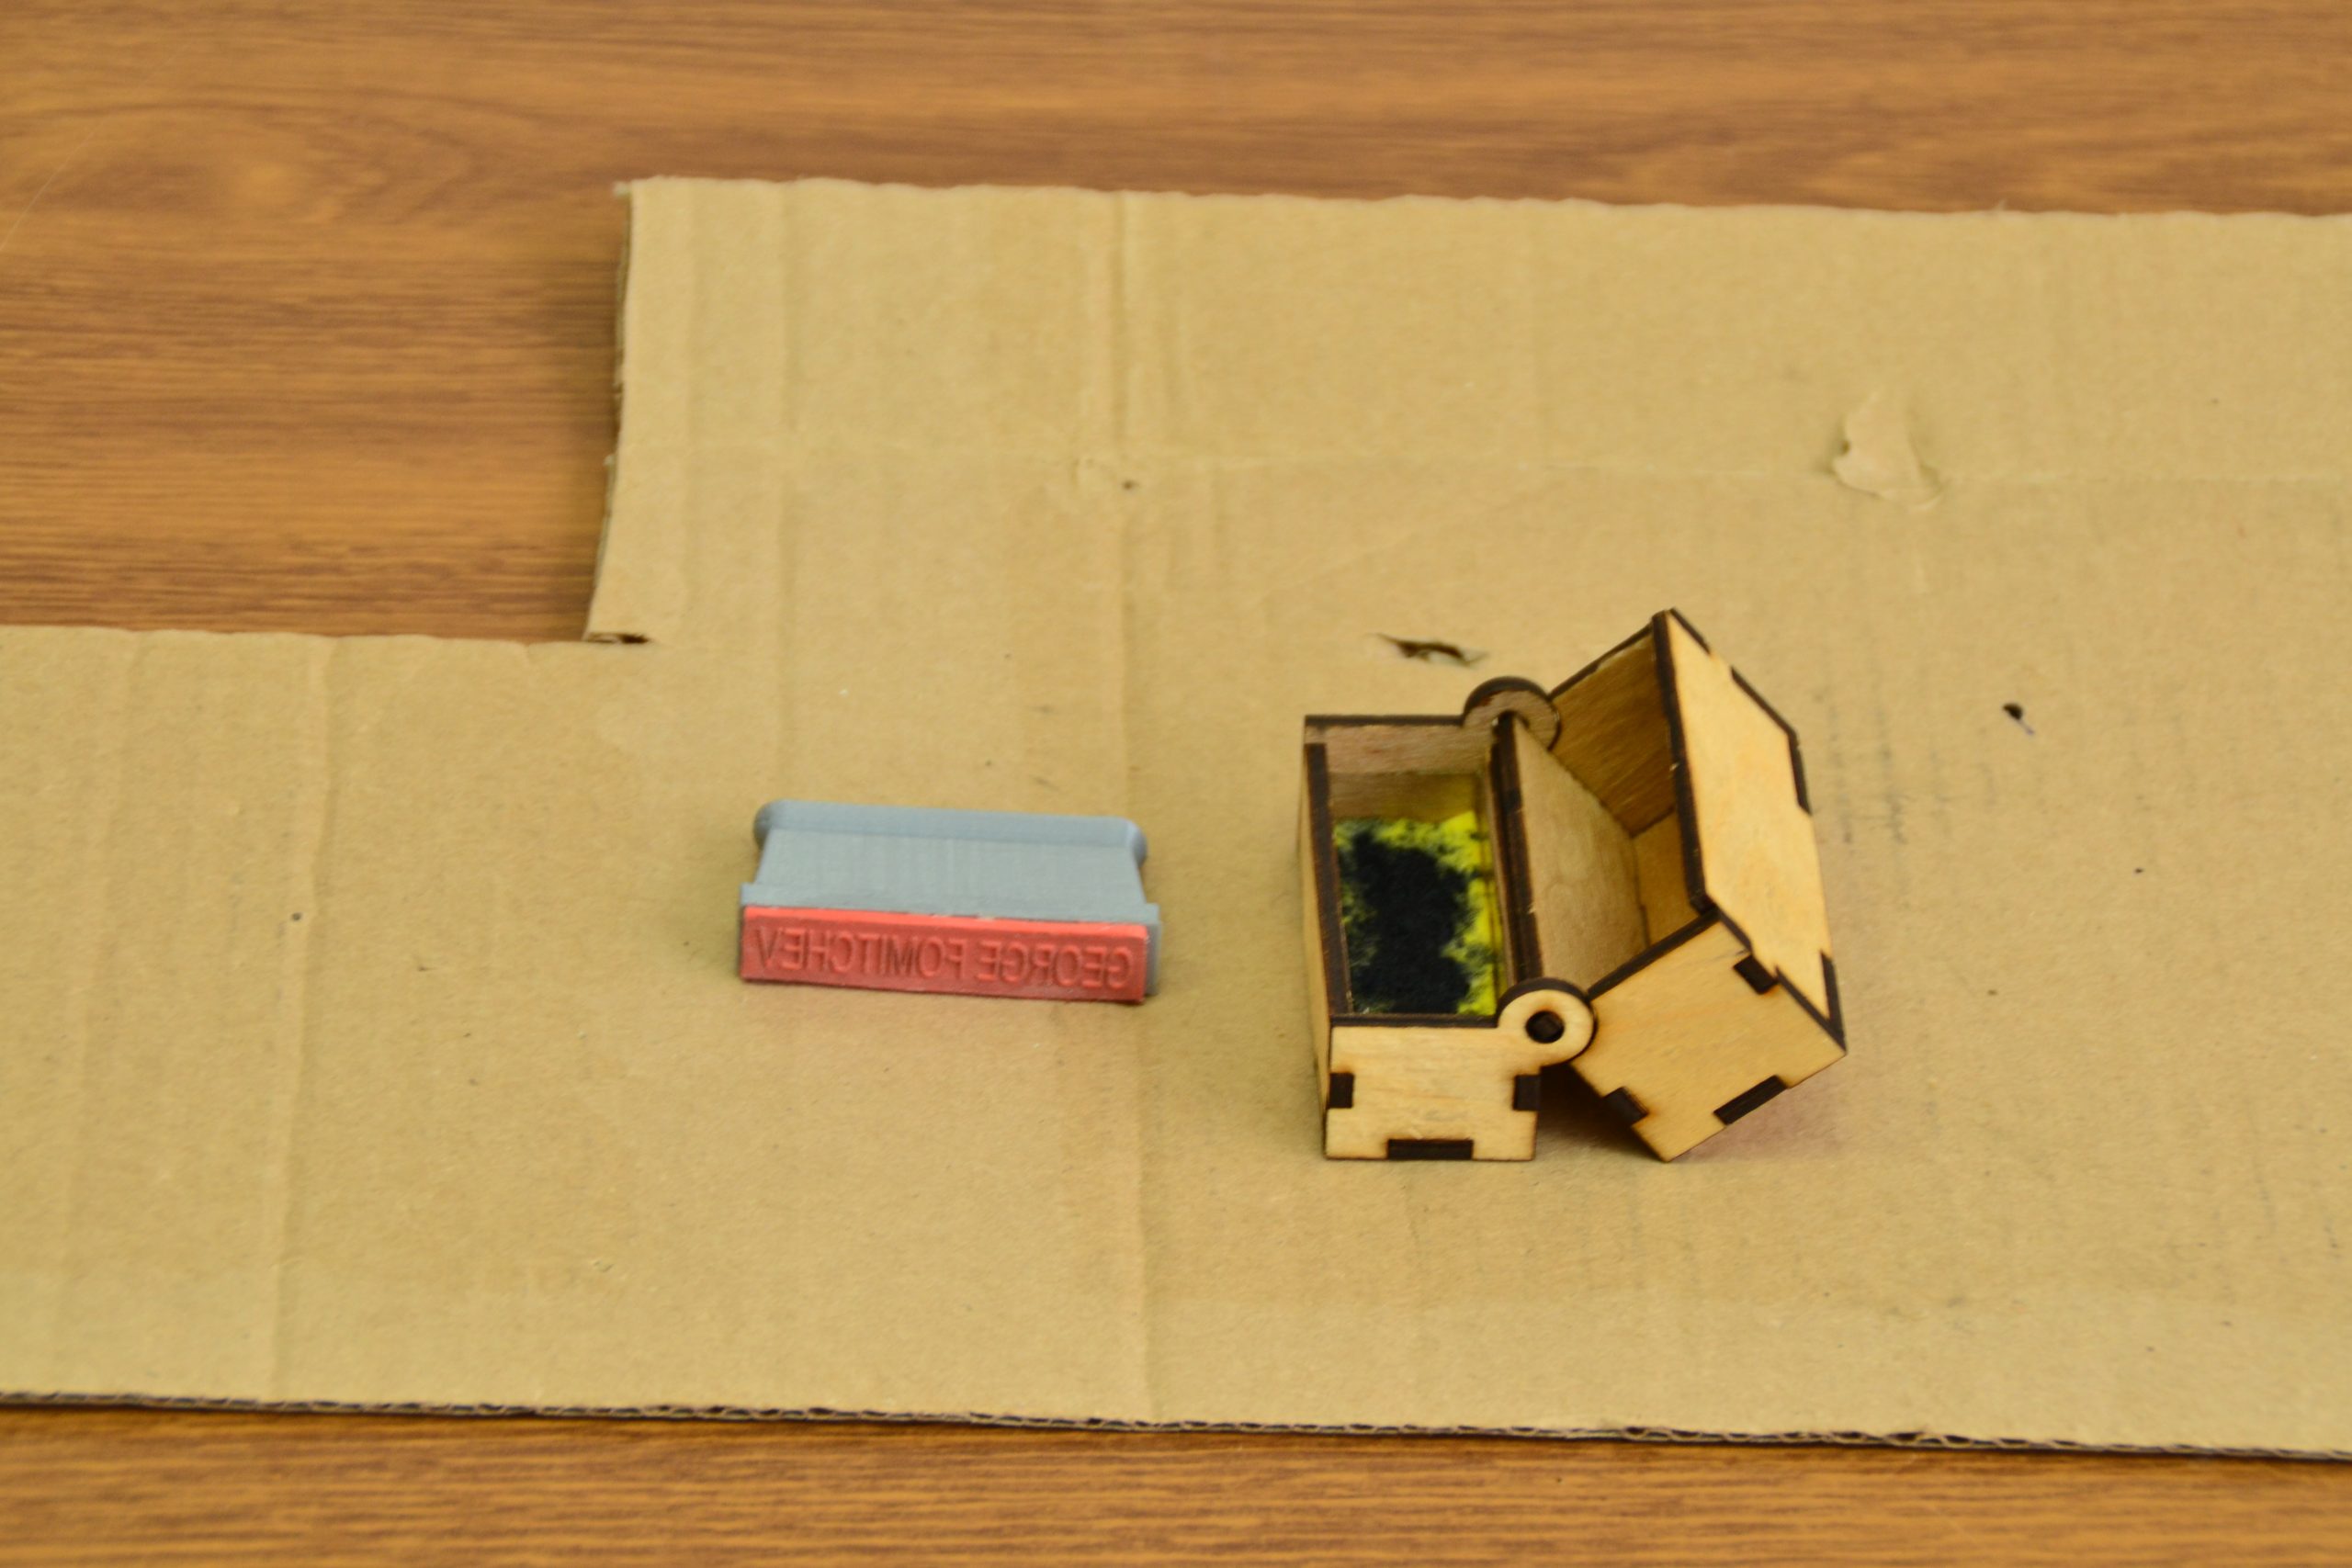
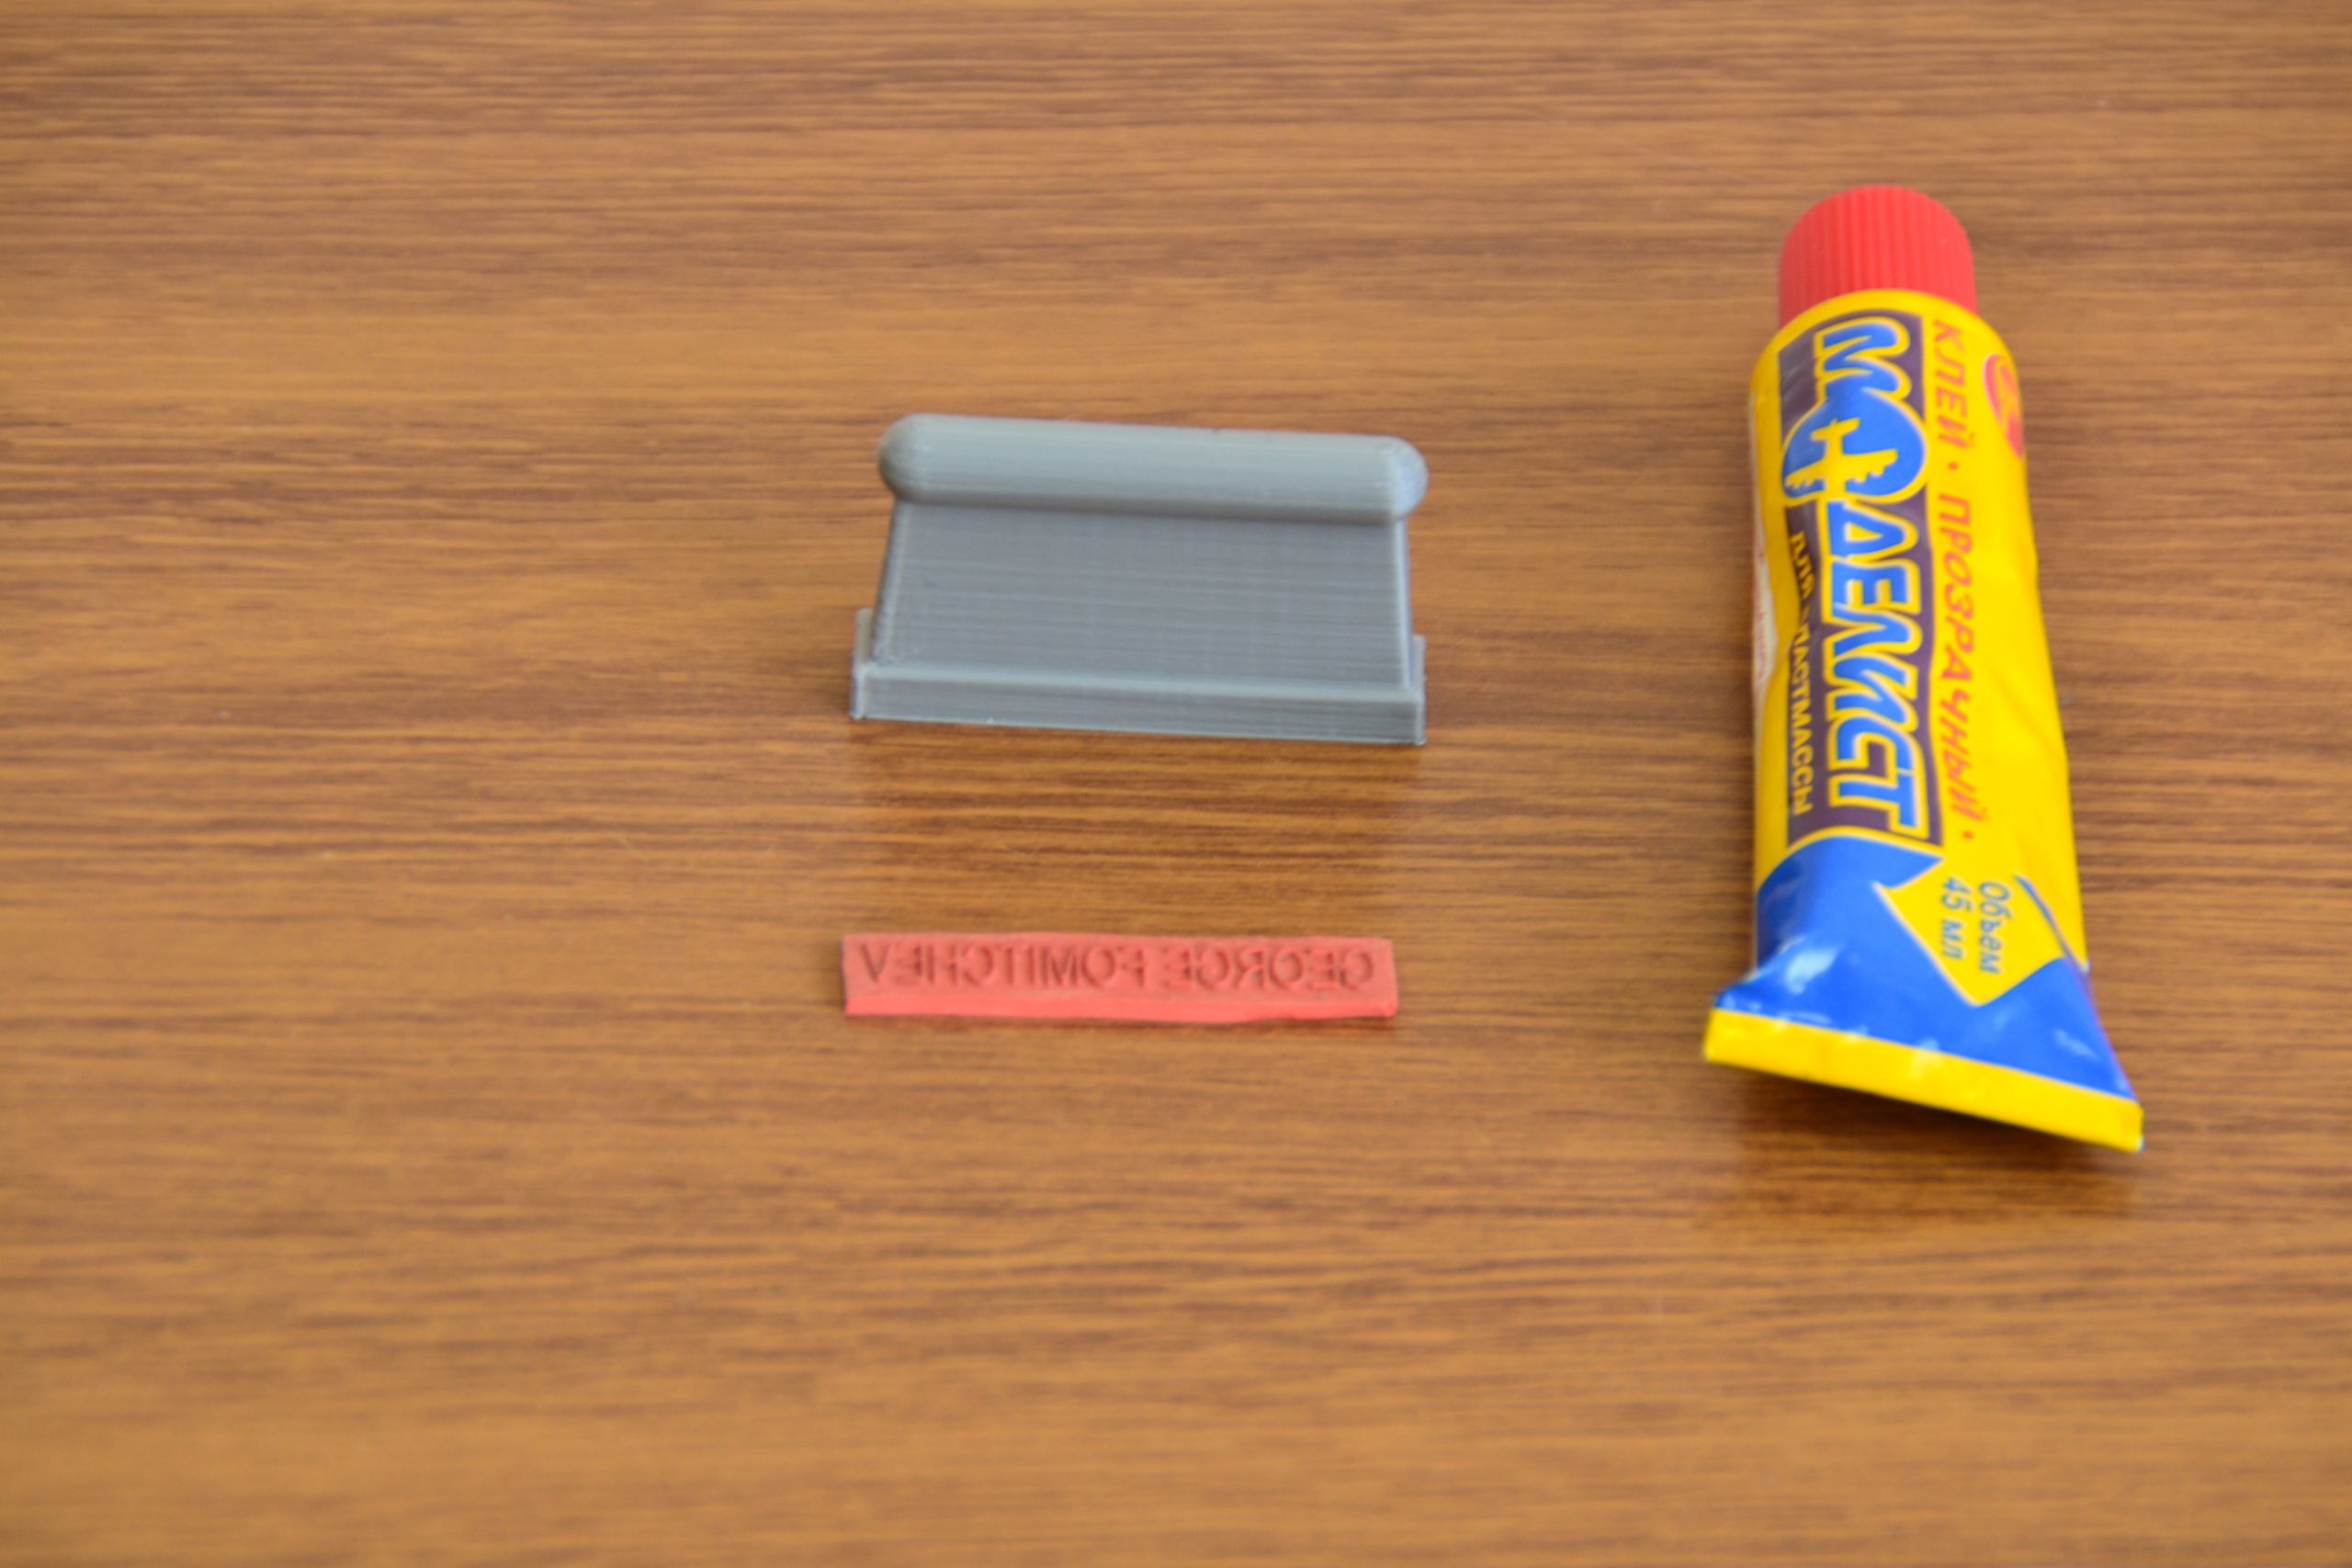
Assembling of the stamp
Now, when the stamp and its handle are ready we need to glue them together. Any all-purpose adhesive able to glue together rubber and plastic will do. For a better result we pinch it in a carpenter vice (the necessary time to let the adhesive dry up is indicated in the adhesive instruction).

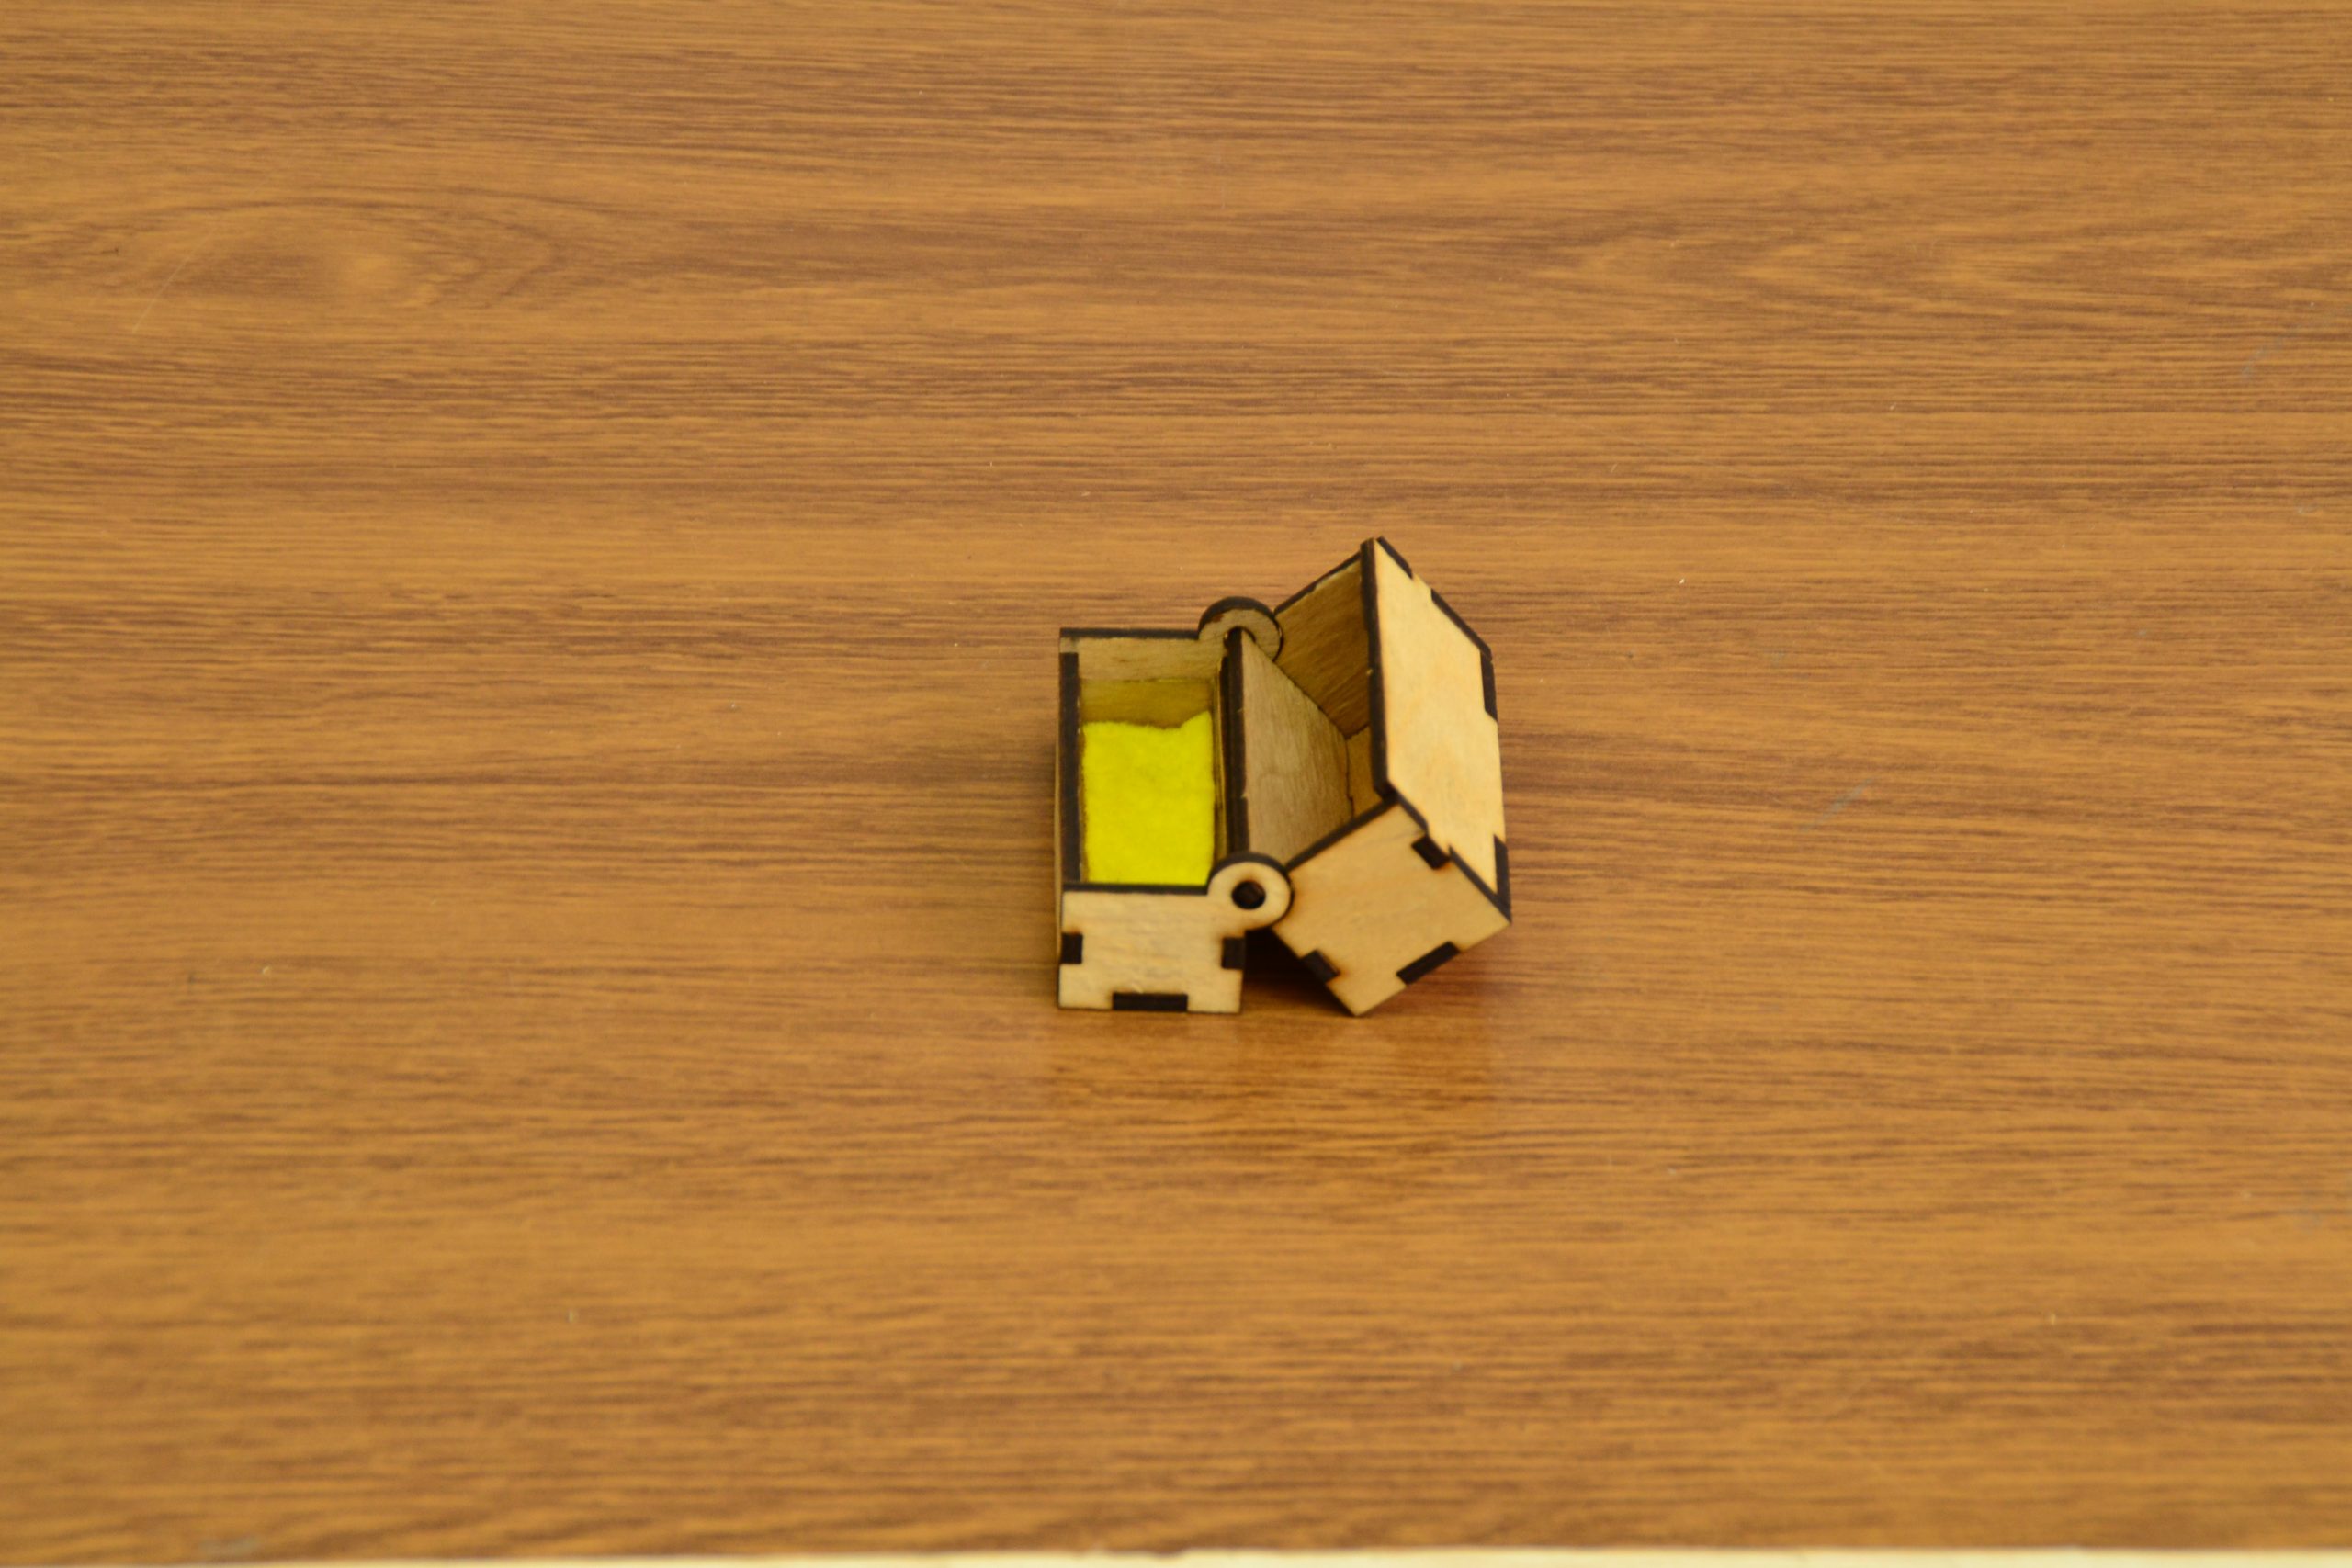
How to make a stamp box
We” make a stamp box out of plywood (birch), 3mm thick.

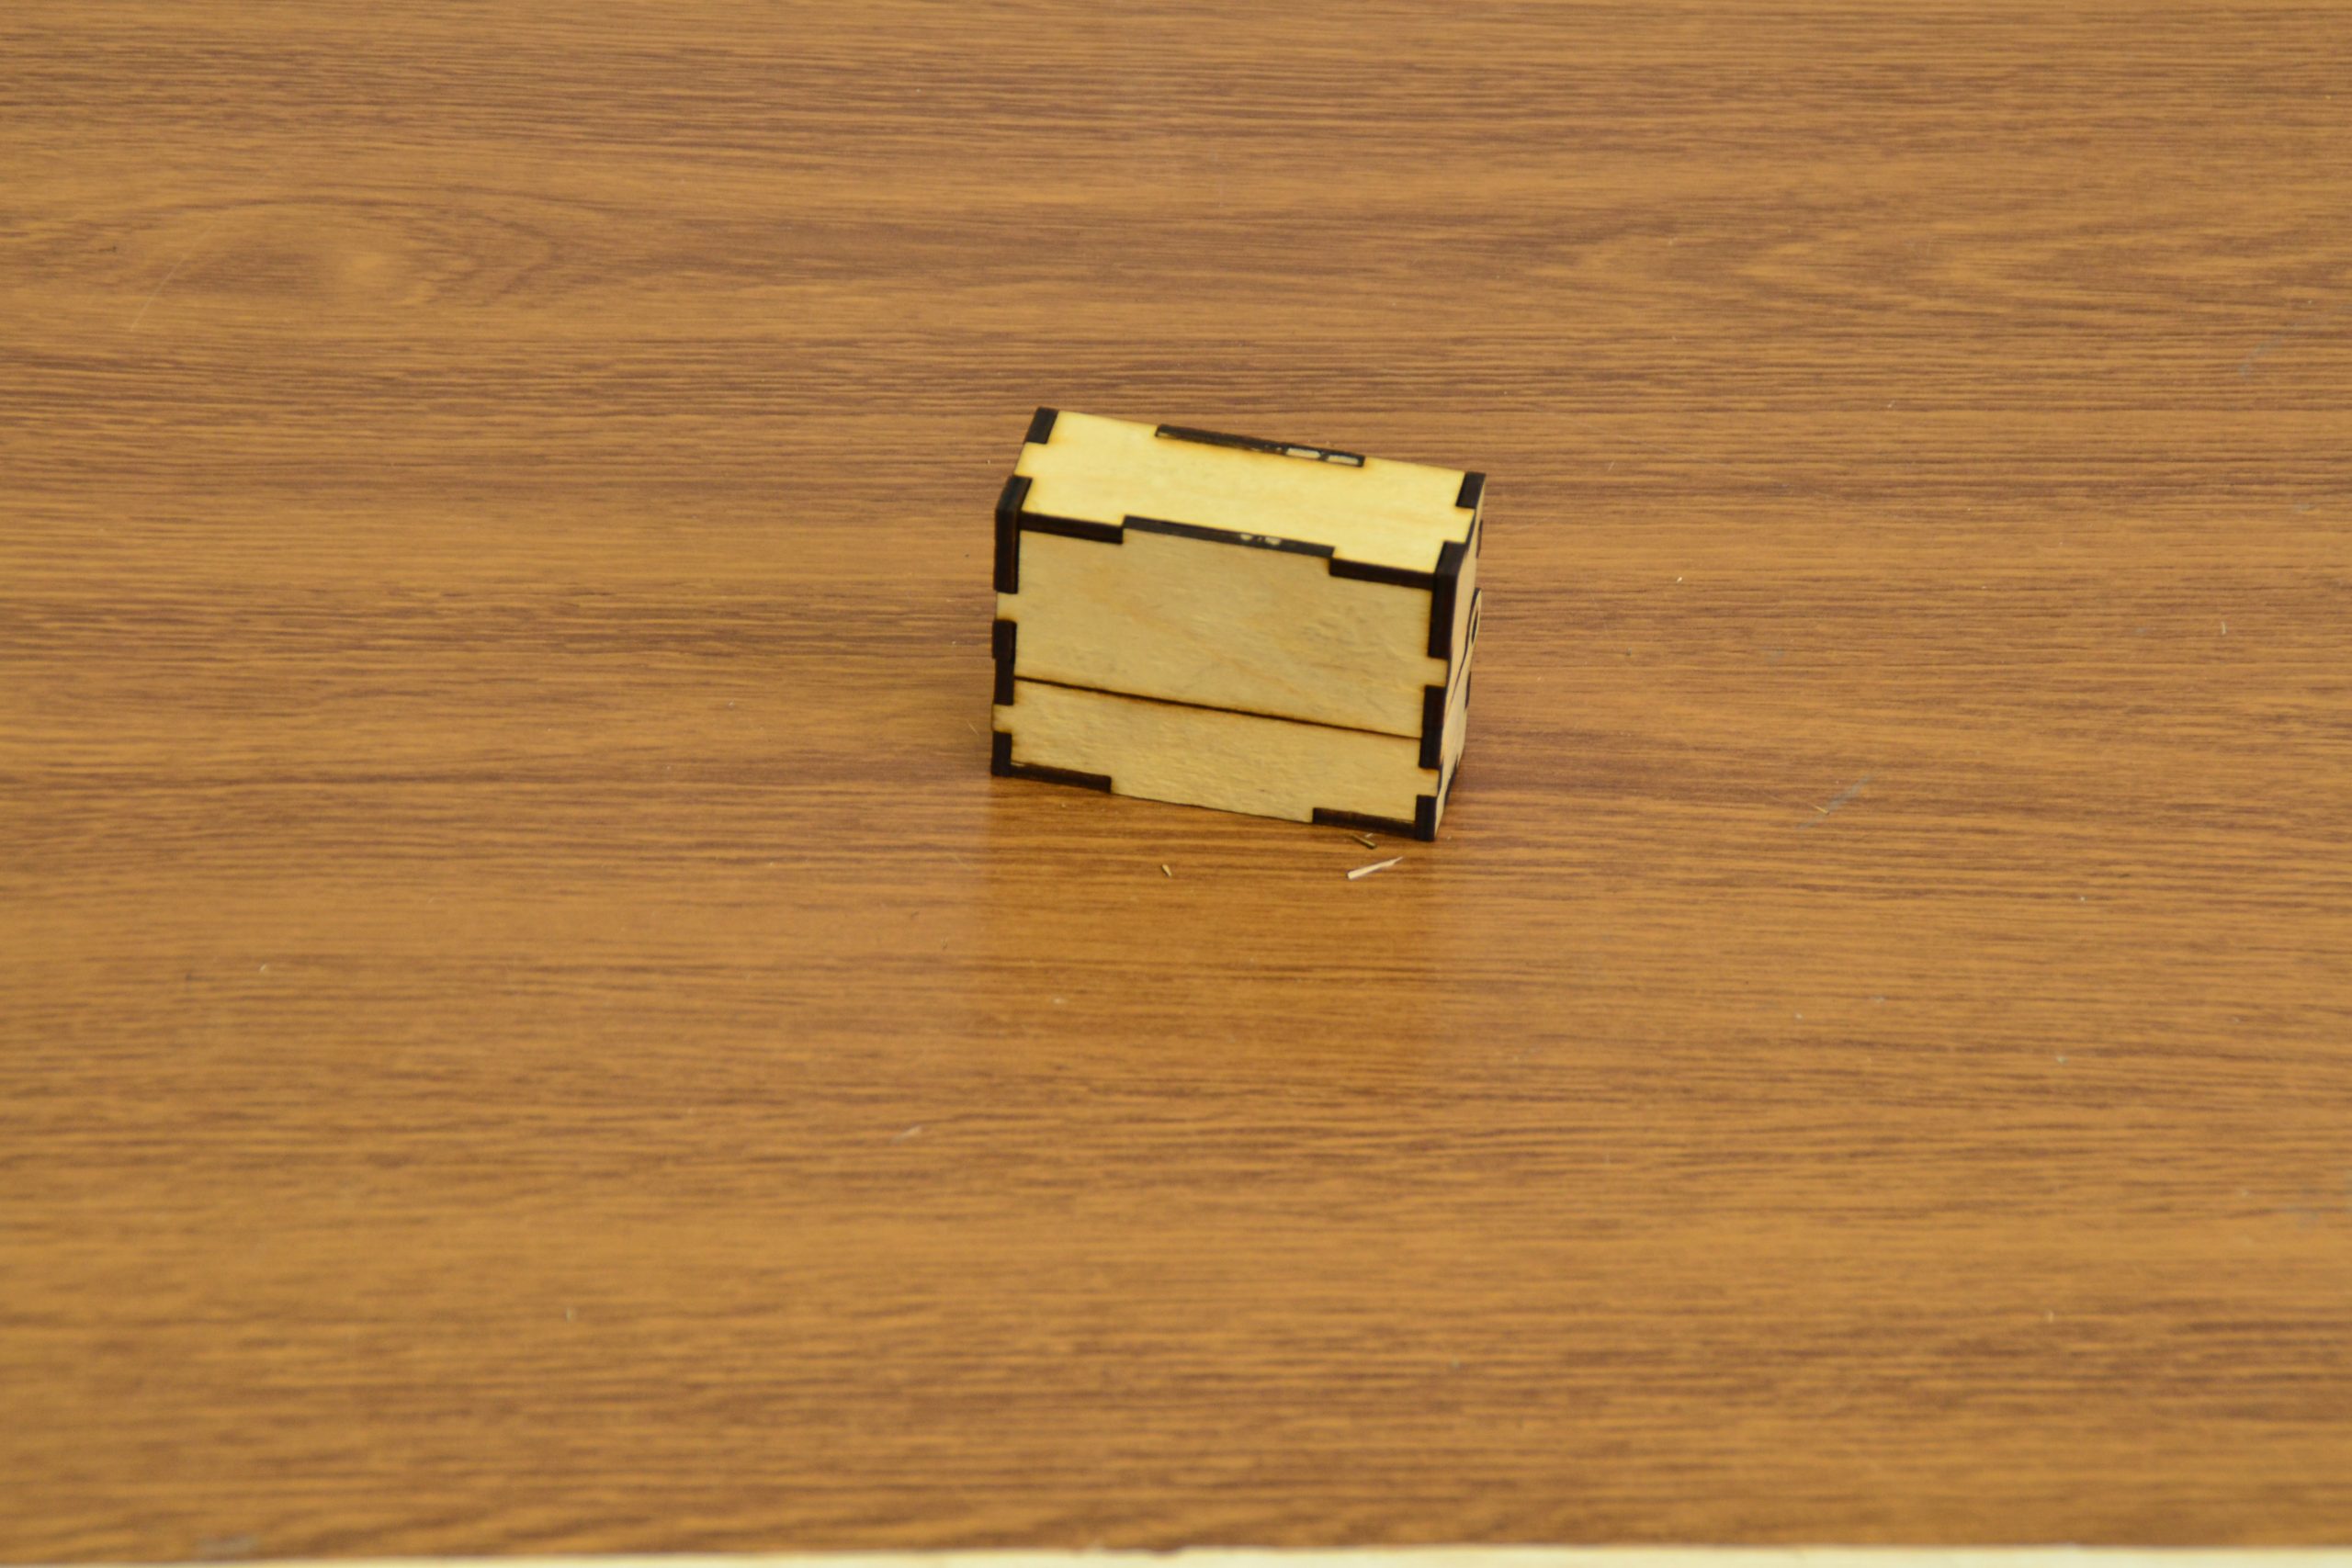
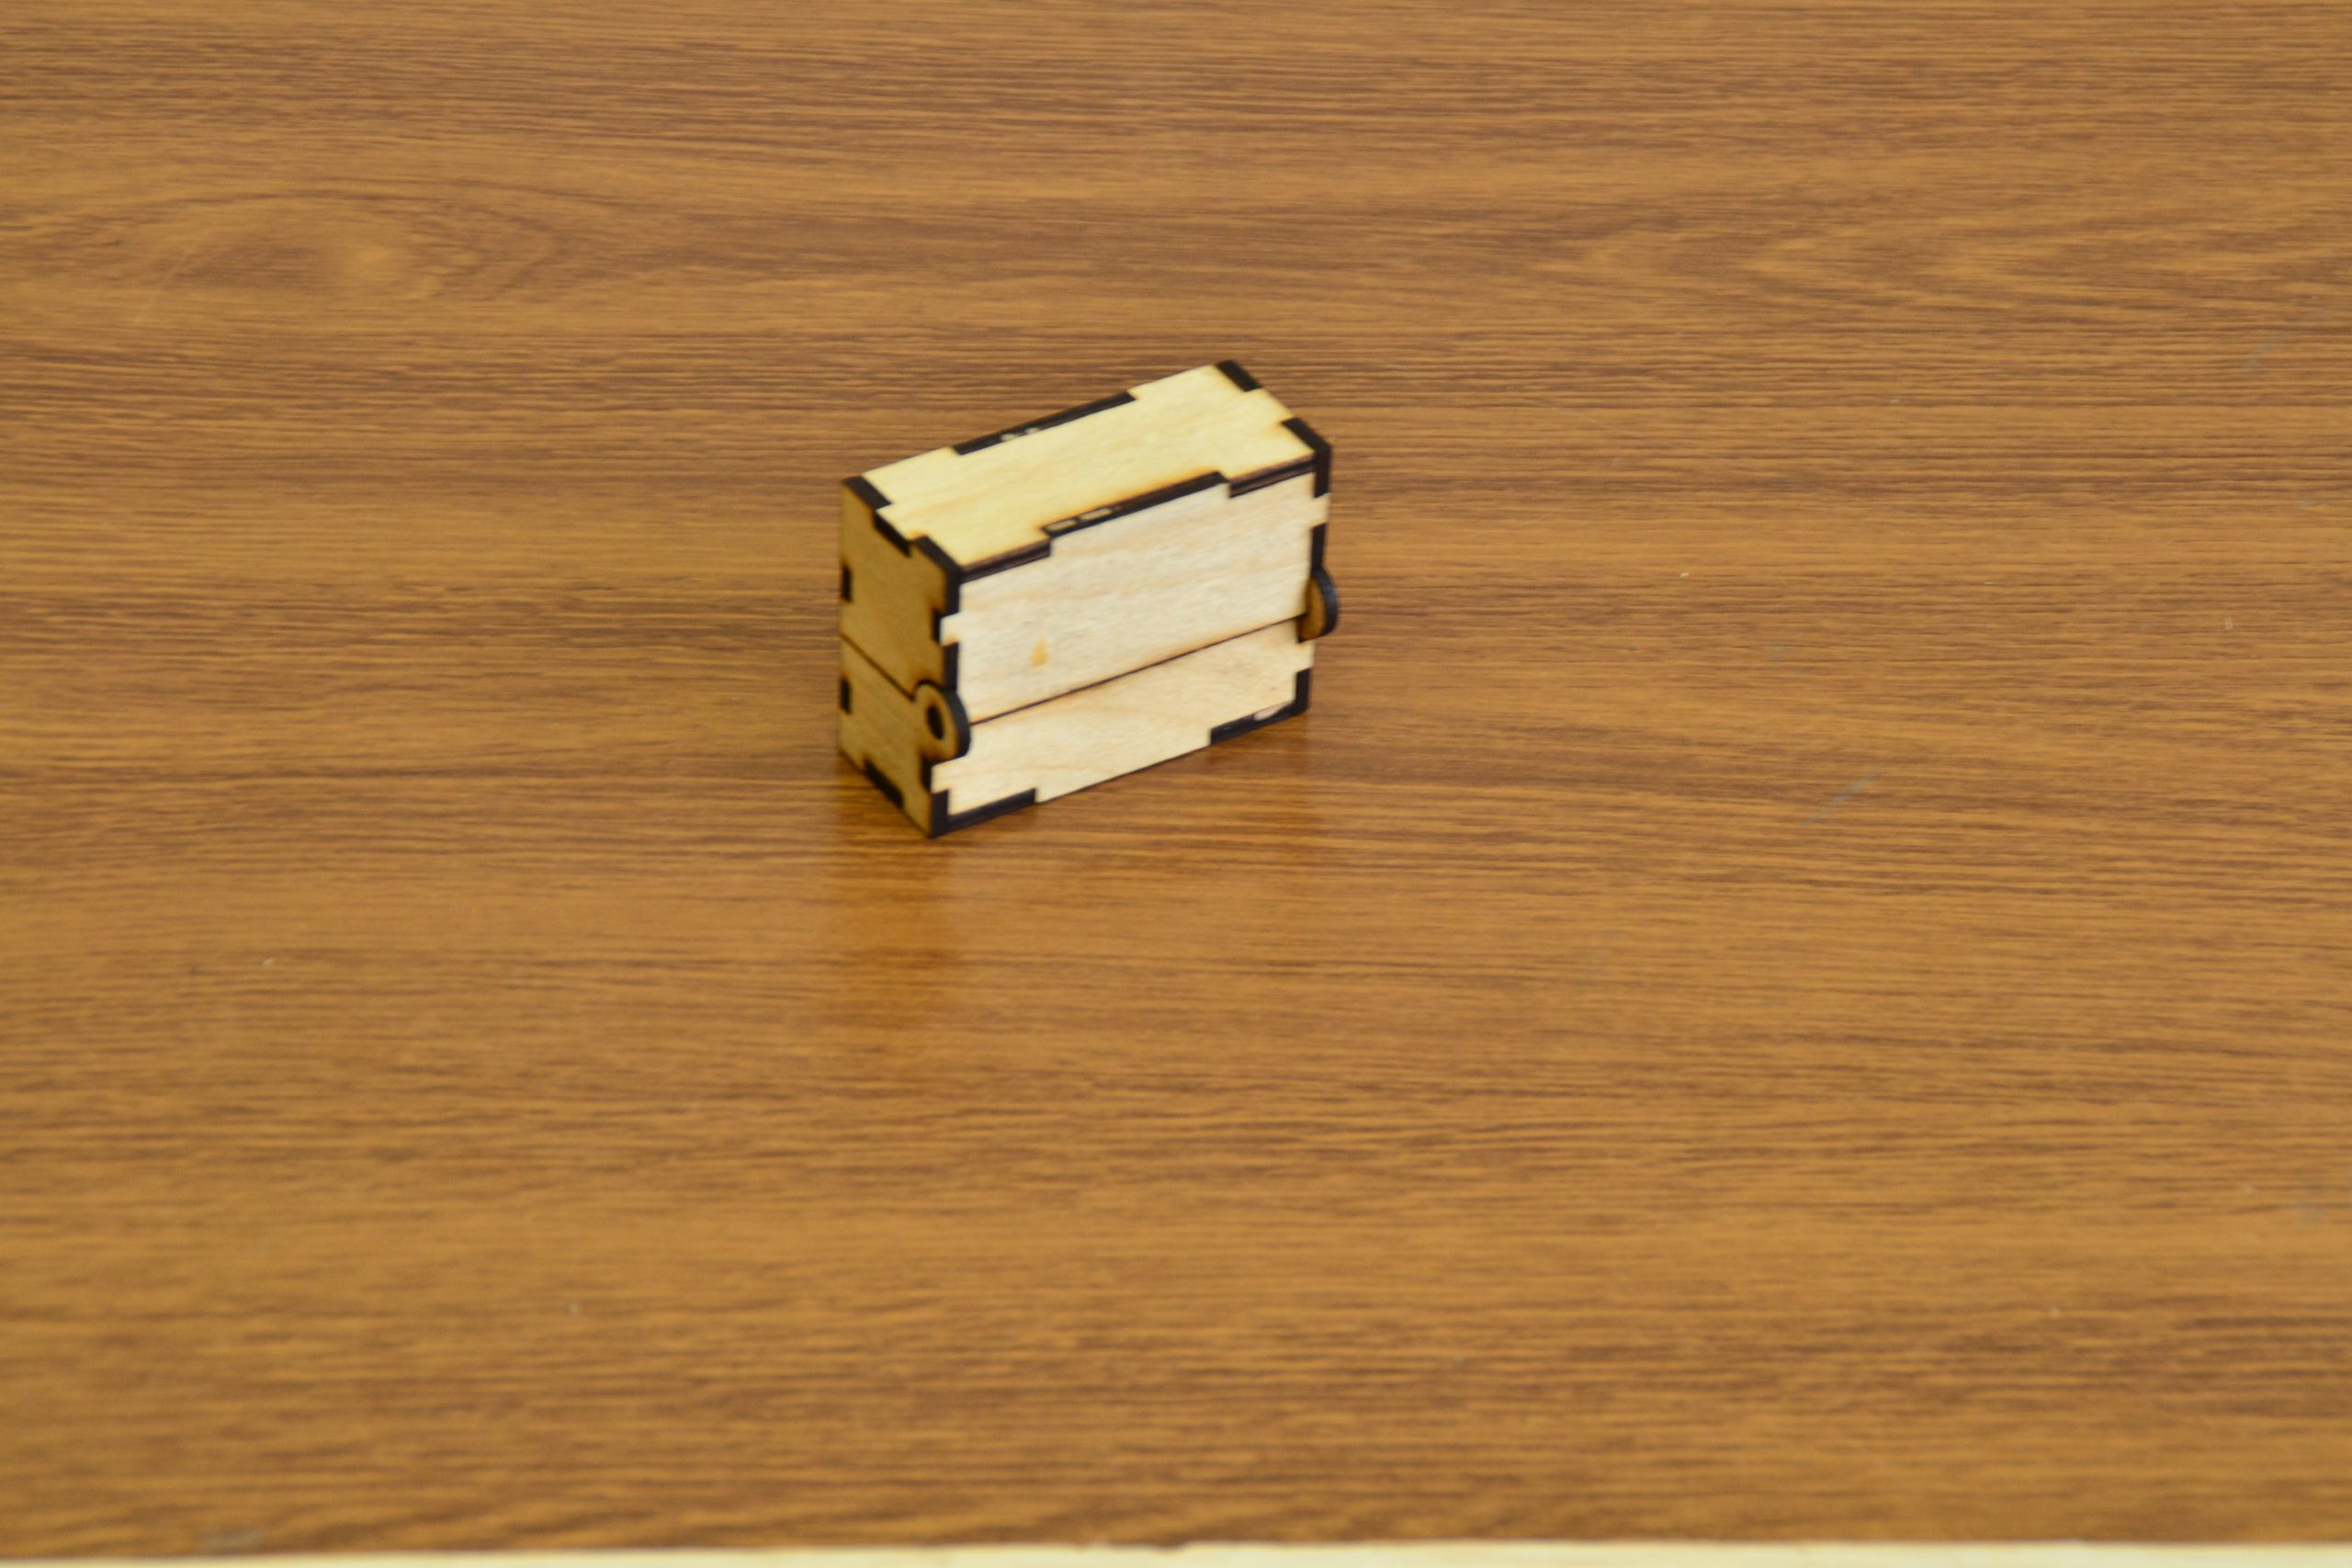
As the stamp size is rather small, the box will be also small but wide to be well-balanced and easy to open and take out the stamp. The mating force ensured by mail-female joints will keep the box closed.
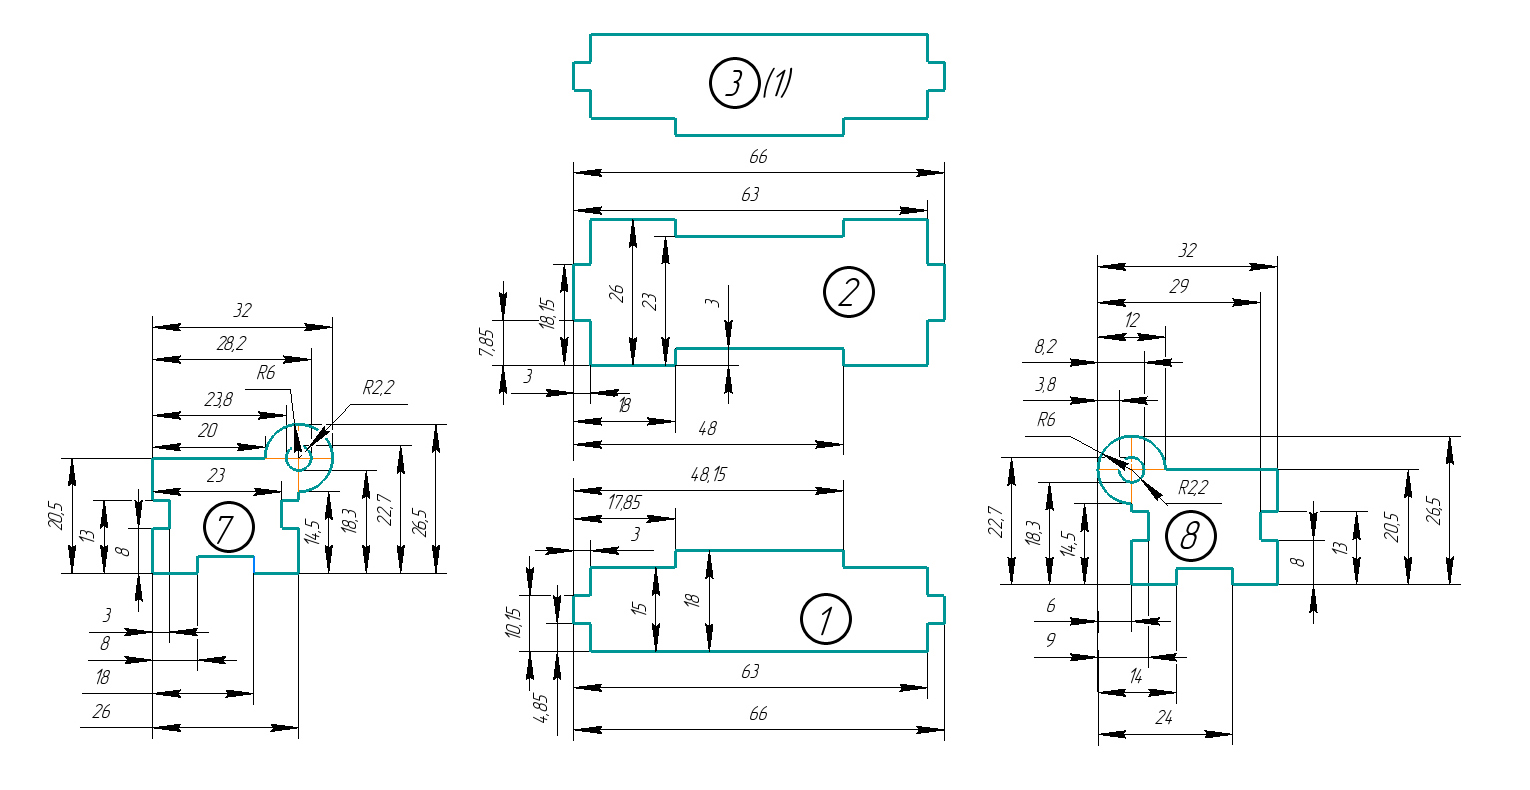
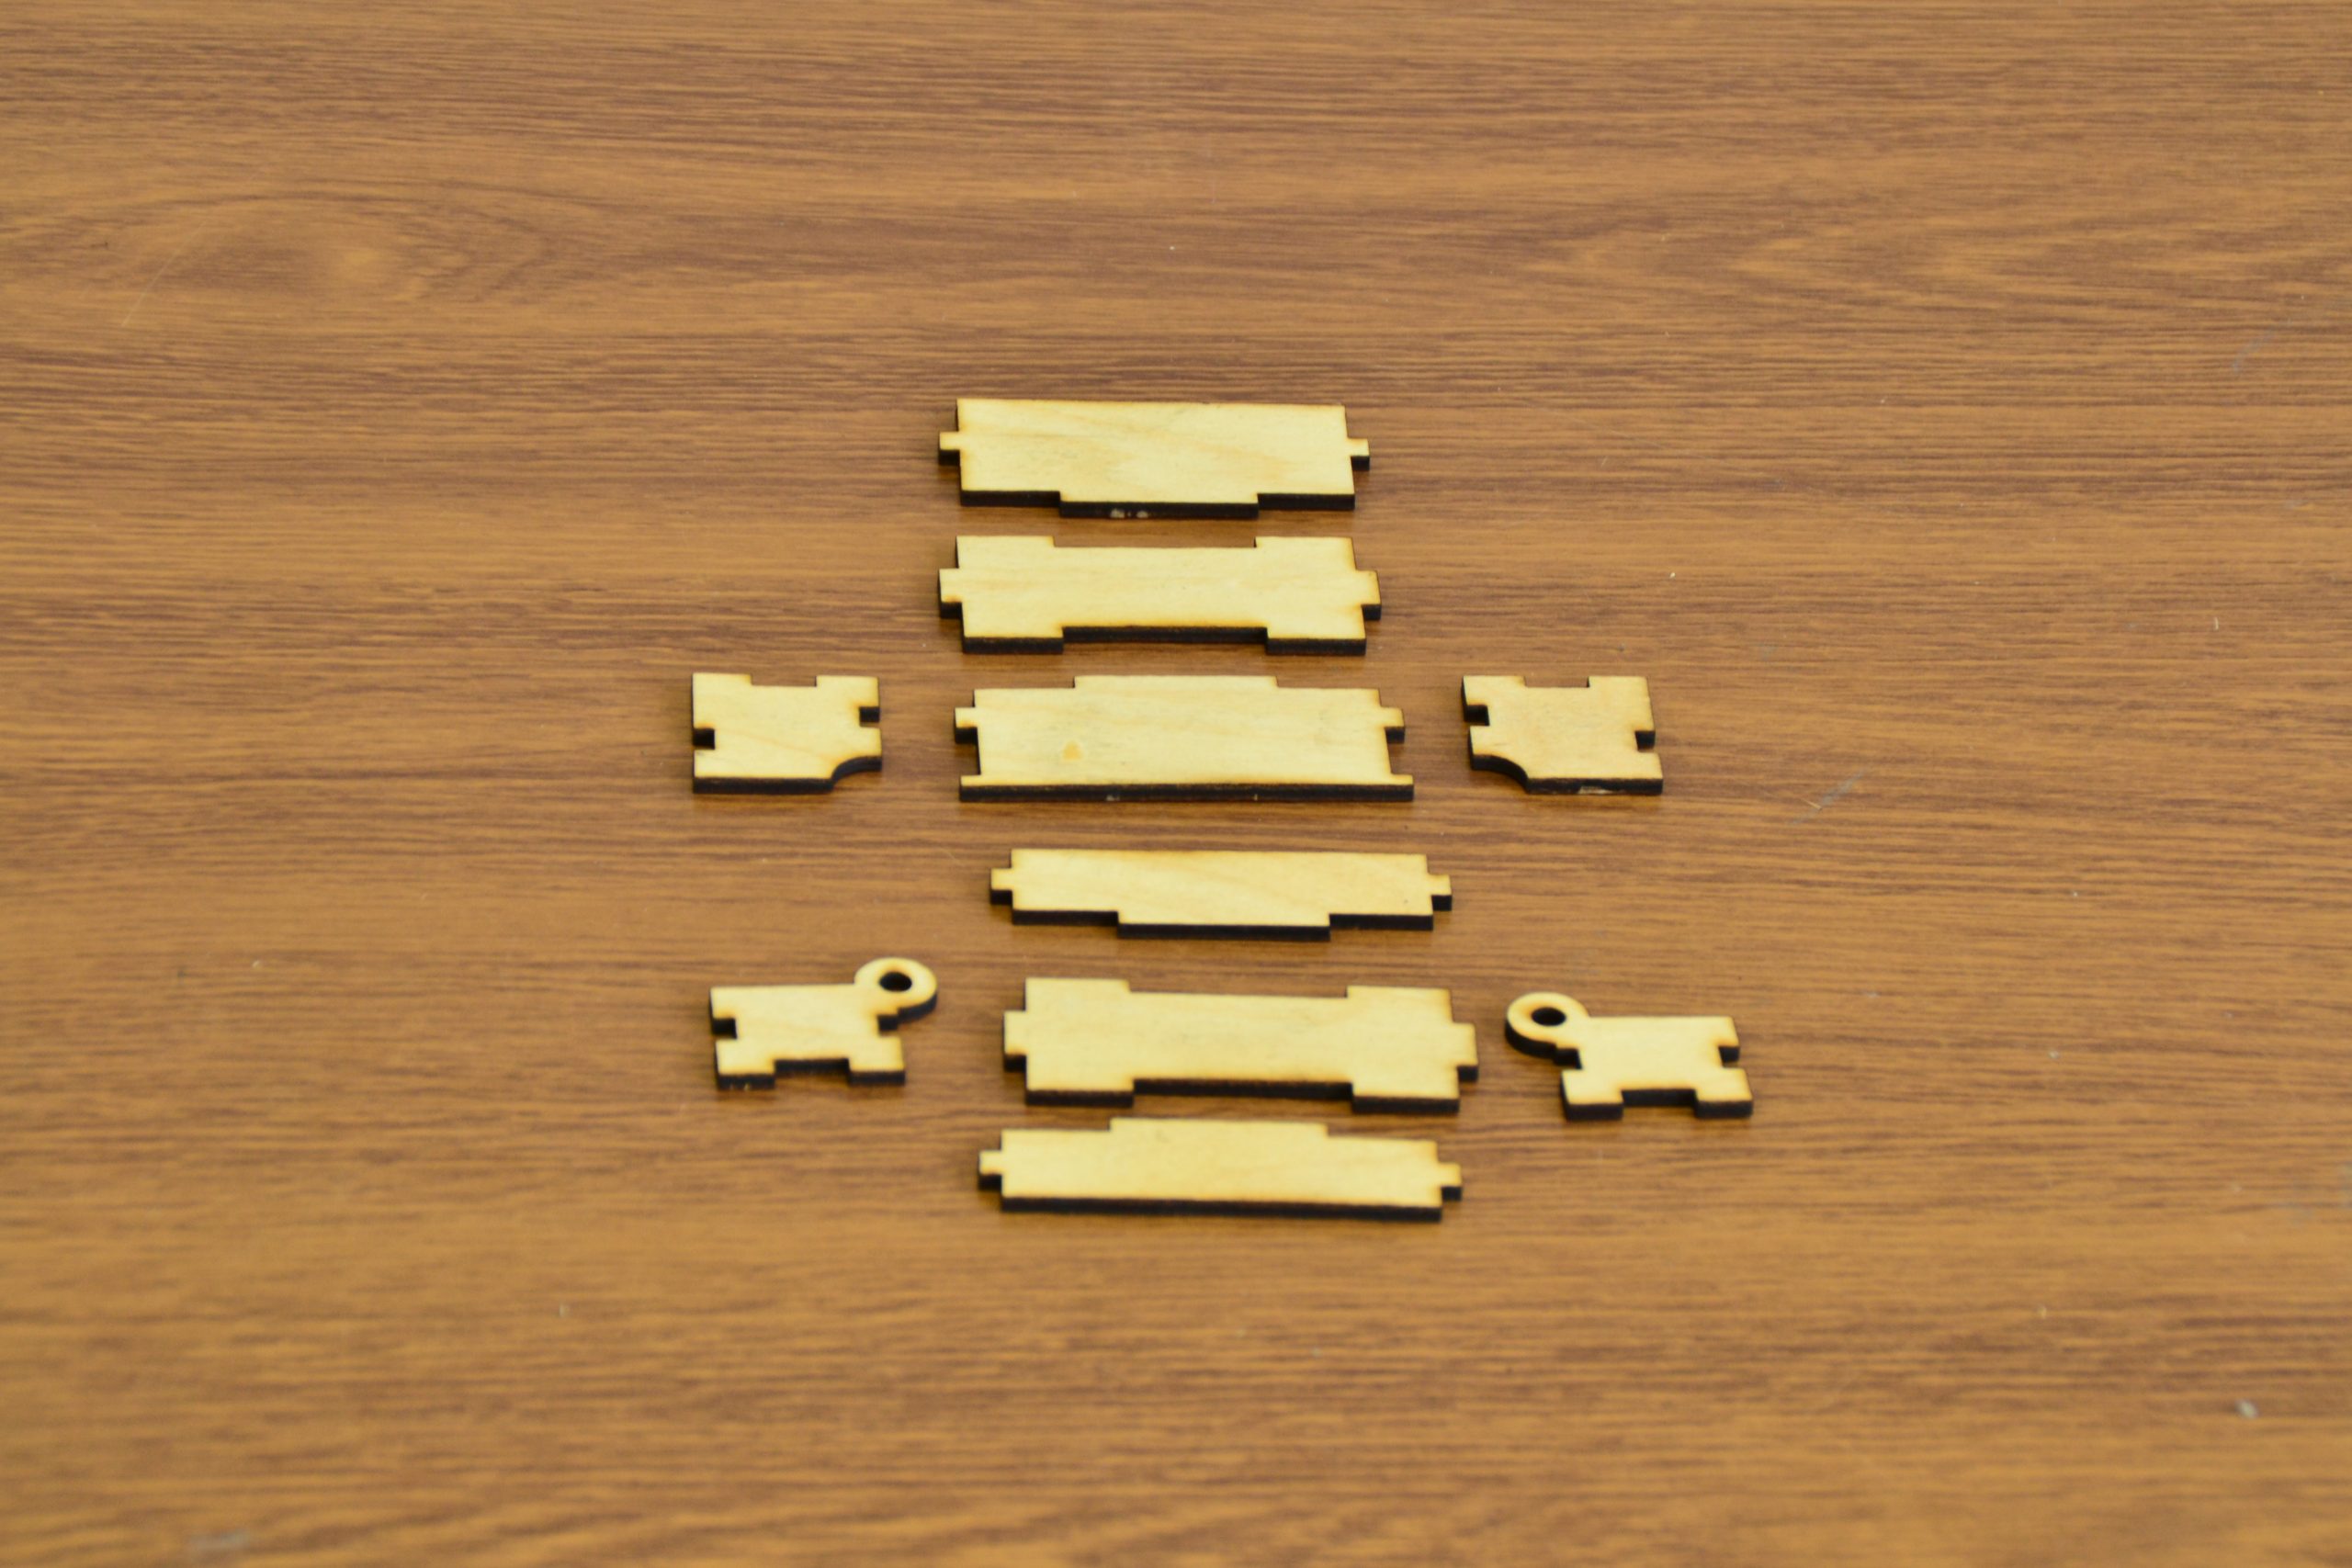
Below are drawings of the box.
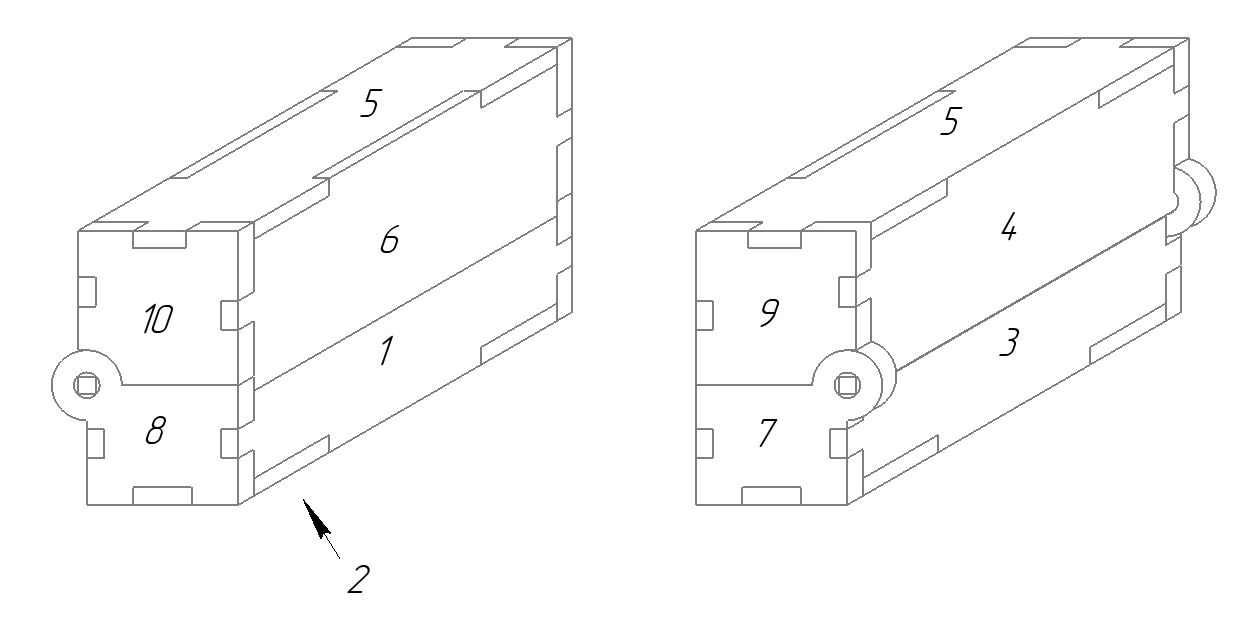
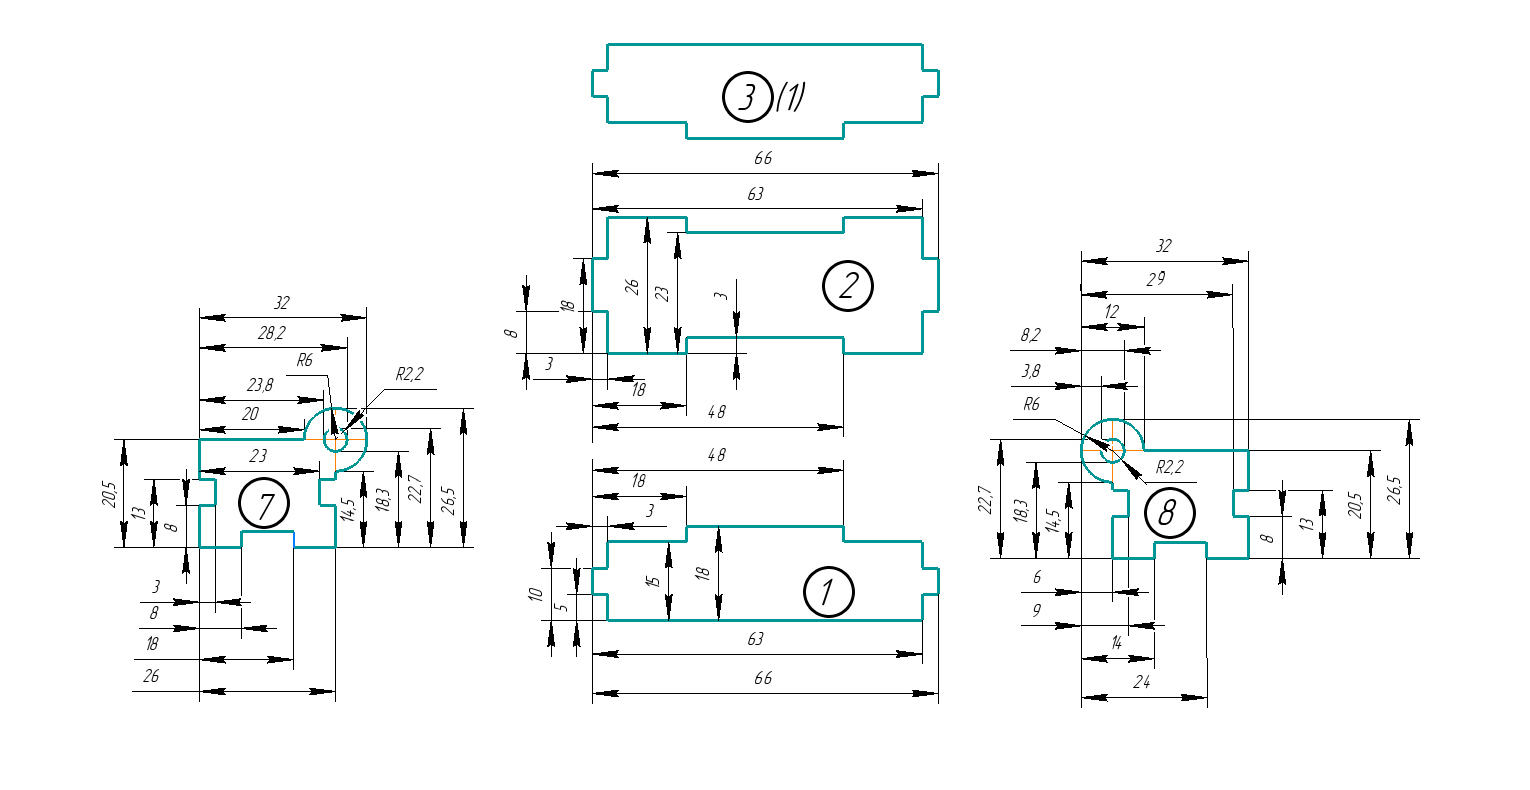
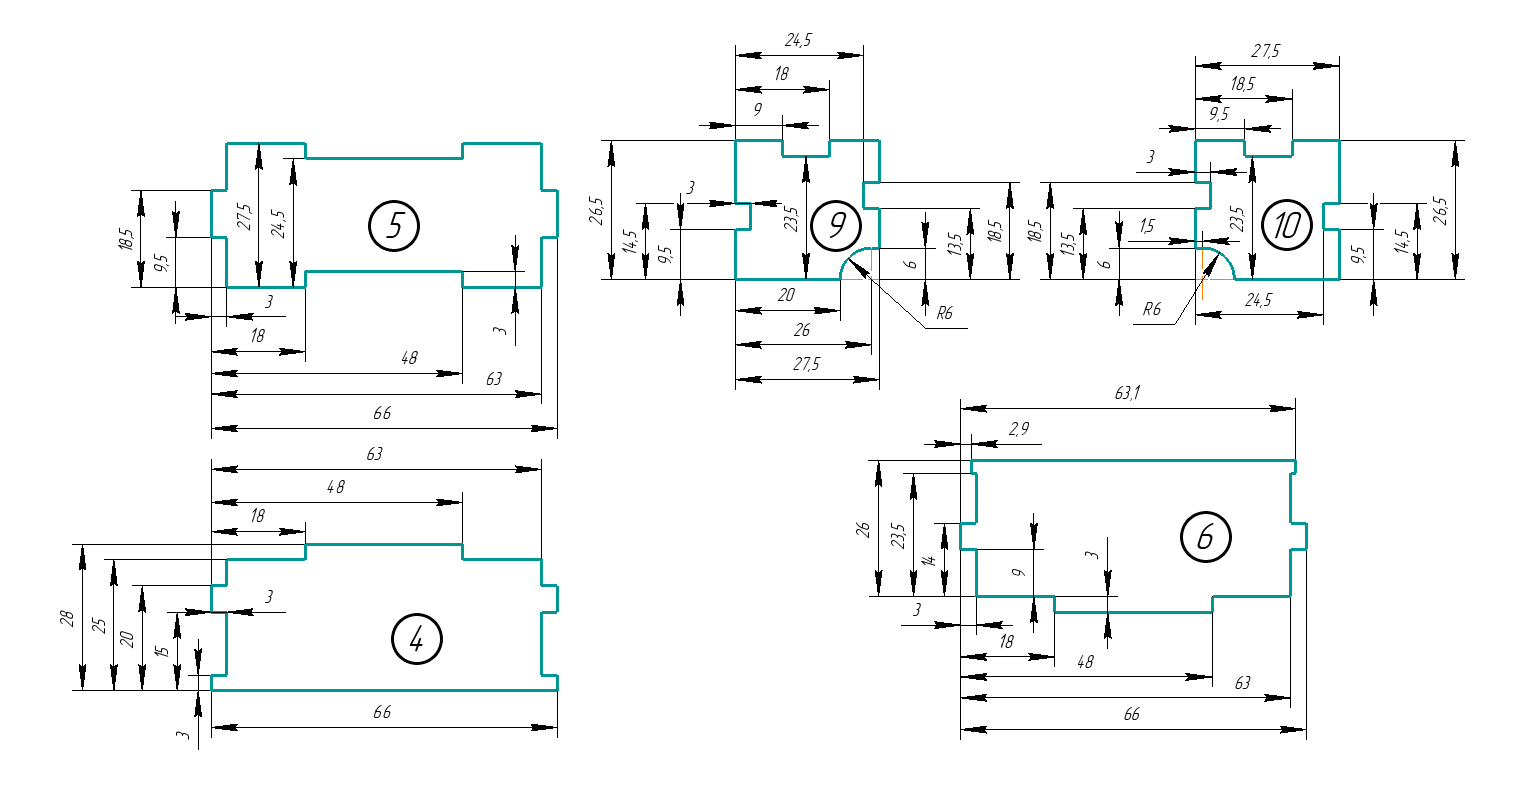
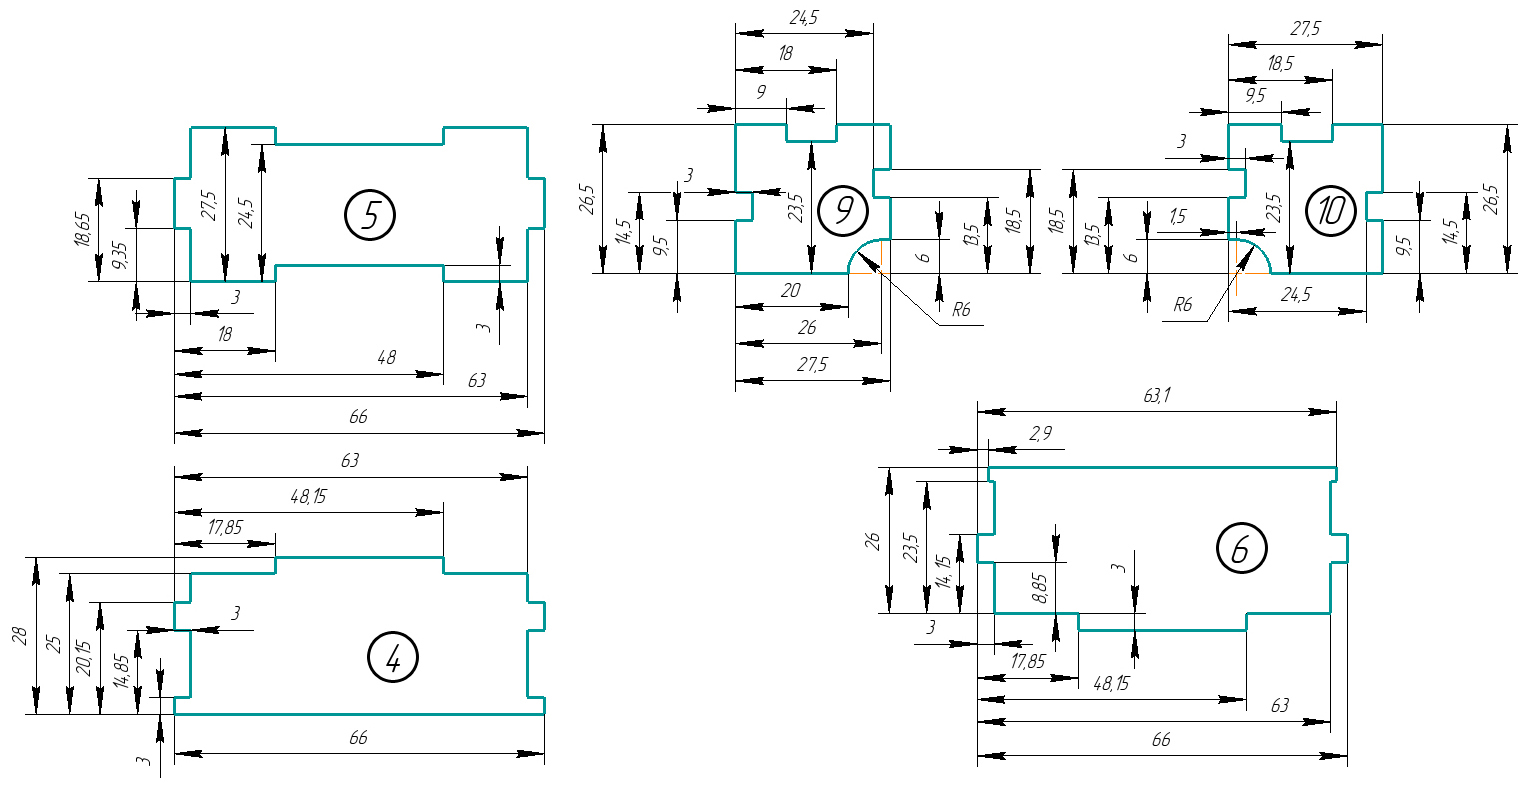
The box consists of 10 parts. Parts 1 and 3 are similar. The male-female joints sizes in the drawings are identical. But you need to remember that the laser is unable to cut accurately to within microns. Some of the material evaporates in the process. Therefore, if we cut out the parts exactly according to these drawings, then the groves will turn out a little wider, and their counterparts a little narrower, so when assembled, the box parts will not be kept together, and we’ll have to glue them together. To avoid this we’ll increase the width of the protrusions (males) by 0.15mm on each side.
Therefore, our drawings will look like this:
Now we can start creating G-codes according to these drawings. But before we need to set the cutting parameters:
Laser power – 100%
Speed – 600 mm/min
Passes – 8
8 passes are an ideal quantity. 4-6 passes are needed to cut plywood 3mm thick. But plywood is not homogeneous. It might have some sections with a harder texture than the rest of the material. If we fail to cut such sections through we’ll have to use a knife to cut them through. Doing this we might damage the item. But we don’t want it.
We are fortunate that our machine has 3 axes. At the beginning of cutting, we’ll lift the laser by 3 mm so that the point of beam application is on the upper side of the plywood. Then after every two passes, the laser will go down by 1 mm. As a result, the cutting will be better.
Link to the article about G-code creation
Links to G-codes for a machine with 3 axes (Download zip >>> stamp box):
stamp_box_3axis_part01_03.nc
stamp_box_3axis_part02.nc
stamp_box_3axis_part04.nc
stamp_box_3axis_part05.nc
stamp_box_3axis_part06.nc
stamp_box_3axis_part07.nc
stamp_box_3axis_part08.nc
stamp_box_3axis_part09.nc
stamp_box_3axis_part10.nc
Links to G-codes for a machine with 2 axes (download ZIP stamp box 2 axis):
stamp_box_2axis_part01_03.nc
stamp_box_2axis_part02.nc
stamp_box_2axis_part04.nc
stamp_box_2axis_part05.nc
stamp_box_2axis_part06.nc
stamp_box_2axis_part07.nc
stamp_box_2axis_part08.nc
stamp_box_2axis_part09.nc
stamp_box_2axis_part10.nc
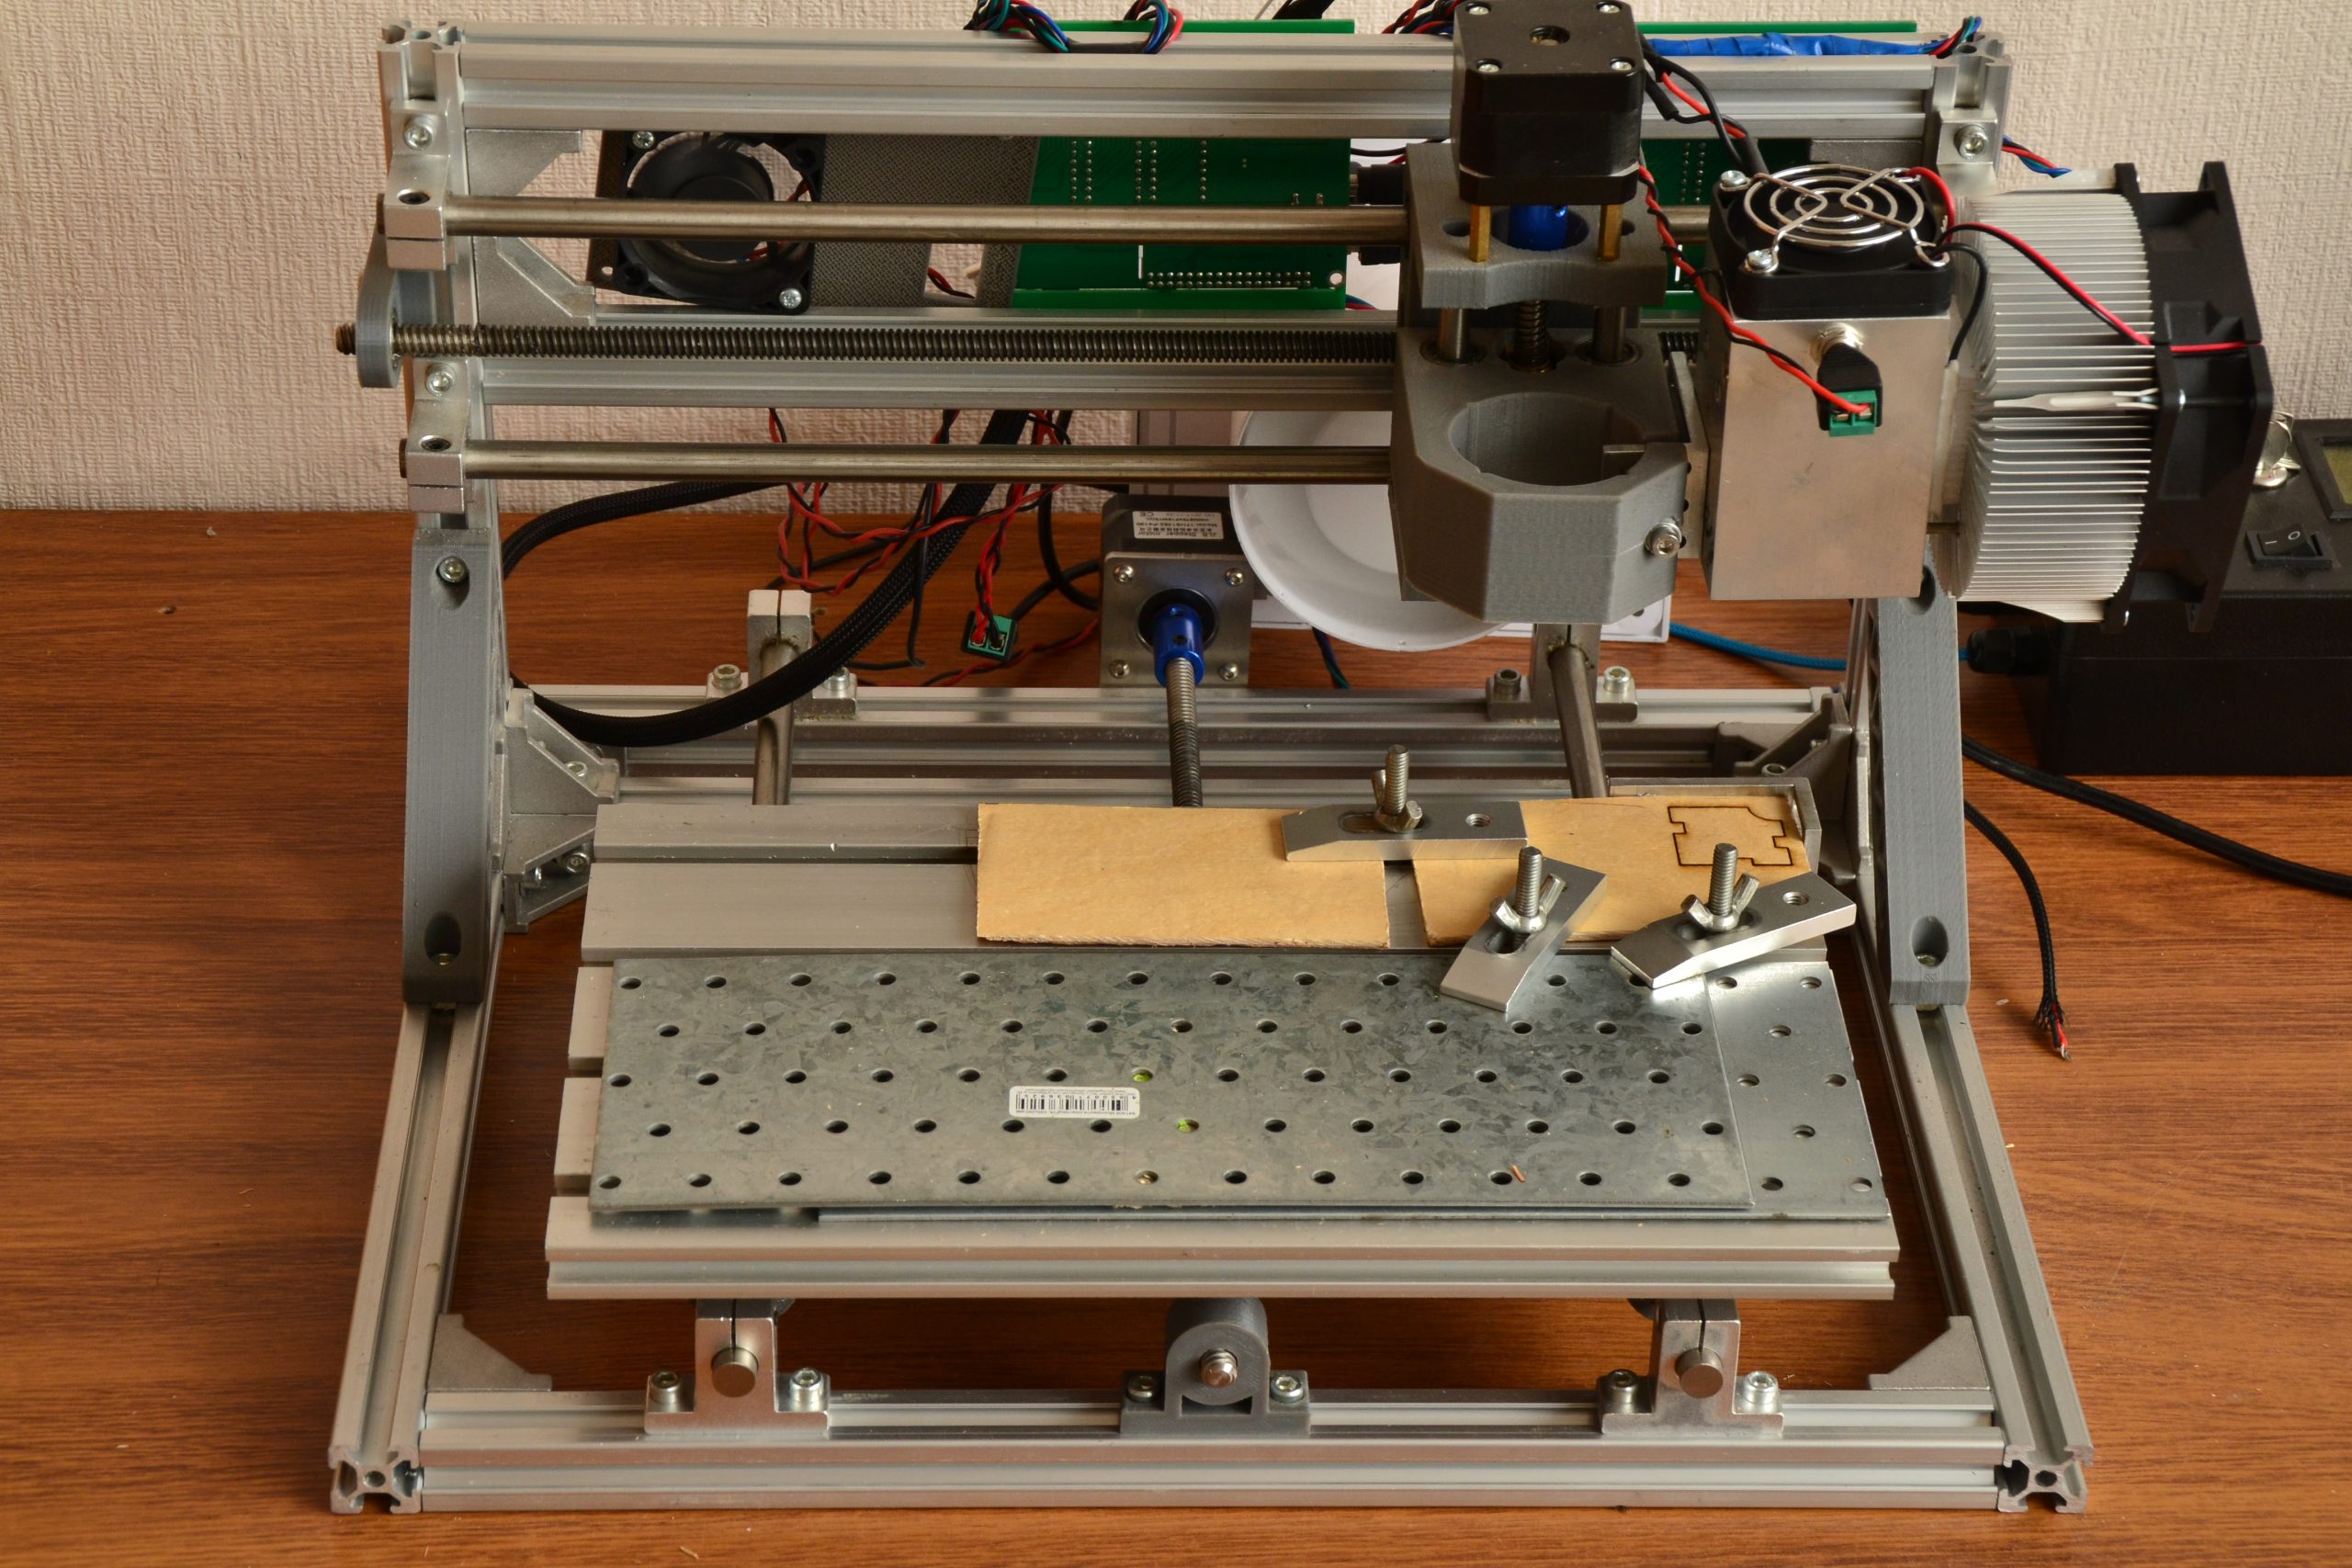
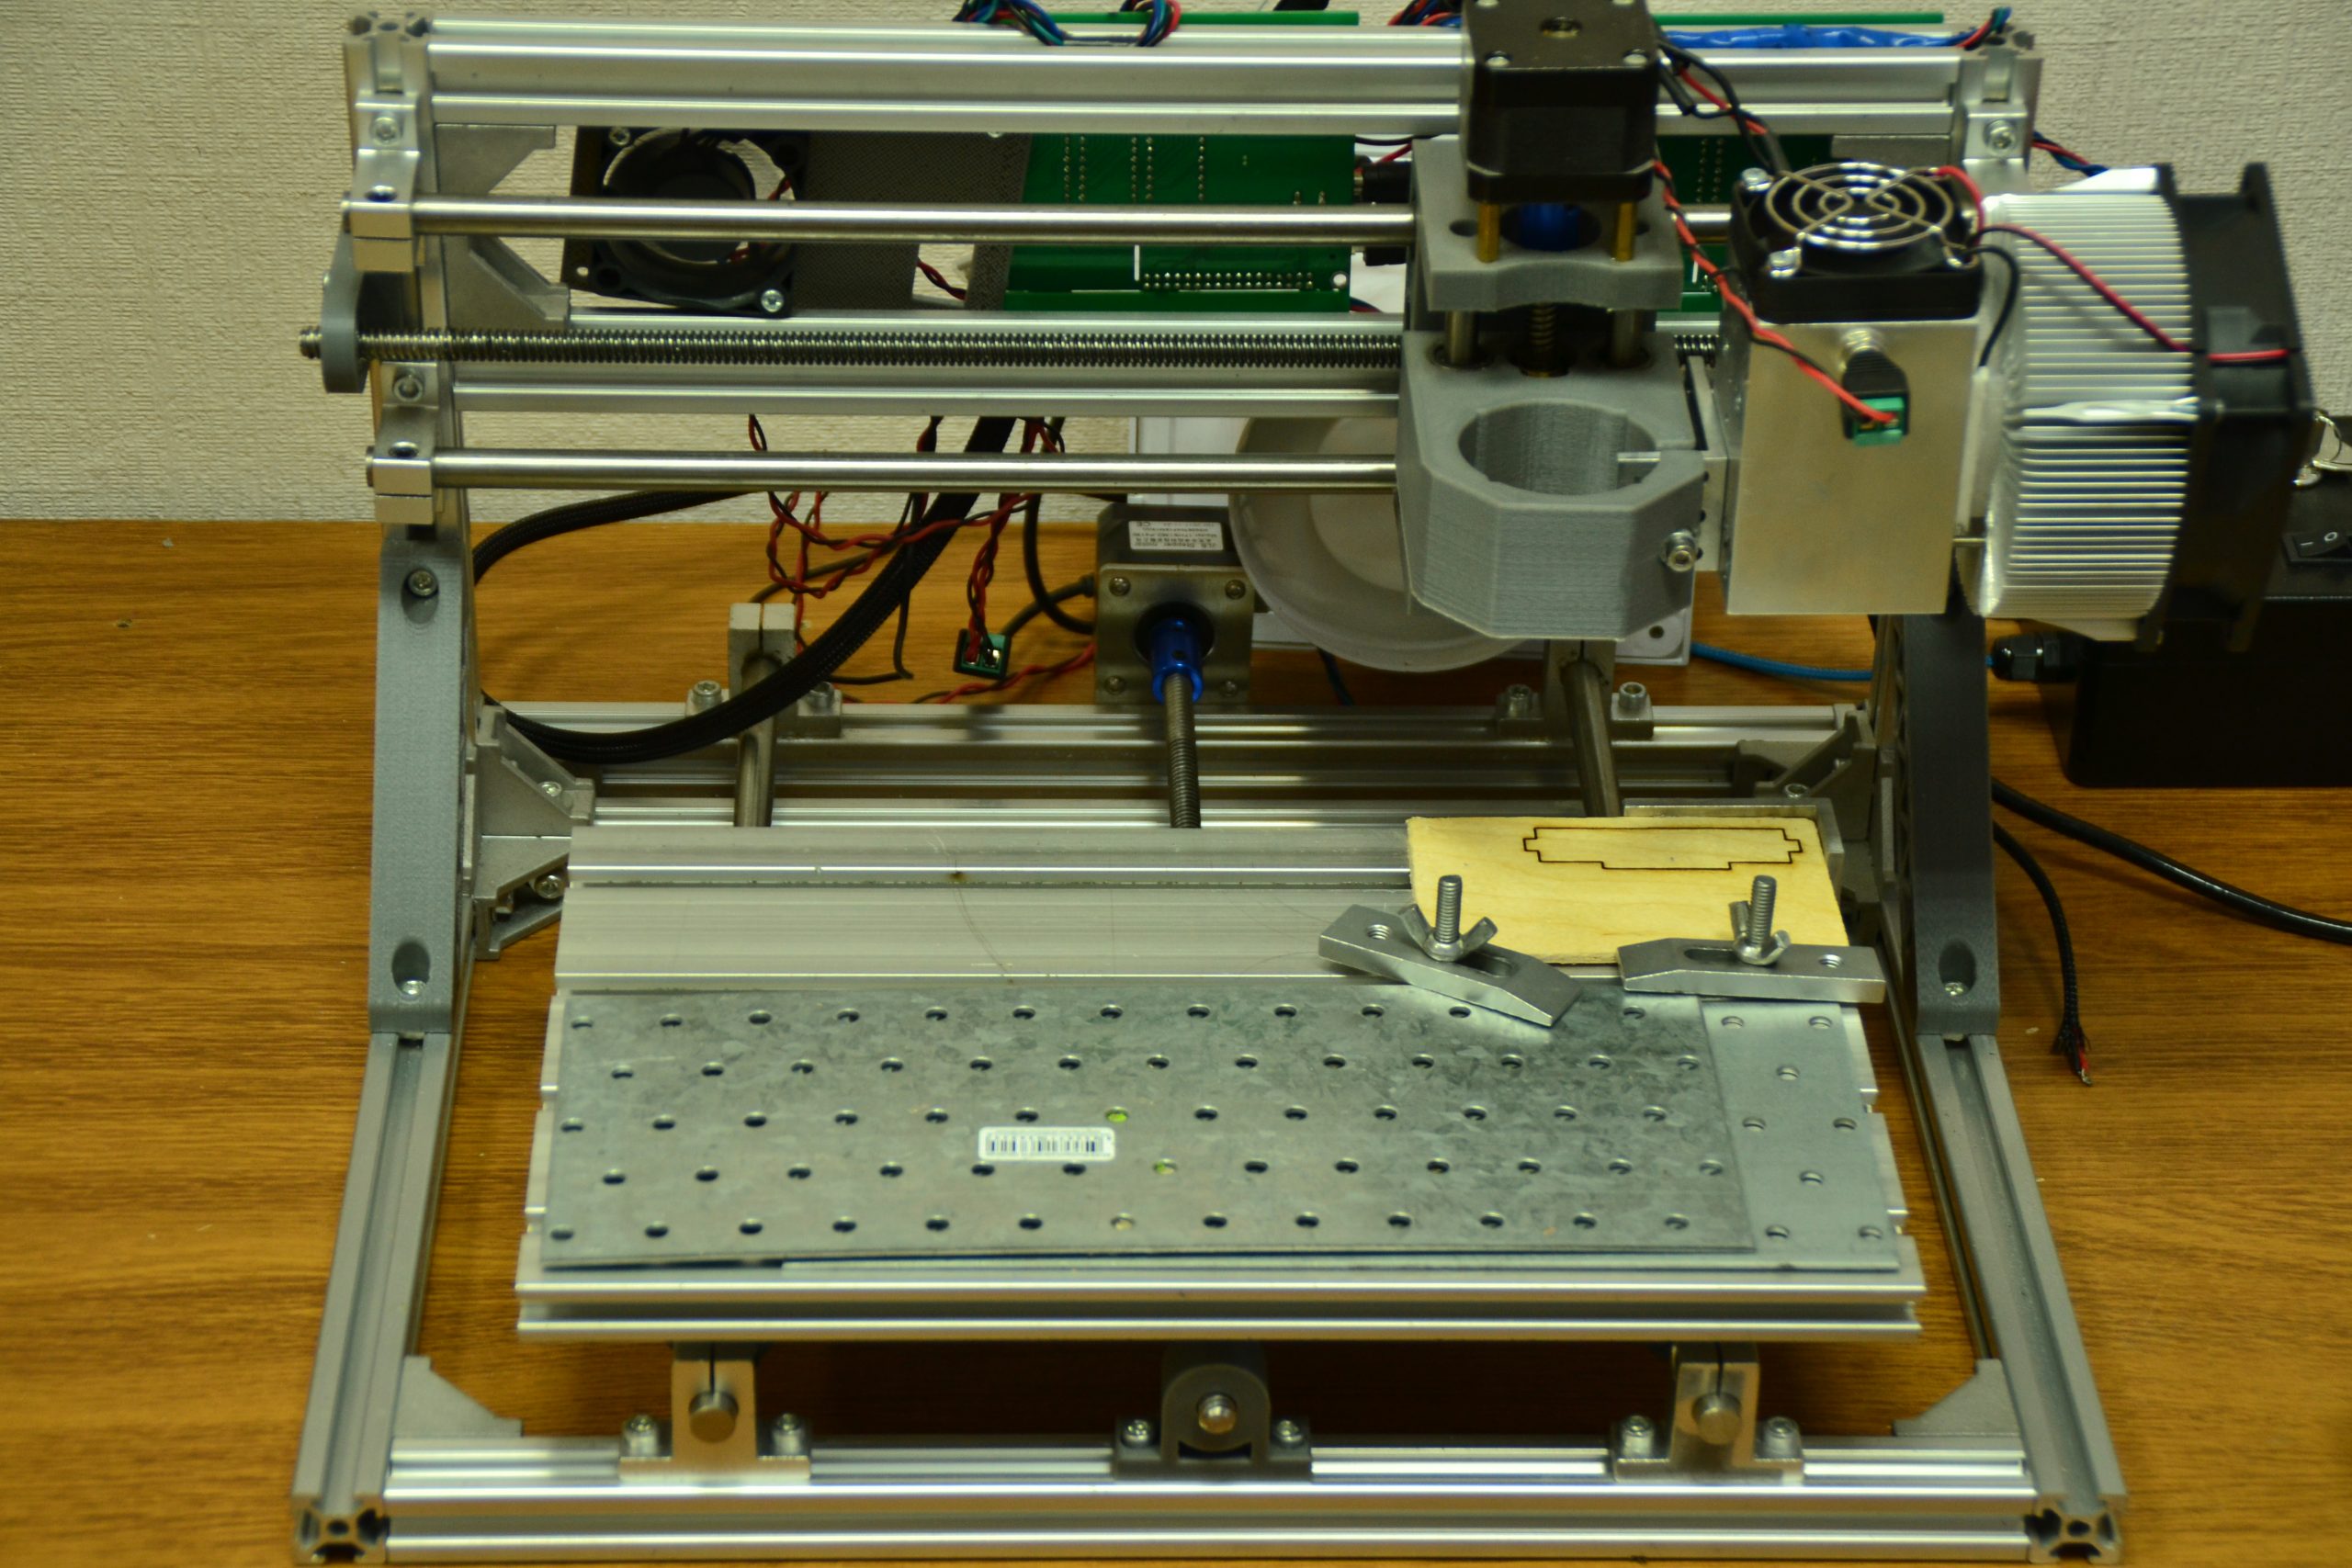
Now we fasten the workpieces to the worktable and begin cutting.


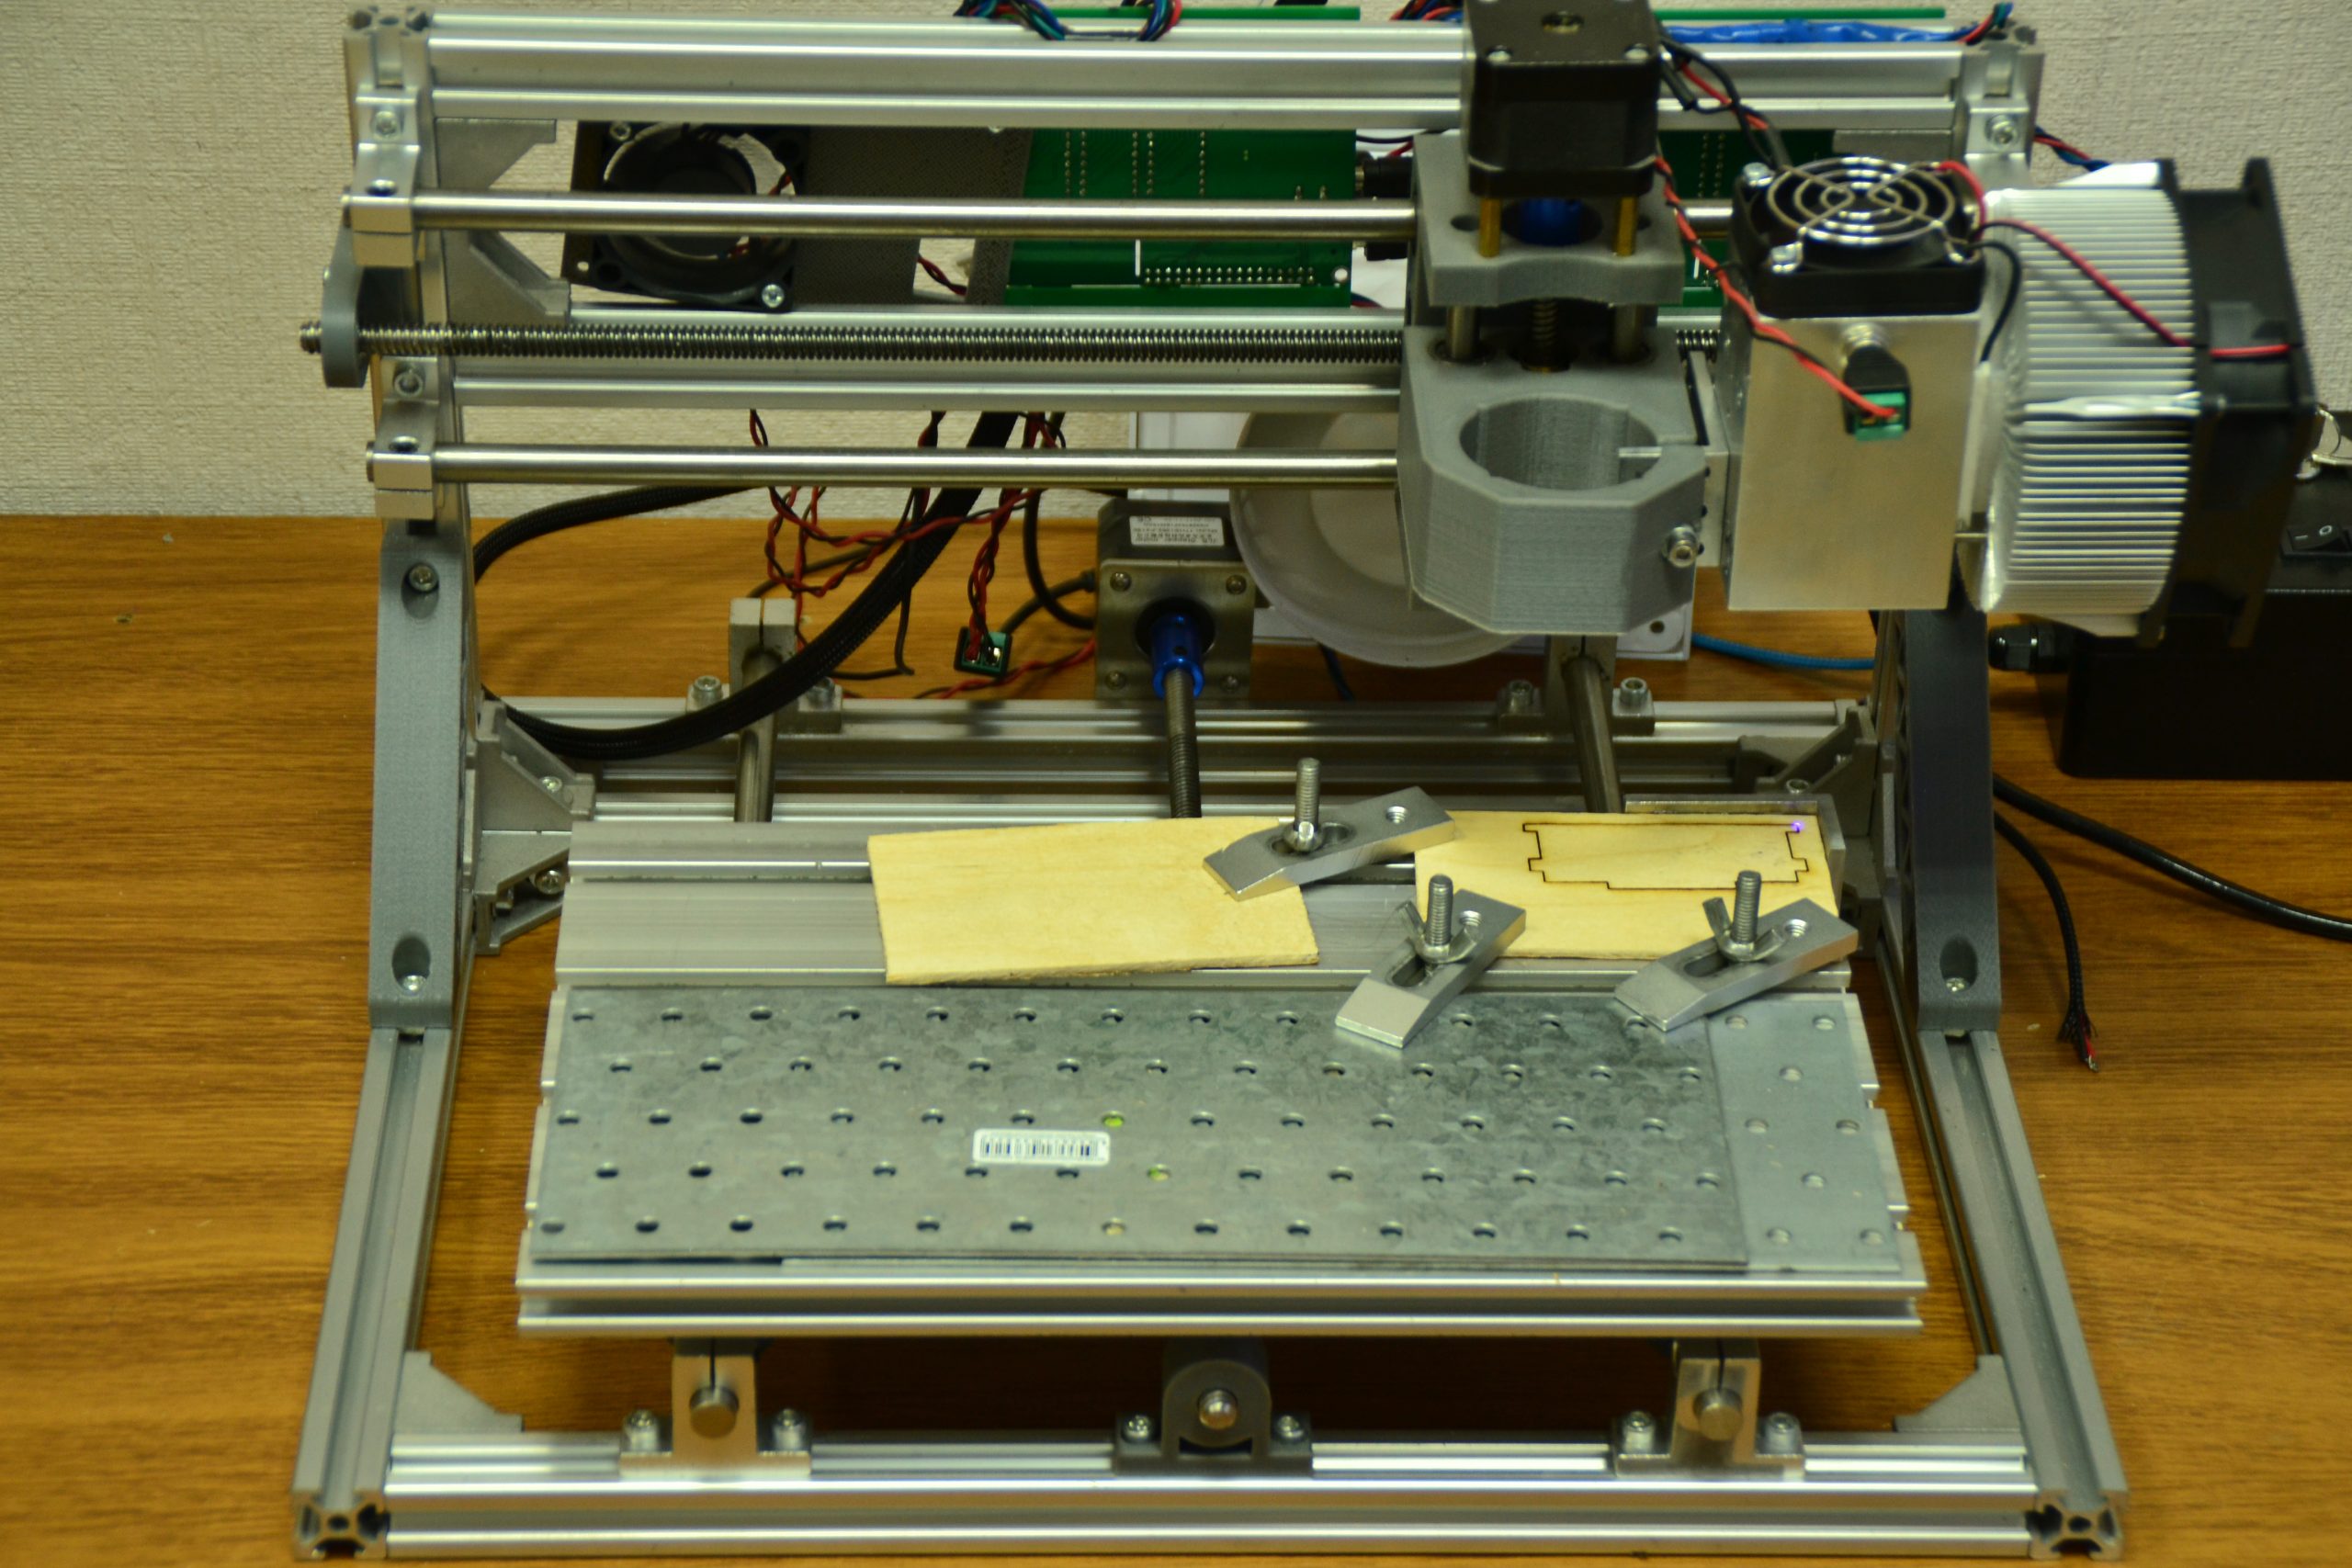

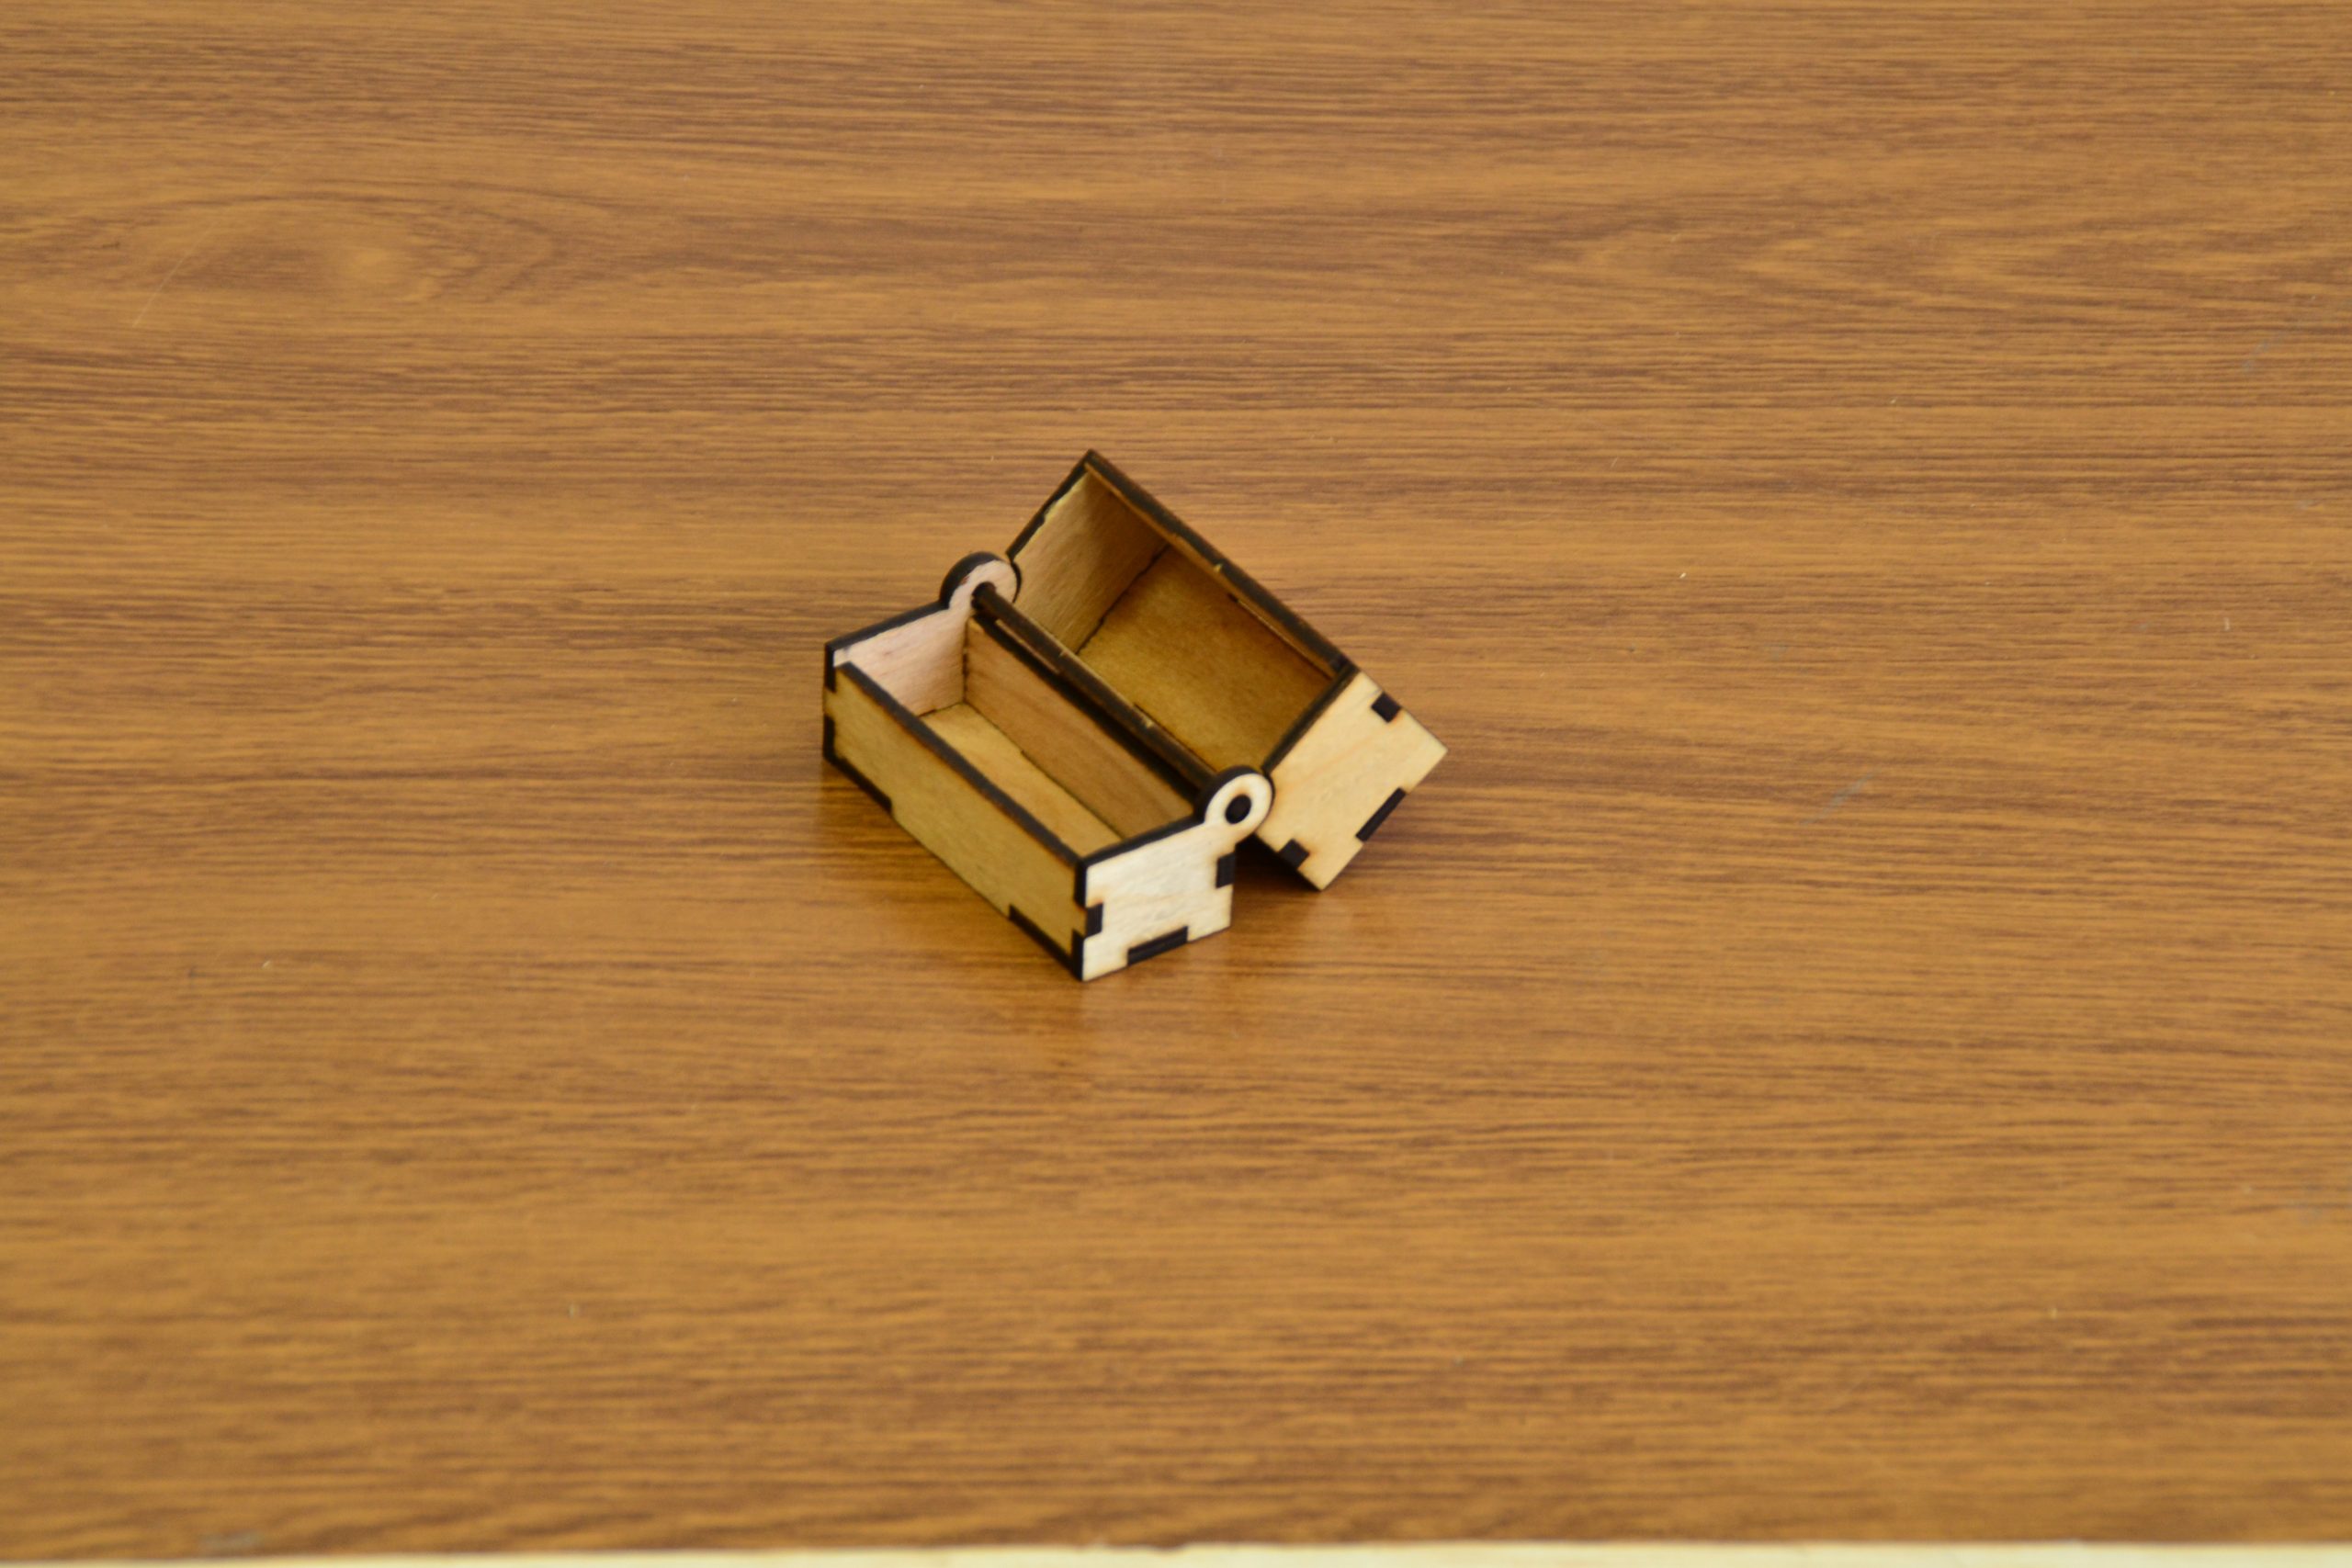
All the parts are cut out. We set to assemble the box according to the drawing.
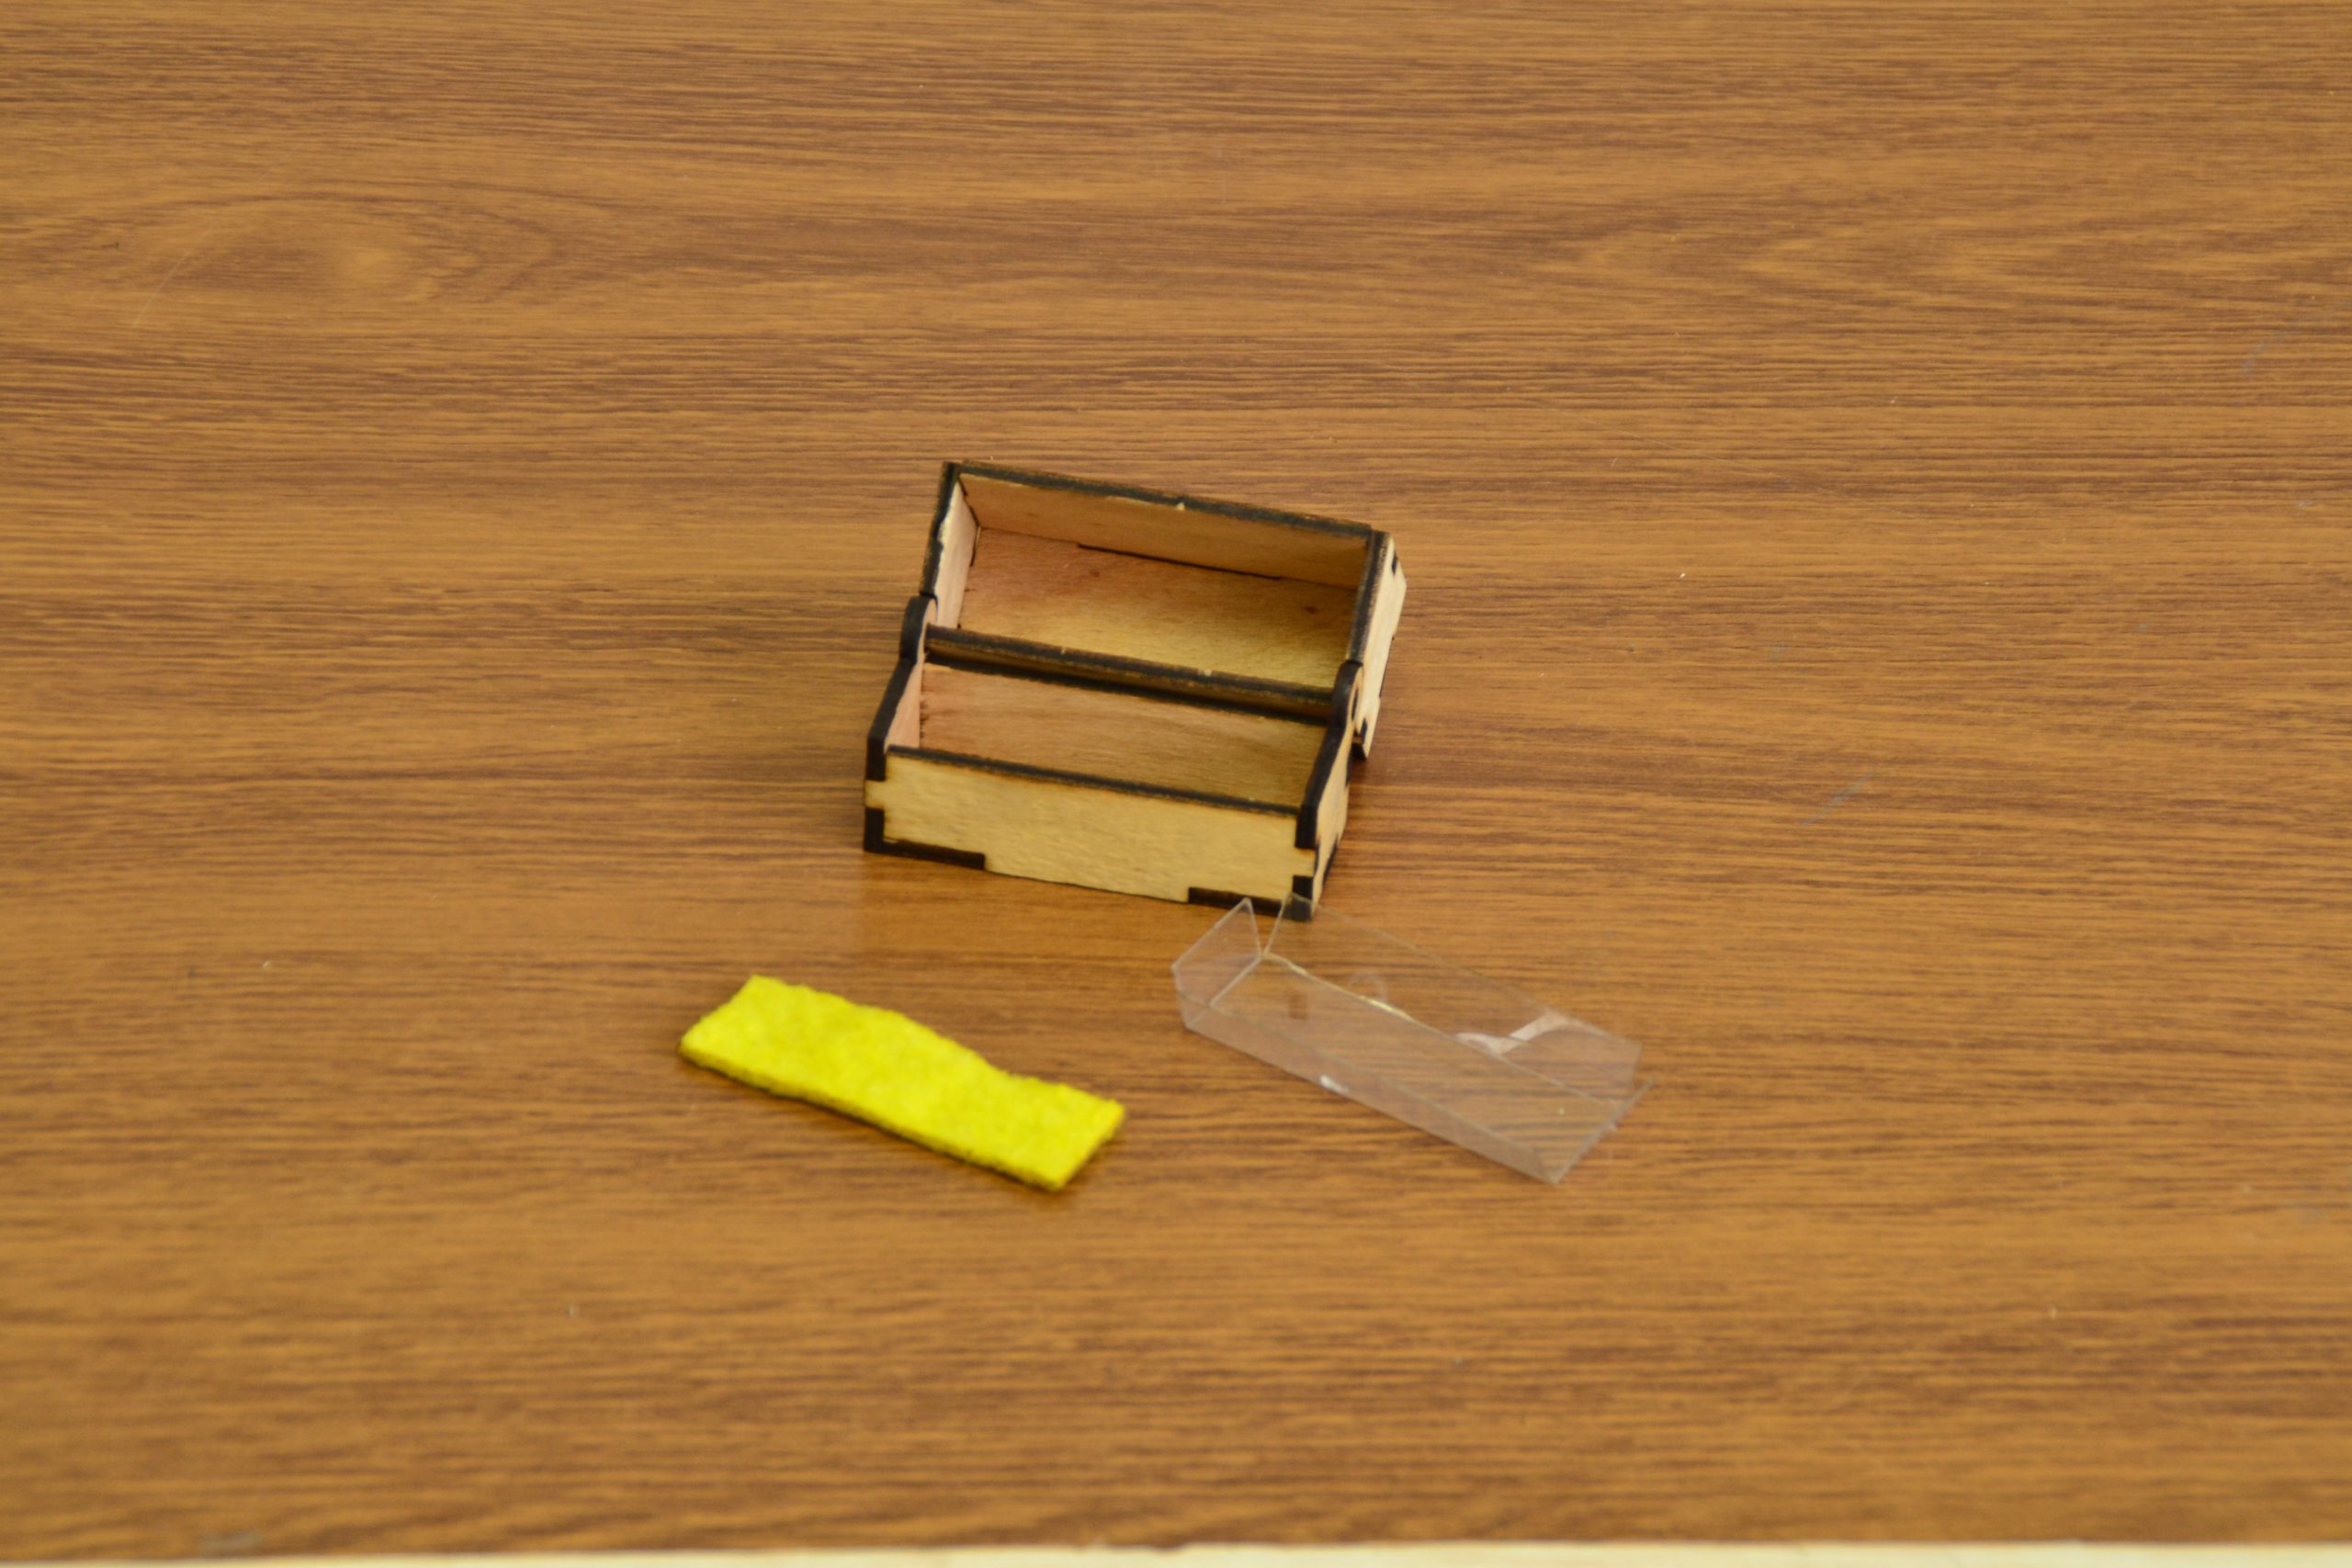
How to make an ink pad
For an ink pad, we need a highly absorbent material. We use cotton of flannel type, 1 mm thick.

Out of it, we’ll cut out a rectangle a little bit smaller than the size of the box inner area: 59x19mm.
Cutting parameters:
Laser power – 75%
Speed – 600 mm/min
Passes – 1
The thin fibers of the fabric will shrink in the process of laser cutting. As a result the size of the ink pad will be by 2-3mm smaller than it should be. With this in mind, we cut out a rectangle 62mm by 22 mm.
Link to the G-code (download ZIP stamp_pad):
Stamp_pad.nc
Before we start cutting we spread the smoothed tissue on the worktable and fasten it with clips.

How to make a bottom layer
The final thing we need to do is making of a bottom layer to be placed under the ink pad to prevent soaking of the ink into the plywood of the box. We’ll make it out of PET plastic, 0,3 mm thick.

It will look like a drip plate (pallet). For our convenience, we make a drawing before creating the G-code.

Outline the cutting parameters:
Laser power – 95%
Speed – 100mm/min
Passes – 2
Dashed line cutting parameters:
Laser power – 95%
Speed – 250mm/min
Passes – 1
We don’t need to cut through the PET plastic at the dashed lines, we need to make it there less rigid so that we could easily fold it to shape into a pallet.
Link to the G-code (download zip pallet):
Pallet.nc
Before cutting out the pallet out of PET plastic we tape both sides of the workpiece with painter’s tape, which is to be removed when the pattern is cut out. After that we shape a pallet folding the edges of the pattern according to the dashed lines.
Final part
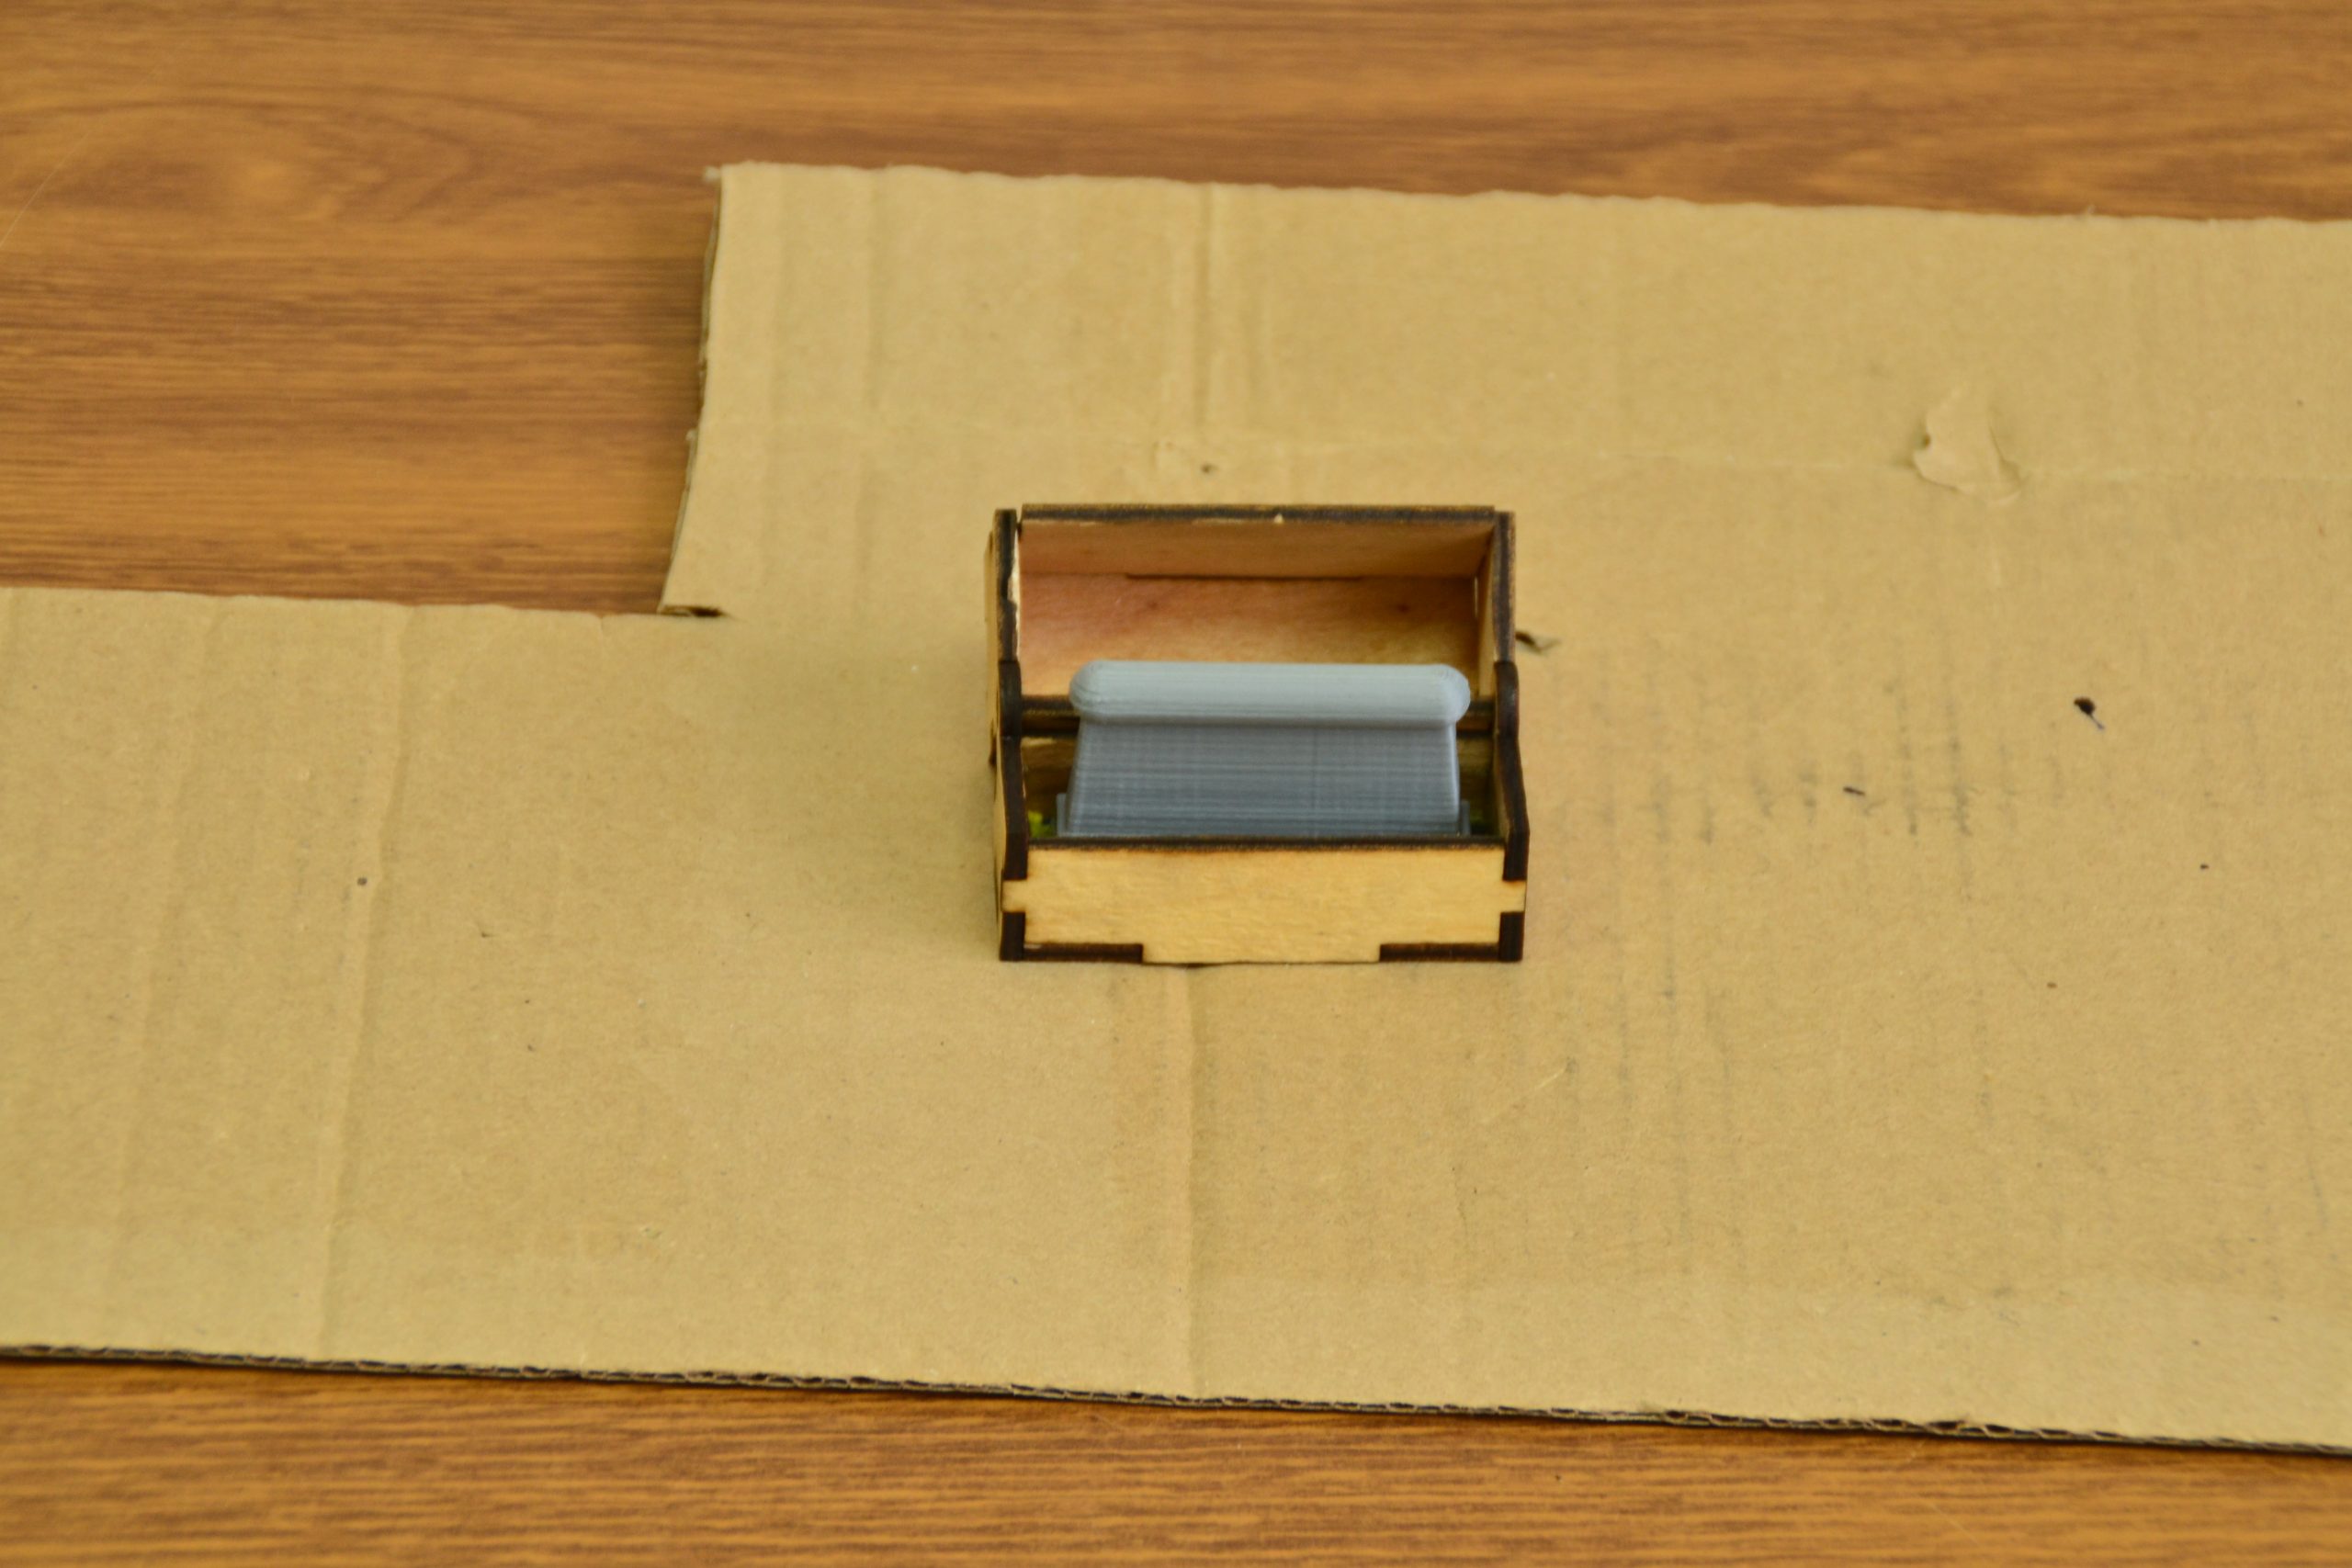
Now we can place the ink pad onto the pallet and put it inside the box.
Then using a syringe we ink the ink pad.
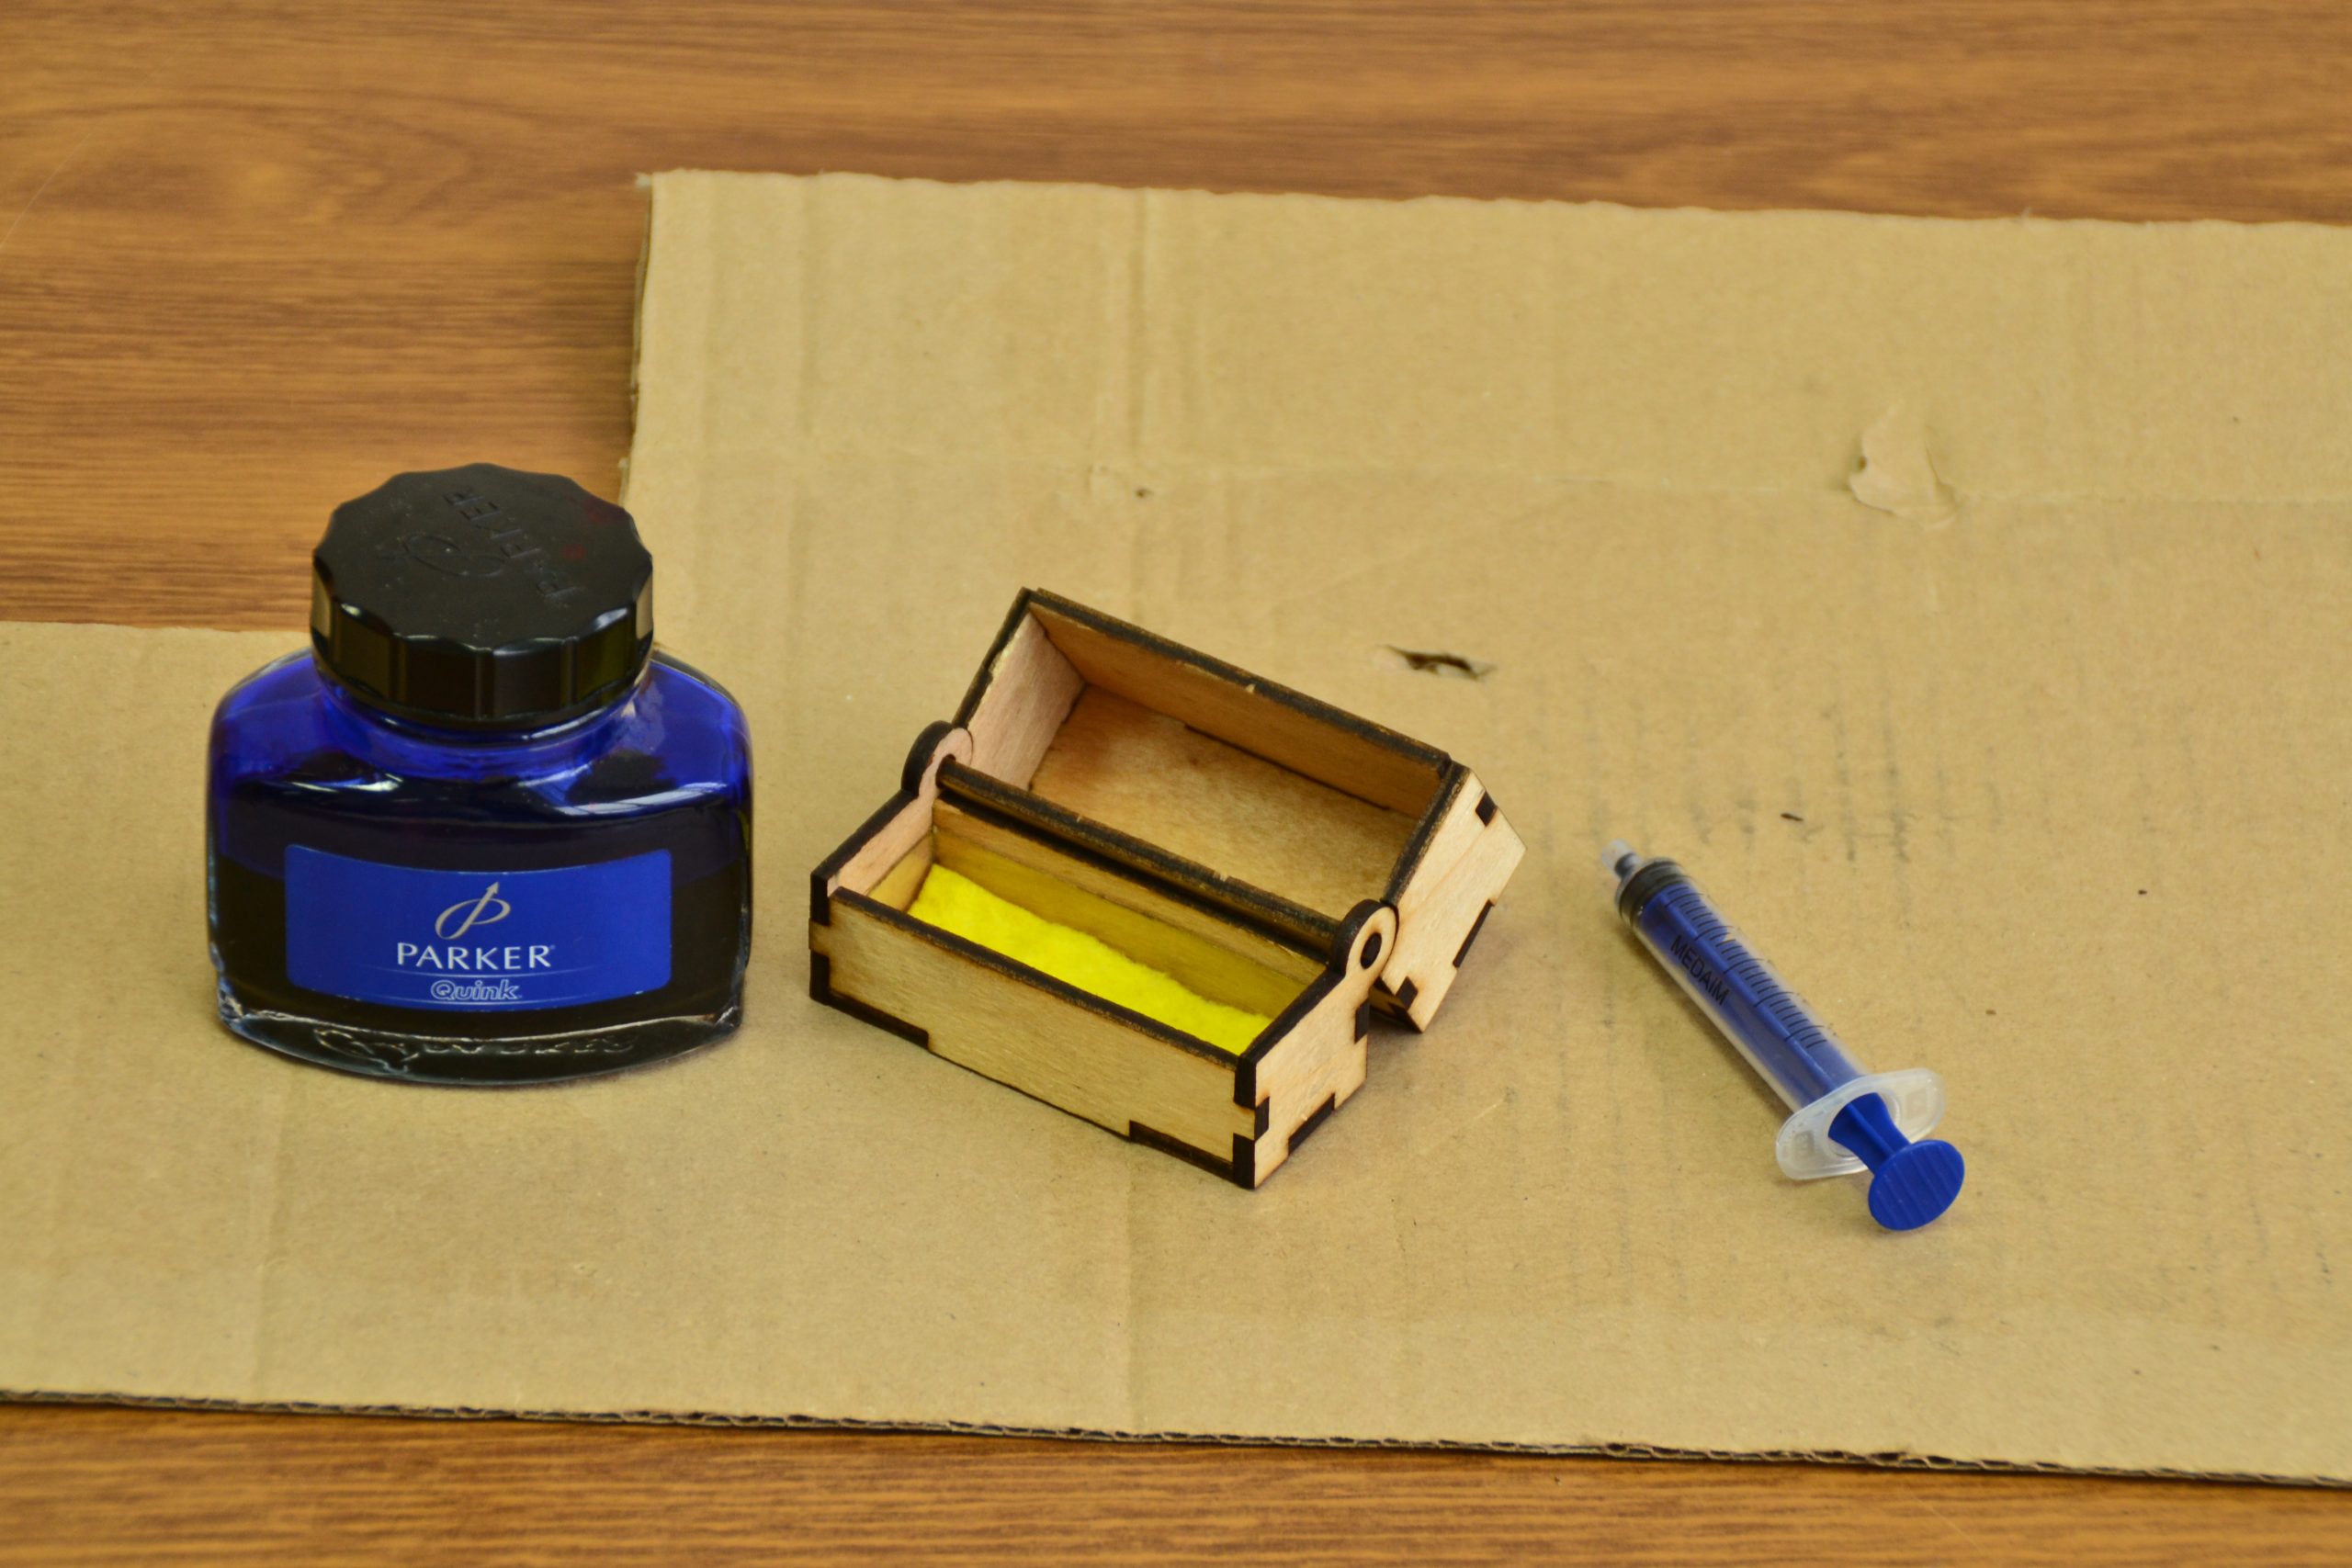
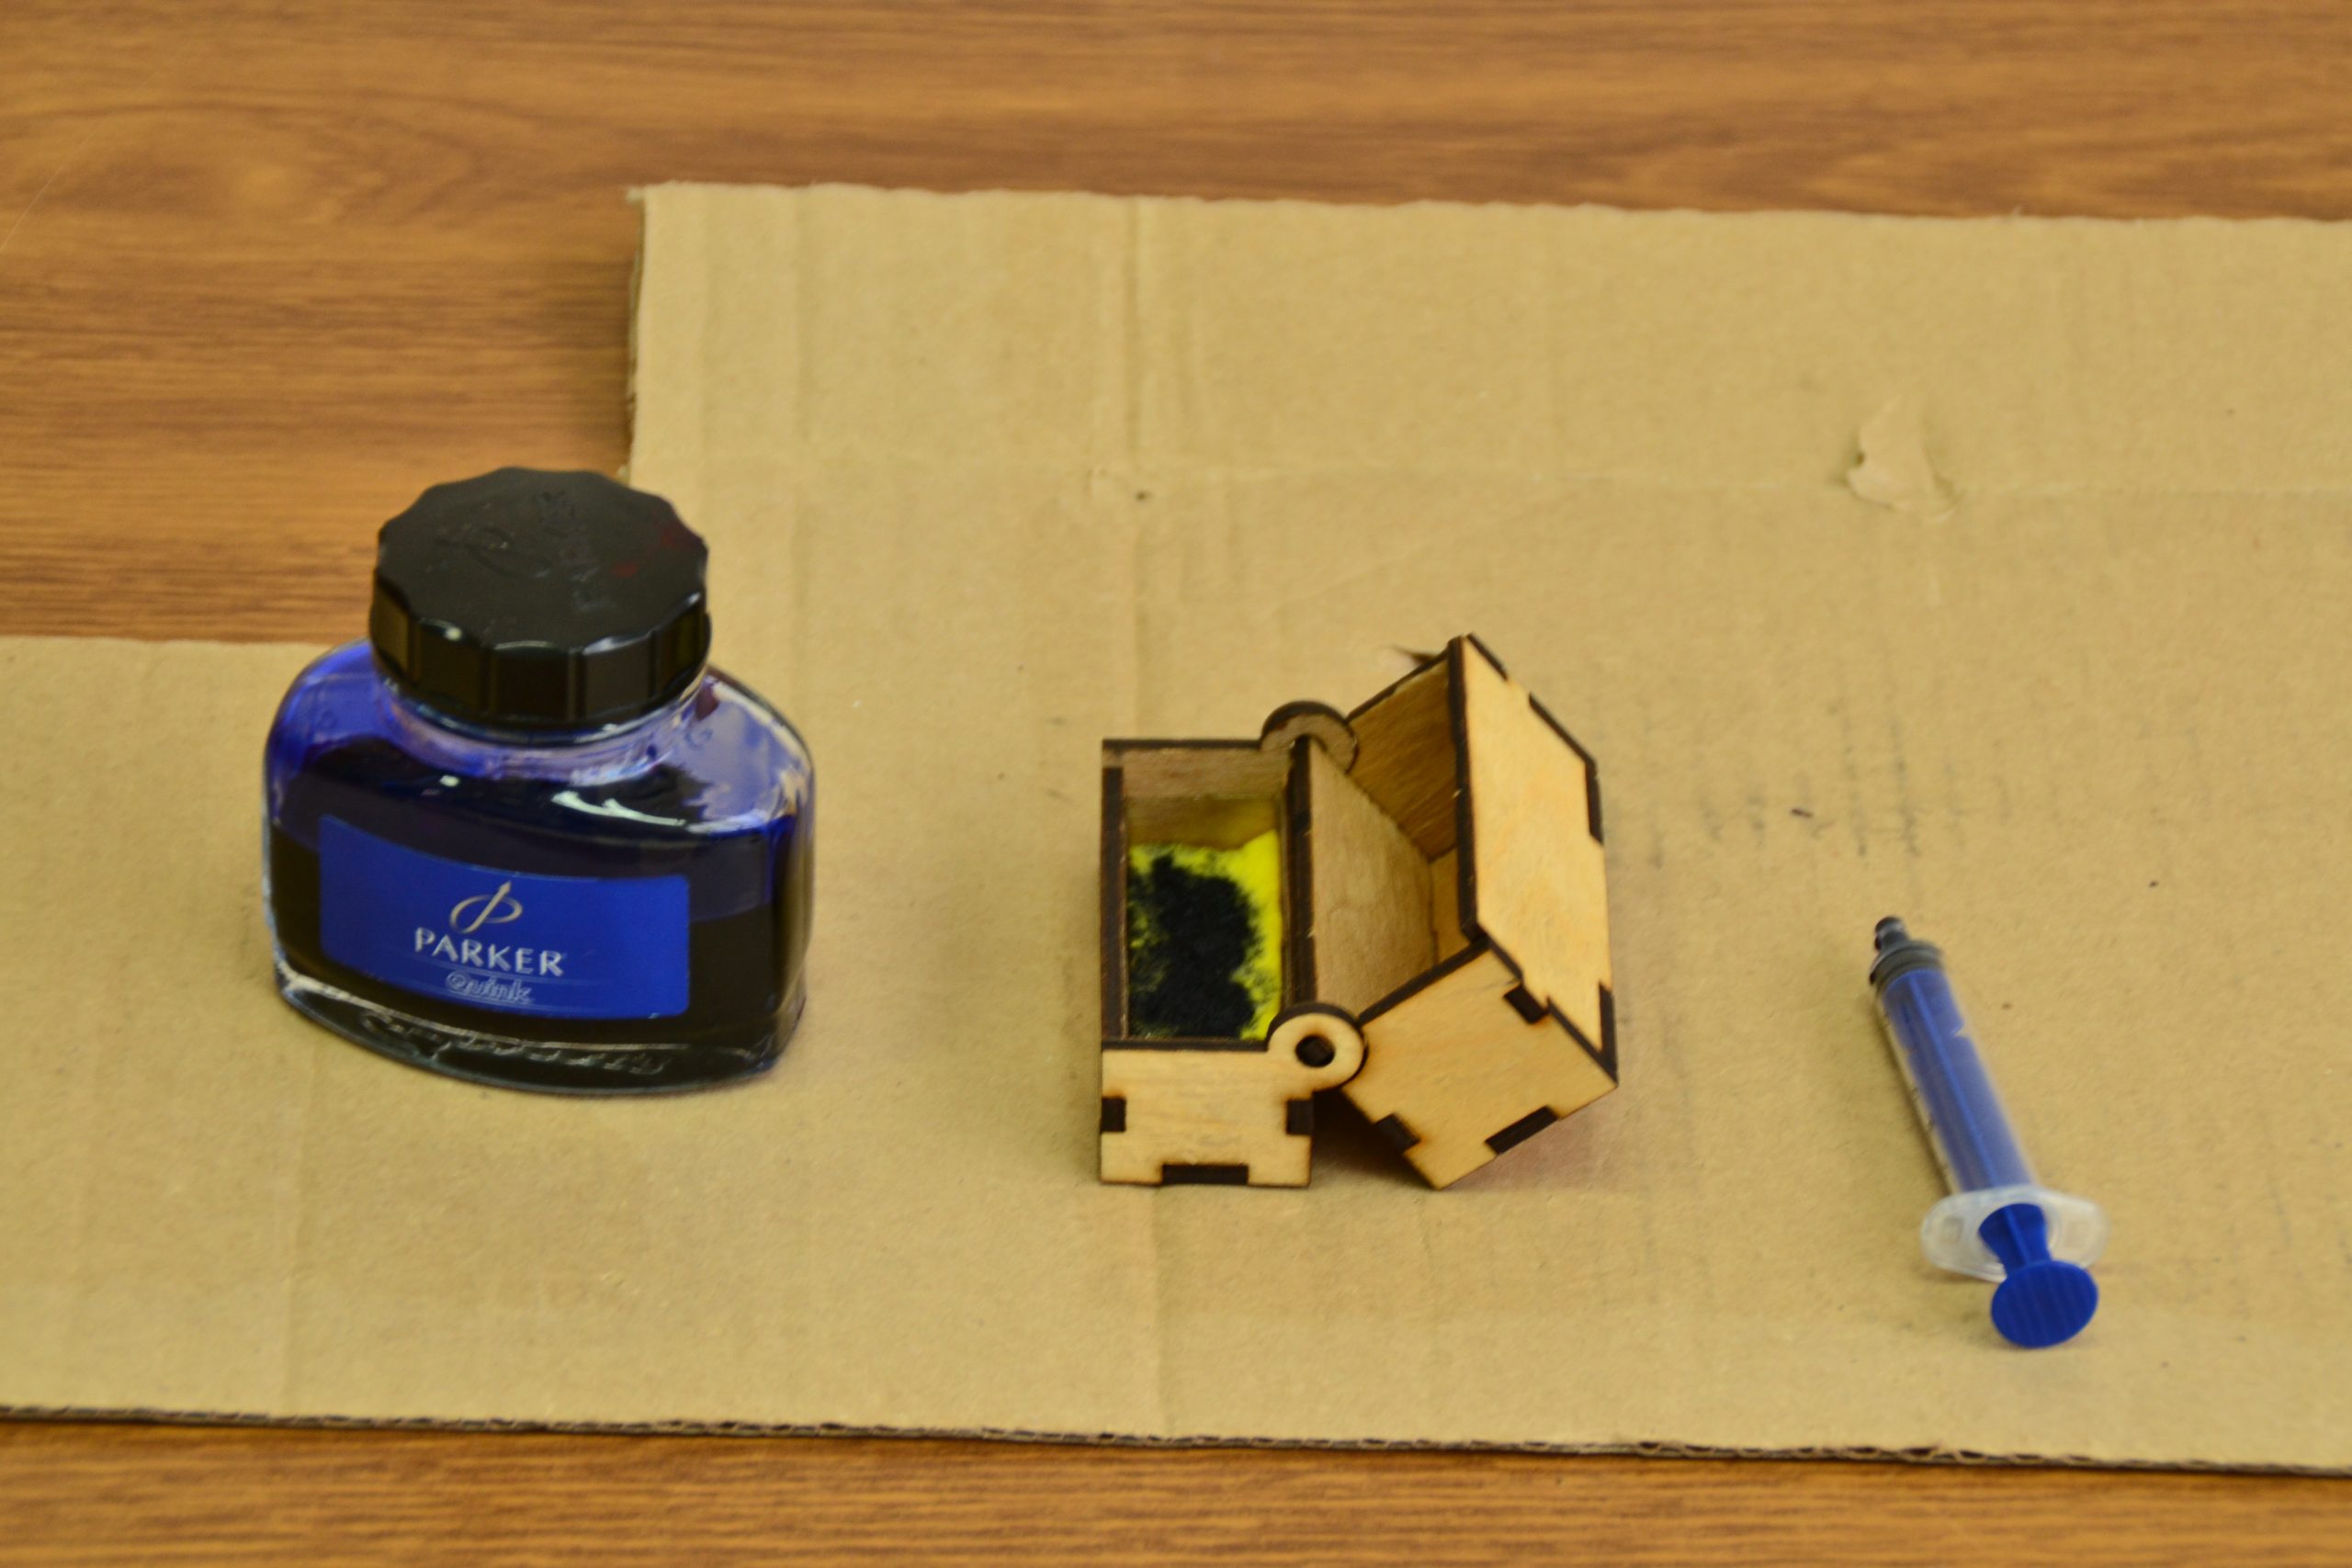
A few minutes later, when the ink pad has been soaked with ink we make a sample stamp print.