In this post, we will highlight a few very important questions
What sort of file does a 3D printer use?
How are those files transferred?
How are those files saved?
How are those files sliced?
How are the models created?
How does each part of a computer correlate to these steps?
If you can afford an upgrade in one area of your PC, what should it be?
3D printing – building the picture
3D Printing. You’ve heard of it, perhaps you’ve seen it on forums or social media, maybe you know someone, a real serious DIY fanatic, who has one in his workshop, between his TIG welder and his CNC milling machine. It’s a fabrication technique far removed from the coping saw and hand planer of your dad’s shed, so it’s easy to think of it as an intimidating beast – fickle, and hard to tame by people without a Ph.D. in computer science and a NASA supercomputer at their disposal. However, this is a common misconception, based in the traditional perception of computer hardware. Most people don’t realize just how powerful their computers are – indeed, an average laptop can be used to create outstanding 3D modeling results. In this article, we’ll explore how a perfectly normal laptop or desktop PC can be paired with a 3D printing machine that costs no more than perhaps a hobbyist’s bench sander, drill press, or circular saw, and which gives professional results in a method and material you may have never considered before.
This article is part of a series on entry-level 3D printing. Check out the rest of the series to put the information in this article into a wider context, and become a 3D printing pro
Does the 3D printer run off your computer?
The answer is simple – no! Almost every 3D printer will run itself using a simple onboard computer. While it is possible to connect your PC to your printer via USB, the better solution is to use the printer’s onboard storage (usually an SD or Micro-SD Card reader) and let it run itself. This prevents any interruptions should your PC enter hibernation during a long print, for example (very large prints can sometimes take in the region of 20 hours to complete. An interruption is not impossible to recover from, but certainly should be avoided). If using the SD card method, your computer is only needed to download, modify, or create your 3D models, and then load them onto the SD card.
What sort of file does a 3D printer use?
Let’s work backward, from the printer itself. In broad terms, the printer creates plastic models in the same way as an ink printer creates documents. It takes a set of instructions and moves a printhead to achieve the desired shape. The only differences are that while an ink printer moves in two axes and deposits ink, a 3D printer moves in all three axes and extrudes hot plastic (this article assumes the use of an entry-level 3D printer of the FDM type, although the other, more advanced methods still follow the same basic workflow). The set of instructions are stored in a programming language called “G-Code”, a way of writing instructions for CNC machines (CNC standing for Computer Numerical Control) that’s been around since the late 1950s. G-code tells the motors of a computer-controlled machine where to move its motors, how fast to move them, and how long to keep them there. Using this G-code the printer builds up layer after layer of just-melted non-toxic plastic, in a method called Fused Deposition Modelling.
So how do we get this G-code? There was a time when someone would have needed to write every individual line of code, telling the machine exactly what to do. Fortunately, we now have a selection of very powerful tools at our disposal to complete this for us in a simple and intuitive way, so powerful in fact that a hobbyist should never have to manually write or even edit a line of G-code.
This is where a “Slicer” comes in.
A slicer is a special program which takes a 3D model and, yes, ‘slices’ it into horizontal layers. These layers are the exact thickness of a layer of the melted plastic coming out of the 3D printer nozzle (known as “extruding”). There are other settings we tweak in the slicer, but the key point is that the slicer turns a solid 3D shape into a series of 2D layered instructions – like a floor-by-floor layout of a skyscraper. So, is this where the NASA-grade supercomputer comes in? Surprisingly not. Modern slicer software is so good that even the free options (such as Cura, PrusaSlicer, or IceSL to name a few) can efficiently slice the kind of models that will fit on an amateur-sized 3D printer in a matter of minutes, if not seconds, depending on the complexity of the model and the specs of your computer.
To complete this slicing process, the PC relies heavily on your CPU (Central Processing Unit). This is the workhorse for most normal software on your PC, and slicing is no different.
Below is a typical 3D model, loaded into the popular slicer Ultimaker Cura.
Here is the CPU usage graph for the slice. You can easily see the spike where the software temporarily used as much CPU performance as it could get its hands on, then promptly resumed its nominal load.
Slice ends
Slice begins
All told the slice took less than 10 seconds to complete, and gave us our sliced model, ready to save as G-Code instructions directly to our SD Card.
Note the slider to the right of the screen. This allows us to control what is visible in our Preview window, giving a section view of the sliced layers.
The slicer software has many interesting features and settings, and a comparison of slicers and the suitability for different projects and experience levels will be given in a coming article. Stay tuned!
So, we’ve got our slicer program ready to turn models into G-Code, but where do we get our models?
The standard file format to use in a slicer is .stl – possibly taking its meaning from Stereolithography, Standard Tessellation Language, or even Standard Triangle Language. Whatever the etymology, the filetype is ubiquitous and any 3D modeling software worth its salt will be able to export a model into this format. The .stl file contains only the actual shape of the object. It contains no data representing the color, texture, or internal structure of the model, as might be commonly found in 3D models used for other purposes. The removal of this unnecessary data makes the format perfect for 3D printing, where the color, texture, and internal structure are all defined by the user’s choice of 3D printing method, material, and slicer settings. This also makes the files small and easily downloaded, saved, and transferred, meaning we don’t need a hyper-fast data transfer system, special hard drives, or a world-class fiber connection to move our files from one place to another. This is especially good news for the 3D printing beginner, as to start with you’ll likely tend to download more models than you’ll create.
Actually downloading the models couldn’t be easier. Websites like Thingiverse.com allow simple, unlimited downloads of other users’ uploaded files, and you can choose from thousands of original and remixed creations. But what if you want to remix a model yourself, or indeed create one entirely from scratch?
That’s where CAD software comes in. CAD simply means Computer Aided Design and is exactly that – a way to design something in a virtual space on your computer. Modern CAD software is powerful, fairly user-friendly, and often free. A comparison of the multitude of CAD options on the market will follow in an upcoming article – for now, we’ll just examine CAD software in general terms.
Generally, creating something in CAD isn’t a particularly intense exercise for a PC. A computer is completely at home turning user inputs from a mouse and keyboard into on-screen operations. Again your CPU will be quietly putting in the bulk of the work, assisted by your RAM (Random Access Memory – think of this as the component that allows your PC to multitask). An average modern computer should be quite at home with basic 3D modelling, but where things may get a little slow is when your models get very large or very complex. For the most part, when you’re designing a model, you’ll only be changing one feature at a time. This is a simple thing for the CPU and RAM to keep up with – you’re only really changing a handful of parameters with any given mouse click or cursor drag. But the other thing we tend to do in a virtual CAD space is rotate our object, to give ourselves an understanding of its 3D shape from a 2D computer screen. This is where the most venerable of PC parts come in – the Graphics Processing Unit, or GPU. The GPU is integral to any high-quality visual display (think video gaming, or video editing, or really anything that needs a high-speed visual output), and CAD modelling is no different. Rotating our virtual model requires a new virtual projection of the shape many, many times a second (depending on the refresh rate of your setup). Each refresh means your CPU calculating a new projection and your GPU turning that into a visual image on your display. Therefore, if there is ever a place that your PC components are going to show their age or limitations during the modeling process, this is it. 3D models can become extremely complex, and it is not uncommon to feel stuttering or a low refresh rate or even a laggy cursor during complex modeling, even on high-end computers. But don’t be deterred – it’s easy to separate your model into smaller, less complex components and work on them individually. Remember, once you’ve combined them back together and exported them as a .stl the only data that will be recorded is the overall shape. None of the messy joins or internals will matter, so long as the visible external faces match nicely. It’s also worth remembering that the limited build-plate size of entry-level 3D printers means that the kind of files likely to be encountered by an amateur hobbyist is going to be pretty small, even for complex models.
The important thing to remember is this: Moore’s Law is the proposition that the number of transistors able to be crammed into an integrated circuit (read: computer chip) doubles about every two years, due to the development of seemingly ever-smaller technology. Named after the co-founder of Intel Gordon Moore, the ‘law’ has, amazingly, more or less held true since 1975. In simple terms, this means the computational power available to the average person has literally increased exponentially over time, and certainly since the 1980s – which is when FDM 3D printing was invented! If they managed back then, we can certainly manage today, with our infinitely more powerful computers.
The Stratasys 3D Modeler, the first commercial FDM printer
But what if we want to upgrade? Where is the most bang-for-buck to be found?
It’s really down to a balance of the big three components:
CPU (Central Processing Unit)
RAM (Random Access Memory)
GPU (Graphics Processing Unit)
Ideally, you’ll want to balance these out. Consumer computers tend to ship with a distinct lack of GPU power (some don’t even have a separate GPU, instead leaving the CPU to handle everything), so this can be a good place to start. If you’re using a laptop this might be difficult, simply due to the limited space inside the case, but technically not impossible. The same goes for the CPU, but the RAM at least is often straightforward to augment in laptops, with there often being a special port where an additional 4GB stick can simply be plugged in next to the battery.
If you have a desktop PC your options are almost limitless. Almost all PC parts are universally interchangeable, with the exception of CPUs, for which you will need to match the brand of your intended new chip (Intel or AMD) to the brand for which your Motherboard is set up. The same also applies for RAM upgrades, where you will need to be mindful of the DDR (Double Data Rating) – older computers will have a motherboard limited to DDR3, whereas newer machines will likely accept only DDR4. Beyond these constraints (and they’re barely constraints with the sheer number of options available) you can do what you want to your PC. You can even consider overclocking an old CPU to achieve an output similar to that of a modern one (like turbocharging a small engine). Another sometimes overlooked upgrade is the method of storage on your computer – augmenting an old Hard Disk hard drive with a modern Solid-State Drive (SSD) will make a massive difference to the feel and responsiveness of any PC. The point is that a family computer can be easily and cheaply upgraded to a strong machine capable of tackling any 3D printing related task – and if you can’t justify an upgrade, it will likely be fine anyway, perhaps just a little slower than you might like when it comes to rendering in CAD or slicing your model. If you’ve already got a capable device, you’re all set – order the 3D printer of your choice and get creating!
For more on entering the world of 3D printing, stay tuned for a series of articles detailing the wealth of methods, machines, and materials available to the hobbyist DIYer, and how to use them to achieve professional results.
A computer for 3D Printing – all you need to know – a real customer experience
3D printers are an incredible piece of technology, letting users turn an idea into a reality seemingly at the push of a button. For most printers, from the basic consumer printer to the advanced industrial-grade variants, the magic begins on a computer. Obviously, to make this happen, we need a crazy expensive supercomputer, right? The answer just might surprise you.
Timofeev Vladimir – Shutterstock
Experience and Goals Matter
The computing power needs for 3D printing specifically are quite minimal. For the average hobbyist, not only do you not need an ultra-fancy and expensive supercomputer, the cheapest computers and laptops on the market are more than capable of handling your 3D printing needs. This is because for the average hobbyist, the only thing needed to run their 3D printer is an internet connection and slicing software. This slicing software is typically very easy for a computer to run, with minimum requirements averaging:
Intel Core 2 processor or better
550MB of available hard drive space
4GB of RAM
While the process may be a bit slower with an older or weaker computer, by downloading an STL file from common 3D printing sites and running them through the slicing software of the user’s choice, the coded file is automatically generated for your 3D printer.
Resin Validation Print Created by PapaChop83 – Thingiverse
Getting More Involved
While the average hobbyist can get by with even the most basic computer setup, what about those who want to move beyond the realm of models created by others and start designing their own prints? In order to accomplish this, the user is going to need to get themselves set up with basic 3D modeling software. There are a wide variety of free programs designed for those just getting started or who don’t have a need for more complex professional programs. Examples of these programs include Tinkercad, Meshmixer, etc. Some of these options, like Tinkercad, are browser-based programs. These allow the user to utilize the program without demanding requirements for computing power. For example, Tinkercad prides itself on being able to be used on most computers and laptops purchased in the last 6+ years, so long as it has a graphics card that supports WebGL. Programs like Meshmixer, which are installed to the computer like most other programs, require a little more but are still not far from that of slicing software. These requirements generally include:
Windows 7/OS X or later
4GB+ of RAM
500MB of available hard drive space
A model created in Tinkercad by $TacoCAT$ – Tinkercad
Advanced Users
I’m sure you’re all wondering when you’ll finally get the excuse you’ve been waiting for to go out and pickup your dream machine. In reality, it is when you start moving toward the professional world of 3D printing that the demands begin to ramp up. In order to create more advanced and complex 3D models, the need to use professional modeling software begins to arise. Professional modeling software like Fusion 360, Solidworks, Blender and Catia range in price from free to upwards of $10,000. While they come with more of a learning curve, they also afford the user the ability to create incredibly detailed works of art. In order to make this possible, though, they come with a much more intense list of system demands, such as:
Microsoft Windows 8.1 or newer
A recommended 8GB of RAM or higher
3-10GB of free hard drive space or higher
Multi-core 64-bit processor (minimum – 3 Core, 1.7GHz, recommended 4 Core or above, 3GHz or above)
Dedicated graphics card with 4GB or more of VRAM
While this may not seem like much, these are the minimum recommended system requirements. The software will run, but the user experience and processing speeds may vary. Many professional users choose to upgrade further in order to achieve better results with less wait time or risk of crashes. While these upgrades can be costly, you don’t have to rush out to rebuild your entire setup. Modeling software typically focuses on three main components of your computer’s hardware:
Graphics Card – For processing visual renderings, textures, and detail
RAM – To store data short-term as you make additions and changes to your model
Multi-Core Processor – For increasing efficiency and performance when running high demand or multiple programs
Of these items, this is arguably their order of importance when it comes to 3D modeling software. While you may not need the latest and greatest graphics card, you want one that specializes in rendering. These will generally be graphics cards made in the last one to three years, with 6GB of VRAM or more. Outside of your graphical rendering, RAM is generally your computer’s most taxed resource. For this reason, professional modelers tend to aim high when upgrading RAM. While the software minimum recommended RAM is only 8GB or higher, professional modelers often aim for 32-64GB. Processing power is important, but most 3D modeling programs are specifically designed to minimize this requirement. Fusion 360, for example, isolates a single core of a multi-core processor when opened to use for modeling purposes. This allows the computer to have a dedicated processor to help minimize delays in tasks while still allowing the computer to use the remaining power for anything else the user may need to have open.
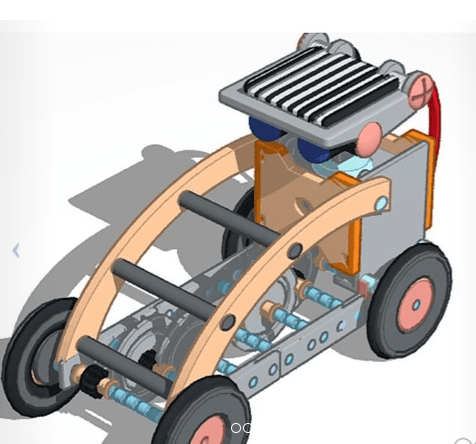
An example of a 3D model created in Fusion 360 – Autodesk
3D Printers for Other Purposes
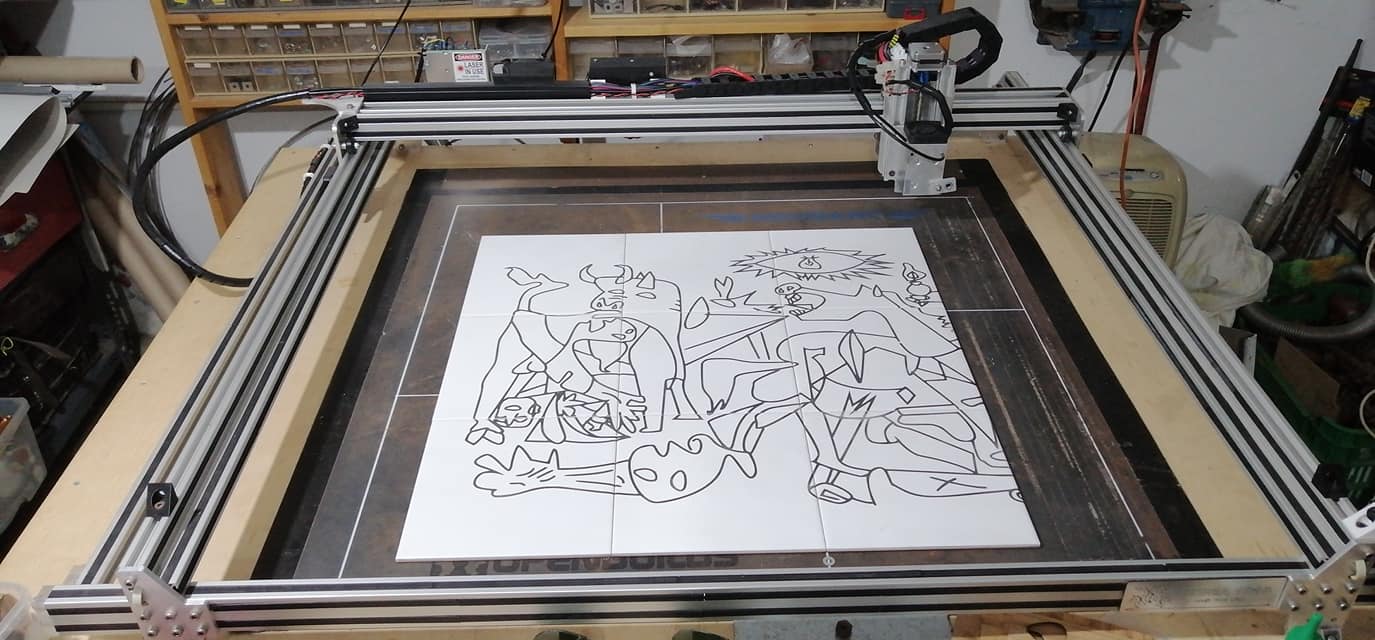
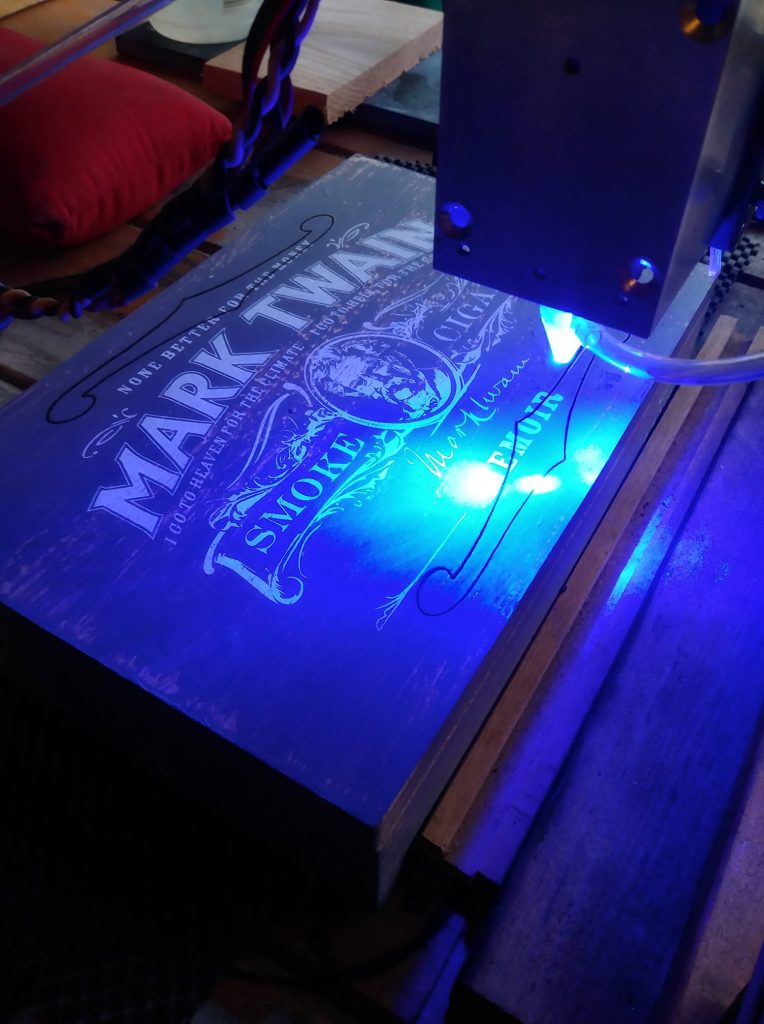
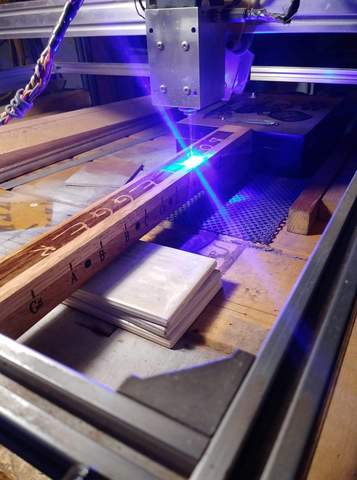
Now that we have a better idea of the computing requirements for 3D printing, what is required to use 3D printers for other tasks? 3D printers can be used for a wide variety of non-printing tasks, including CNC machining, laser engraving/cutting, and more. CNC machining utilizes 3D models to create its parts, so the requirements for it are very similar to that of 3D printing. Using laser technology on a 3D printer, though, couldn’t be easier. For example, by mounting an Endurance laser like the one shown below, you can utilize very simple two-dimensional software to create logos, upload photos, or to make designs. These can then be transferred to the printer at the push of the button. Endurance offers a variety of lasers fitting any need and budget, allowing users to perform a range of tasks from cutting wood to etching/engraving metal and carbide, and even creating engravings in color. For more information, photos, and videos, check out www.endurance-lasers.com.
A colored image etched into a ring created by an Endurance laser
An engraving on a copper plate created by an Endurance laser