Acrylic is a nice material to work with and can find an almost limitless use. It can be of various colors and sizes. Besides, this material is rather long-wearing so may be used in all kinds of constructions.
Visually transparent acrylic is comparable with glass, but it’s much easier to process. To configure glass in a complicated way expensive equipment, such as a waterjet cutting machine, is needed.
To cut acrylic even a hand tool will do. But for a better result lasers are used.
These machines can be used to cut/engrave different materials: from plywood to glass.
Here, we are going to tell how to make a beautiful stand with lighting using a CO2 laser. You can engrave the name of your company or some image on it to decorate your home.
You will need:
– A СО2 laser machine (30 watt / 40 watt) – 2 mm acrylic – 3 mm plywood – A soldering copper and whatever you need for soldering – 2 light-emitting diodes – G13 batteries (3-4) – 1 small spring – PVA glue
If you want to change anything in the construction of the stand, perhaps you will need to change this list too.
1) Modeling.
At first we need to make a base for the stand. We’ll make it of plywood plates glued together hiding all the elements of the electronics inside the central plywood plates.
Any editor for vector graphics (e.g. CorelDraw) is good for modeling. In this program, we design all the plywood plates and save the images as SVG files to be later imported to the operation program of the machine.
2) Cutting.
So we import our vector files, place the plywood on the worktable and run the machine. When cutting plywood, it is important to use an air assist. It will help your lenses last and make the cutting quality better. We also use a ventilation system. The laser beam vaporizes the material when hits it generating smoke. Smoke might not just reek but also be harmful to one’s health.
If everything is well-designed for the electronics you will face no problems when assembling the base. Before inserting the light-emitting diodes we recommend that you polish the diode ends to make them flat. In this way the light will diffuse evenly in all directions.
At first we join together 1-4 plywood plates using PVA glue. Then we clamp the glued together part in a carpenter vice and leave for a night to dry.
The next day we assemble everything as shown in the pictures inserting a spring and a small copper plate (for the battery) at the opposite ends of the slot, cut out in the 4th plywood plate beforehand.
After the electronic elements have been installed, we glued down the last plywood plate (5).
After the glue has dried out we take off the carpenter vice and polish all the surfaces focusing more efforts on the edges.
For polishing it is possible to use either hand tools or a portable bend sander. Here is what we have after polishing.
4) Acrylic
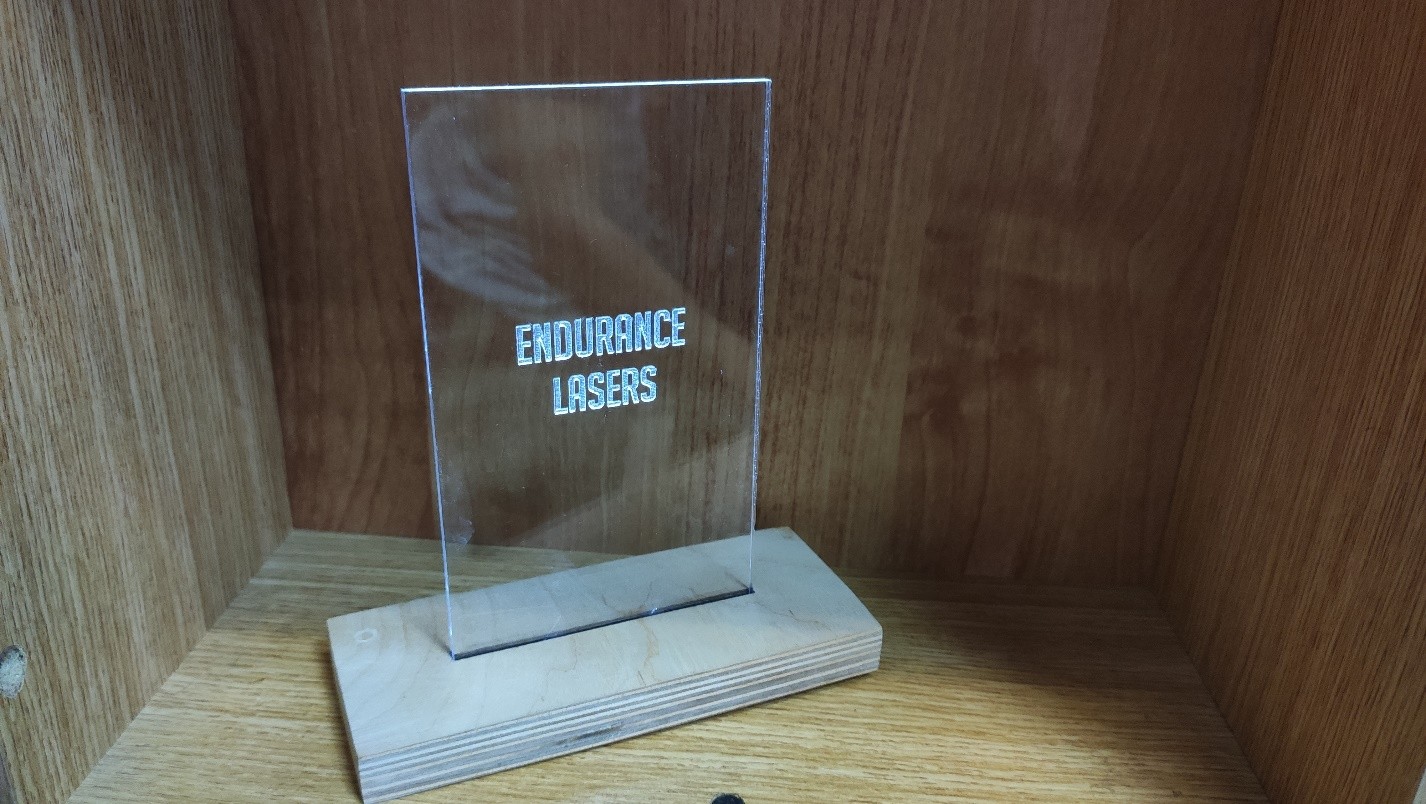
We use 4 mm acrylic. There is a cut out 84 mm by 4 mm slot in the upper surface of the plywood base for the acrylic plate, 84 mm wide by 4 mm thick. The optimal hight of the acrylic plate is 145 mm. In this case the plate and the engraved image on it will be well lit by the diodes.
You can engrave on this acrylic stand any image or inscription. Only don’t forget that to engrave an inscription you need to mirror it first because you will look at it from the opposite site in in the finished item.
Our construction provides for a possibility to change this acrylic plate for another one. With this in mind, you can engrave a number of other plates with different images.
After cutting and engraving we wash the finished engraving with a brush and peel off the protective film from the acrylic.
EVERYTHING IS READY. The last thing left is to insert batteries.
In addition, it is possible to cover the plywood base with oil to accentuate the wood structure and give it a nice shade.