 laser")
I am sure that many of you have never ever thought that you can use your 3D printer as a laser cutter as powerful as a CO2 engraving machine and as efficient as a fiber laser device.
But we make it possible and I will prove it!
Powerful diode lasers appeared on the market not long ago.
Now there is a great variety of powerful 405 / 445 / 808 nm laser diodes. They give an opportunity to do laser cutting and engraving on almost any material including wood, plywood, leather, plastic, anodized aluminum and even stainless steel.
These laser diodes are really tiny that allows to make relatively small lasers weighing less than ½ pound.
What is a laser diode attachment?
The laser diode attachment is a laser diode inserted into a heatsink with a diode laser driver to control the laser power via a TTL (PWM signal).
It is important that a laser heatsink is good enough to draw off heat from the laser diode itself. The laser diode with less than 1/3’’ size generates heat up to 25 watt that has to be removed. If the temperature of the laser diode exceeds 60-70C the crystal starts to degrade, that is why it is ultimately important to have a very good heatsink. The size of a good heatsink is usually 2 x 2 x 3’’ or even bigger plus it should have additional fans to make a strong air flow around the heatsink.
Next important improvement is a laser driver that stabilizes the current and voltage keeping smooth operation of the laser.
Learn more about laser diodes…
How it converts your 3D printer into a powerful laser cutting / engraving machine
Adding a laser to a 3D printer does not require soldering or complicated upgrades. All 3D printers have a FAN 1 and a FAN 2 pin outputs to connect the laser.
To learn more about pinouts for different 3D printers go to https://endurancelasers.com/compatible-3d-printers-and-cnc-machines/
Another good thing is that in most 3D printers or CNC routers you do not need to remove extruder or mill. You can hook the laser just nearby since it is small and light enough.
Perhaps you think that after connecting of the laser you will need a special software for engraving. But NO! No additional software needed. You may use Inkscape with the J Tech Photonics plugin or Endurance G-code plugin to prepare an image for laser engraving or cutting.
It is quite easy to do.
Just make sure you have the proper M command to turn on / off the laser.
You can change the laser speed using the F command and adjust the laser power from S1 up to S255.
Learn more about working with a g-code.
What is the difference between diode lasers present on the market?
This is a crucial and important point. I guess, many of you use Aliexpress, Ebay, DHGate and other sites to buy useful things. But unfortunately, these marketplaces do not provide their customers with decent support. No, I’m not saying the seller does not reply, he does, but how prompt and how efficient your communication will be.
I believe, it is important to have a community and supporters who can help and assist further, share lifehacks, etc.
We are still growing our community of mentors and supporters.
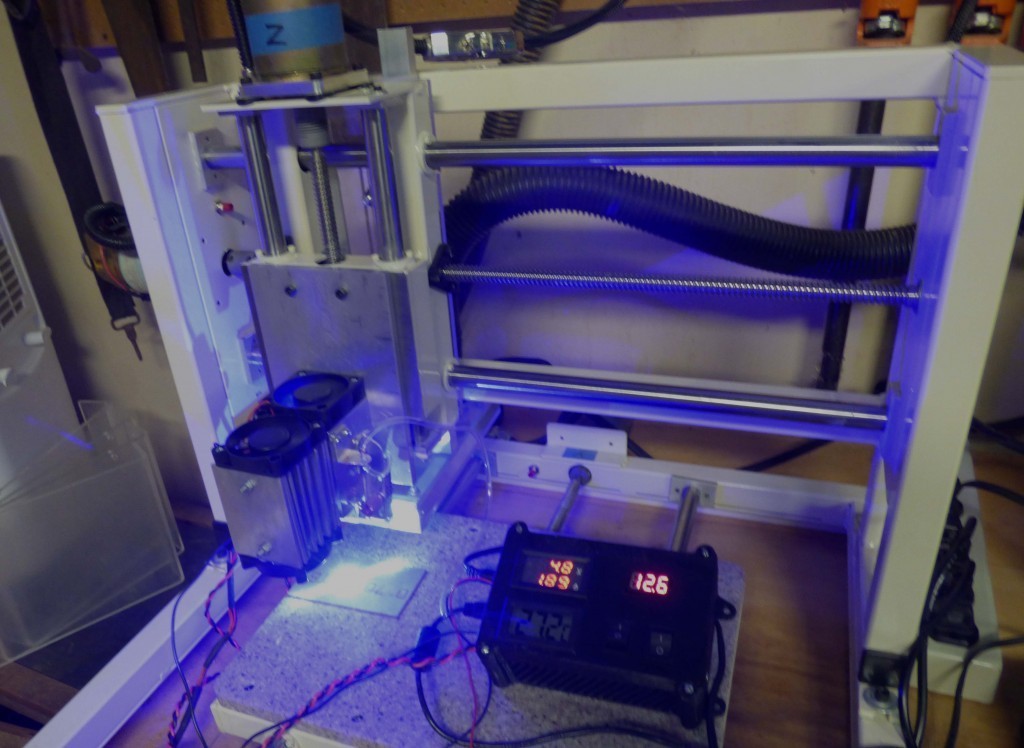
When you buy a laser, you have no idea if it was tested after assembling and what is its real power output.
Doing measurements like this would be very helpful for customers and get a better vision about their laser power.
Measuring of a full laser beam power might be a complicated process since it requires a pretty expensive equipment.
A 10 watt laser can easily cut dark acrylic up to 1/3’’ thick with a few passes, but with white acrylic it might be a problem since the 445 nm wavelength beam will be more likely reflected from the acrylic surface and will be unable to cut at all. That is why it is important to know the real parameters of your laser and understand what exactly you are going to do with the laser.
445 nm lasers are good for cutting and engraving almost any materials of any color but white and transparent.
However, engraving on transparent acrylic and glass surfaces is possible.
How can you use various laser power outputs?
I think it’s a stuff for a new article: parameters that you need to setup for laser cutting and laser engraving using different lasers… The parameters depend on many factors. Here is a full guidance we prepared a few months ago.
Laser focusing
As I have already explained laser hooking and connecting to a 3D printer board is not a big deal, while laser beam focusing can be a bit harder exercise
The better you focus the laser beam the more powerful tool you get. We know that if a laser beam is unfocused even a little bit it is unable to engrave stainless steel or anodized aluminum.
The easiest way to focus the laser is by way of burning lines while changing the z axis height. The finest line will correspond to the optimal focus.
There’s also another way to setup the focus by way of using a mirror camera with full zoom and a green or red filter. I described it in my blog.
I must say that it is a pretty efficient technology, however, burning lines is an easier one.
Key features of 10 watt and 10 watt+ diode laser attachments from Endurance.
At the end I would like to specify key features of our 10 watt laser+.
Laser Type: Nichia diode
Laser Optical Power Output: 10000mW ± 15%
Focal Length: 2-10 cm (variable) for a 3 element lens | 2-10 mm (variable) for a G2 lens
Laser Wavelength: 445 nm
Lens Type: 3 element long focal lens / G2 short focal lens
Operation Time: 48-72 hours of non-stop operation
Voltage: 12V DC
Total Current Consumption (including TEC cooling): ~10 Amps
Cooling: 60 watt TEC cooling with an advanced heatsink and high speed fans
Mount: Ultra compatible and universal
Installation Guidance: Full guidance
Minimum Laser Pixel (spot) Size: 0.1 mm (100 uM)
Power adjustment: Endurance MO1 PCB
Laser Driver: External inside the laser box
Lifetime: 10 000+ hours
Maintenance: Not required
Additional power: Required for fans, TEC cooling, laser box
Presentation of 10 watt laser+
An Endurance 10 watt+ “Invinsible plus” laser
5 key improvements comparing to a 10 watt laser
– Added an air assist.
– A laser box replaced a laser control board.
– An advanced TEC cooling system.
– A big focusing ring for easy focusing.
– A poshed aluminum housing.
Technology
A laser box allows to monitor the temperature, voltage and current of the laser diode.
A TEC cooling system keeps the laser diode safe from overheating.
A big focusing ring allows to setup focus with less steps and make it more accurately.
A polished aluminum housing of the laser looks good to the eye.
A 10 watt laser+ goes with a laser box which
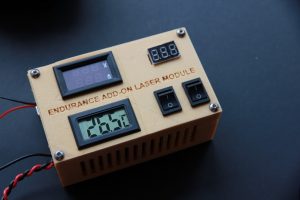
– Stabilizes the current and voltage
– Enables to operate the laser: full power / TTL control
– Protects the laser diode from an unexpected voltage jump
– Measures the laser temperature
– Measures the incoming and outgoing voltage & current
– A programmable Arduino board allows to setup the power (duty ratio) & laser beam frequency (impulsive mode)