How to add a rotary jig (system) [A-axis] to your existing CNC machine like CNC 3018, Eleksmaer, Ortur, Neje, Atomstack. All you need to know.
The rotary attachment is the perfect upgrade to your CNC machine. Installing your laser on a rotary jig is a seamless process. A rotary attachment can be installed onto your existing machine with no welding or complicated wiring and modifications required. Rotary attachments are compatible and can be quickly installed with many CNC machines. This compatibility feature works well with Endurance lasers and the results will always look stunning once you connect your existing machine with new Endurance lasers.
Apart from the X, Y, and Z-axis, the A axis is the fourth axis that can be added to your machine. 3D objects or round objects are often not possible but once you have attached a rotary jig, you will be able to effectively engrave and machine cylindrical surfaces.
The rotary attachment for CNC machines is designed to allow for precision machining on rounded surfaces. While rotating the laser can reach the laser’s focal range.
Focus is always important for your laser engraving and the rotary system will help keep your laser in focus all the time as it rotates while the laser is on. The rotary system will rotate and keep your laser at the best point to engrave by rotating and keeping it within the right focal range. Remember that focus is essential and your rotary attachment will produce stunning results.
You can create your design in 2D and then with the rotary attachment, you can design on the cylindrical surface.
A rotary module can support various sizes of cylindrical items at extends the capabilities of your machine by allowing you to engrave on cylindrical surfaces,
This is a great way to extend the functionality of your CNC machine. The laser is versatile and will be able to be movable.
A recommended software for rotary engraving is Lightburn. This software is user-friendly and you can have full control of your rotary configuration.
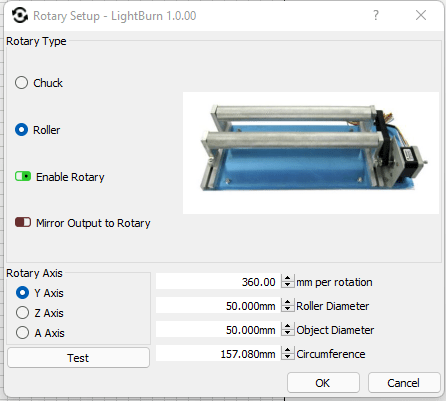
To set up your rotary Jig in Lightburn, first, go to the menu and click on TOOLS> Rotary Setup

A window will open showing you options to configure the parameters of your item.
You need to enable the rotary, then set the diameters.
Set the steps per rotation
Set your diameter for the roller
Set the diameter for the object. When the diameter is being set, you will notice the circumference is automatically being calculated for you.
If you are not using Lightburn software, you can also use a caliper to determine the diameter, radius, and circumference of any cylindrical surface.
Make sure your item is properly set on the jig and you can try tests on the surface.
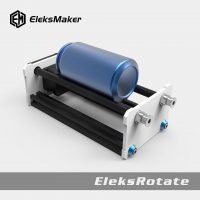
Engraving on a cylindrical surface using an Eleksmaker rotary system makes a great deal of difference of sense. Adding this new axis to your machine will increase its abilities and functionality significantly. You can expand from 2D to round objects and increase the possibilities of what you can create. This will help make your machine more versatile and allow you to take on projects outside the normal cutting parameters.
A full video of how to add an a-axis rotary system on a CNC 3018 machine.

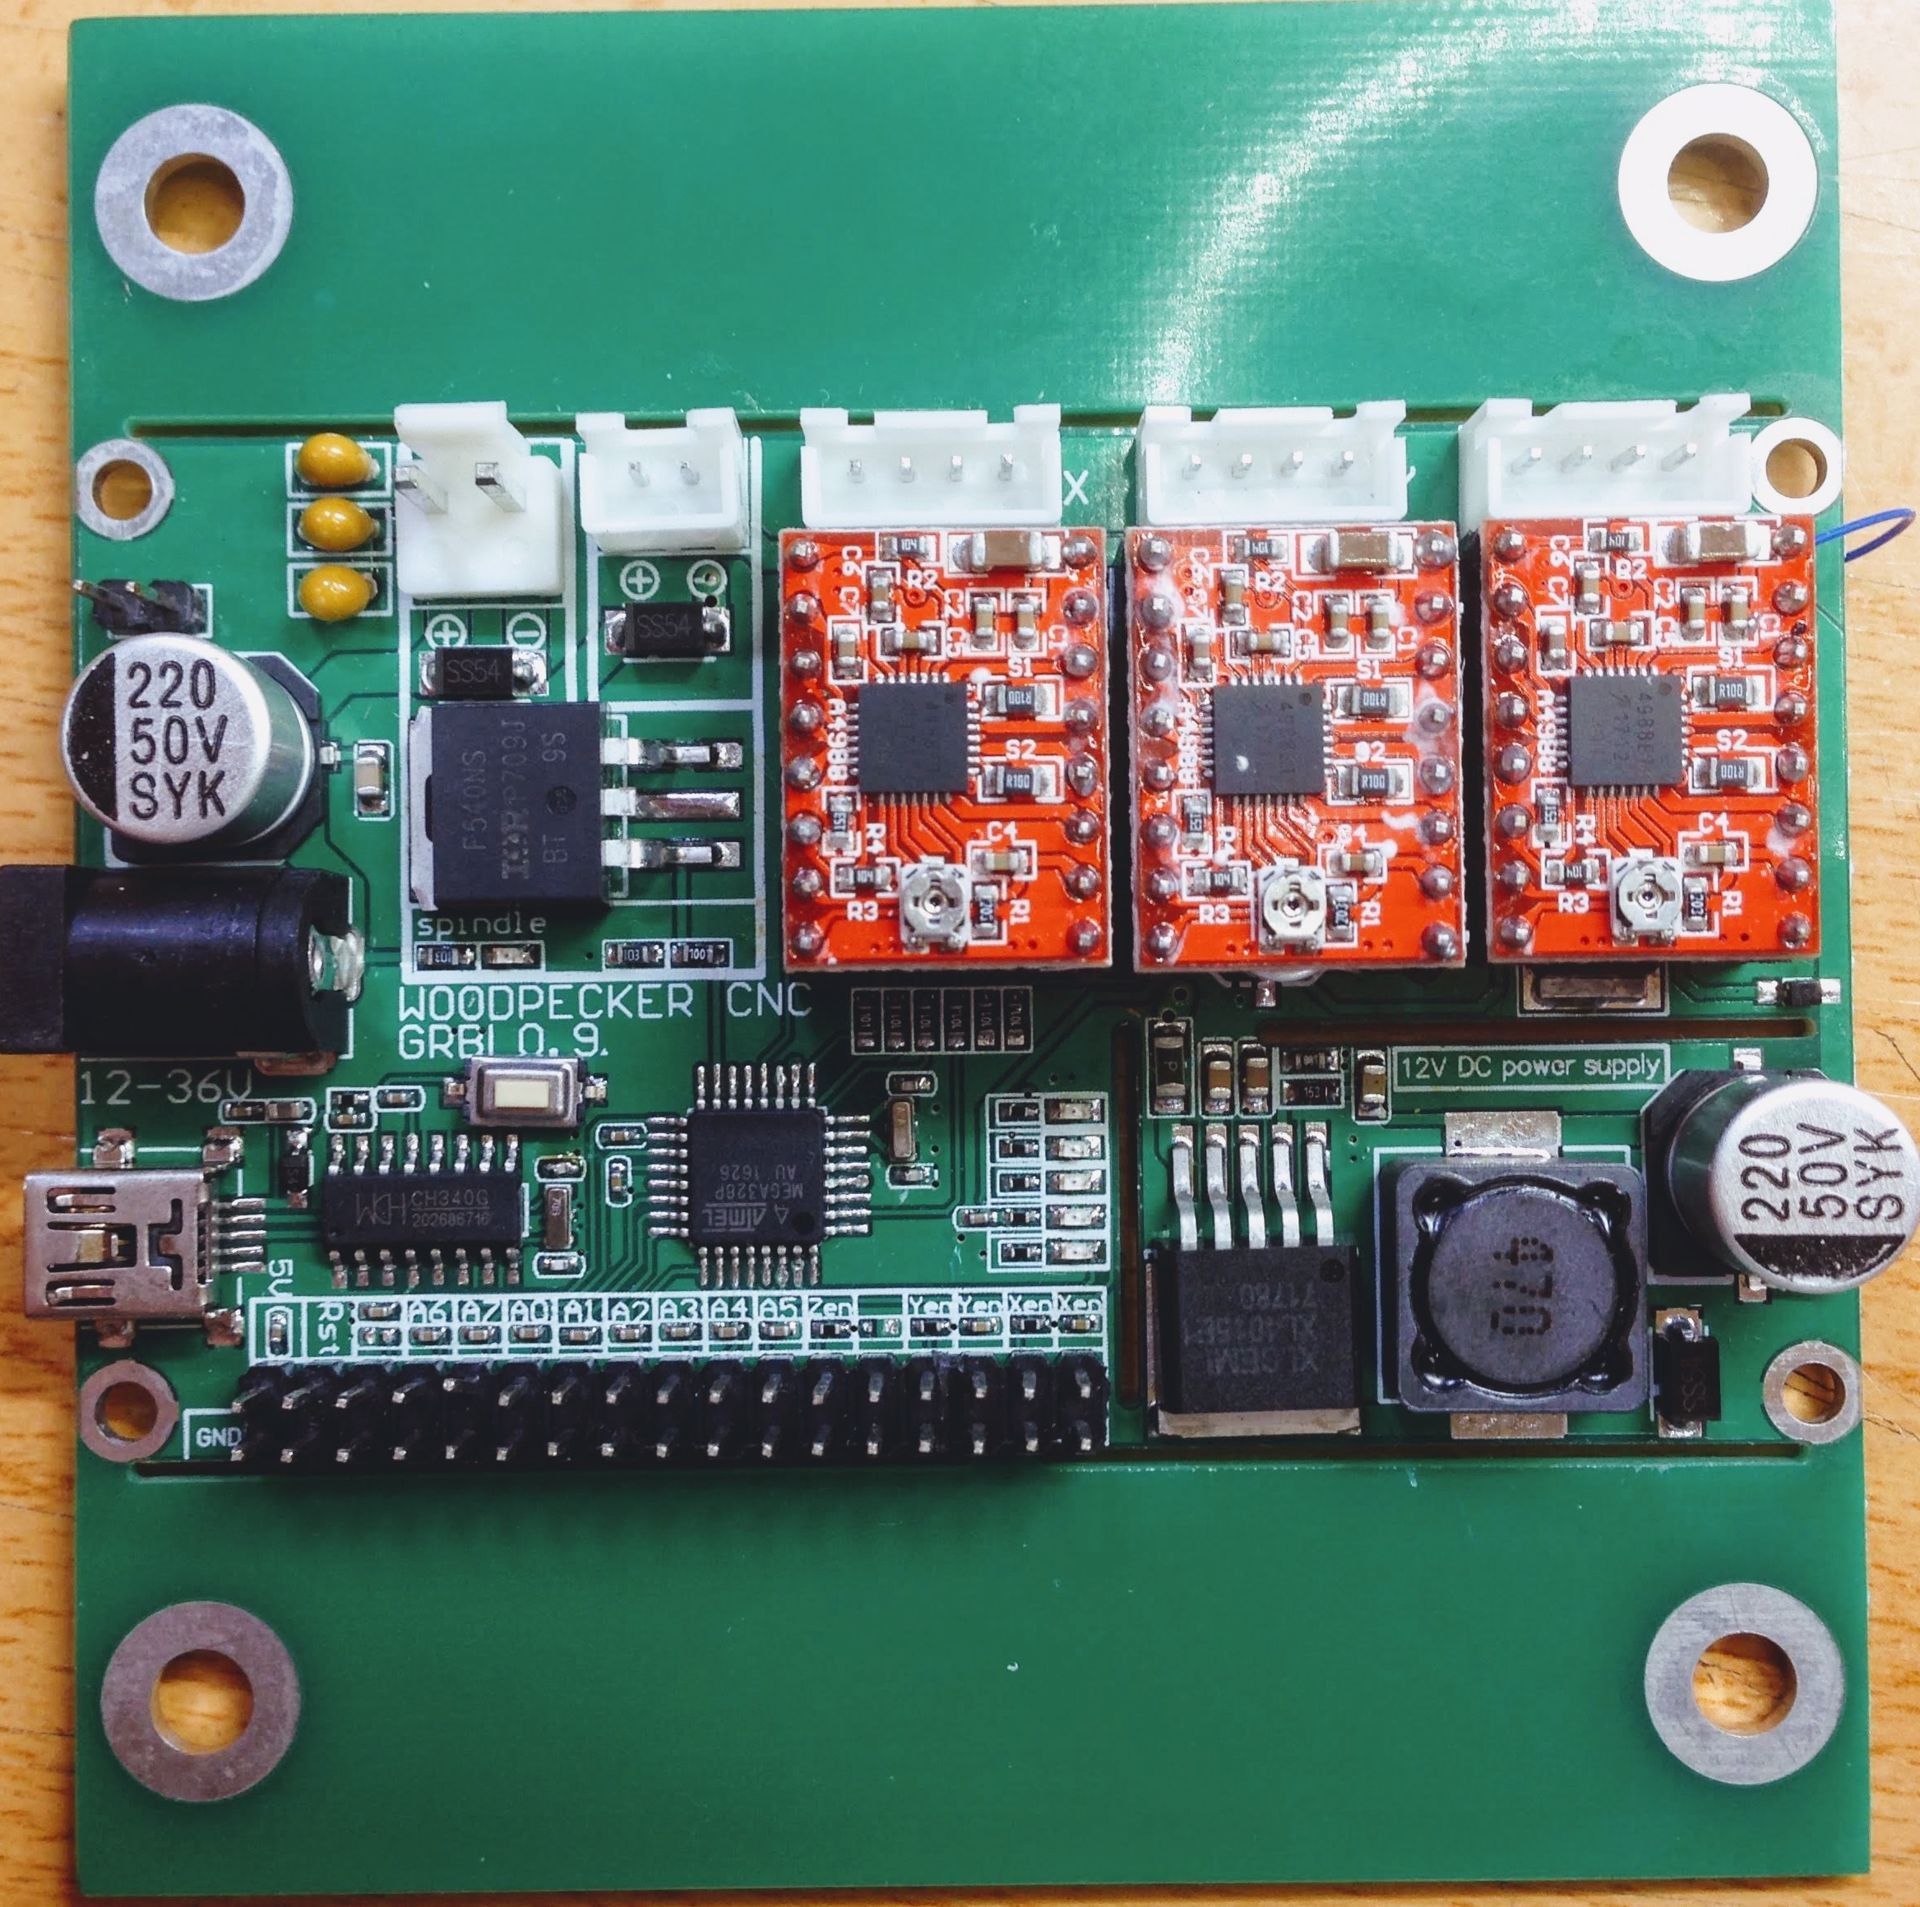
Using a spindle pin for laser engraving.
- Use the Y motor pin for the rotary system.
- Add 10-50 ohm resistors to the spindle pin.
- Connect the laser to the spindle pin.
- Run a g-code using GRBL control software (check our download center for software >>>)
Keep in mind that there is no standalone PWM pin on the spindle pin, just use “+” and “-“.
Also, PWM has a high frequency on Woodpecker GRBL 0.9 board which is why some lasers might not work properly.
You need to reassemble a GRBL and setup power PWM frequency and upload it on your Woodpecker GRBL 0.9 board or just use an Eleksmaker Mana board and connect it to your CNC 3018 router.
Engraving a cup with rotary (A-xis) with an Endurance laser
Engraving on stainless steel (thermos) using a diode laser
Engraving on a drinking glass using 10 watt PLUS PRO laser
Laser paint removal on a glass. Applying non-removable color with the laser.
Rotary system (jig) on an Eleksmaker frame connected to Mana board
If you have any questions about adding A-axis rotary system (jig) to your machine – let us know in Livechat. We will be happy to assist you!
