A detailed guide on how to work with layers in Lightburn / LaserWEB software – all you need to know to get started!
Why Layers?
When you first get started with laser engraving, you’re probably happy to just engrave a few images on cutting boards, but not much later, you might want to create a nameplate. Then you notice that you want to do both engraving and cutting on the same workpiece. You could do this as two different operations, engraving the image first, and then starting a separate program to cut it out. However, there is a better way, and it’s working with layers. This allows you to define different cutting or engraving parameters for each layer, like one that cuts through, while another just engraves, and then export that as a single file, meaning you just hit go and get the finished parts.
In this little guide, you will learn how you can work with layers in some of the most popular pieces of laser software. The more advanced ones have Layer functionality built right in, which allows for easy management of all your settings, but even if your software doesn’t support layers, you can still make use of them, by copying together different gcode files.
Lightburn software – laser engraving/cutting software
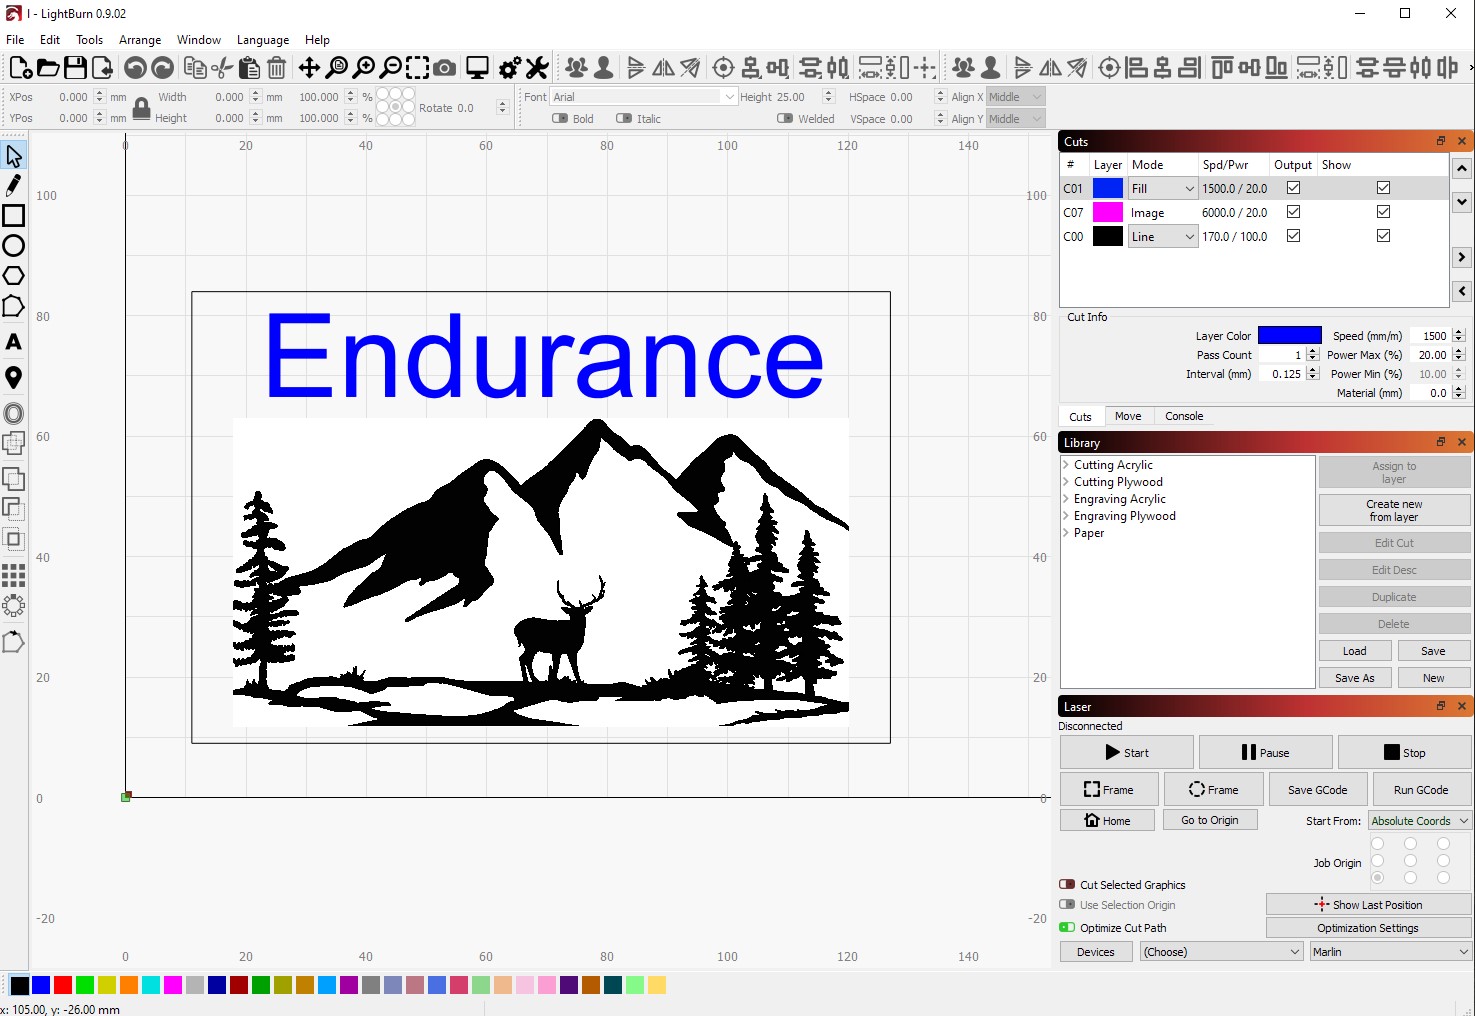
Layers are a central part of using Lightburn. They are represented with different colors in the design workspace and also the cuts overview. To change the layer you’re working on, simply select a different color swatch on the bottom. To change the layer an object is on, you can click on it to select, and then switch to a different layer, by clicking on the corresponding color swatch.
In the cuts panel, is where the real magic happens. If you have elements on multiple layers, you will automatically see multiple entries listed. You can then click on them to change their individual parameters. Having elements on separate layers also allows you to apply different modes to them, like outline, fill, or both. By ticking the checkboxes on the right, you can choose, which layers show up in the design space and which ones will be exported. This is especially handy if you work with a complex design you want to cut out of multiple sheets but keep in one file to work with it more easily.
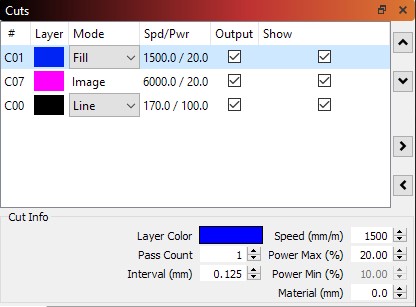
When you then export the gcode, your laser will go through all layers that have the output box checked, and do the cuts. It starts with the topmost layer and works its way down, so if you want to change the order of operations, you can use the arrow buttons on the right to move the layers around. A practical example would be, that you want to do your engraving operations before you cut out the parts, to ensure they don’t move on you. So you would make sure that the engraving layers are showing up above the cutting layers.
Laserweb 4.0 laser software
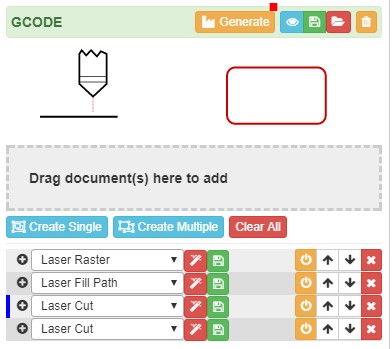
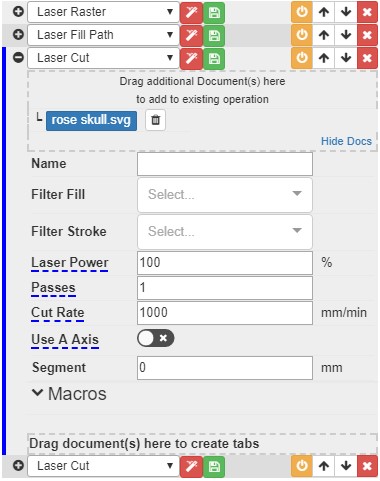
In Laserweb layers are almost impossible to miss, as by default each object you add to your setup is on its own layer. As with Lightburn, you can change the mode and all the settings for each of the layers. There are also arrow buttons on the right that allow you to change the order of operations. If you wish to engrave multiple objects with the same settings, you can drag the document into an existing operation. To visualize which documents are on which layer, you can click on the document in the overview, and the layers that contain this document will highlight in the g-code overview.
Software that doesn’t natively support Layers
If you are using Inkscape, for example, to create your designs, it makes sense to use the laser cutting plugin, as it saves you from having to export your design and use separate software. However, the plugin only allows you to set one speed and power level for everything. That means you can’t export cutting and engraving operations in the same file. What you can do though, is have a complex design with multiple layers and then export each of the layers individually.
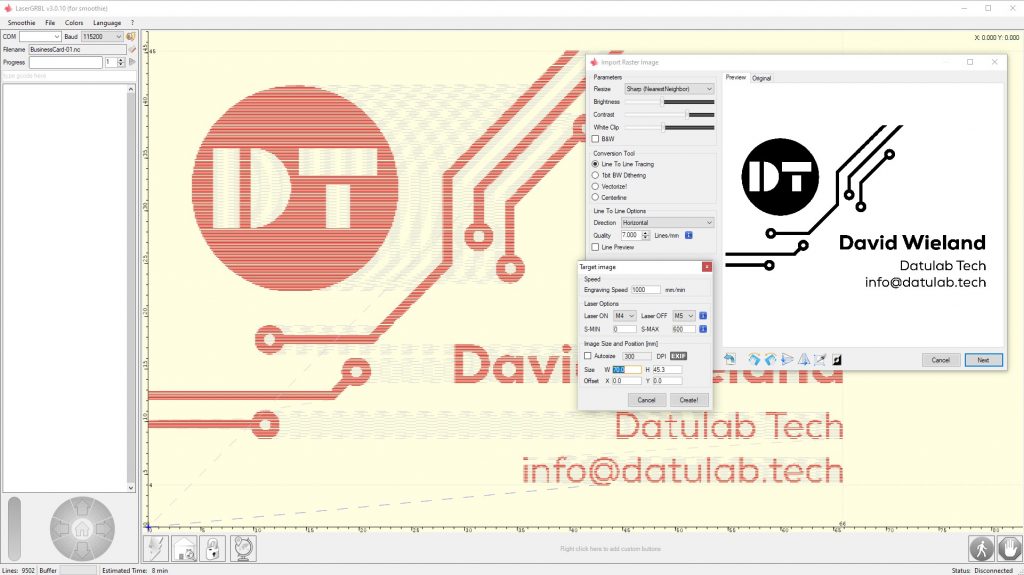
This same approach works in LaserGRBL as well, with the only difference being that you can’t have multiple layers open at the same time. This means that you need to be extra careful to have the position and dimensions of your different designs for the layers perfect, as you have no visual indication if it lines up. To save your g-code to a file instead of running it right away, you can go to “file” -> “save program” and then just repeat the steps for each one of the layers.
This approach has the drawback, that after you created the individual files, you need to run each one of them manually which can be a bit of a pain. A way to avoid that is to open the g-code files with a text editor (Notepad++ is a great option, but the default works too) and copy-paste all your operations into one file. When doing this you need to be a bit careful to copy everything and not mess up the order, as that could result in a bad day. However, if you pay a bit of attention, you can easily combine all your layer gcode files into one file.
Recap – software
Once you start working with layers, there is no way back. The ease with which you can create more complex designs will have you wanting for more and more projects. While it is a bit more difficult to make use of layers with a program that doesn’t natively support it, it is still possible and you can always switch to a different program if you get tired of copying g-code.
Watch a detailed video about using layers on different laser software programs
If you have any questions – let us know in Livechat.
