
Using Lightburn for Laser Cutting
When you get your laser all set up and ready for cutting, the next question is how to convert your design into gcode the machine can understand. There are many different programs available that can achieve this task, but today we’re taking a look at Lightburn. At $40 for the g-code version, Lightburn is priced quite reasonably, considering how many features it offers.
Overview of Lightburn

To get you started as fast as possible with Lightburn, let’s take a look around the interface. (1) In the middle, you can see a representation of the work area that you have defined for your laser. This is where you put your design and can arrange everything. (2) On the left of the screen is the toolbar for making your design right in Lightburn. You can create lines, shapes, text, and then you can combine multiple shapes into one or subtract them from each other. You also can create patterns if you need multiples of an object. (3) Above the work area, you have the properties of the object that is selected. Here you can adjust things like size, font, and more. (4) Above that, you have some more tools like opening, saving, copying, zooming on the left, and some tools to help with the alignment of the different objects on the right.
Lightburn Layers

When we move to the right of the screen (5), we can see the overview of all the layers. A layer in Lightburn is a collection of shapes that all have the same engraving or cutting settings. By separating your design into multiple layers, you can engrave and cut with different settings right in the same file. To change the layer an object is on, select it first, and then choose one of the colors (6) on the bottom of the screen. Below the listed layers, you have a short overview of the laser parameters for the selected layer, and by double-clicking on the layer, you can open a more detailed window.

If you have your laser connected directly to your computer, you can control it in the other tabs (7) that are available instead of the layer overview. In the bottom right of the interface (8), we find some more controls for the laser if one is connected to the computer, but also the button to export the gcode (9) to use it with a different controller. If we switch this panel over to the Library panel (10), we can save cut settings as profiles, that we then can apply to our design and save some time the next time we use the software.
Some Tips
Once you get comfortable with the software and find that you want the panels arranged differently, you can also drag them to a different spot, or completely hide them from the “Window” menu in the top bar. I, for example, like to have the Library visible at all times, so I dragged it to a different place.
Of course, you are not limited to drawing your designs inside of Lightburn, but you can also import many different formats, such as SVG, DXF, Adobe Illustrator files, or even images. When you import an image, you can either engrave it as a greyscale image or convert it to lines, if it is a logo or something. The tools to do that are located in the “Tools” menu in the top bar. When engraving the image, you also have the possibility of choosing different methods. We have a dedicated article and video for that, that goes into much detail.

Another great tool available in the top bar is the preview. You can also reach it by pressing ALT+P on your keyboard. Inside, you get an estimate of the time it will take to complete the lasering, and you also get a graphical representation of exactly how the tool-paths will be.
Exporting files
Before you can export the gcode you created, you do have to choose the controller your laser is using. Lightburn has profiles for Marlin, Smoothieware, Grbl, CanCam, FabKit, and Gerbil in the standard version. If you have a different controller, feel free to reach out to the Lightburn staff, and they can likely help you get everything set up.
I hope that this overview helped you to get started with Lightburn. Once you get the hang of it, it is quite fast to work with Lightburn, thanks to the Library and all the great tools. So now all that’s left to say is Happy lasering!
BASIC LIGHTBURN FEATURES TO UNDERSTAND
Diode laser cutting and engraving can be achieved with a good understanding of the software being used to get the most out of your machine. With the right settings, image preparation, and material preparation, it’s possible to achieve high precision and reliable operation. For this article, we will be using Lightburn software. Lightburn provides many options for laser engraving. Lightburn includes image modes for engraving including atkinson, jarvis, newsprint, ordered, stucki, dither, threshold, greyscale, sketch, halftone. In this article, we will demonstrate many features of Lightburn and provide tips for getting started.
GETTING STARTED WITH LIGHUTBURN
When setting up for cutting or graving, you will want to note the type of material when setting the speed and power of the laser. With any laser used for cutting, the thicker the material, the more repeated passes will be required.
The settings on your machine should be properly set so that it does not compromise on precision and ruin your project because of an avoidable error.
WORK AREA
The bed size on Lightburn should match the parameters of your machine. This will be important for homing and using the maximum space. Inside Lightburn’s grid, a green dot can be found. The green dot on Lightburn’s work area is where the origin can start from. The position can start at user origin, current position, or absolute coordinates.

The job origin can help to customize additional start points of the subject. This job origin has been set to the top left.
FRAME
The frame feature will give you a preview of whether or not your material will fit the cut inside the laser bed. Click frame: Frame can be done to get a preview of the area used for the engraving or cutting. The frame can be useful for all projects on Lightburn. Frame by holding shift and frame at the same time click either frame square or circle type of frame.

OFFSET
With offsetting you can create an inward, outward, or both with an offset and have the inner or outer layer selected separately. This is useful if you would like to engrave the inner part of the offset and then select the outer layer to use as a cut line to make a unique design.

LAYERS
To change the layer of objects select the object and click on one of the layers located on the bottom 00-29 that you would like your object to be on. The color will represent the layer. The layers shown will be able to individually do separate commands for the final image. In the cut/layers panel you can set the specific instructions that your machine runs when it commences.


INBUILT PHOTO EDITOR
An image can be adjusted further with Lightburn’s inbuilt photo editor. An advantage of using Lightburn’s editor is the live picture comparison to adjust the image and avoid problems in engraving.

To find the image editor just right-click on your image, then click on adjust the image.
ENGRAVING IN LIGHTBURN:
You can get started on a project right away with a selected file loaded with custom settings and materials in Lightburn. Lightburn will support the following extensions .ai .pdf .sc .dxf .hpgl .plt .rd .svg .jpg .jpeg .png .gif .tif .tiff .tga .scpro2 .lbrn .lbrn2 .bmp
A clear result can be achieved with proper power and speed and image adjustments.
A preferable type of image used are, high contrast quality, defined edges, little to no noise.
As you can see from the image below, the inbuilt Lightburn editor has many tools for image Layer settings, image modes, Image settings.

AFTER
BEFORE
The before and after show adjustments, in increased contrast, reduced brightness, and greyscale image mode. The improvements include the smoothness, more details can be seen and the overall quality of the picture has been improved.
The quality of the image you intend to use makes a great difference. To create a clear final image a high-definition photo can help achieve a great result. Otherwise, time will be spent bringing up the image quality.
Image options that save time include vector files. Once loaded, you can use the trace feature in Lightburn and select individual elements to a group, and ungroup together to make needed adjustments.
CUT TOOLS AND FEATURES:
Lightburn has several useful inbuilt cutting tools. Once you’ve selected and loaded your file for laser cutting. When lasers are cutting patterns, diodes typically can go through thin materials such as wood or acrylic.
Once you have loaded your image, you then make sure your image file is aligned.
One way to preview a is to use the frame options. Another Option is a quick run of the laser path with low power and high speed. This is done by setting the power to very low to 2-5% and the speed to high (14000mm/s) example. Once set you can see the path the laser will run over a cut or traceable design. This should be done cautiously because even at low power of 2W there can be leftover lines.
The settings for starting a cut can be found in Cuts/Layers

For some lasers detected by Lightburn, the cuts/layers will either use ‘cut’ or ‘line’. Both of them are the same.
Speed and power can either be set up as mm/s or inches/s in Lightburn.
CUT OPTIMIZATION SETTINGS FOR CUTTING.
Lightburn offers easy-to-use cut optimization settings to help increase the efficiency of cuts. To use this feature you first select the subject to be cut. (You can easily hold the shift key while clicking to select and deselect multiple parts of a subject.)
Enable the optimization cut path then click on optimizations settings, then you will see a window that says, order by layer, order by group, order by priority.
Order by layer- This includes the individual layers that are created and assigned within the cut/layers tab.
Order by group-Order by the selected grouped items in the work area.
Order by priority – Order which you assigned your chosen layer on the cut/layer panel.

With optimization settings, you can save time for your project to be completed. For example, choosing the best starting point and cutting in directional order options may reduce a substantial amount of time.
A common method to use for laser cutting and engraving is the addition of air assist. To make sure you get a better result, you may want to consider an easy upgrade of an air assist to enjoy the improved benefits of your laser.
An air assist provides several advantages when laser cutting. This allows for much more precise cutting while eliminating the debris and soot from being brought back into your laser.
An air assist for your machine hardware installation can become an indispensable part of your diode laser engraving and cutting. The items for a good air-assist include:
5×8 mm + 5meterAquarium Air Pump Hose used for aquarium fish tanks
- Air assist mounts to attach onto the laser head. (A 3D printed air assist mount is a very inexpensive and great option you can acquire online.
HAILEA 30W Air Compressor ACO-308
35-55 PSI (pressure per square inch) air pump air will be able to create enough air pressure to make a clean cut without charred edges, reduce flare-ups, and reduce the number of passes required for cutting. With an air assist, laser cutting is more efficient than ever.
TEST AND FIND YOUR OPTIMAL SETTING FOR MATERIAL
A diode can cut through many materials but there are limits even with an air assist. This is simply because the depth of the cut will be impossible for the focal length to follow the depth and space of the cut line. When your laser starts cutting deeper and deeper, the behavior of the laser will change.
Testing your material will help you find the optimal values and settings of speed and power for your project to achieve desired results.
Test cutting can help determine how many passes it takes to cut through your material. A grid array with different values in each will help you understand your laser and material. You can arrange the grid and run a test with 2, 5, 10, or as many spaces as your grid will allow. The test grid will show how many passes will be required.
Laser cutting is an extremely accurate means of cutting, allowing you to save time and money. Endurance lasers will provide high-quality laser that is excellent. See how Endurance lasers are changing the game in the laser cutting industry.
THE RIGHT APPROACH FOR DIODE LASER BEGINNERS.
A diode laser is a powerful device that performs well with the correct settings. Diode lasers are popular among skilled hobbyists and are used in many businesses. As a beginner, you will realize how much detail matters in everything from speed and settings to DPI (dots per inch) and the number of passes.

PROBLEMS FACED BY BEGINNERS
It is common to face problems when first laser cutting or engraving.
The values and speed settings, preparing your image, correcting the right power, and checking for mistakes before you start will determine how well a laser will perform on any project.
SPEED SETTINGS
Determining the speed before starting a laser cut or engraving matters. A high speed does not necessarily mean a faster time to complete a project. When your laser is too fast then the engraving will not have adequate depth, darkness, or consistency on your material surface. Fast speeds will only capture fewer details onto the material and it will also be missing critical details.
A slow speed can also adversely affect your project. When your laser speed is set too slow then you may cause deep rough charring or a fire on wood for example due to a concentration of the laser’s power within a short space for a long time.
A slow-speed setting is also sometimes useful and may be done for several reasons such as a deeper darker result or parts of a cut or engrave that require repeated passes for a cut,or to touch upon an area. A slow speed can be used on certain surfaces without bad reactions but beware of things unseen such as the increase in fumes being released slowly due to the amount of burning occurring. Diode manufacturers usually provide a speed and power reference table for your laser.
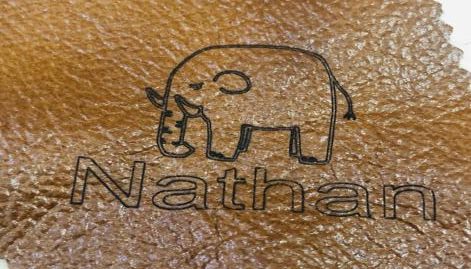
POWER VALUES AND MATERIAL

Certain materials such as leather need careful attention to power values that are high level. Leather will burn and produce a strong smell during contact with a diode laser, thus it is important to have proper ventilation against harmful fumes. Different materials will tolerate heat at different temperatures.
A good rule of thumb is to remember that lighter material such as 3mm plywood or less, leather, felt and other thin materials cannot tolerate the laser’s high levels of heat moving at a slow speed. They will be prone to charring and unintended damage to your engraving. A thicker and dense material such as bamboo or 5mm plywood or higher, will require more power.
PREPPING YOUR IMAGE
Preparing your image is an essential part of laser engraving. Three image settings to focus on are the DPI settings, contrast, and image quality. Choosing a high-resolution image will help you achieve a more realistic depth and impressive clean finish. A high-resolution image will also allow you to see more fine details on the finish.

When burning images, check the DPI for the image to be used. The DPI settings should be adjusted to match the laser’s set DPI of the software used. Reducing the DPI can reduce the time of a job at the expense of quality and increasing the DPI will apply more detail but increase the time for completion.
BACKGROUNDS
A great question to ask before engraving is whether or not the background is needed in your image. When you see the estimated time it will take for your laser to recreate your work to perfection, you may question the long hours that could be spent doing something else. For removing the backgrounds of any image you can use free software such as Imag-r, Picsart, GIMP, Inkscape, or Microsoft 3D which can help you to edit and remove backgrounds neatly.
YOUR LASER MIGHT NOT BE THE PROBLEM WHEN THINGS GO WRONG!
Diode laser modules aim to last for at least 10,000 hours. When a laser begins to underperform, there are several common causes for hardware challenges.
WIRING CONNECTIONS– Check all the ports on your machine and make sure everything is properly connected. The correct COM port should be selected for your software to detect your machine.
BOARD– The board used for a diode laser module board is also a place to pay attention to. The laser board is needed for efficient power and communication with your software and machine. The board should be free from dust and debris, kept at a safe distance wet substances and it should be checked regularly.
Do not do these mistakes that can cause low performance.
- Do not run your machine at 100% for a long time- Once a diode laser is exposed to high temperature for an extended amount of time the laser will be adversely affected. Check the temperature of your laser.
- Don’t leave your laser or mirrors dirty! Keep it clean and your laser will keep you smiling. A clean laser promotes good leaser health, helps maintain power, and prevents dull results.
- Do not use the same settings for all materials. Different materials require different settings. Pay attention to the type of material you are using. One example of this is bamboo.
PROLONG THE LIFE OF YOUR LASER BY DOING THIS!
- Check basic preliminary settings for your laser such as speed, power level, focal length.
- Every time you turn on your laser, check the values of speed and power. There may be saved settings from a previous project that can unintentionally be set. This is true for some software that uses layers because they can save over previously saved settings.
- Test your laser on a scrap piece of material with a variety of image outputs such as greyscale, dither, etc. You can also do this starting from low to high settings with an array of boxed grids from 10% to 100%.
By doing this, you can gauge what settings and materials are right for a final engrave or cut. Every grid filled will be able to give you an indication of what is a comfortable speed and power.
- Consider the output capacity of your laser. There will be different abilities to cut and mark different surfaces depending on laser output. Do comparisons and read about the capabilities of the power outputs of your diode.
- Do always remember to listen to the critics on reviews, avoid little or no reviews, and communicate with your supplier very well.
Achieving a spectacular finish is possible with proper laser and material preparation. When a laser is well taken care of, the rewards of a good-performing laser will give you confidence and certainty to go forward with lower risk. That being said, a diode laser can create some incredible and creative projects.


Photo laser engraving on wood, plywood. How to make it yourself.