
- Install xloader
- Install LaserGRBL
- Connect MKS v2.0 to the computer. Install the USB-SERIAL CH340 driver if needed.
- Run xloader, set up the parameters as shown in the picture, select the file with the firmware using the link
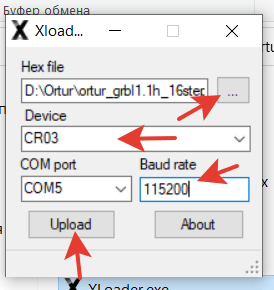

- Ckick Upload, wait for around 60 sec for the downloading to complete.


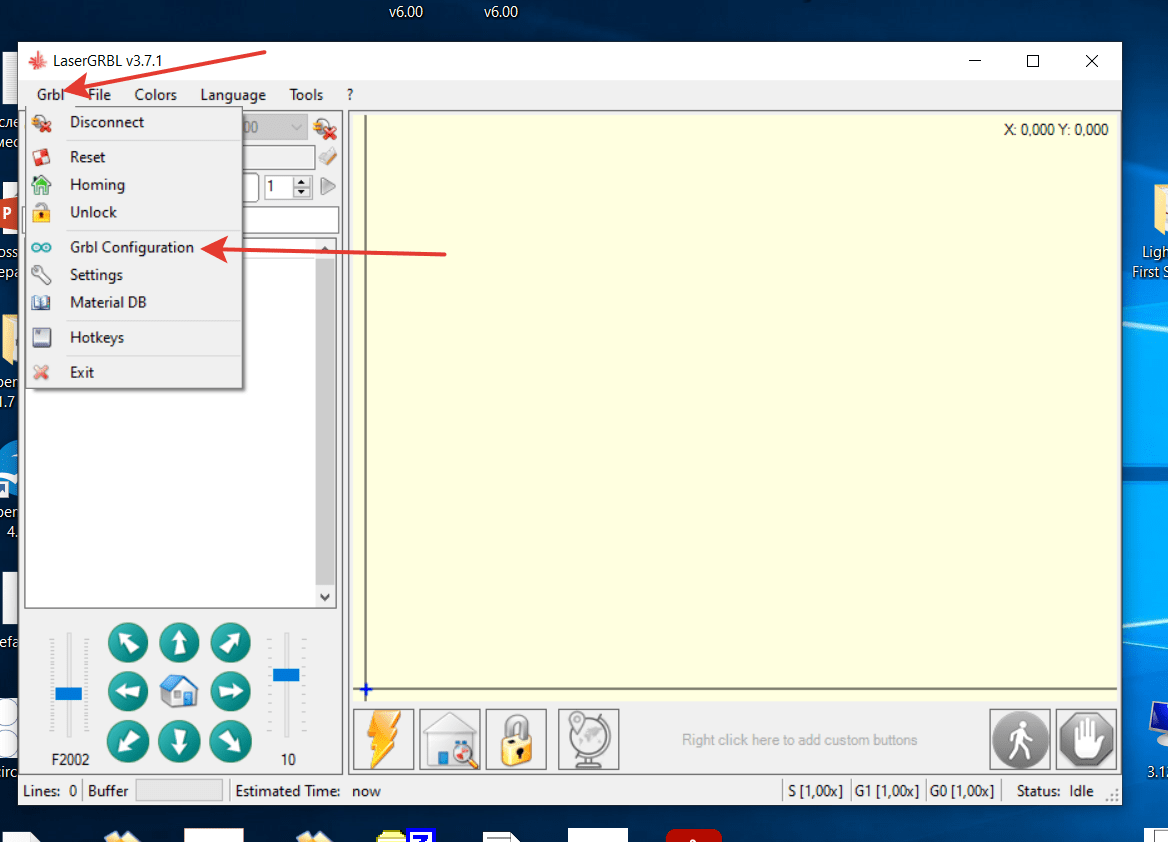
- Run LaserGRBL. The COM port number can be different, set up the other parameters as shown in the picture. Click Connect.


- You will see a message similar to the one in the picture.


- Select GRBL Configuration.

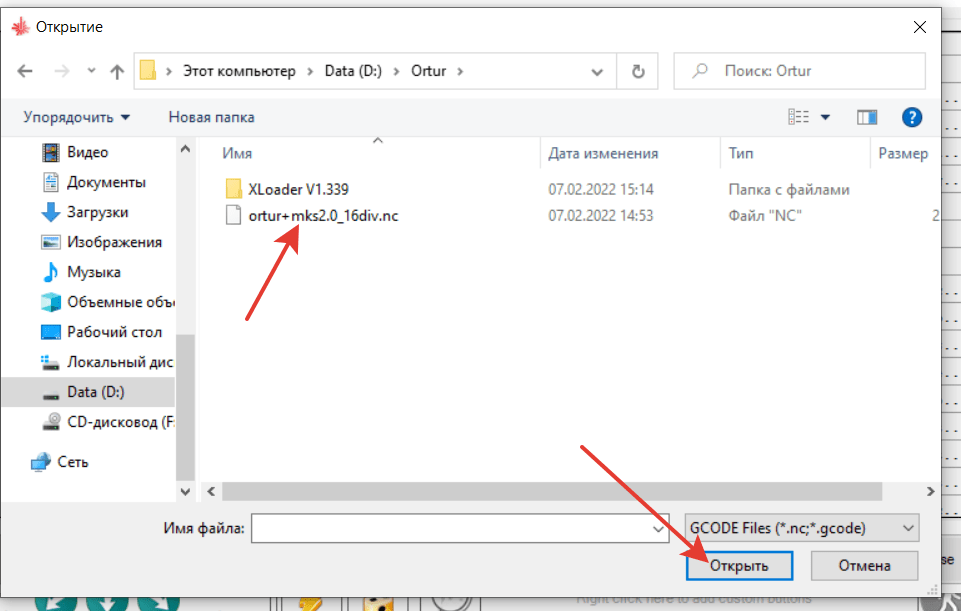
- Select and click Import in the opened window and specify the path to the file with the GRBL parameters. Download here >>>
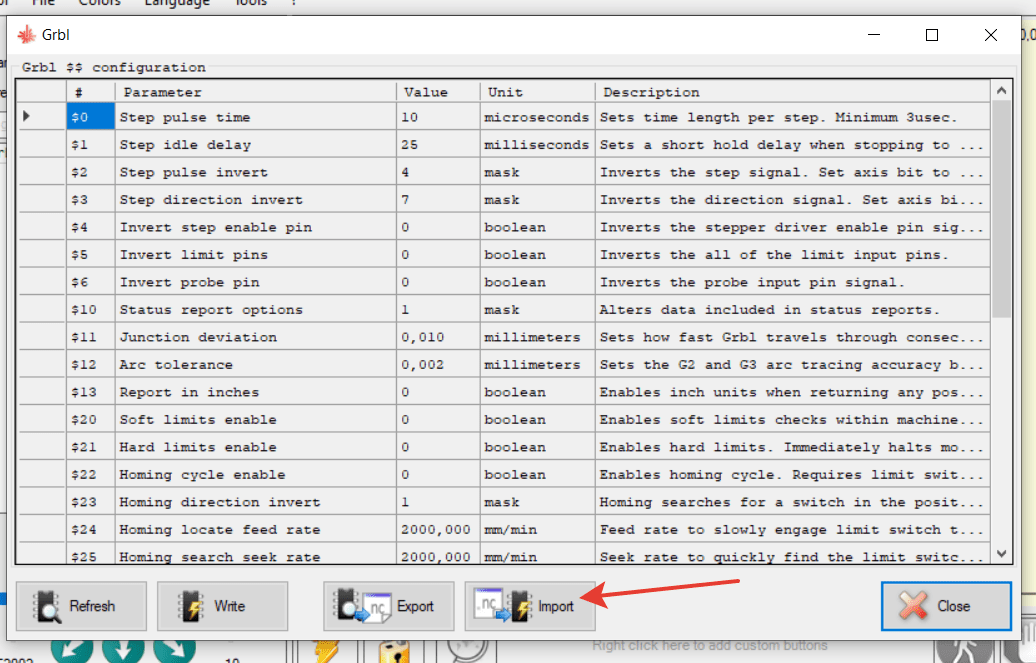


- Click Write


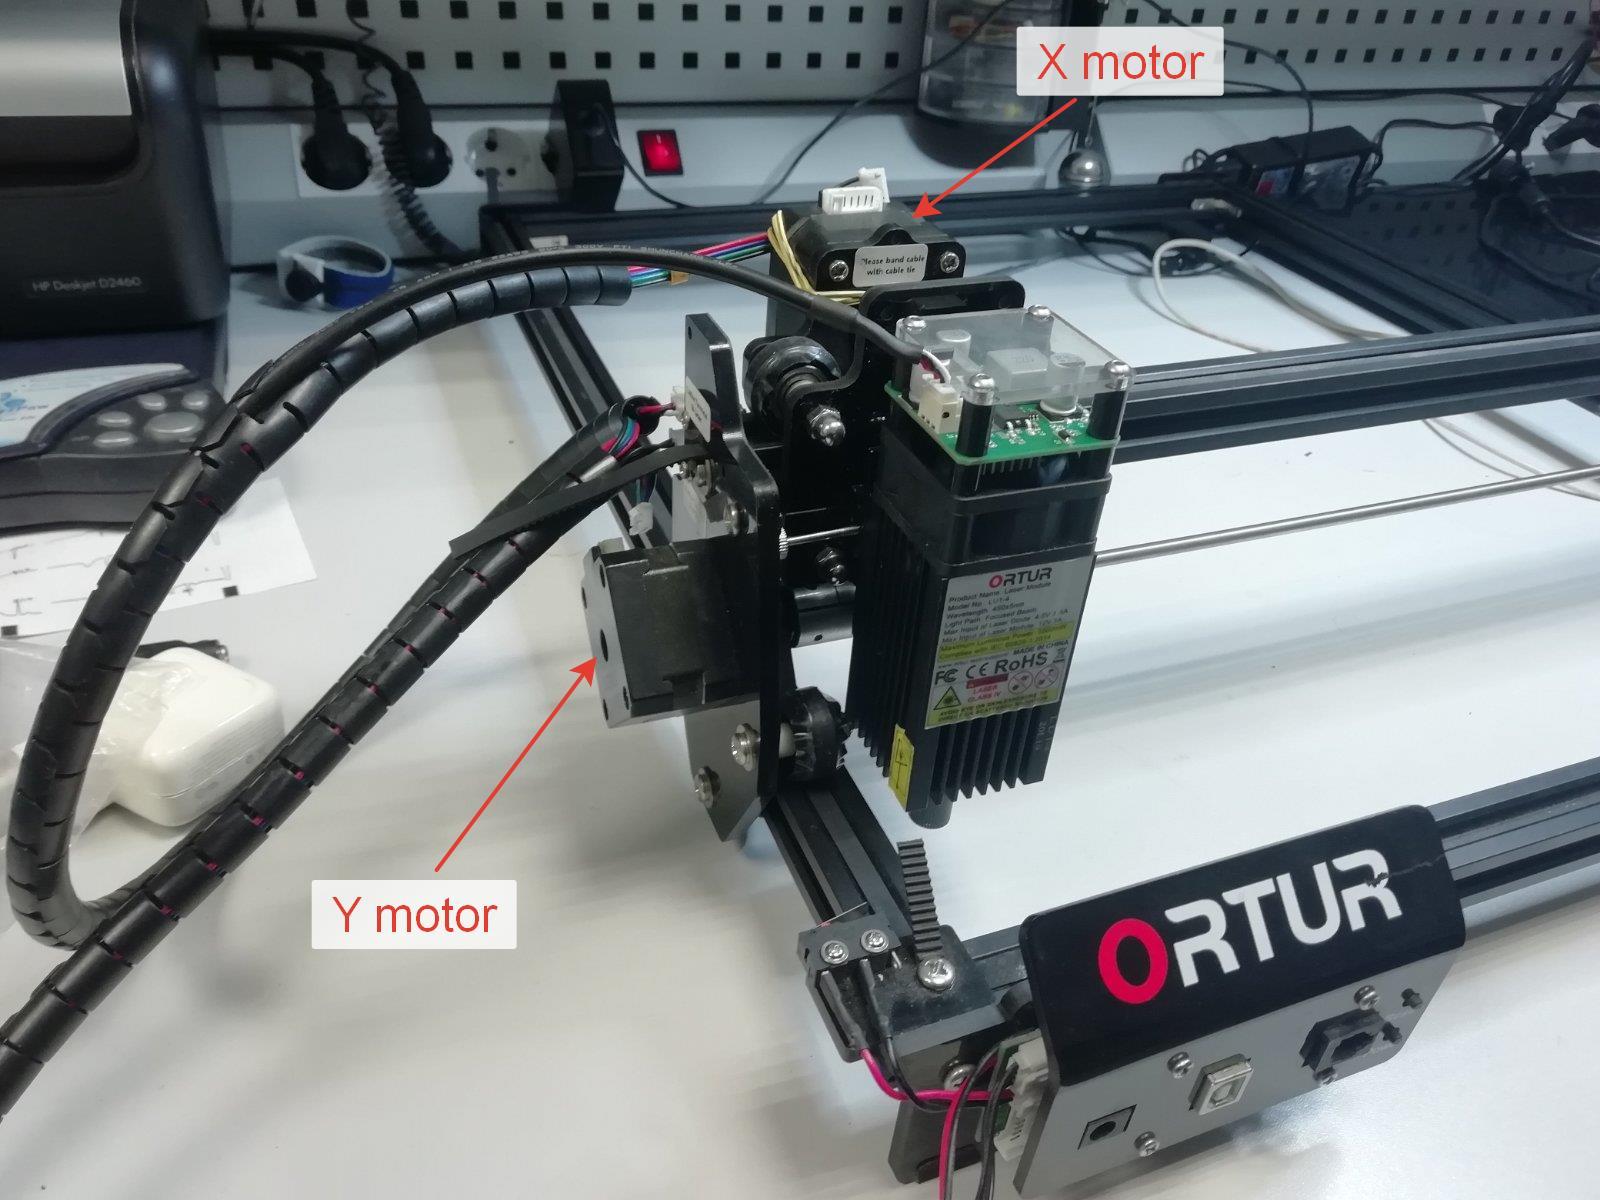
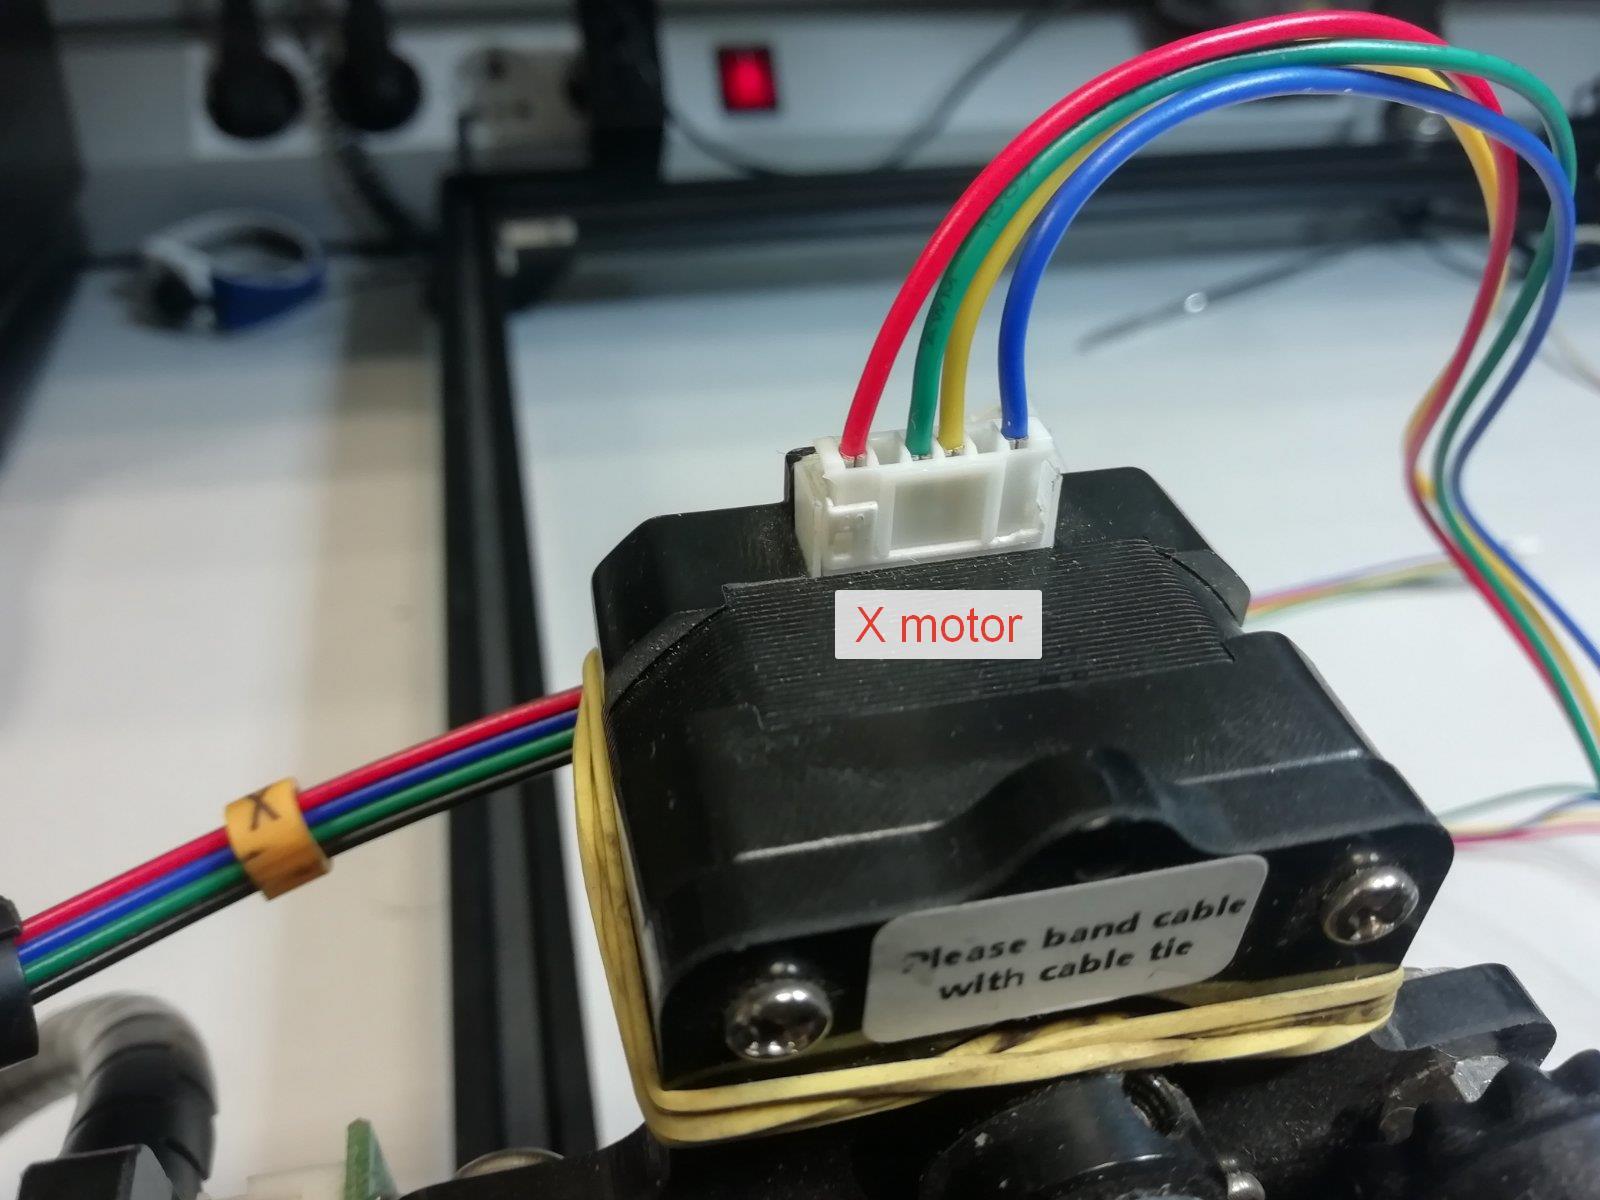
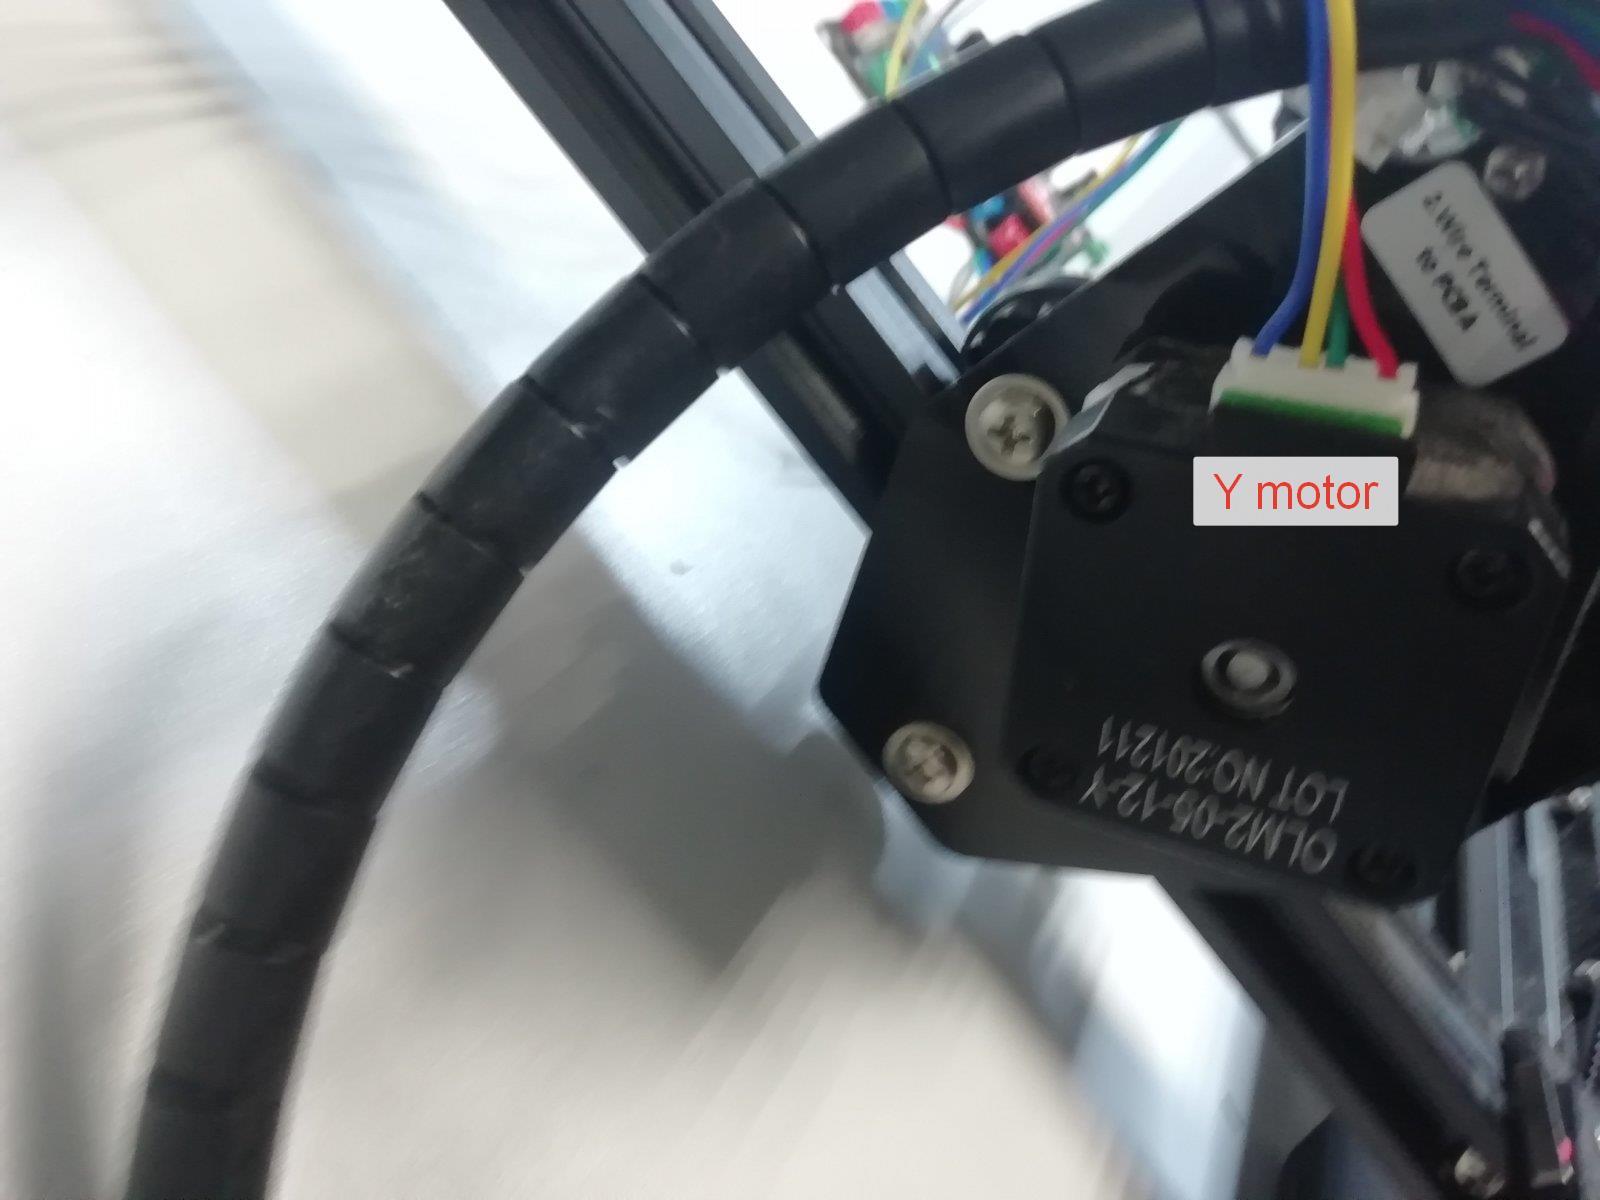
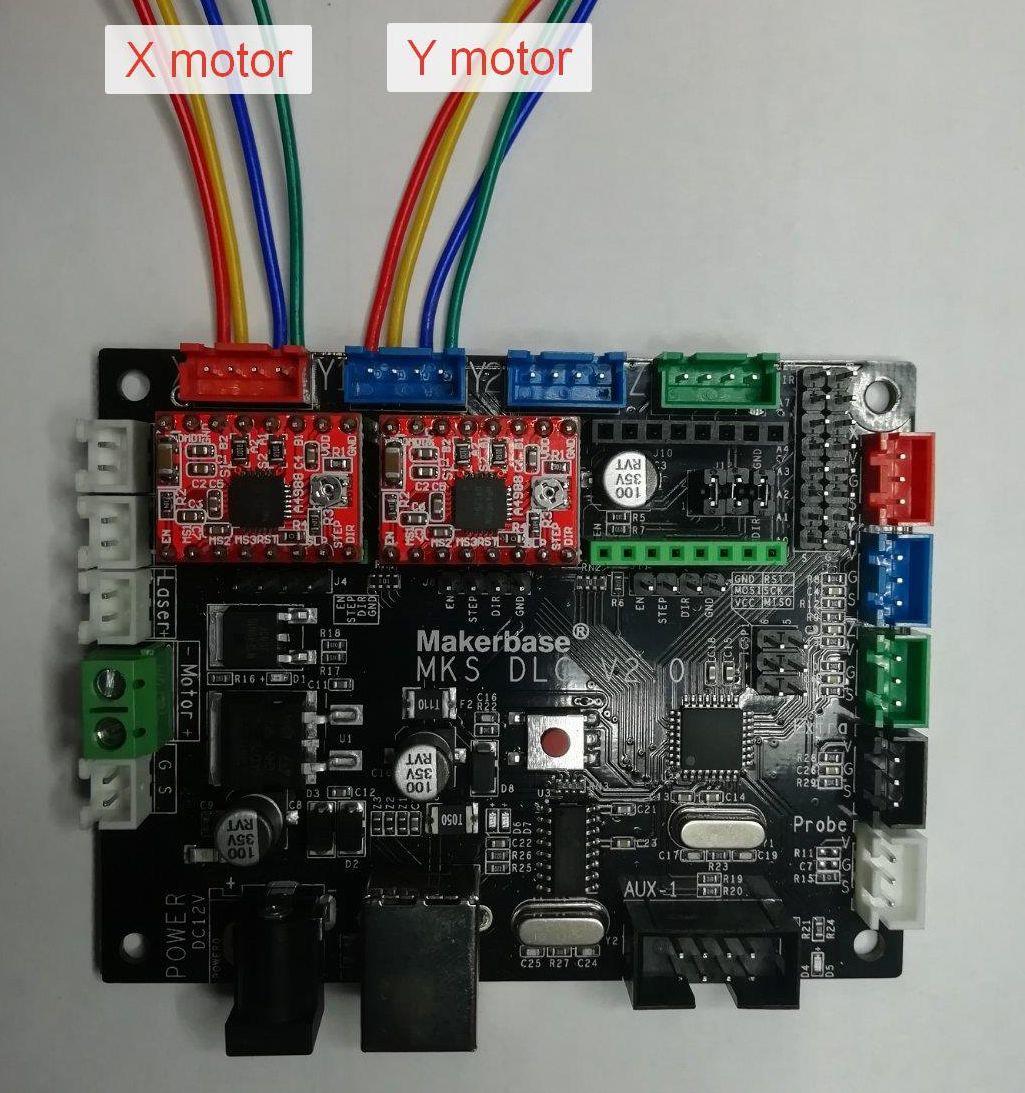
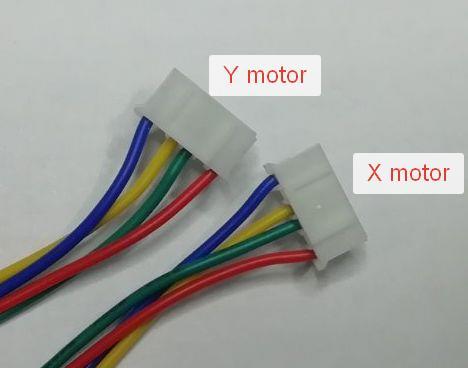
- Disconnect the USB cable from the MKS 2.0 control board. Connect the motors of the X and Y axes with the control board according to the pictures below.


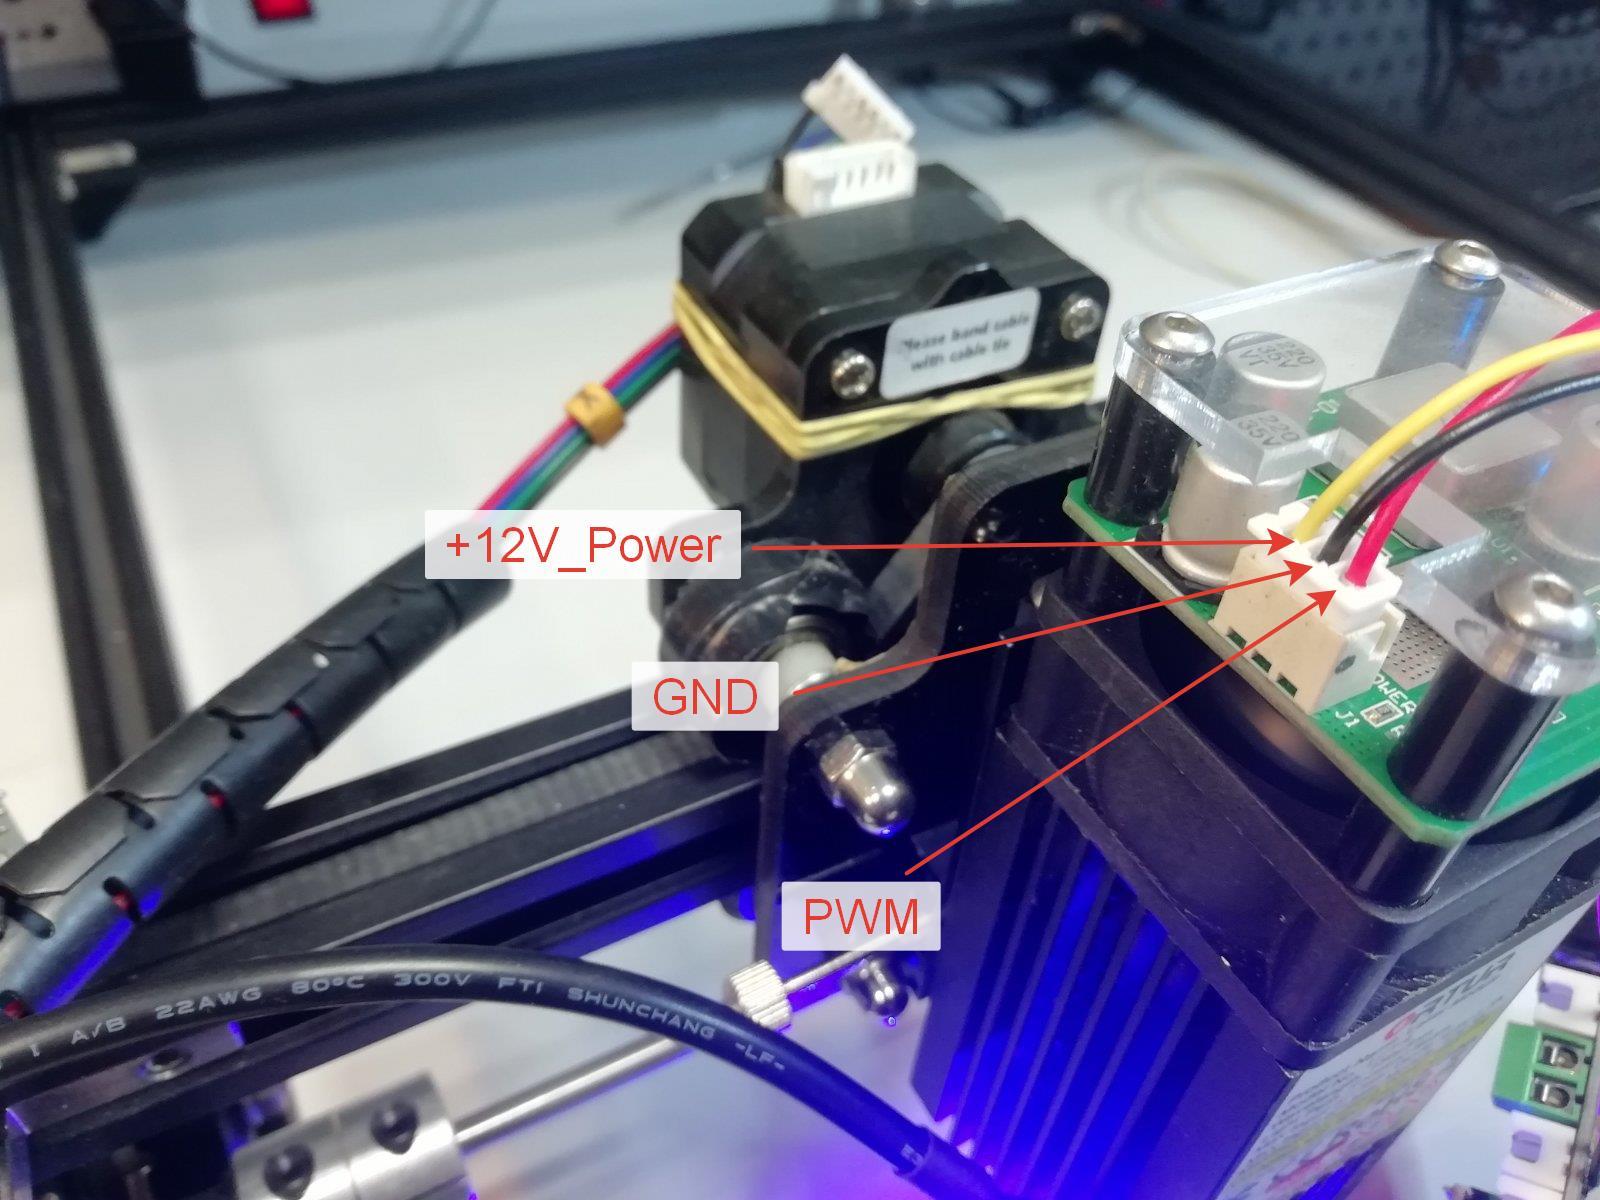
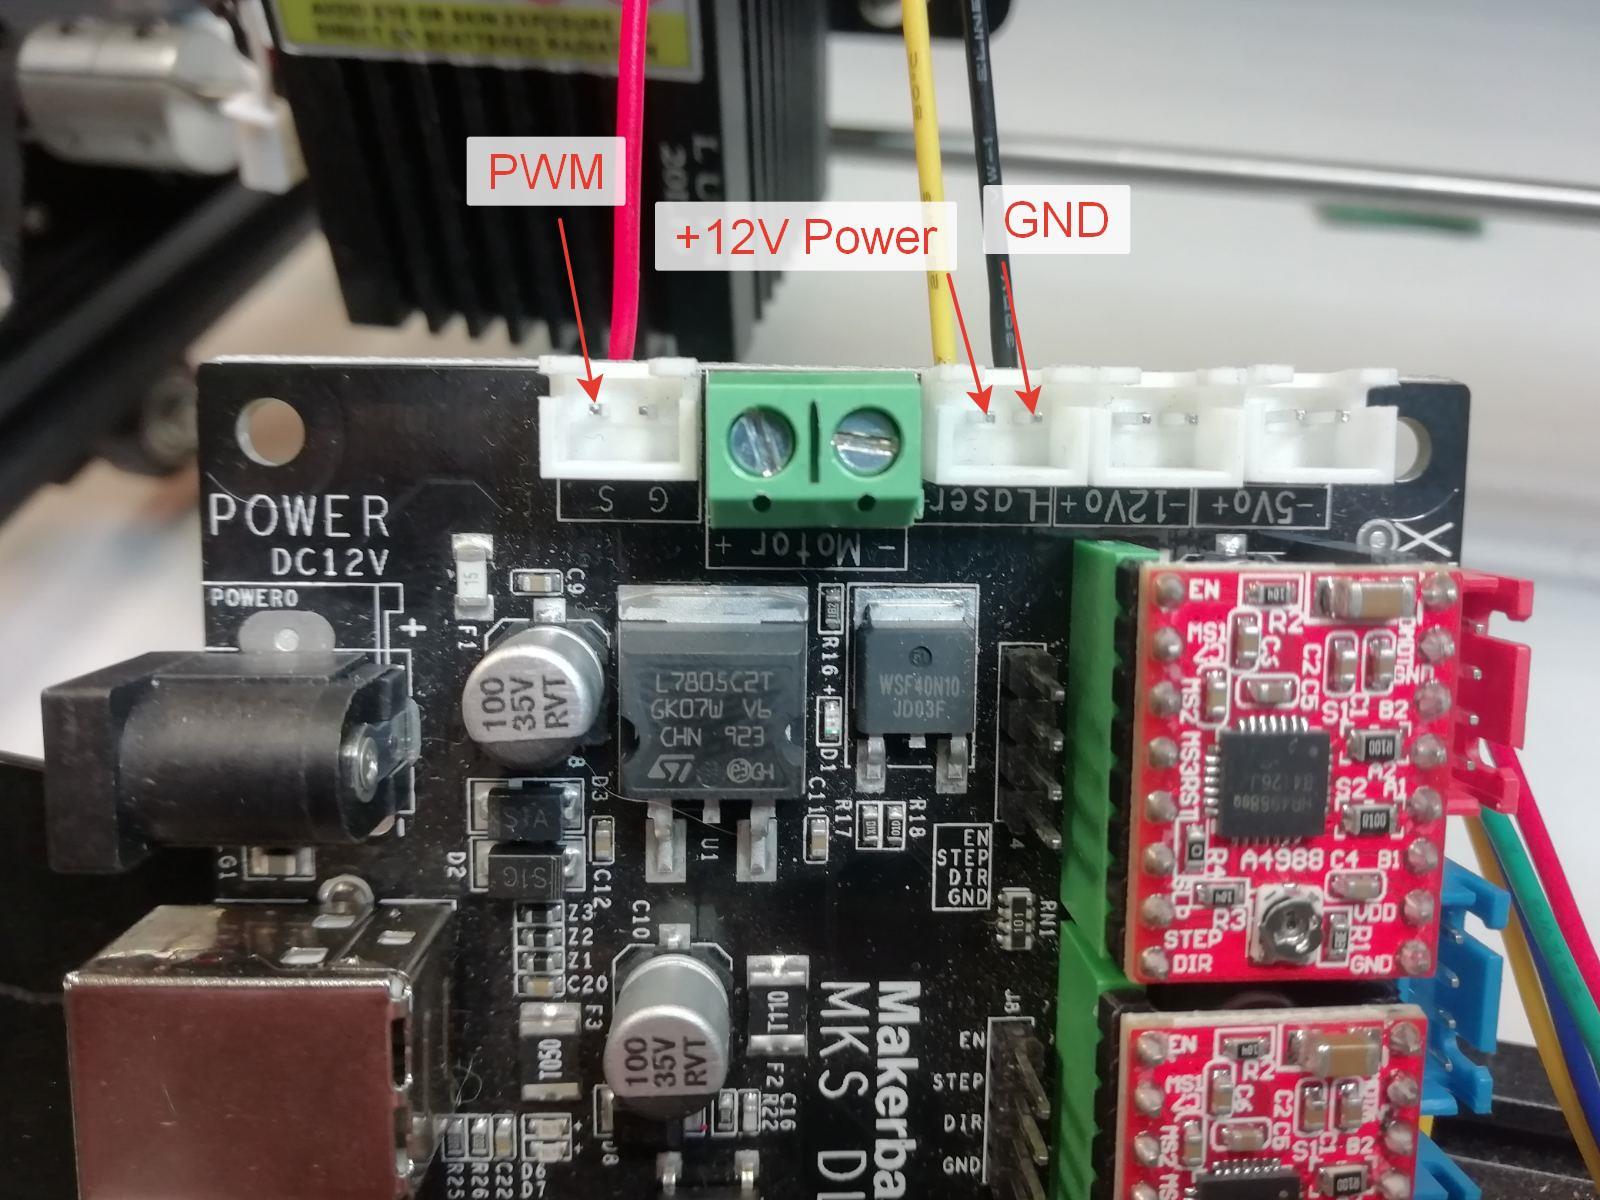
- Connect the laser as shown in the picture below.
- Connect the control board to the computer using the USB cable. Apply +12V voltage to the control board. You are ready to work.


Enjoy photoengraving
An important things you need to know about GRBL parameters, firmware settings
Uploading firmware on different boards: GRBL / Marlin. Settings, parameters.