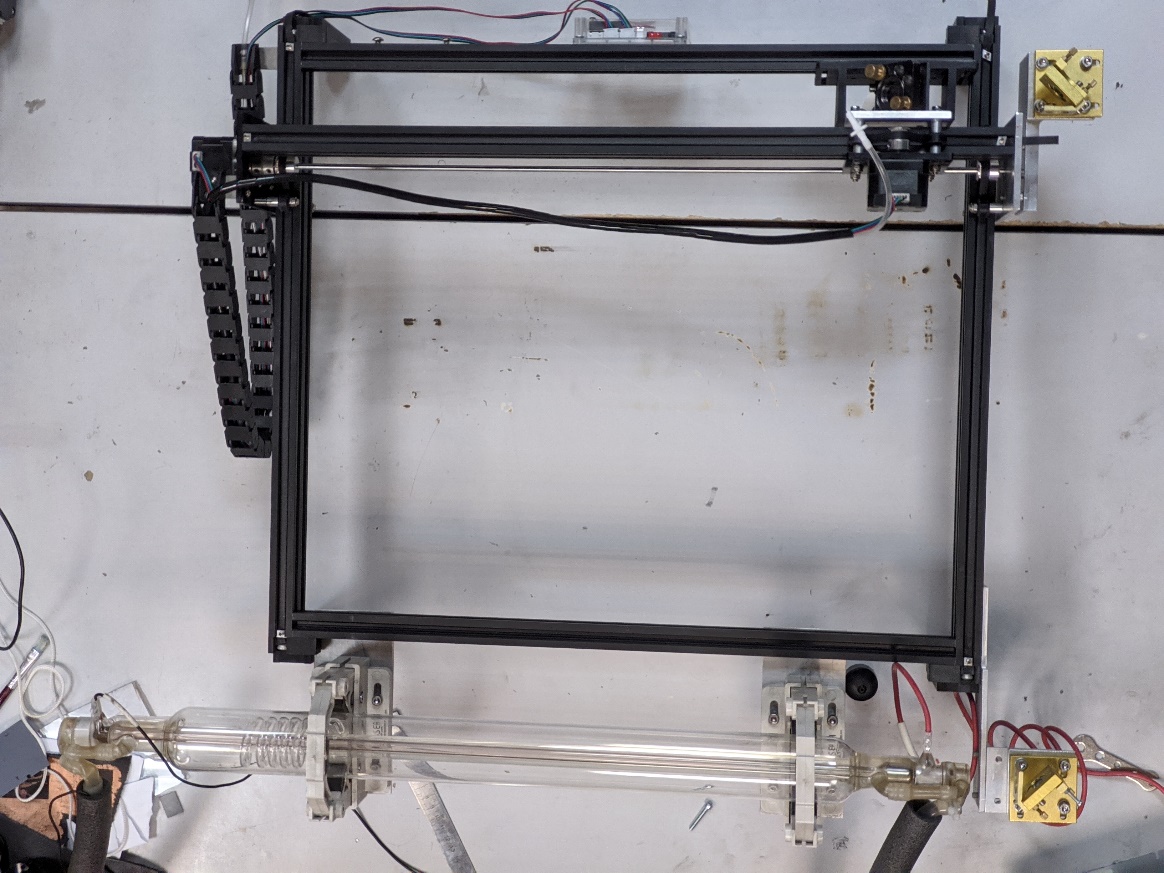
Getting started with mirror alignment for Co2 laser
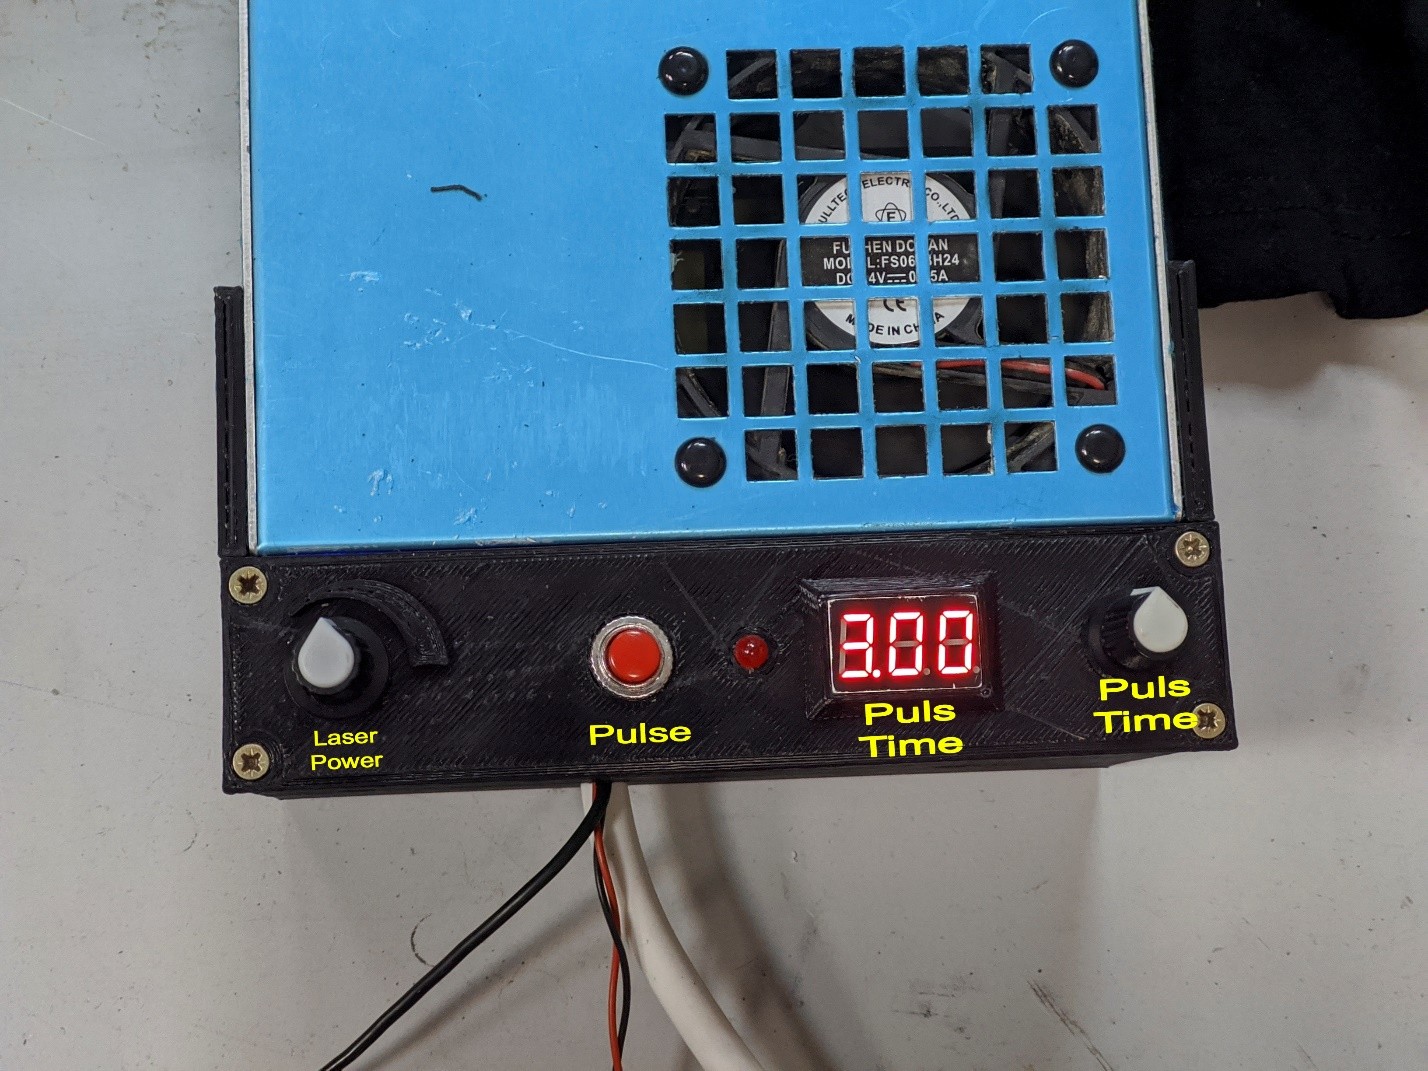
Use a Dynamic PWM box to laser beam allignment process

Power supply 12v 1a dc
The knob adjusts the pulse width from 1 to 100 ms
The display shows the current pulse width multiplied by 10 ms. For example, if the indicator value is 5.50, then 5.50 x 10 ms is 55 ms.
Red button to send a pulse to the handset. Needed for setting up mirrors.
Power setting for a short pulse
The power is set to 20-30%, the pulse duration is 50 мmilliseconds. When you press the “Pulse” button, there will be pulses that will leave a small imprint on the masking tape.
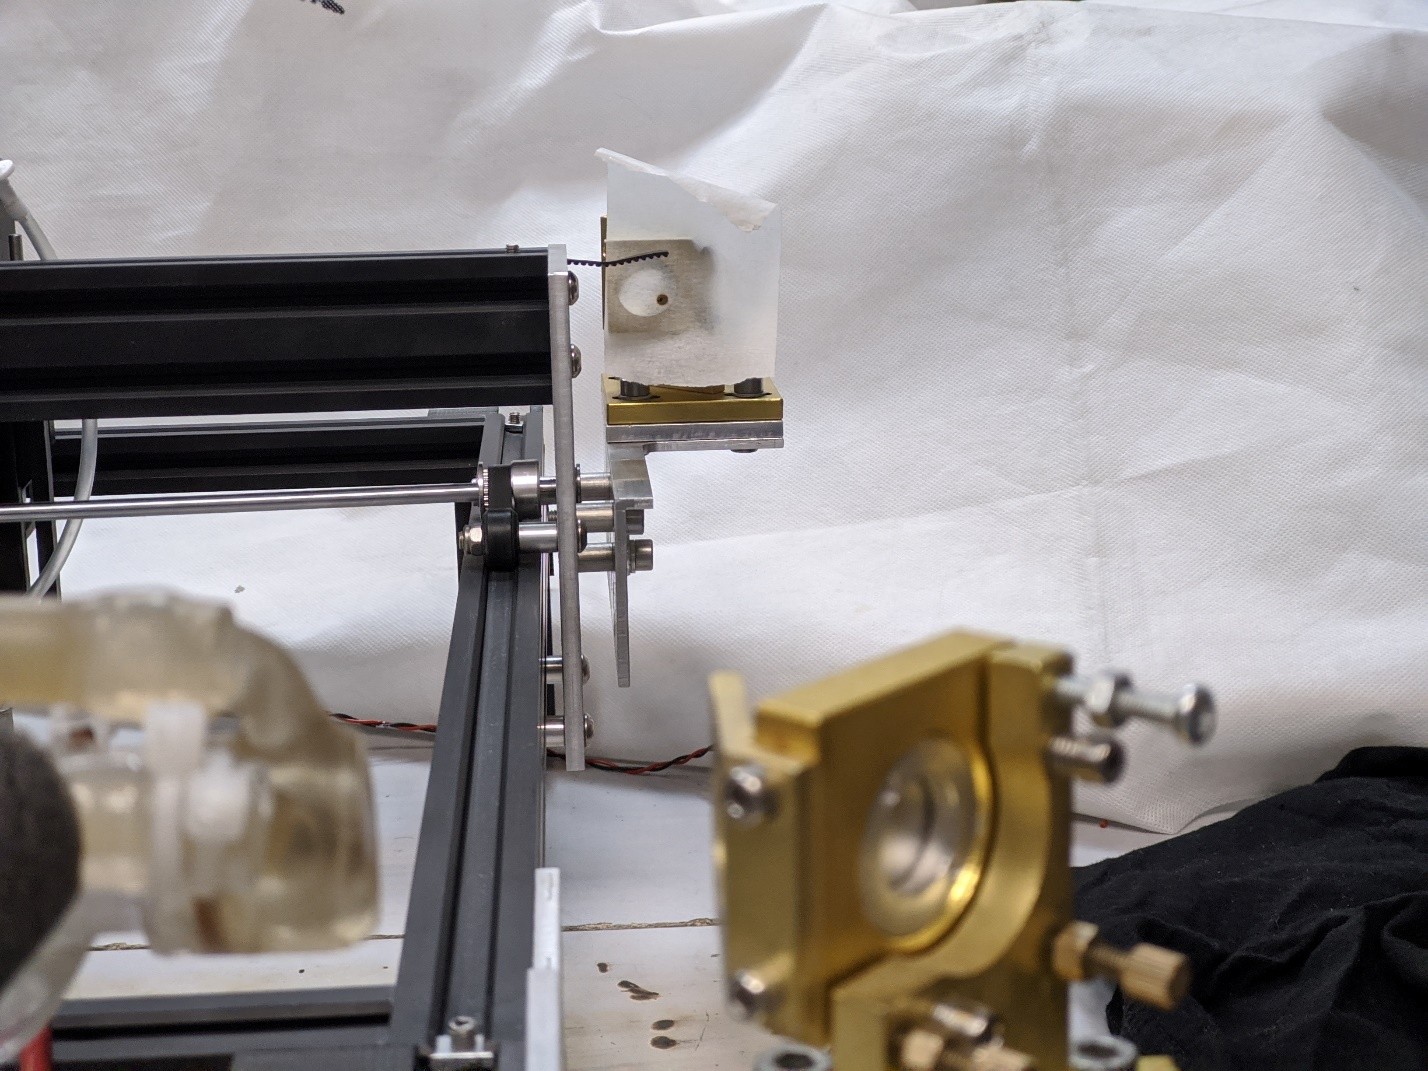
We stick the tape on the frame in front of the first mirror-as shown in the photo.
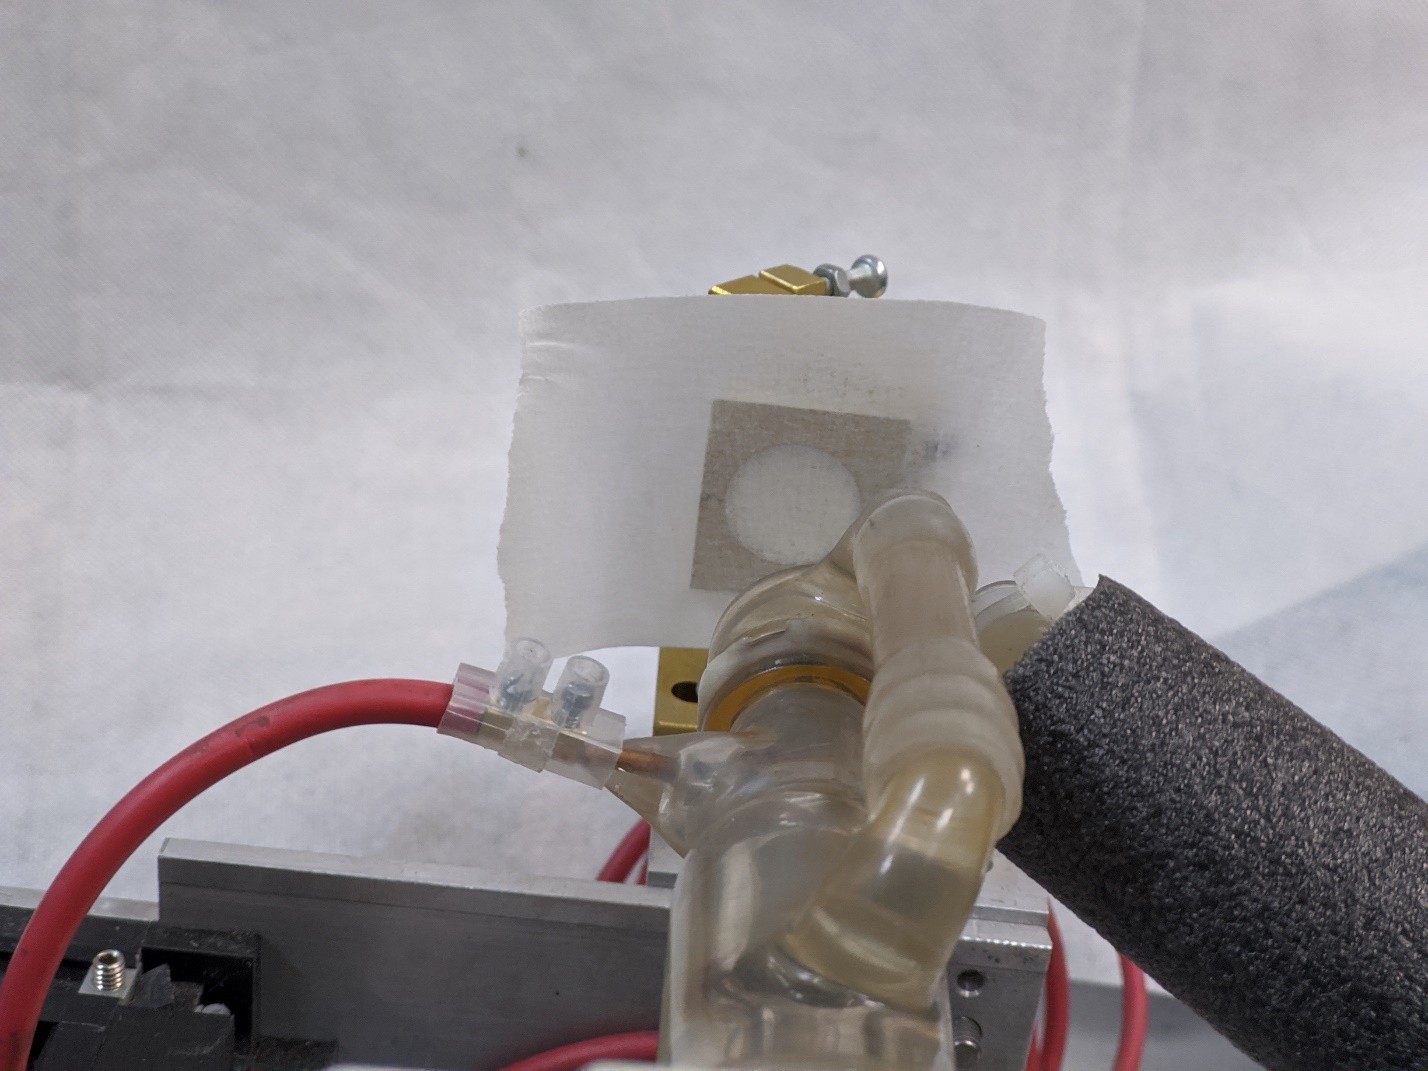
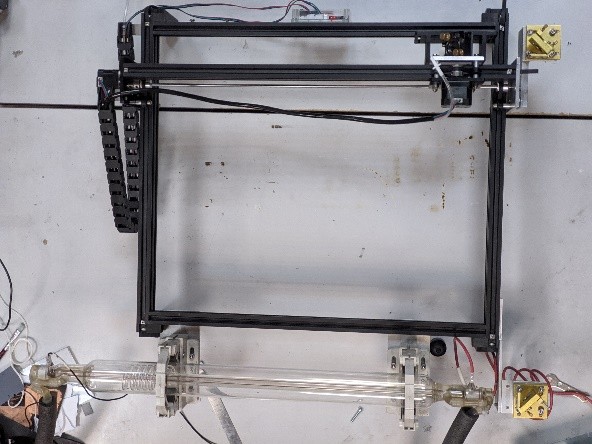
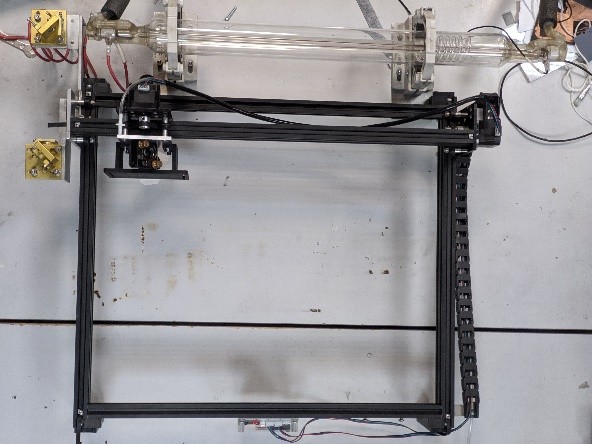
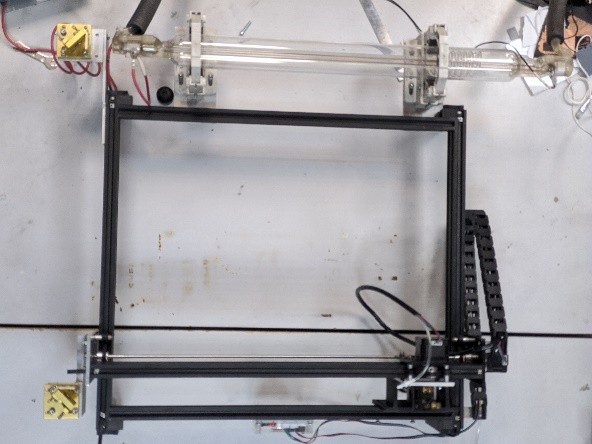
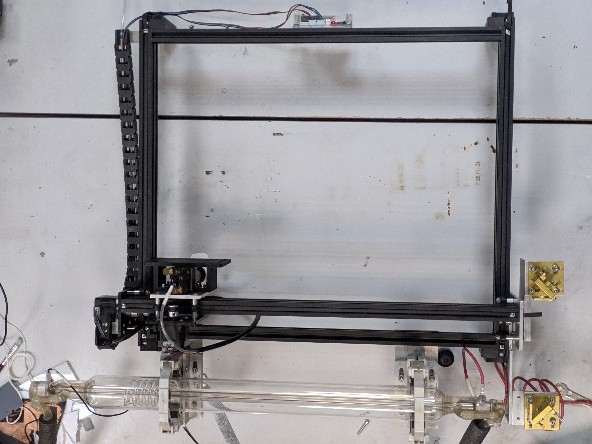
By adjusting the position of the tube, we get the beam to hit approximately in the center. For adjustment, there are screws on the tube mount that allow you to raise or lower it.
The beam doesn’t have to hit the very center of the first mirror. The photo below shows an acceptable result.
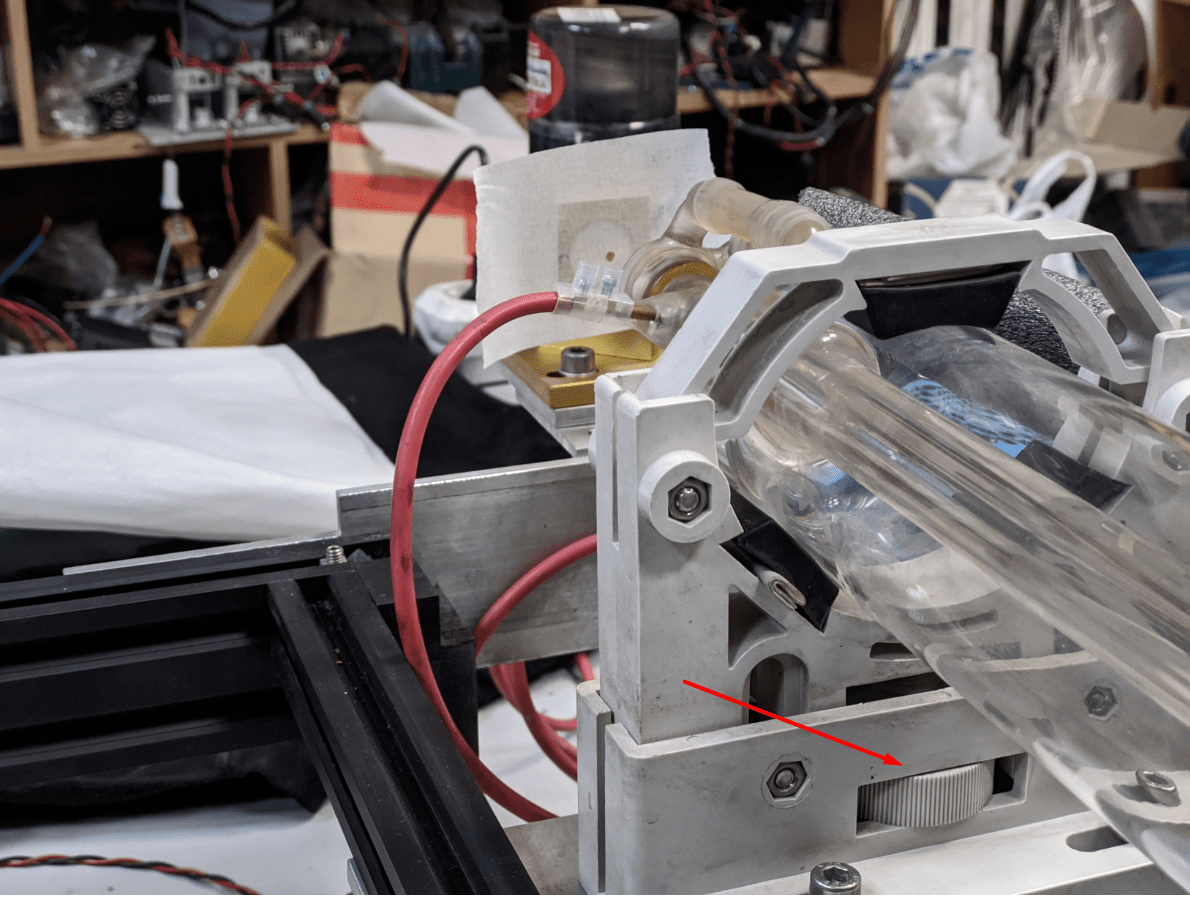
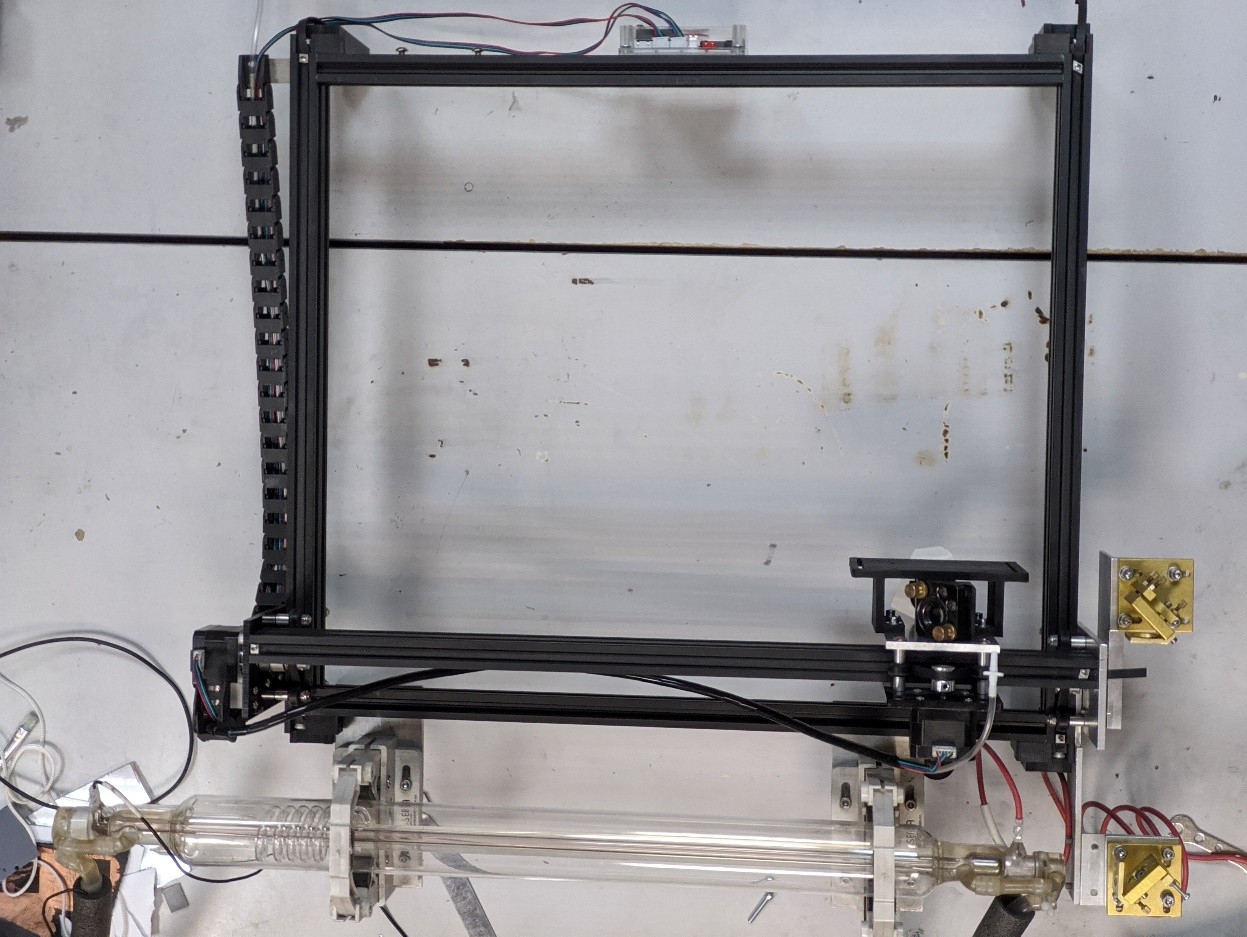
After you set up the drop in the first mirror – you need to make adjustments to the position of the tube so that the beam height passes at the level of the 2nd mirror.
After the tube is set in the correct position, it must be fixed with the bolts provided for this purpose. The position of the tube is usually fixed once. For further adjustmentе, it is sufficient to control the position of the mirrors.
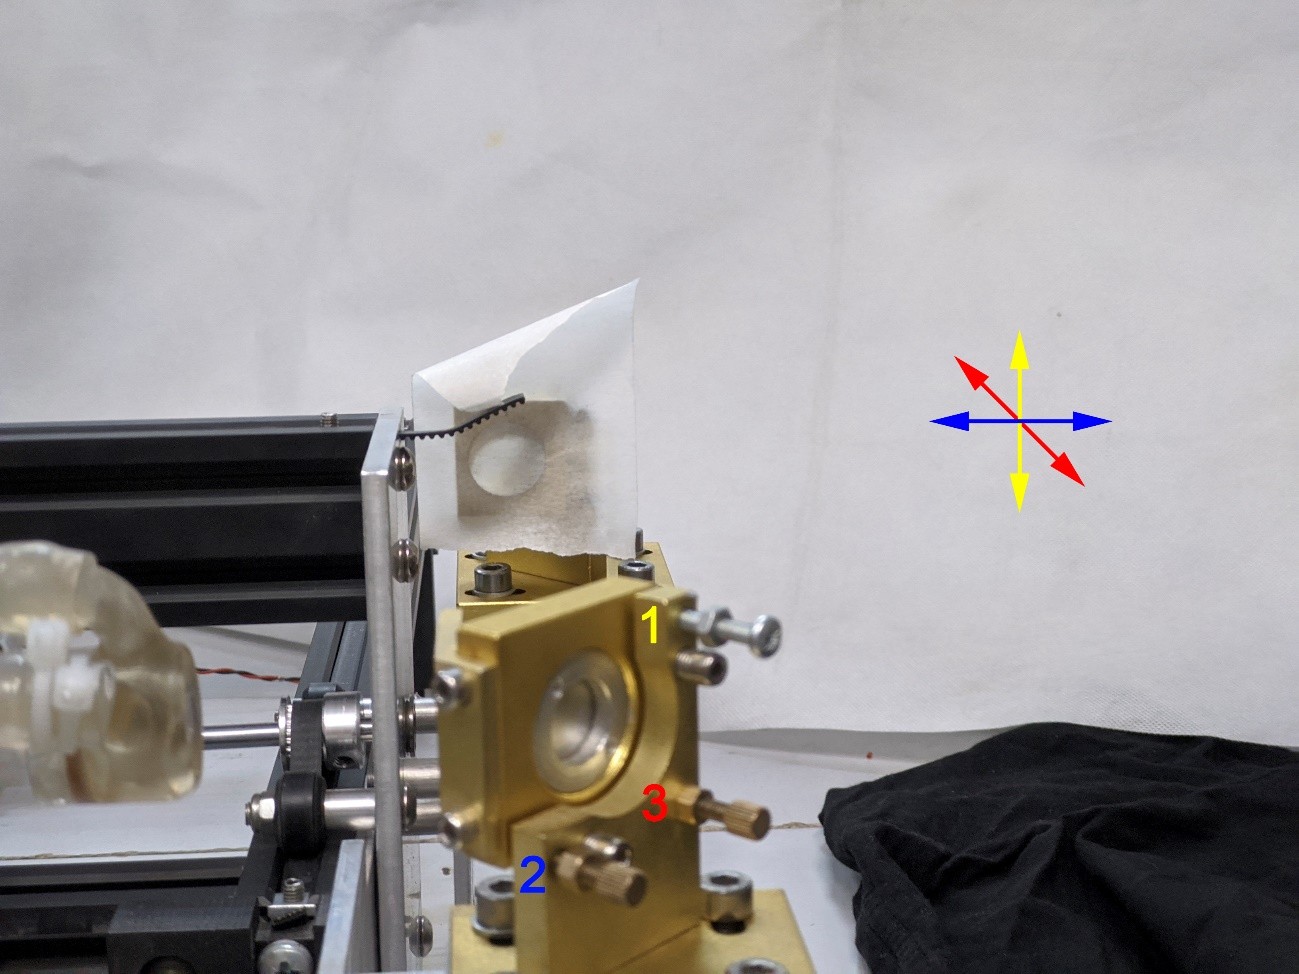
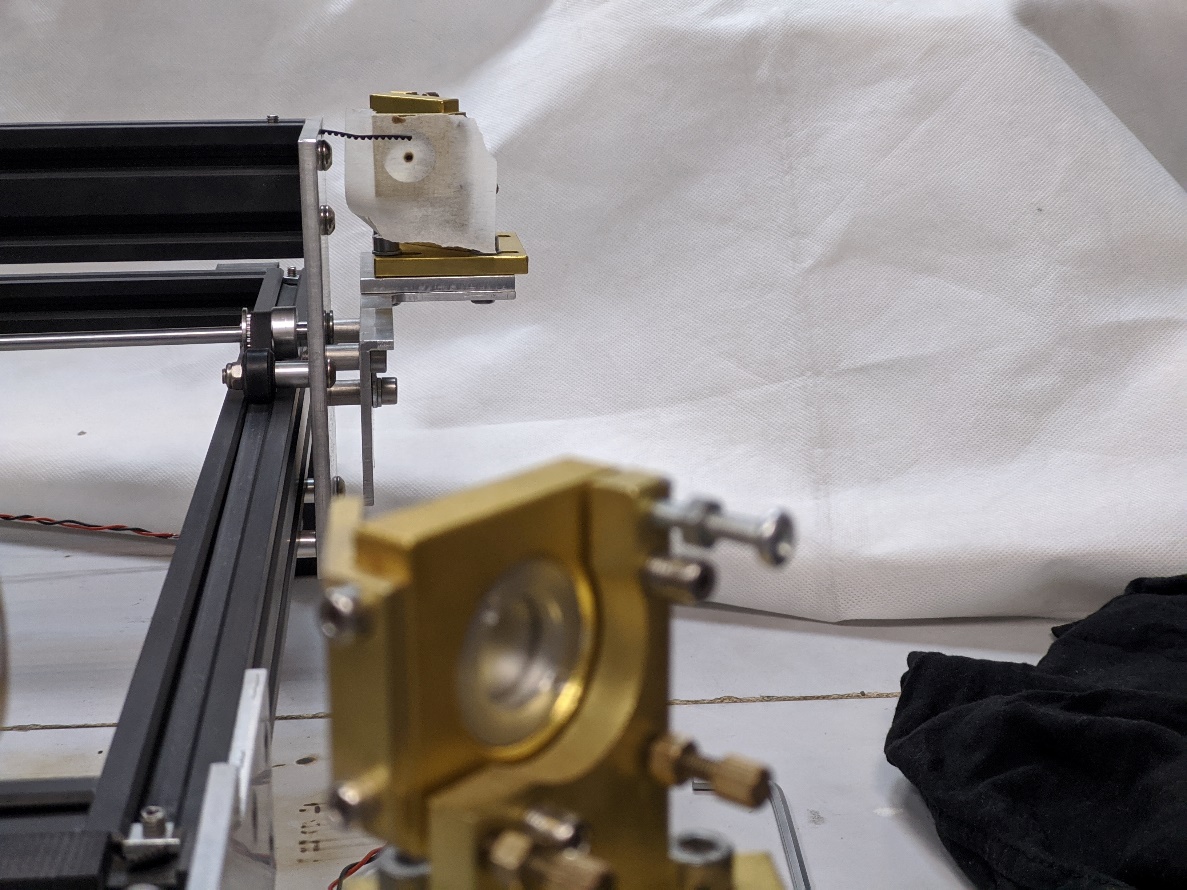
CONFIGURING THE FIRST MIRROR
The mount consists of two parts: one frame has screws with springs, the second one has a mirror attached. The second frame always tries to press against the first with its springs. Brass screws adjust the tilt angle by pushing the frame away from different sides. The upper screw adjusts the angle of inclination vertically, the left – horizontally, and the right – diagonally. The larger the machine field, the more sensitively the laser deflects when the screw is turned.
Move the caret to the position shown in the photo.
By rotating the brass screws of the first mirror, we achieve a hit approximately in the center of the frame of the second mirror.
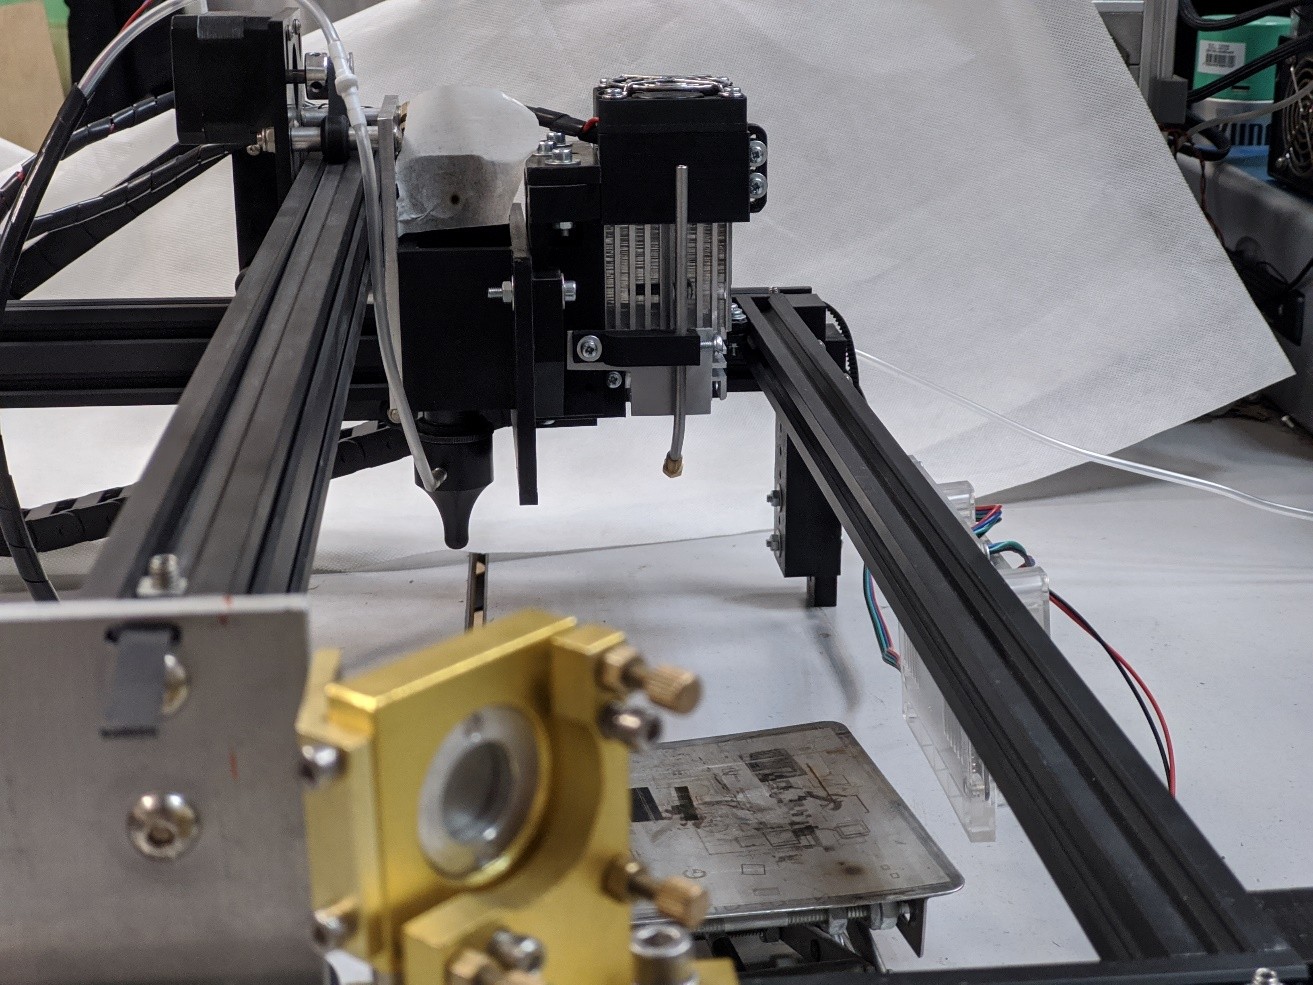
Move the carriage to the next position.
By rotating the screws of the first mirror, we get the laser beam to hit the same point (in the first and second positions). The operation is repeated several times to make sure that the mirror is positioned correctly and the beam does not escape.
CONFIGURING THE SECOND MIRROR
The adjustment principle is the same as in the previous step, but now it is important that the beam comes to the center.
Now, by rotating the screws of the second mirror, we first adjust the hit to the center at the nearest point. Then move the caret to the opposite corner. And repeat the operation.
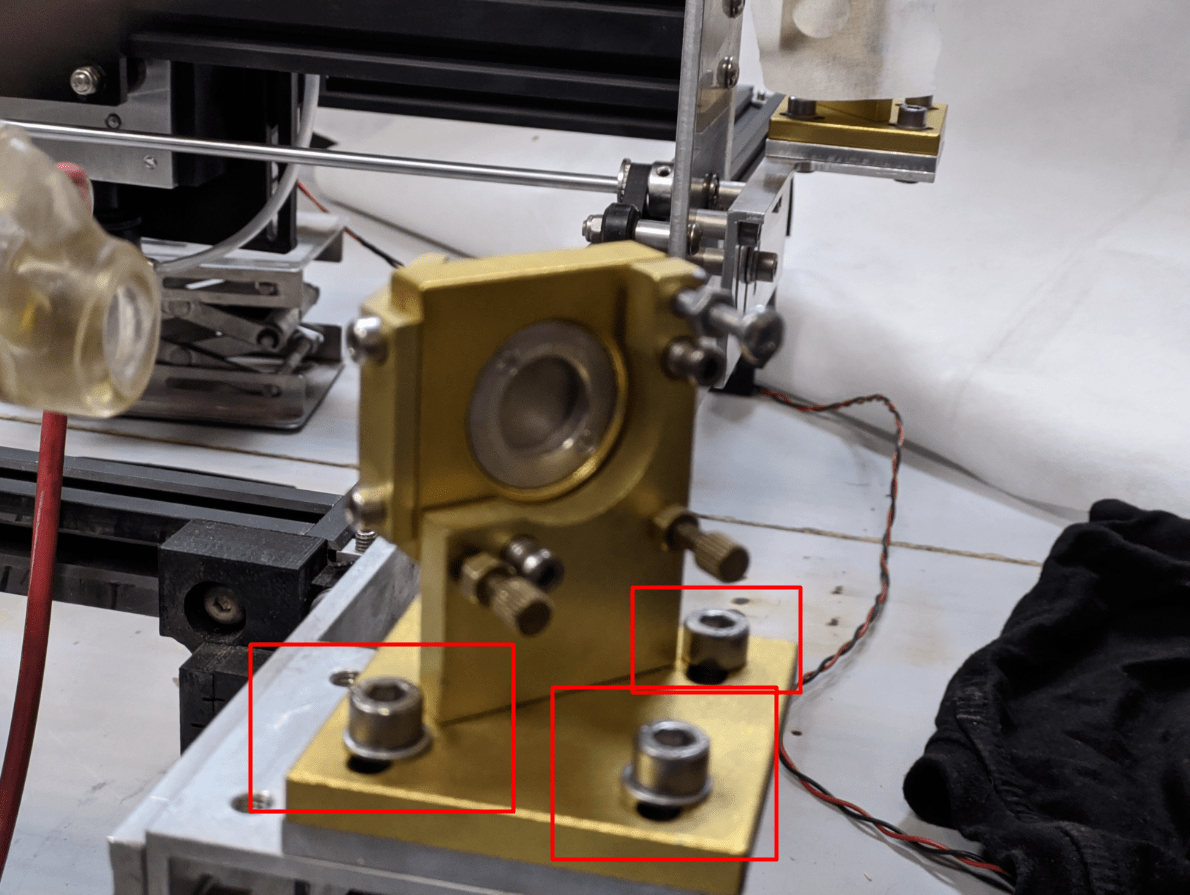
To accurately correct the center of the third mirror, it is best to change the position of the first and second mirrors. But if earlier we changed their slope, now we need to change its position. To do this, slightly loosen these 4 screws. We move the mirror and see how the laser hit point on the third mirror changes.
After that, we again check the point of hit of the beam on the third mirror, moving the carriage in all corners of the machine.
SETTING UP THE THIRD MIRROR – SETTING THE BEAM’S VERTICALITY
You will need a papersling and a small mirror. The tuning principle remains unchanged, only the direction of the laser beam changes: from the horizontal plane to the vertical one.
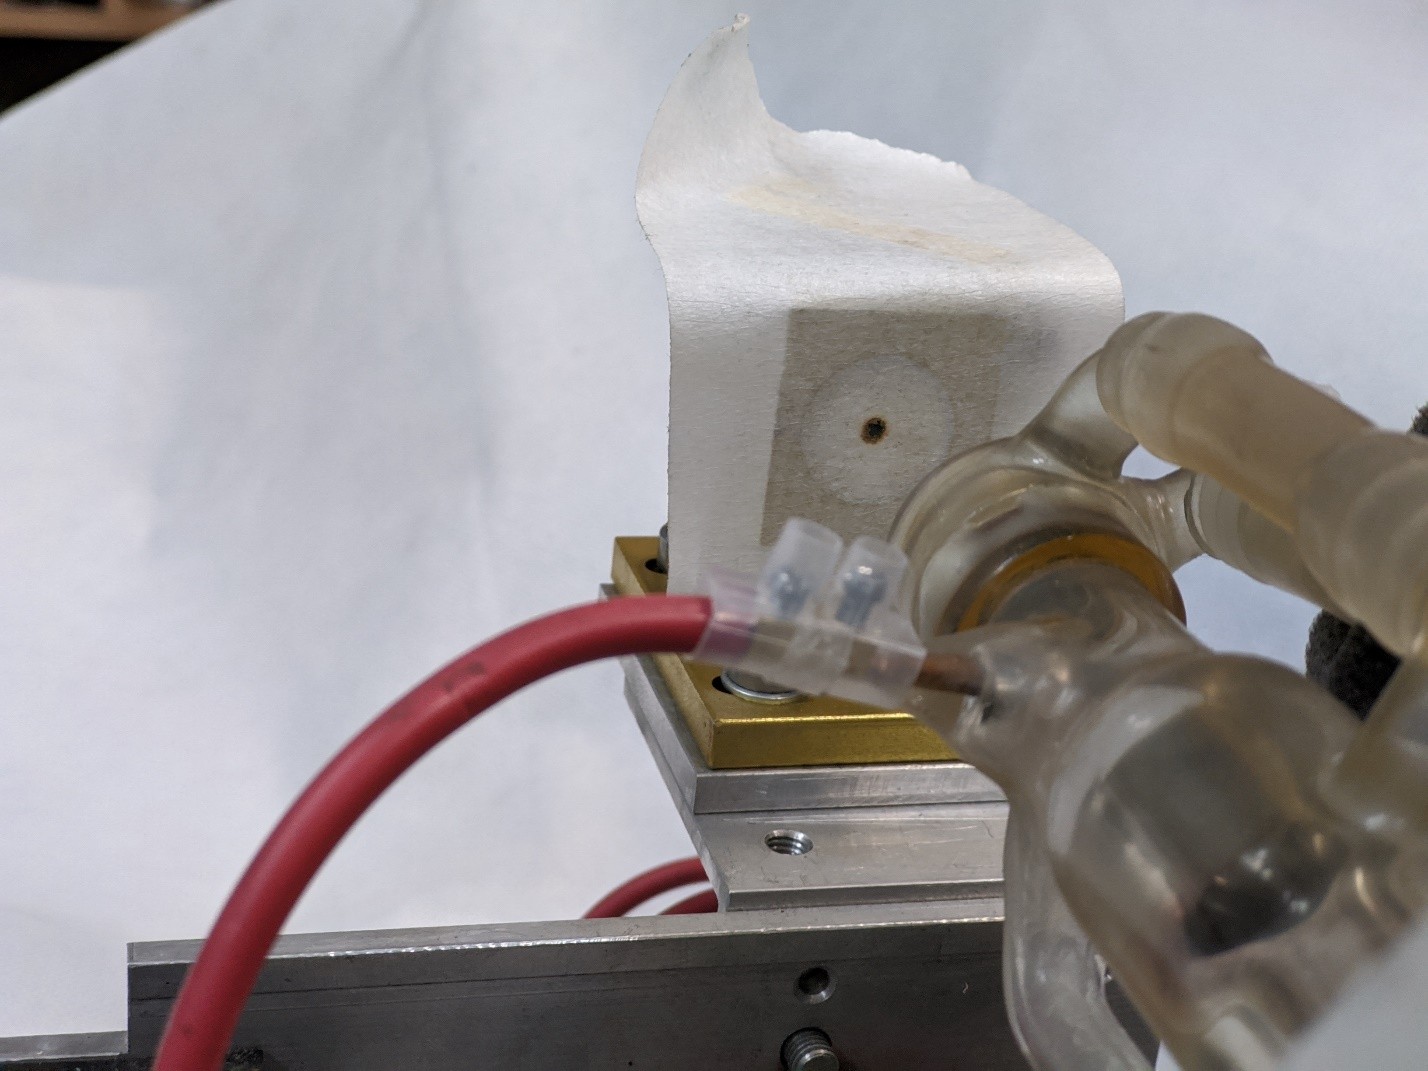
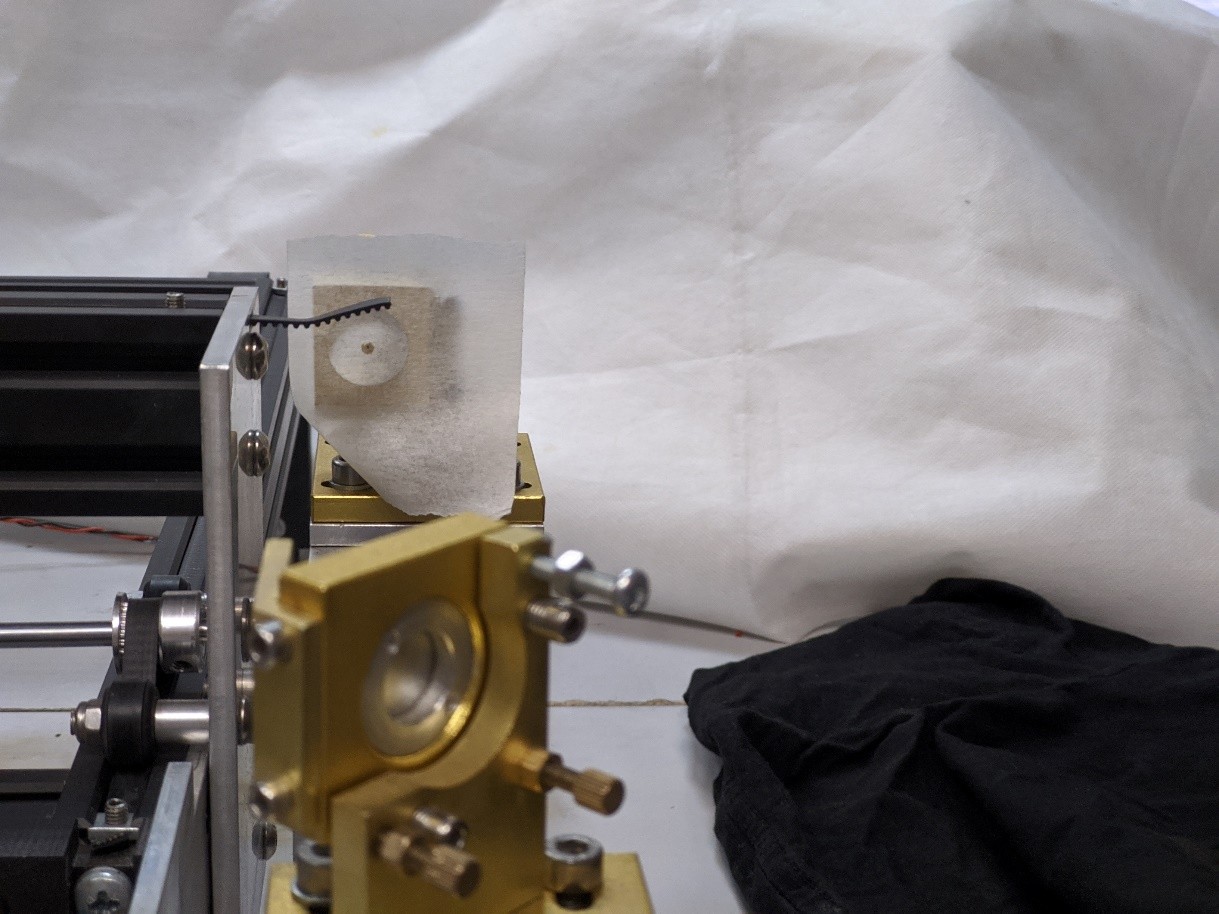
Stick the tape on the nozzle as shown in the photo. The minimum power is set, about 10%, and “Pulse”is pressed.
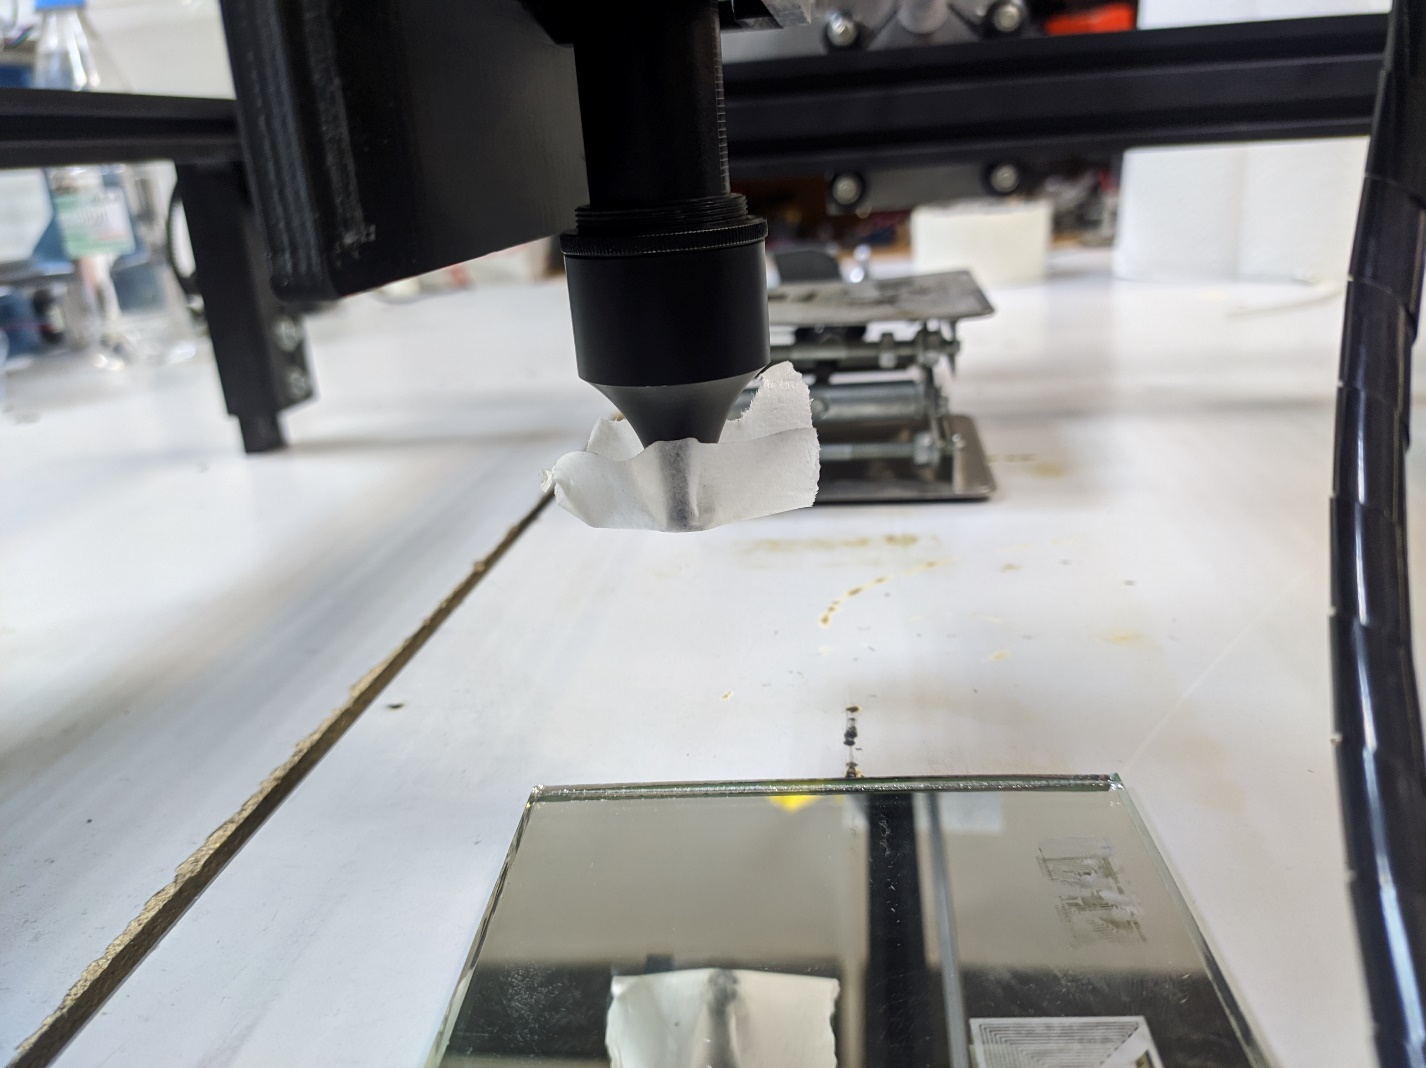
We place the mirror as shown in the photo above. The nozzle opening is clearly visible through it. And the trace of the beam. The beam hole should be exactly in the center of the nozzle. The mirror position is corrected.
The tape is applied again, and the alignment is checked. The operation is repeated until the correct position is reached.
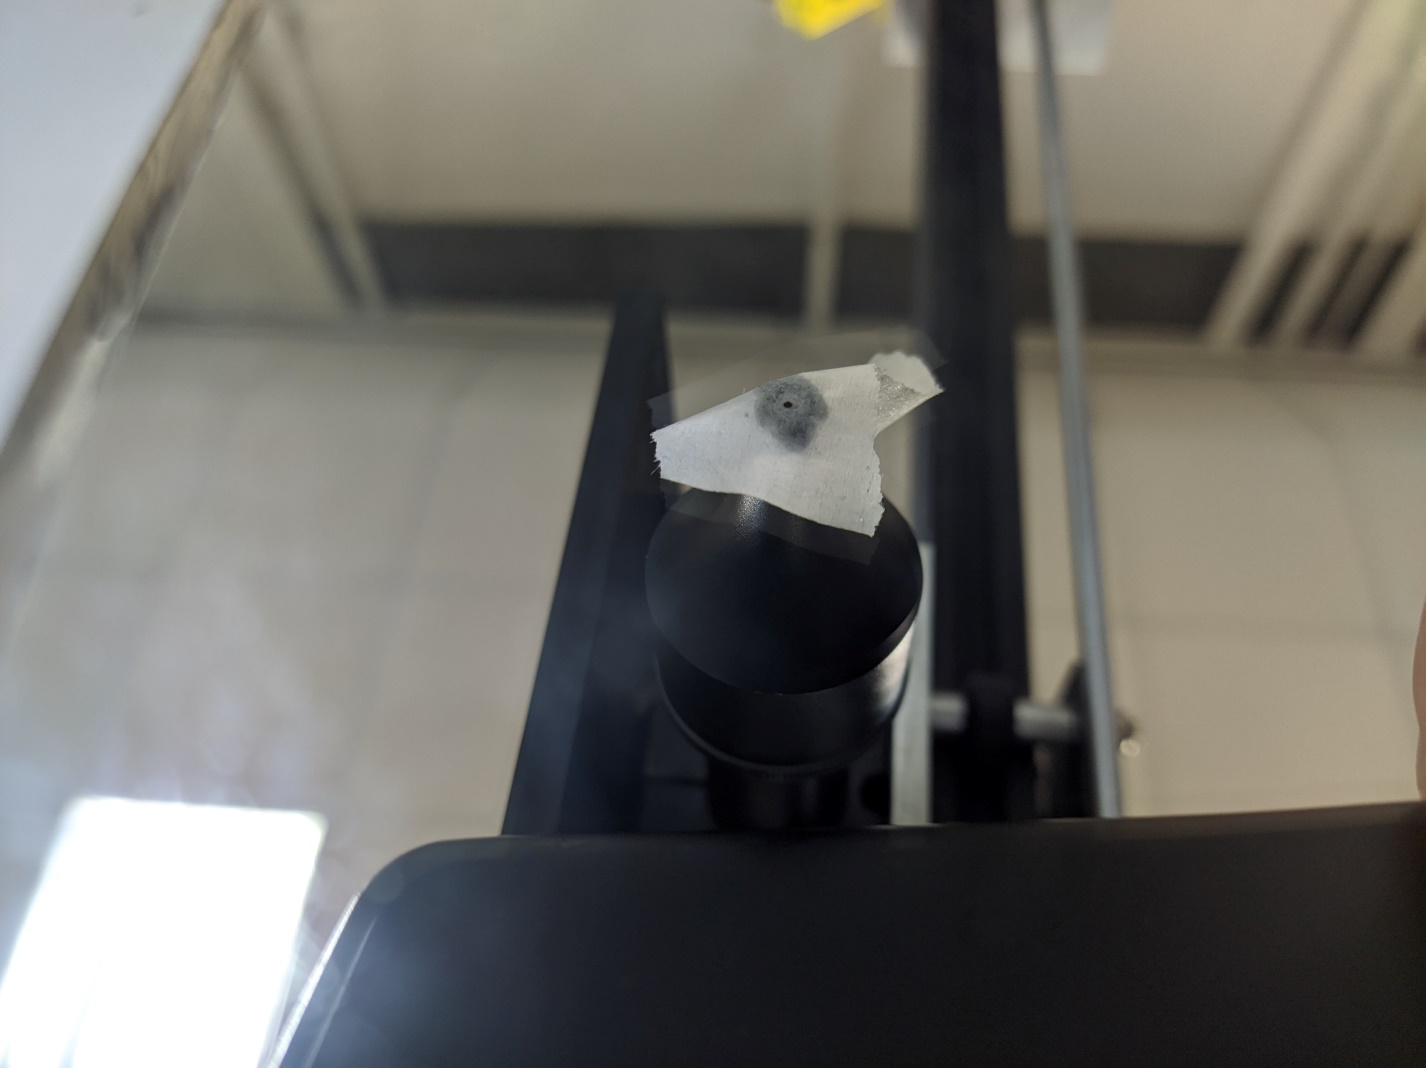
When the beam is properly centered, a small round dot remains on the material.
This completes the alignment process. If you have anyлибо problems, please contact our support service.