SETTINGS USED:
(8W endurance laser with air assist 60L/m air compressor)
An Endurance 8.5 watt (7000/8000/8500 mw) PLUS PRO laser module 445 nm
endurance-lasers.com/products/yuting-sunsun-aco-005-air-compressor-for-laser-cutting?_pos=1&_sid=57462c6a3&_ss=r
(your settings may differ on your machine
Power:90% Speed: 170mm/m Passes:4
Required materials:
-3-4mm plywood.
-Wood Glue
This 100% laser-cut display stand will help organize your items and create a neat set of items. These steps use Lightburn software to prepare and laser cut the parts. Other software such as GRBL can be used.
This display stand can hold 12 items on the provided hooks. More or less can be added to hold items.
The file can be found below and downloaded and used on Lightburn software. Download the display stand file
Step 1: Begin by cutting 3 bases.
The base is made up of 3 pieces that will be cut and stacked on top of each other. The inner line cut out of the base is where the display wall will be inserted. The 3 base pieces should be perfectly aligned, especially the inner lines.
If you will like to use the base as a platform, you can modify and extend the size of the outer square as well as the inner square.


The middle line for inserting the stand can be adjusted. Adjust only using the left and right toggle. This will maintain the width of the wood without adjusting the height. Toggling the inner line can make excess space for the standing wall and this can be more unstable, lean, and fall easily.
Step 2: Align and Glue
Use your adhesive in between the pieces that will be put together. Glue the stand one by one. Make sure the inner lines are aligned perfectly to insert the standing wall of the display perfectly.
STEP 3: Making an Array
If you will like only to make use of 12 hooks, you can skip this step and proceed to laser-cutting the display wall.
The Lightburn file contains 12 slots already for the display hooks. To add more or fewer hooks to match your desired number of hooks, you can use the array tool found on the left tool panel in Lightburn.


Create a virtual array to have a preview of the placement of the array before and decide how you will like to modify the parameters of the slots. Put the number of slots you will like by writing in the X-Column and Y-columns.
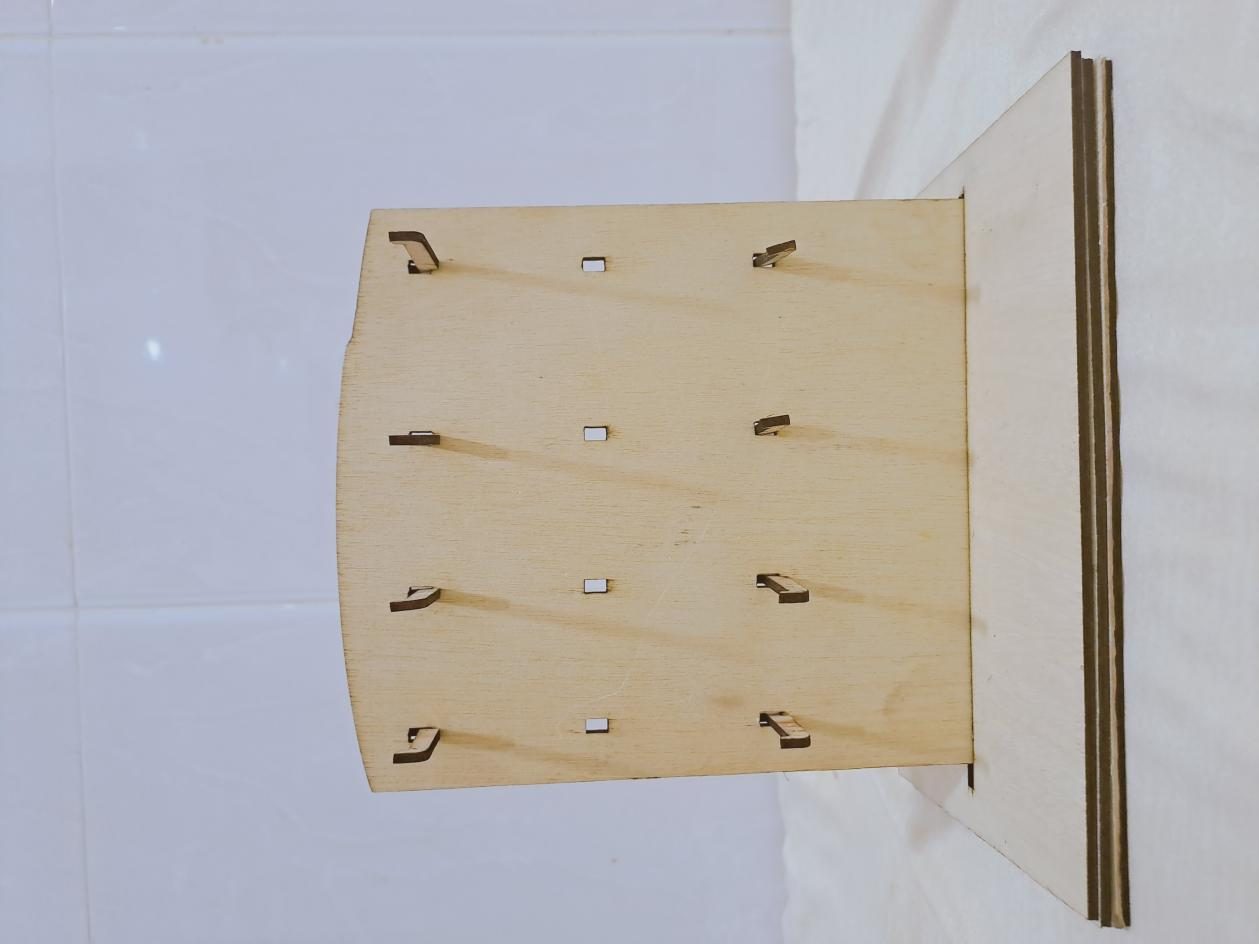
Step 4: Cut out the display wall.


The front of the display is where your items will be held. The hooks will fit securely onto each slot. You may edit the number of slots to accommodate your specific products. Use the array tool in Lightburn to easily adjust each hole the hooks will go into for holding your items.
Laser cut the item display.
If you have modified the width of your stand slit, adjust the width of the item display to the exact with.
Laser cut the hooks. The number of hooks can be modified to hold more or fewer items.
You can further customize your display stand by Laser Engraving on the front face of the stand. This can be your logo, catchphrase, contact address, or image.


Step 5: Laser cut the hooks


The hooks can be easily inserted into each slot.
The hooks used for this design are from Thingiverse There are many hooks available for laser cutting you can download and modify hooks to insert onto the display stand. You may also try 3D-printed hooks to use and show a mix of colors.
Your display stand can be painted in any color you like. You can use the spaces between the hooks to laser engrave or paint designs that can match your desired theme.
This display stand can be easily disassembled and used in future events. Laser cut more than one to create a great-looking stand at your next market event.
Remember to keep the proportion of the stand and base balanced if you are increasing height to accommodate more items. Measuring the required height means the base should be wide enough to securely stay on any flat surface and accommodate your products without tipping over.
By Yerima Medugu