


Endurance lasers getting started page
All you need to know about the maintenance of your diode lasers.
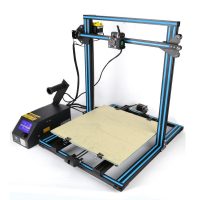
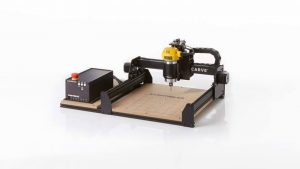
All you need to know about how to connect the Endurance lasers to your 3D printer or a CNC router – wiring, pinouts.
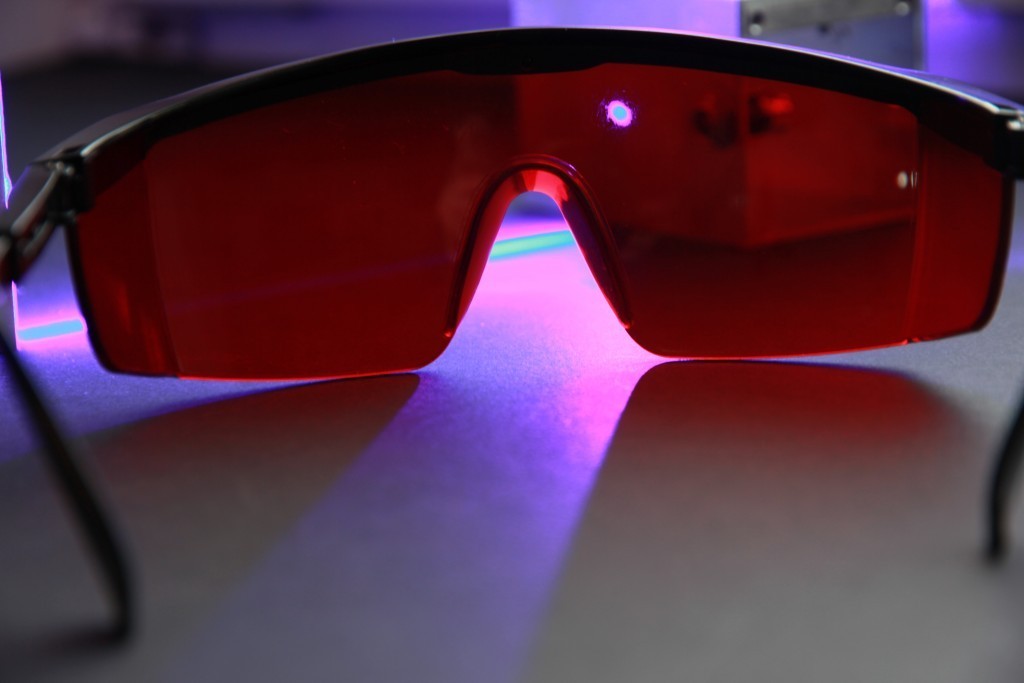
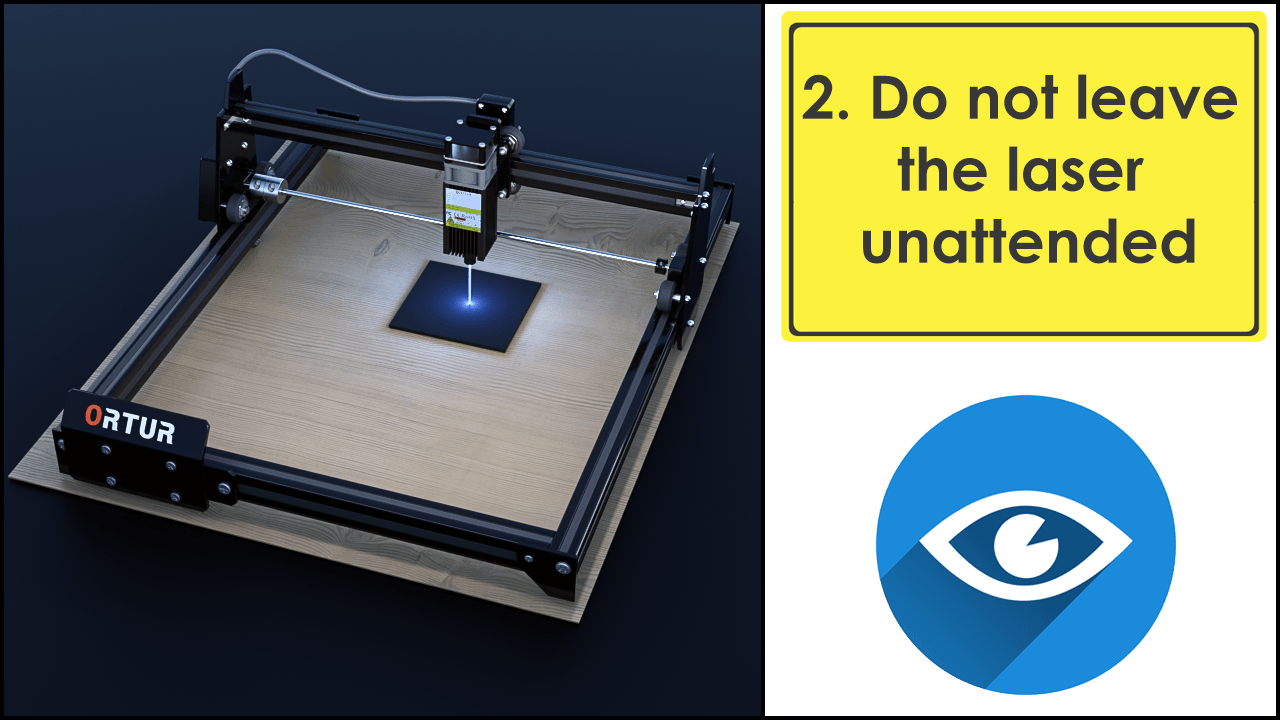
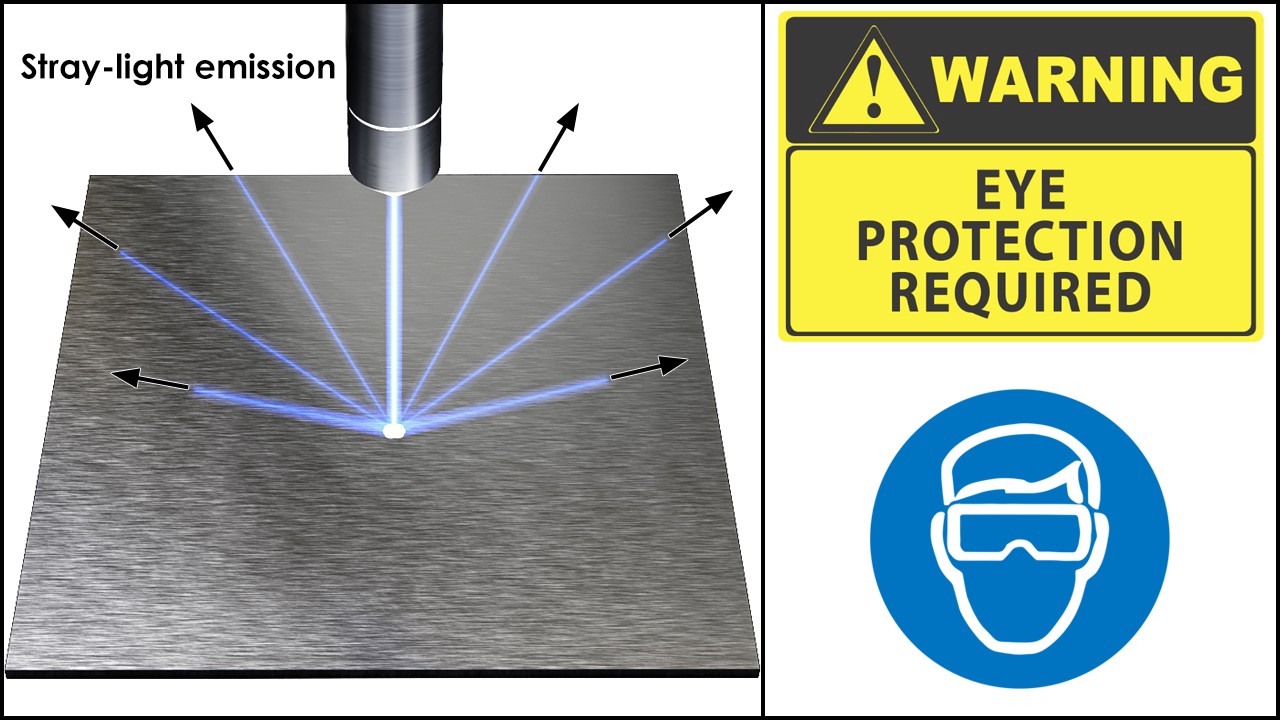
All Endurance lasers are class 4, and you must never operate the laser without special protective goggles.
We always send red, dark red, green, or dark green goggles. These goggles are tested for the safety and protection of the eyes from serious damage. They will protect your eyesight from the reflective laser or accidental eye contact with the laser.
You should never shine with the laser at anyone or try to see inside the working laser (even with protective goggles)
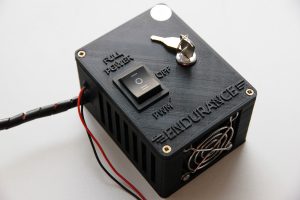
About Endurance laser boxes (diode laser drivers). Buttons switch positions, wiring.
The installation and setup process for connecting your endurance laser is seamless. We include the required parts, pins, and useful tools to easily install your laser and get you started.
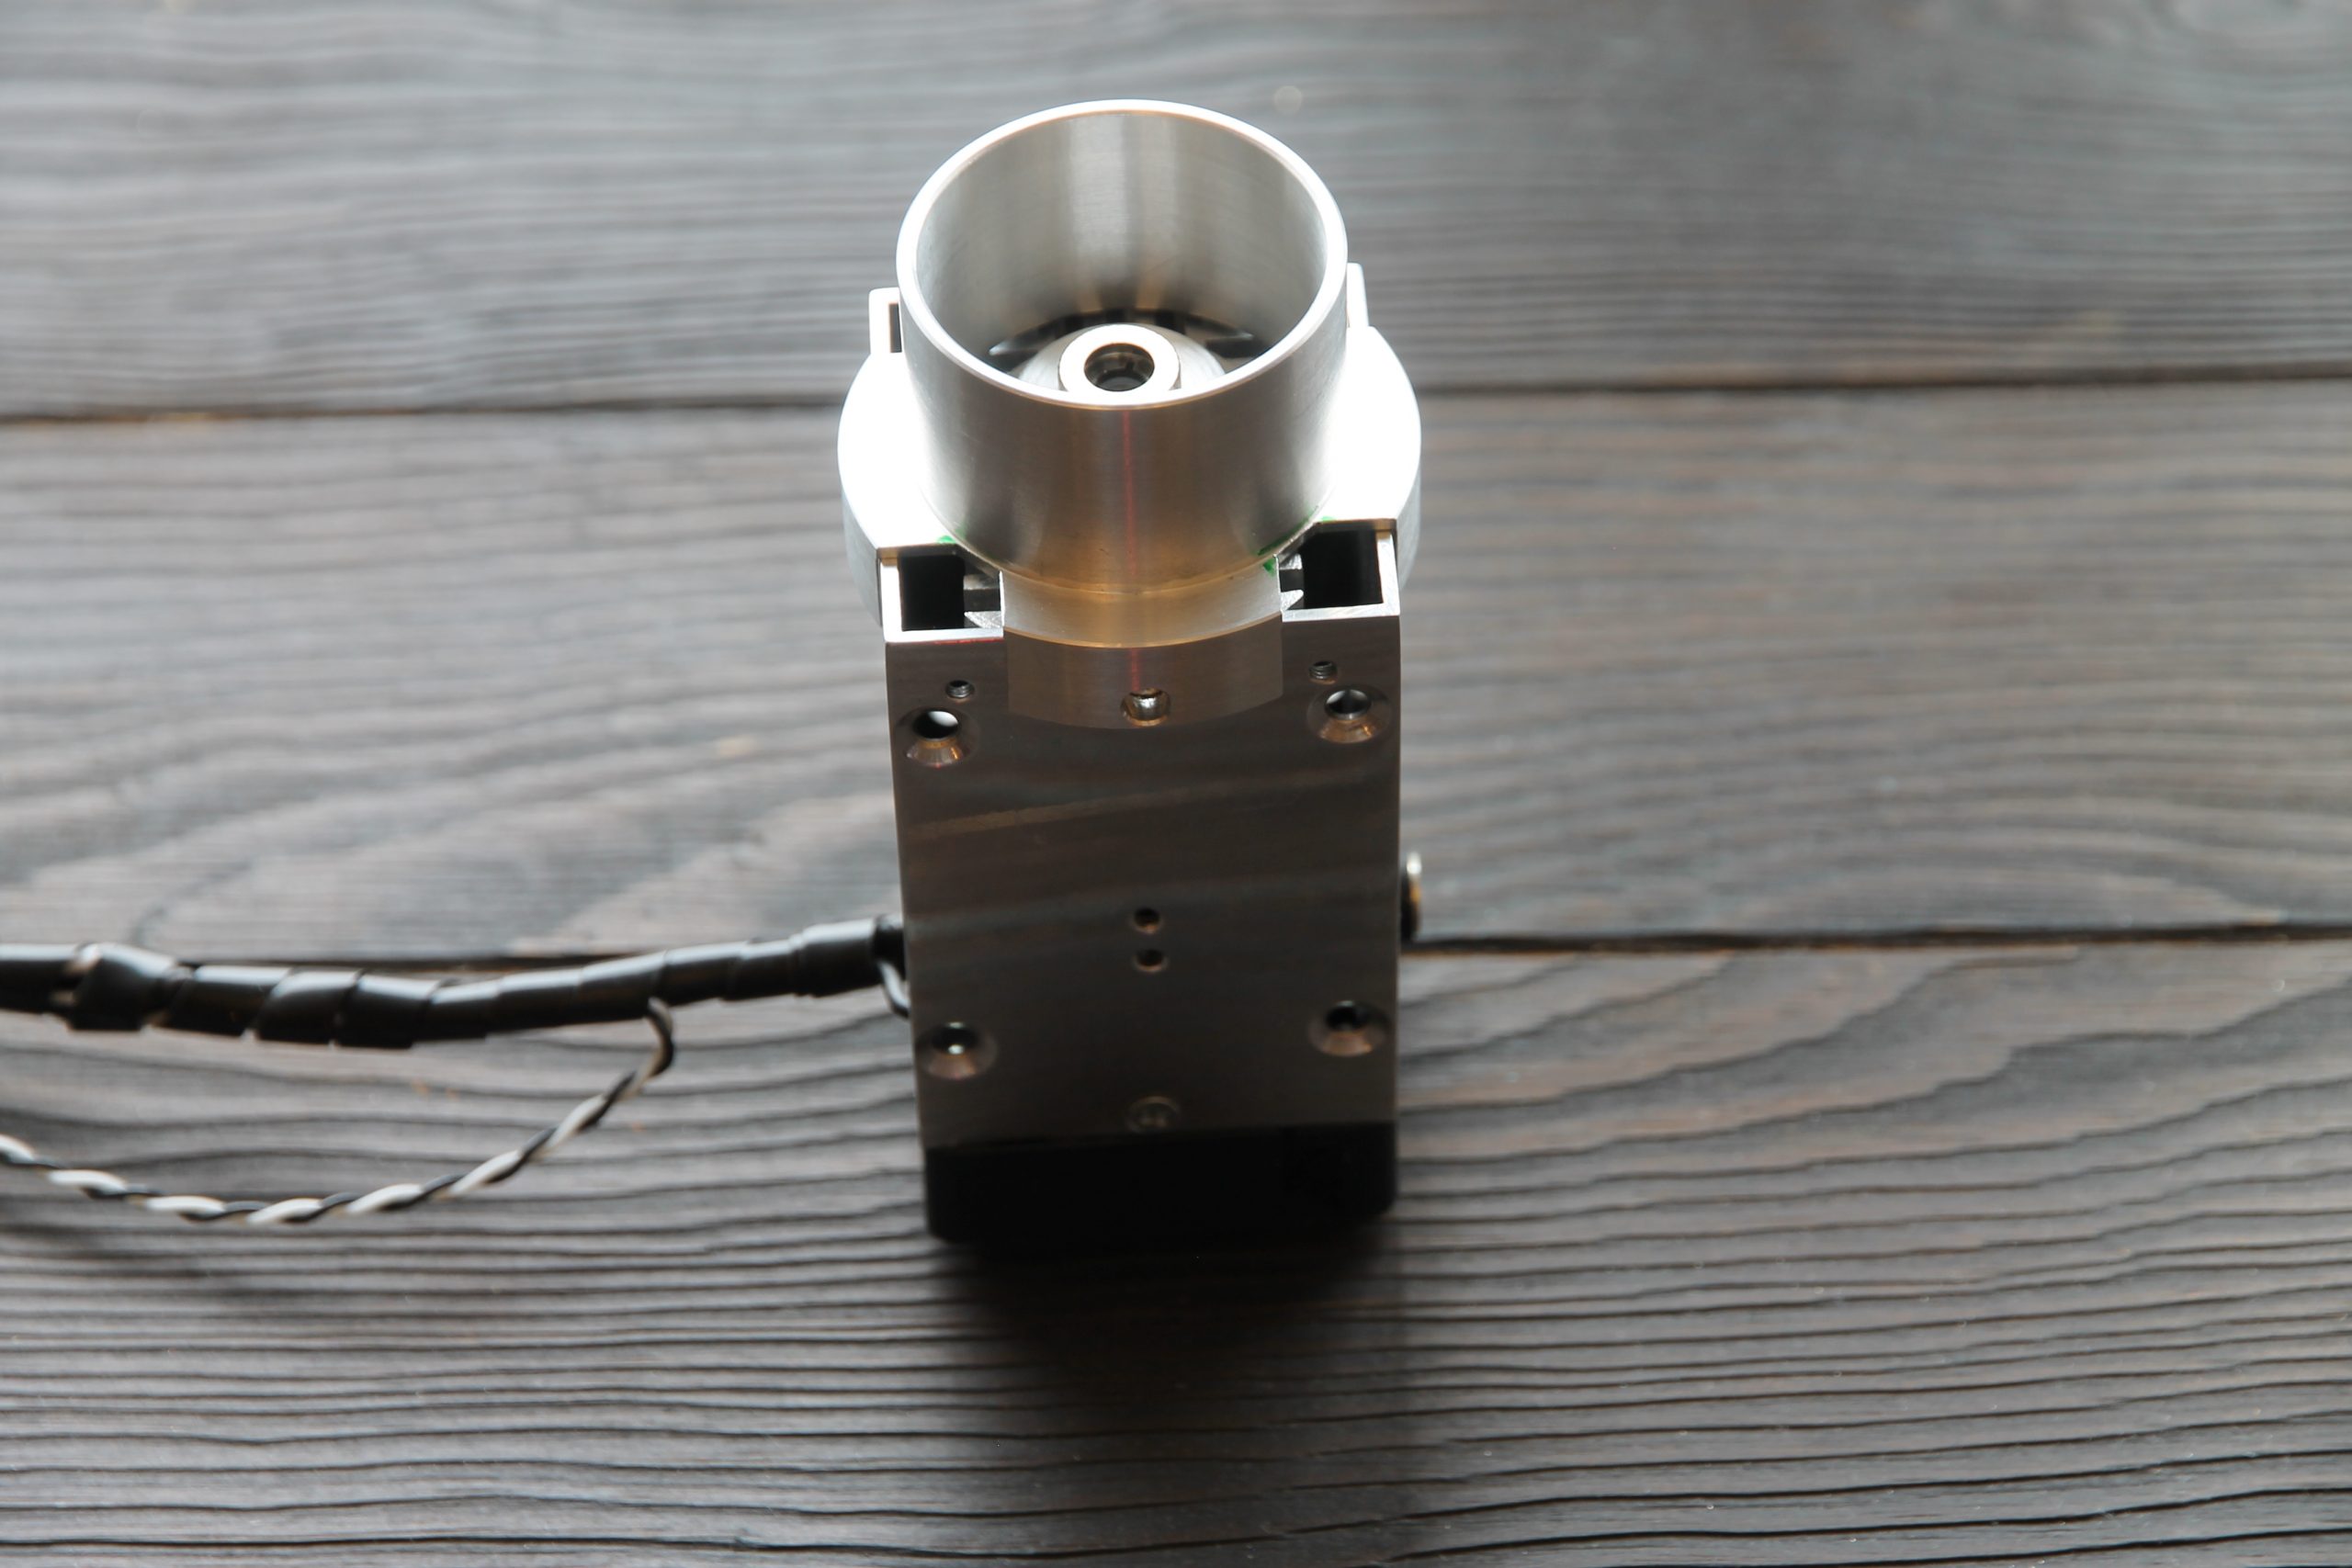
The main components of the laser diode are the laser box, connecting wires, and laser diode securely housed in a heat sink. The laser diode and laser box are very durable to hold all the DCDC converters, sensors, and board together well.
You should choose Endurance lasers for your CNC and 3d printer for several reasons. Our endurance lasers are compatible with many CNC machines and 3D printers, so you can use them for a wider variety of projects!
Endurance lasers are built to last, with a 48 hour continuous work time guarantee. Don’t settle for a laser from a company that can’t provide useful answers or cannot provide quality and customer service. Endurance diode lasers are powerful; they have unrestricted continuous output power, which enables them to perform heavy-duty tasks with ease. Endurance lasers are the perfect fit for any engraving or cutting application.
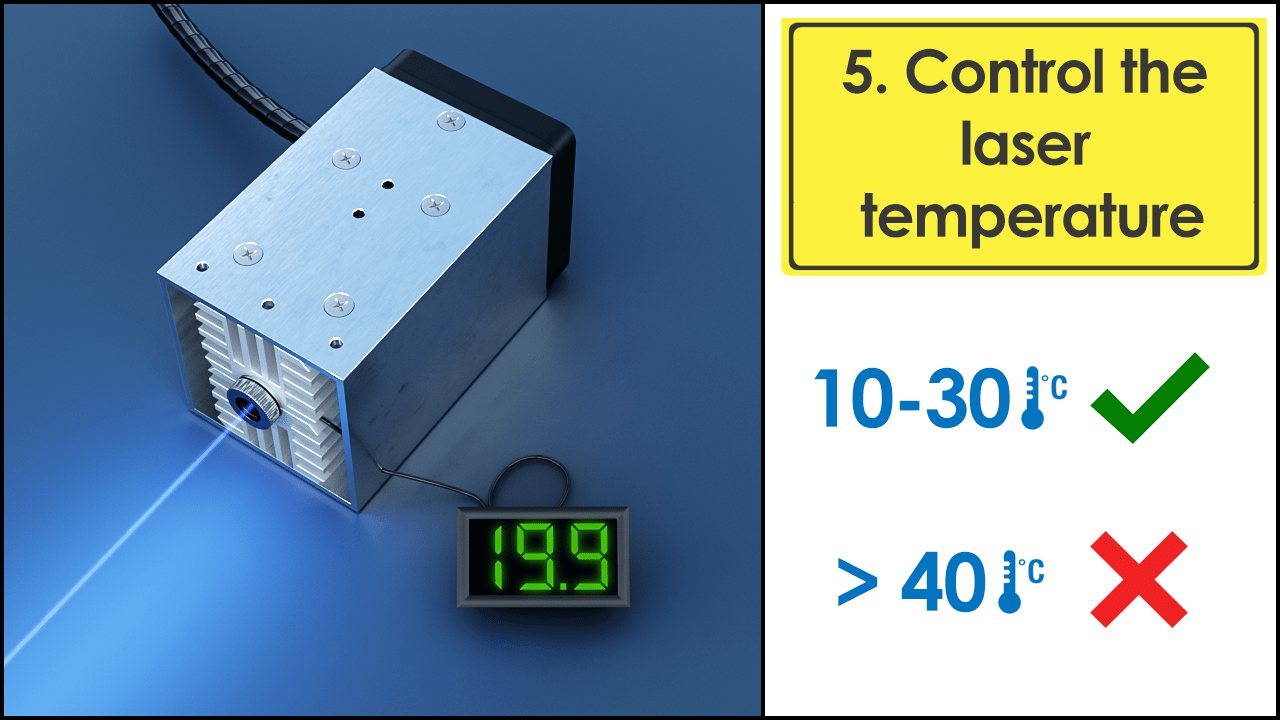
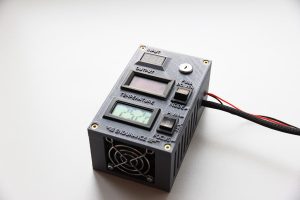
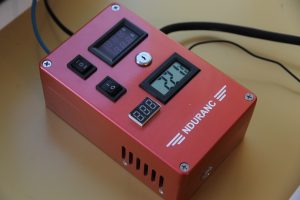
To run an Endurance laser diode you need an Endurance laser box. These laser boxes provide excellent stability for high performance with your laser. The laser boxes available are durable and very helpful to monitor your machine when it is operating and completing a project. The laser box is easy to use, and well equipped with relevant information such as voltage and amperage meters, temperature as well as control of the different available modes.
Different laser boxes are used for different categories of Endurance lasers and we have provided a guide for you to get started with the right one for you and your laser.
All the laser boxes have the impulse and constant mode. The laser box starts from Version 1.1 small laser box, followed by version 1.1 big laser box, and laser box ver 2.0 with Mo2 PCB.
From version 1.1 large laser box (10 watt “Delux”, 10 watt SE / 10 watt PLUS) and upward, the laser consists of Laser temperature, input voltage, and going voltage and amperage going to the laser diode. The toggle keys that come with each laser box will help to keep the box safe and controlled. It is also made safe for anyone who is not supposed to be operating the machine, to require a key to operate. You can also turn the key to not require the key also. It is an added layer of protection.
The laser box is simple to connect to the laser. Endurance makes it easy for you to use the laser box and get started.
This laser control board has three-position switches. This switch has full power and impulse mode (TTL).
The laser box has two wires coming out of it. One wire is red and one is Black. The red and black wire needs to be connected to PWM. The red is plus and black is ground.
The power supply used is 12V and it is important because some power supplies can lose power.
The braided long cable is the outgoing wire that will connect to the laser.
This is a version 1.1 big laser box used for 10 watt “Delux”, 10 watt SE / 10 watt PLUS. This laser box version is equipped with additional features from version 1. This laser box includes Laser temperature, a Voltmeter showing input voltage, a multi-meter showing output voltage and current, voltage, and amperage going to the laser diode.
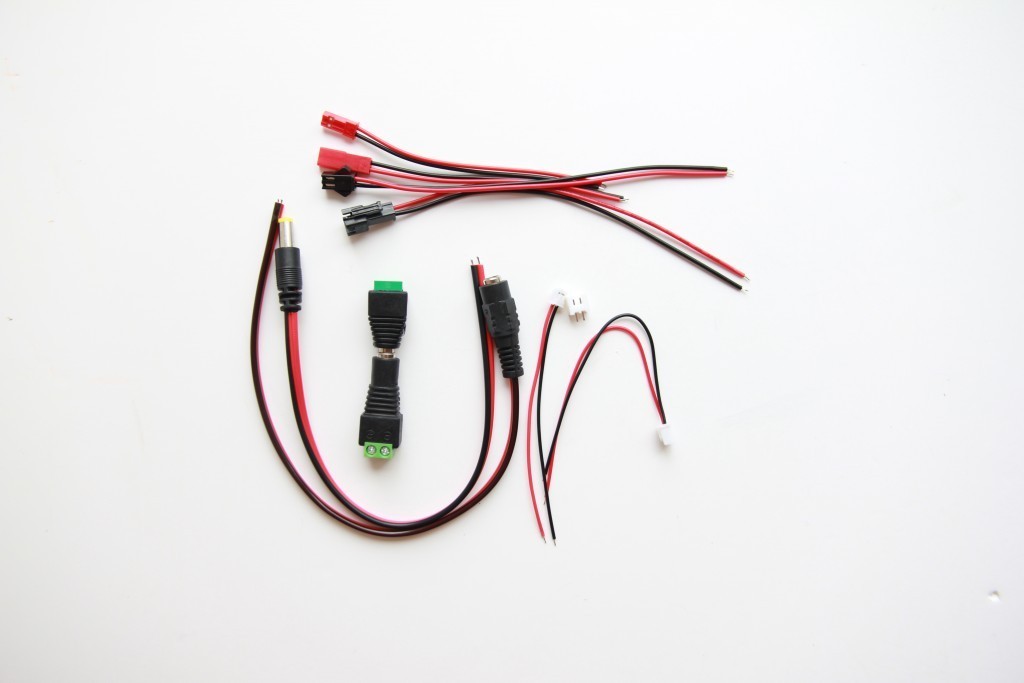
When you order your laser, we always send a pack of universal laser connectors that can be used to wire the laser to your mainboard (2 pin / 3 pin connectors, female/male jacks).
This will help to connect your laser more easily and use the suitable wires recommended for each step for installation.
Customer satisfaction is very important to us, so if you have any questions or requests for your machine. You can contact us for any assistance. We will guide you through and make sure everything is okay for you to get started with your laser.
Laser instructions in English, Italian, Spanish, French and German


Wiring Endurance lasers to your mainboard.
Usually, our lasers are very easy to wire.
Laser boxes ver 1.0 and 1.1 have PWM pins and can be connected to PWM pins on your laser board or FAN1 pin on 3D printers. PWM frequency should be in range 250-500 Hz and the voltage on that pin can be in range 3.5V-24V.
Laser box ver 2.0 has a more advanced PWM with no frequency limit and has an analog input 0-10V that allows operating the laser on all types of CNC machines.
However, some CNC machines require an extra (add-on) to connect the laser box to its board, for example, Shark CNC requires laser box ver 2.0 + a special add-on (we provide them for free upon request).
Keep in mind that if you have 3 pin output, for example, PWM, GND, 12V, you do not need to use 12V, just PWM+ground.
If you are not confident that your 3D printer or a CNC machine has a PWM or an analog input – send us your machine wiring diagram to [email protected] and we will check it out for you.
Running an Endurance laser on a CNC machine >>>
All you need to know about Mo1 PCB >>>
All you need to know about Mo2 PCB >>>
We always send a pack of universal laser connectors that can be used to wire the laser to your mainboard (2 pin / 3 pin connectors, female/male jacks).
Extra useful links about lasers
Read this page before running the laser.
All you need to know about PWM and TTL >>>
Explore Endurance lasers technical specs >>>
A full list of compatible CNC frames and 3D printers >>>
Connecting the laser to a 3D printer >>>
Connecting the laser to a CNC frame >>>
If you have a problem with the laser wiring – here is a detailed guide of how to find the PWM pin output on your board.
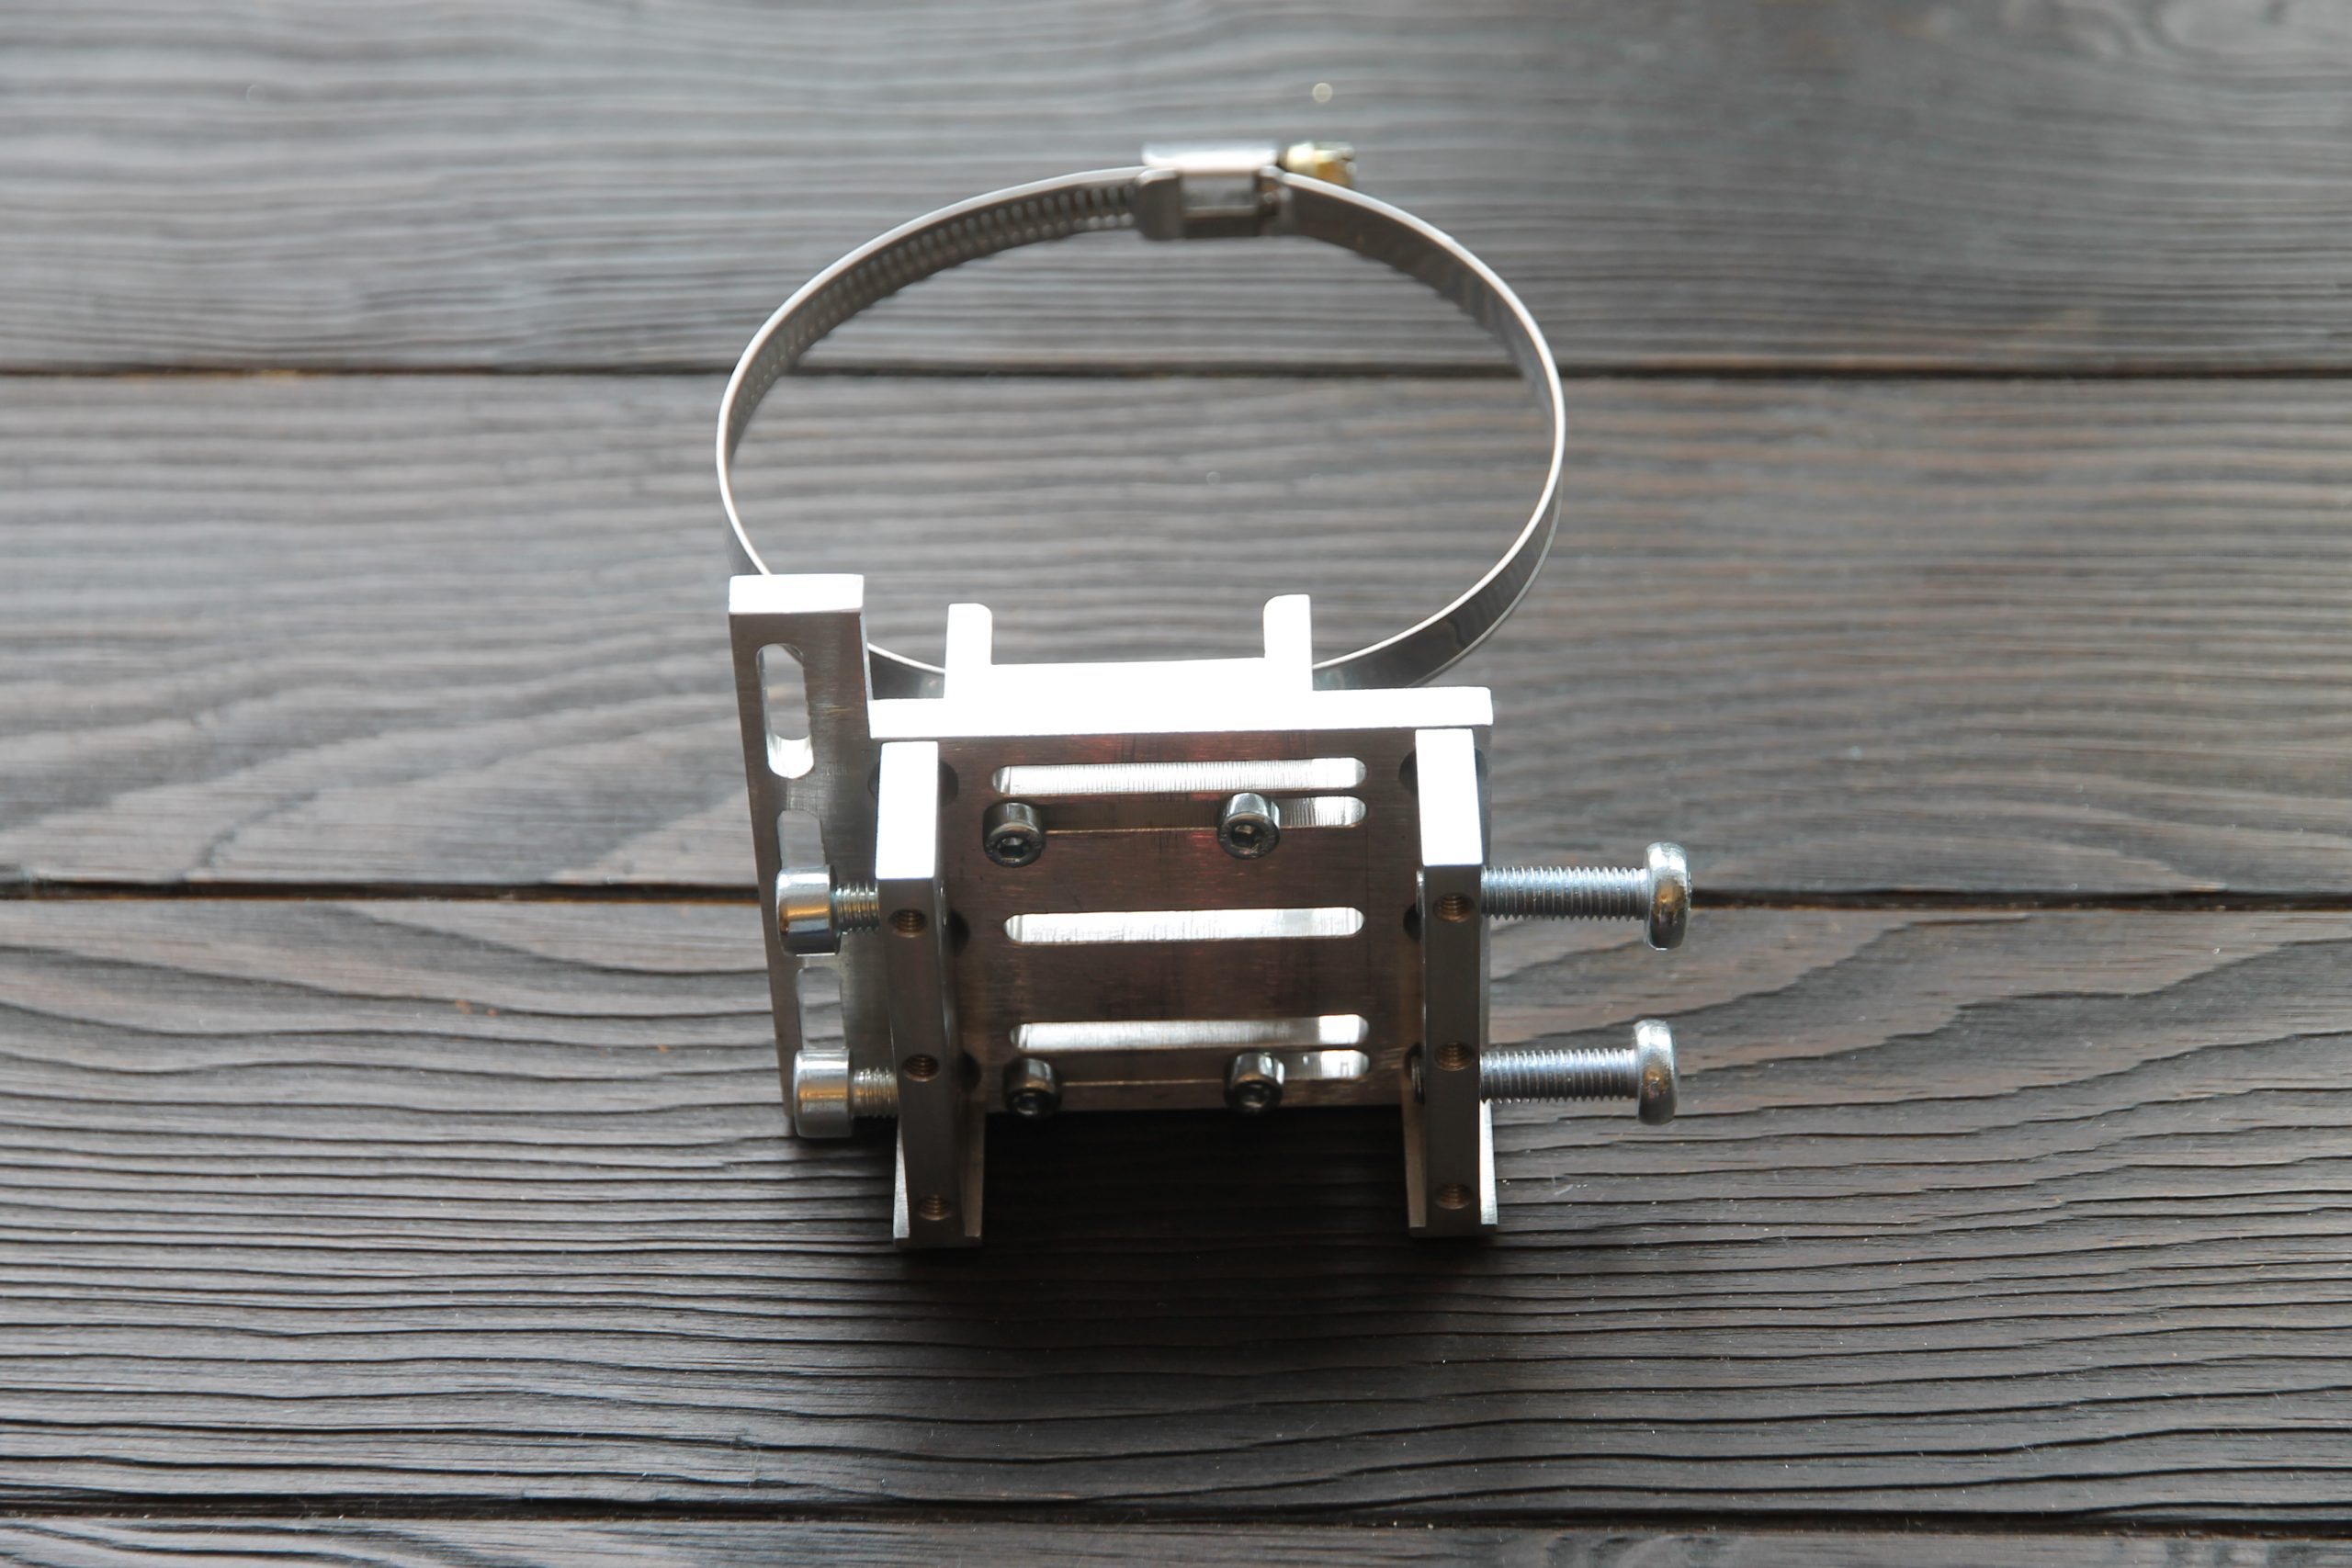
Laser mounts. How to mount the laser on your 3D printer / CNC or engraving machine.
It is very important to properly hook the laser on your frame. Most users hook the laser near the extruder (however sometimes it is better to remove an extruder to reduce the weight of the moving part) and near a spindle on CNC frame.
Our customers make and share their laser installation
Installing Endurance lasers on difference CNC frames – upgraded machines
If you need to extend laser power cords you can do that with AVG 10 or AVG12 wires.
If you need to extend laser PWM wires you can do that using AVG22 or AVG24 wires.
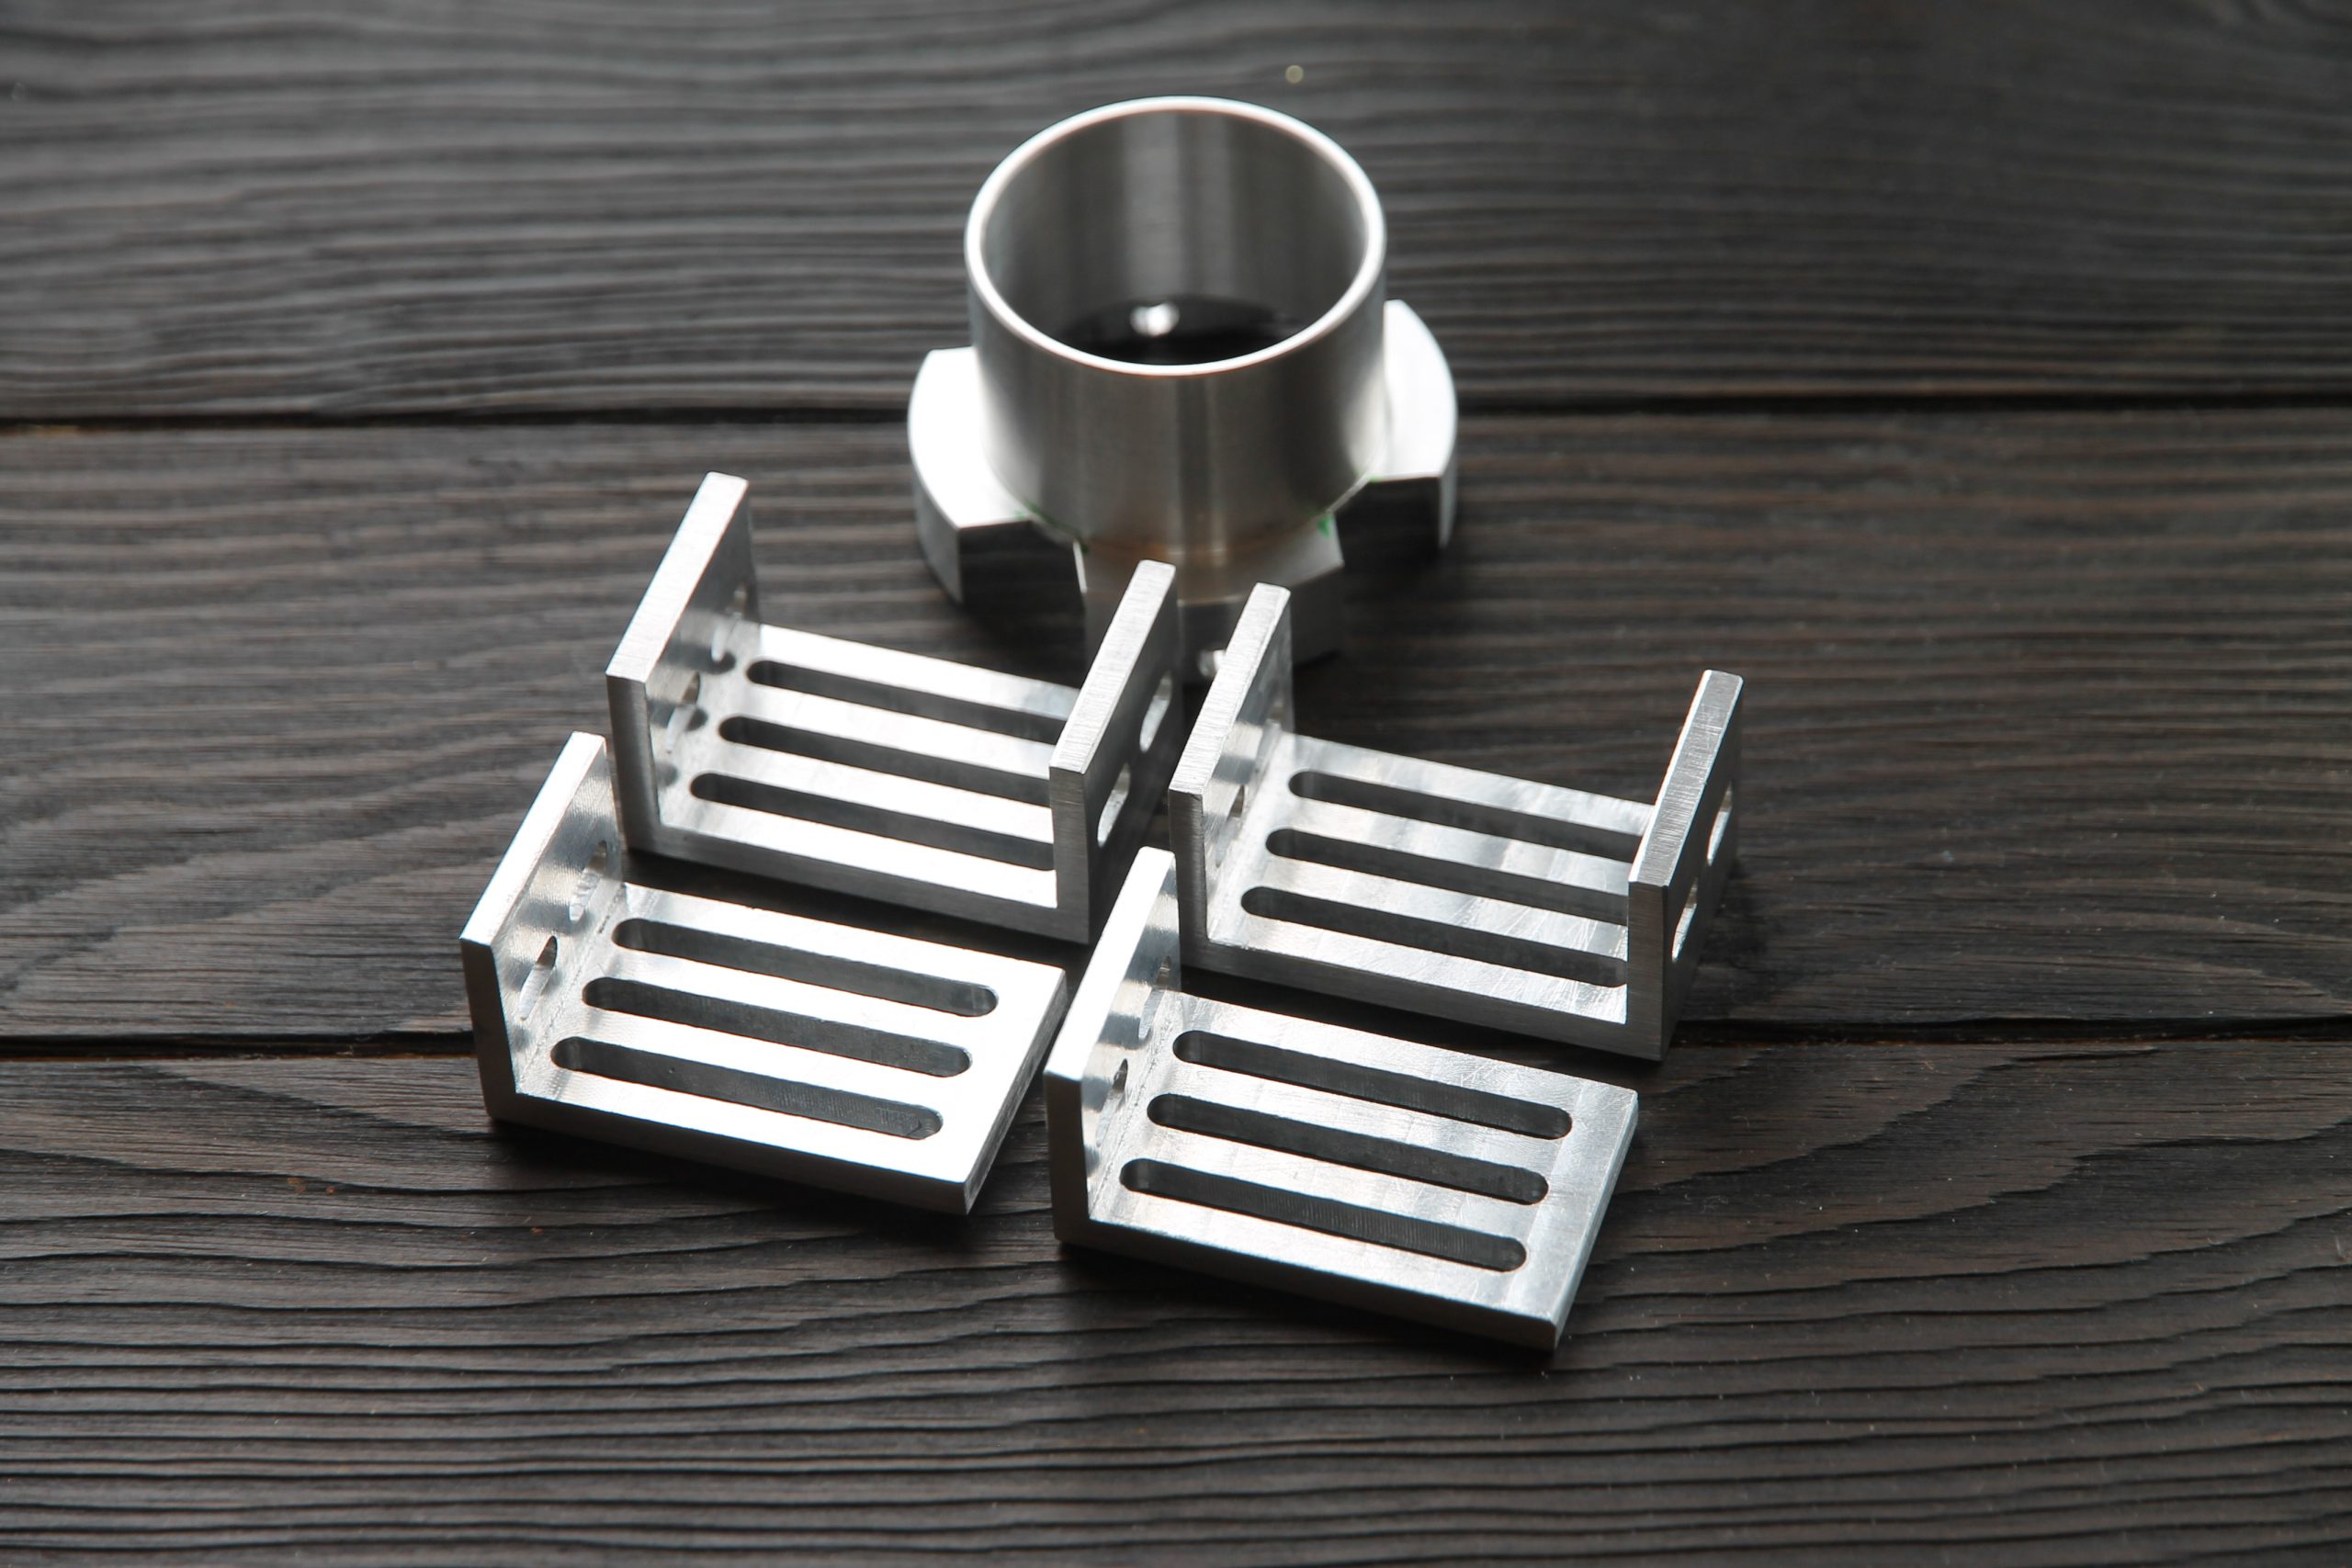
For hooking the laser we offer a wider variety of different mounting brackets.
Some brackets we offer are made of aluminum.
We tried to make Endurance lasers mounts as universal as possible so that any of you can easily mount the laser.
Keep in mind that the better the laser is hooked the better engraving and better cutting quality you will get.
We suggest using mounts like this: П / L / I / T shapes. Check our STLs files on Thingiverse >>>
If you need a mounting pack you are welcome to order on our online store >>>
Some of our mounting brackets are made out of PLA plastics and can be 3D printed and can be easily modified.
Download advanced and basic mounting brackets for free on Thingiverse
An Advanced and basic mounting brackets: https://www.thingiverse.com/thing:4444946
All STLs in one place >>> https://www.thingiverse.com/endurance_lasers/designs
Endurance getting started a playlist on YouTube
Getting started with Endurance 10 watt PLUS PRO
Laser beam focusing
Once you wire and hook the laser you need to set your focus.
We send lasers with pre-setup focus (you may find it on a business card). The focal range from the laser to a surface is about 50-75 mm (~2-3″) and can be changed.
Different lenses have different focal ranges.
Learn more about Endurance optics >>>
If you plan to do a lot of laser cutting we suggest using an air nozzle for effective laser cutting.
Laser power supply
Usually, we send all necessary power supplies for the laser you bought with your local plug. However, you may use yours as well. All Endurance lasers work from 12 volts but require different currents.
In case you have a 24V power supply – we suggest using a step-down “buck” DC/DC converter.
The power requirements can be found on a product page. Usually, it is 12V 4A minimum for 10 watt “Invincible” and 12V 15A for 15 watt (15000 mw) “Duos” and 12V 30A for the DPSS laser module.
10 watt (10000 mw) PLUS and 10 watt PLUS Pro require power for the TEC (Peltier) cooling system (it is an independent power supply that goes to it).
Please check with your power adapter and power output. Your power brick should have at least +1-2A more from its max output. If you run your power adapter and your control board on a maximum output it can cause damage and overheat. Be careful with that!
Your power adapters should always stay cold.
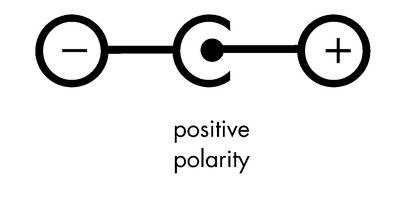
Where is the positive and negative in the laser jack?
We use standard positive polarity on our lasers like this
Endurance troubleshooting
In case you face a problem with the laser, for example, something is not working or it works not like how you expected, you are welcome to follow this troubleshooting guide.
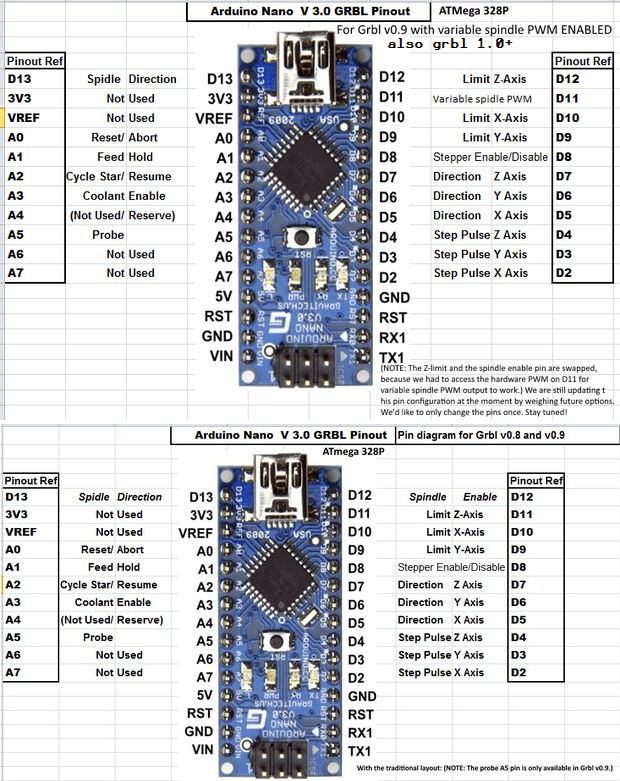
Arduino pins with GRBL 3.0 pinout
If you have an Arduino board or GRBL board – it is quite easy to connect our laser.
A guide about Endurance Laser Arduino CNC Shield setup (PDF)

Once the laser is ready, installed, wired, and prepared you may try our laser test g-code
If you did not get an answer just post your question here
or in our google group, or you are welcome to join our Facebook community.
or simply email me [email protected]
or text+7.916.225.4302 (WhatsApp, Viber, telegram, WeChat)
skype: george.fomitchev
High-quality standard
Multi-level testing system.
Industrial components.
Ultra reliable
The guaranteed duration of the continuous operation ~48-72 hours.
True continuous power output
Our products have the rated power output as advertised – unlike Chinese analogues.
TTL mode
Can be turned on and off with 3.5-24V.
Variable power output.
Plug and play
Universal and compatible mount.
Compatible with most 3D printers and CNC machines.
Friendly return policy
Do not like the laser?
Simply return within 30 days and get a full refund.
Real-time advice
We assist and give advice by Phone / Email / Facebook messenger / Telegram / Whatsapp / Viber.
Professional support
We help to install and tune the laser. We offer qualified after-sales support.
Everything you need
We ship everything you need in one parcel to get started.
Immediate delivery
We ship all units within 4-24 hours. DHL express delivery allows you to get the package in 3-5 days.
Lifetime warranty
All our lasers are tested and could work up to 10000 hours.
Upgrade option
Do you have an old model? Upgrade your unit with more powerful one.