
All you need to know about how to add a camera to your engraving machine. A complete guide
1. General settings
In the LightBurn settings, the dimensions of the working area of the machine must be specified (menu “Edit -> Device Settings”

Basic Settings Tab

The working area of our machine is 460×340 mm.
2. Camera fixation
The camera should be fixed above the machine in the center of its working area.
Using a camera in a lightburn software. Convert your smartphone camera into a webcam.
3. Print out “circles pattern”
Before starting the calibration, you need to print the “circles pattern” on the printer.

The print size should be approximately 148x105mm and have at least 6mm of white space around the edges.
4. Camera lens calibration
Run the camera lens calibration (menu “Tools -> Calibrate Camera Lens”.

Choosing our Webcam. Depending on the type of lens, we indicate either “Standard Lens” or “Fisheye Lens” below. Leave the “Use Preset” parameter “None – do full calibration”.
On the left, you can see the transmitted image from the camera. For more accurate calibration, it is desirable that there is nothing superfluous there. If the machine is in the frame, then the camera can be slightly lowered during the calibration.
After we press the button “Next”


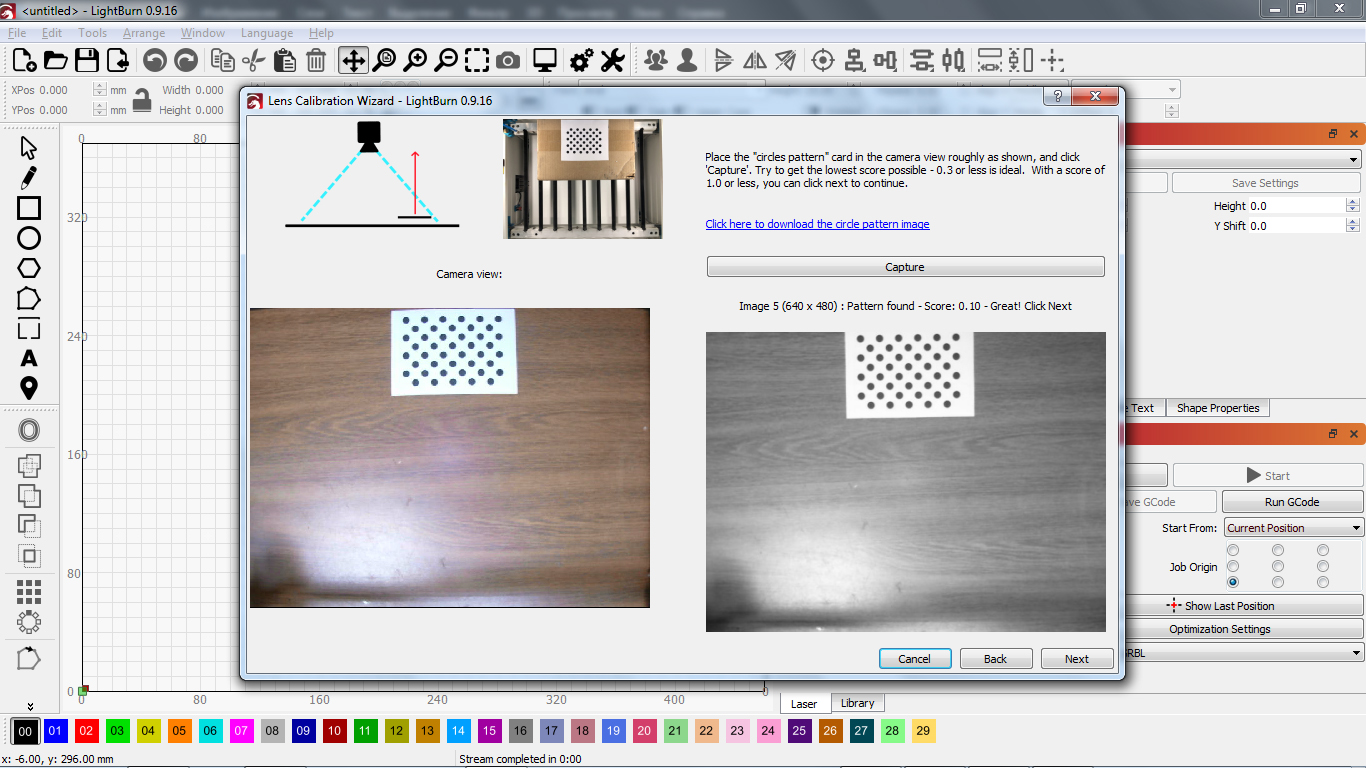
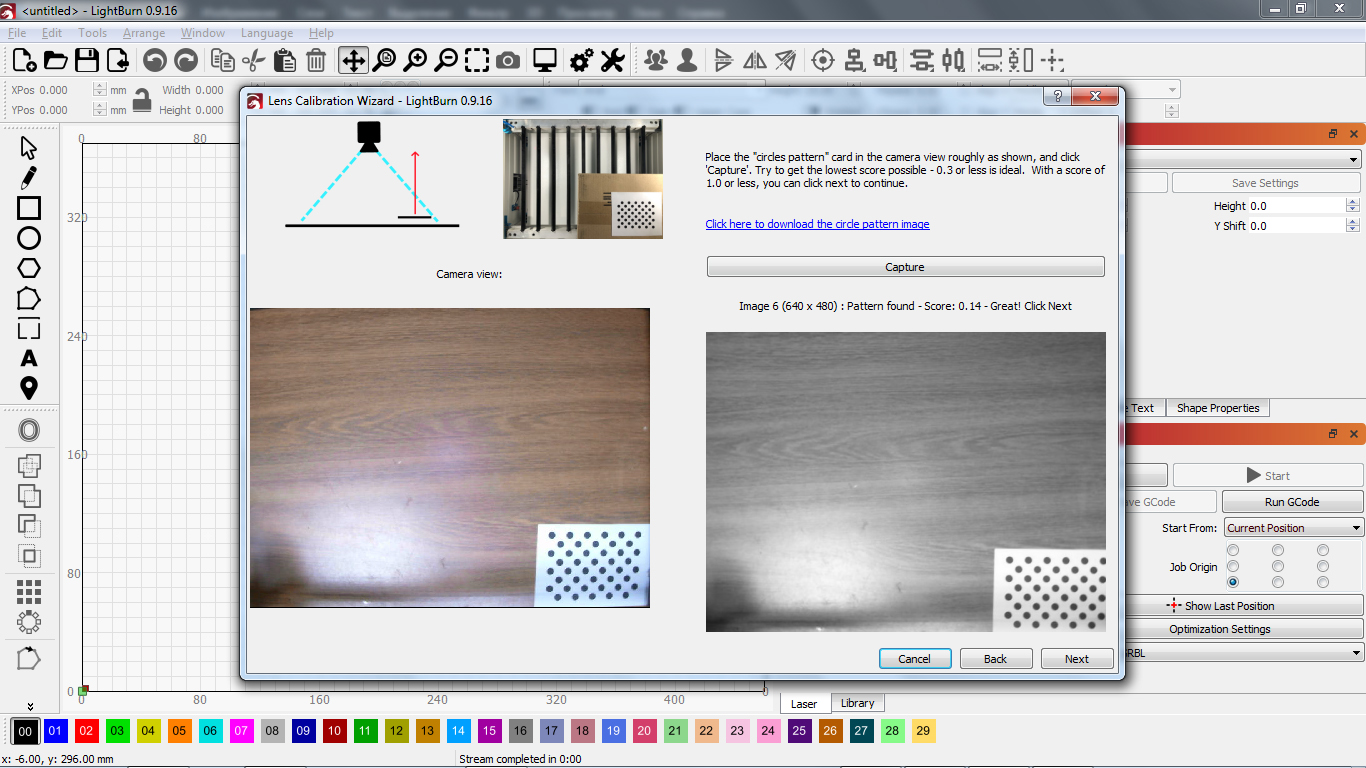
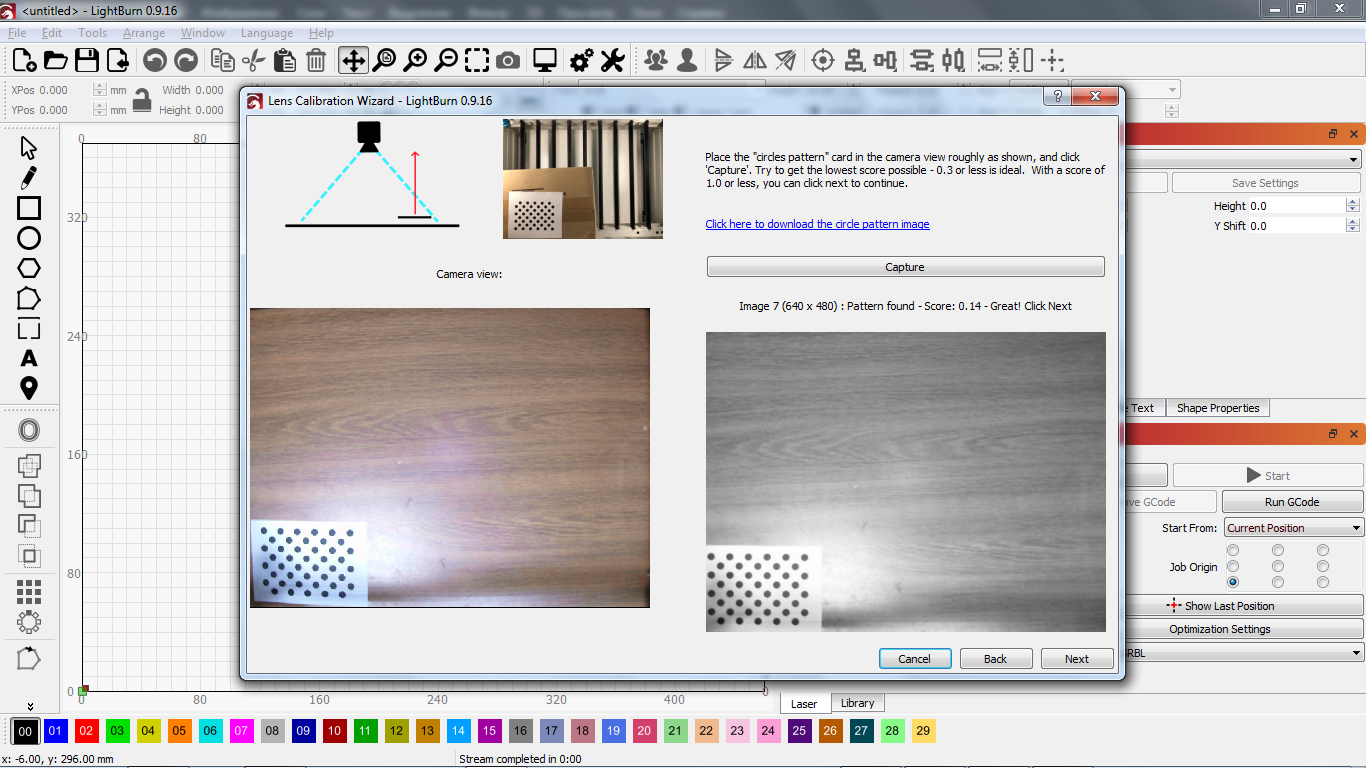
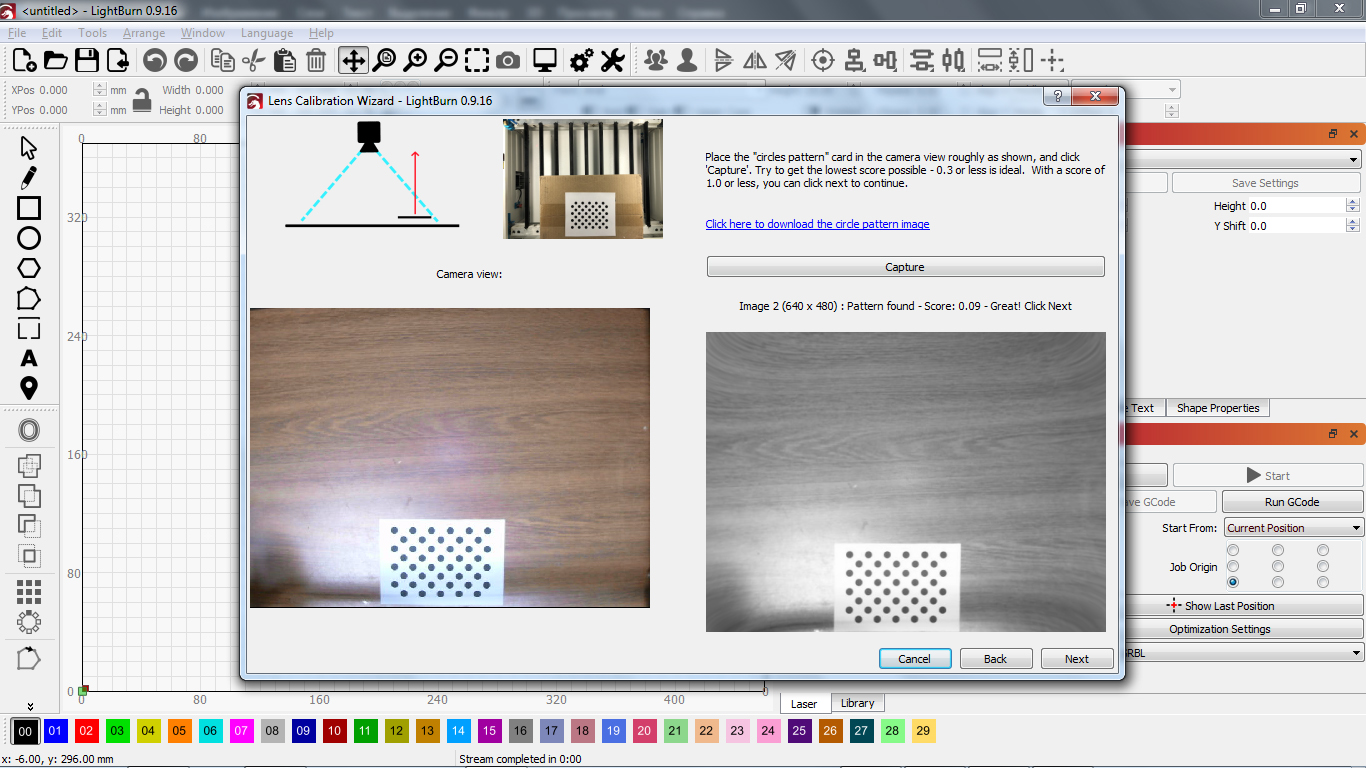
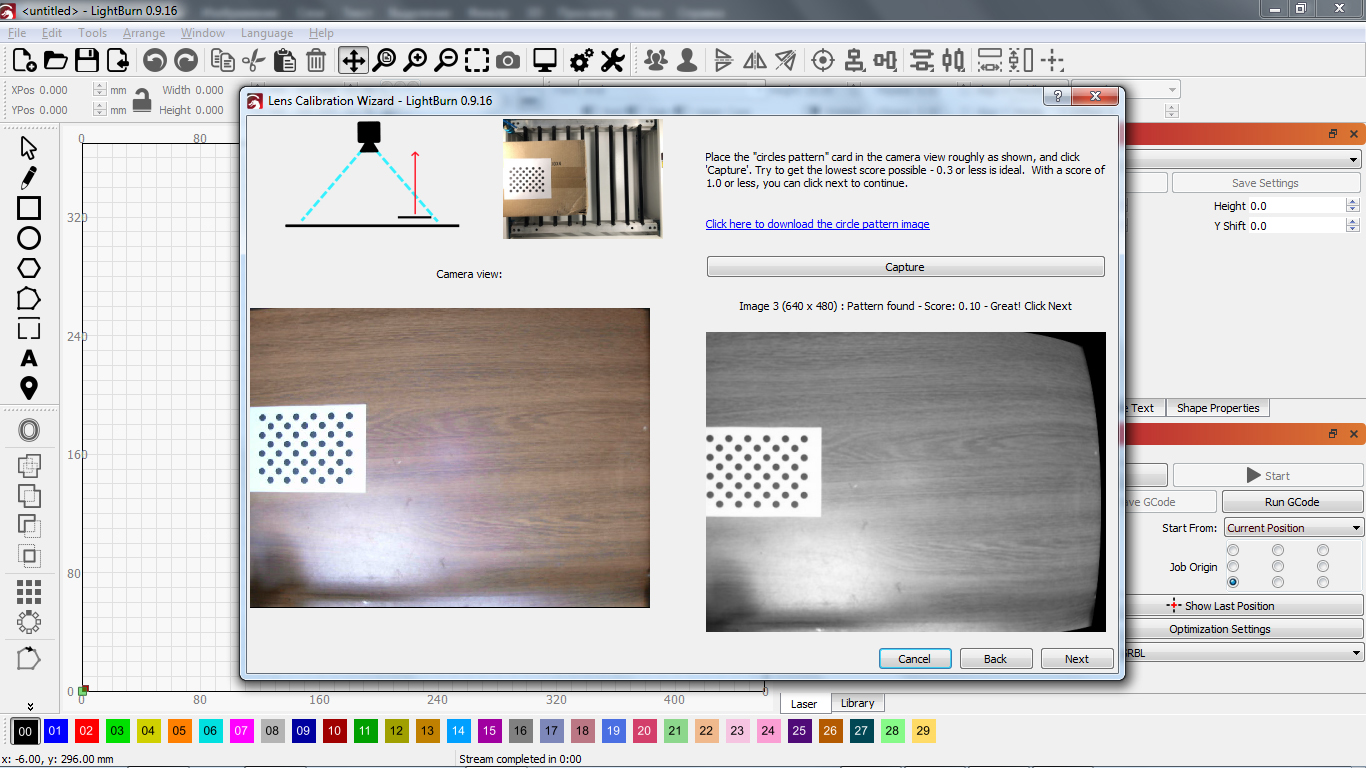
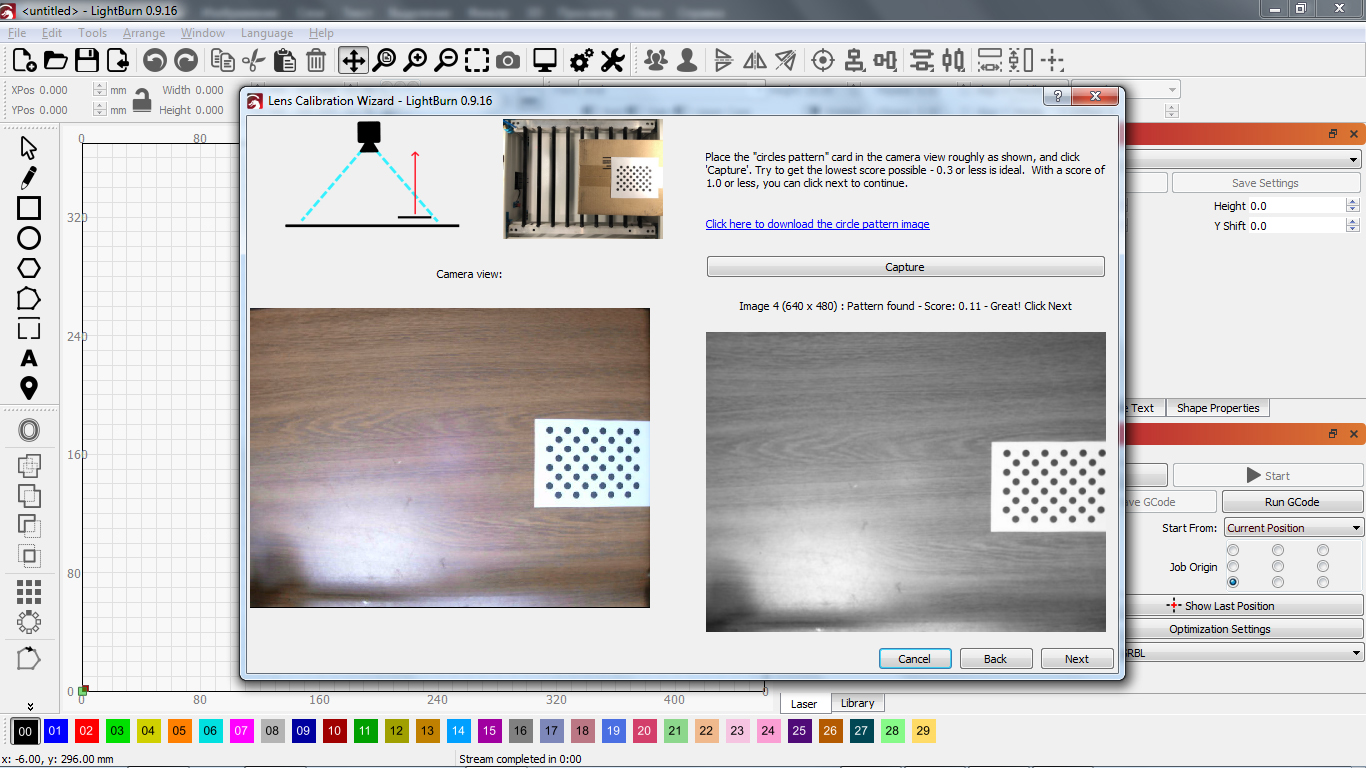
Place the “circles pattern” as shown at the top of the screenshot, then click the “Capture” button. A snapshot from the camera should appear on the right with the inscription “Pattern found – Score:” above it. Next comes the number, which should be no more than 1.0 – ideally, if 0.3 or less. Then we press the Next button and repeat this procedure 8 times more.


5. Camera alignment setup
After completing the camera calibration, it is suggested to start the camera alignment setup (the “Align Camera” button)

Also, this procedure can be started through the menu “Tools -> Calibrate Camera Alignment”.

Choosing our Webcam. If, when calibrating the lenses, it was slightly lowered, raise it so that the entire working area of the machine is visible. We press the button “Next”.

Now you need to engrave the adjustment image on paper, cardboard or wood. Set the parameters of engraving “Speed” and “Power”, and also set the scale of the image “Scale”. With a value of 100, the engraving size will be 200x200mm. Engraving will take place in the center of the machine’s working area. Check the engraving area with the “Frame” button. After we have made sure that the material on which the engraving will be performed is in the desired area, press the “Start” button and wait for the end of the engraving process. Then we press the button “Next”.

In our case, the engraving was done on a square of plywood 300×300 mm.

Place the engraved image in the center of the machine’s working area and press the “Capture Image” button. Then we press the “Next” button.

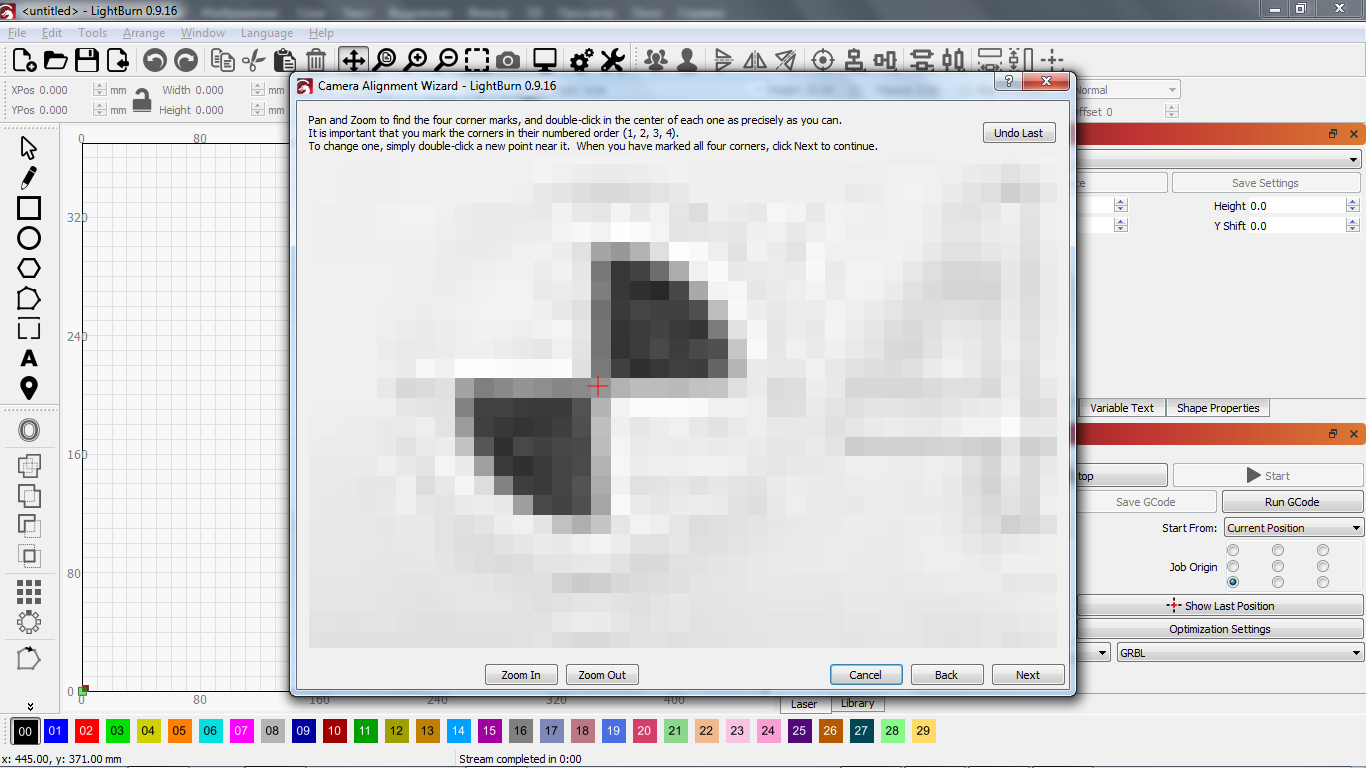
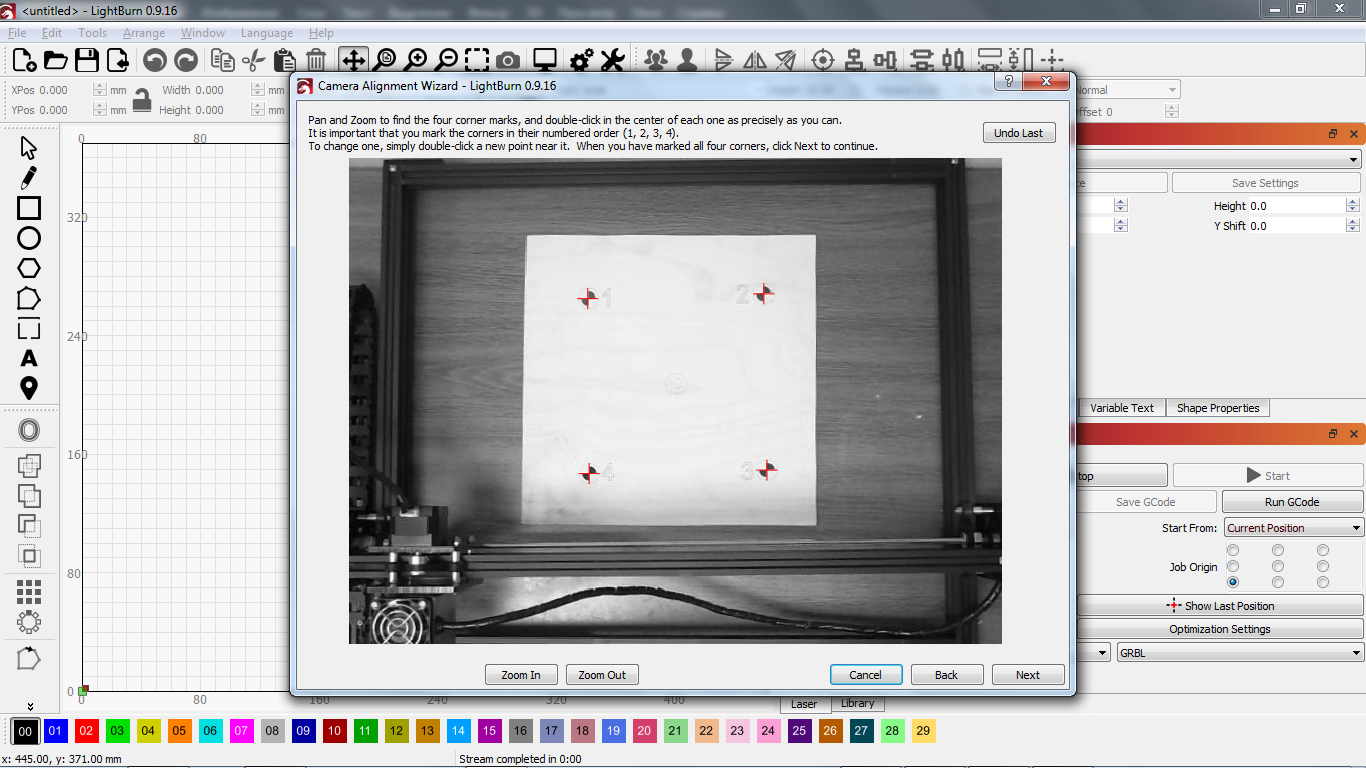
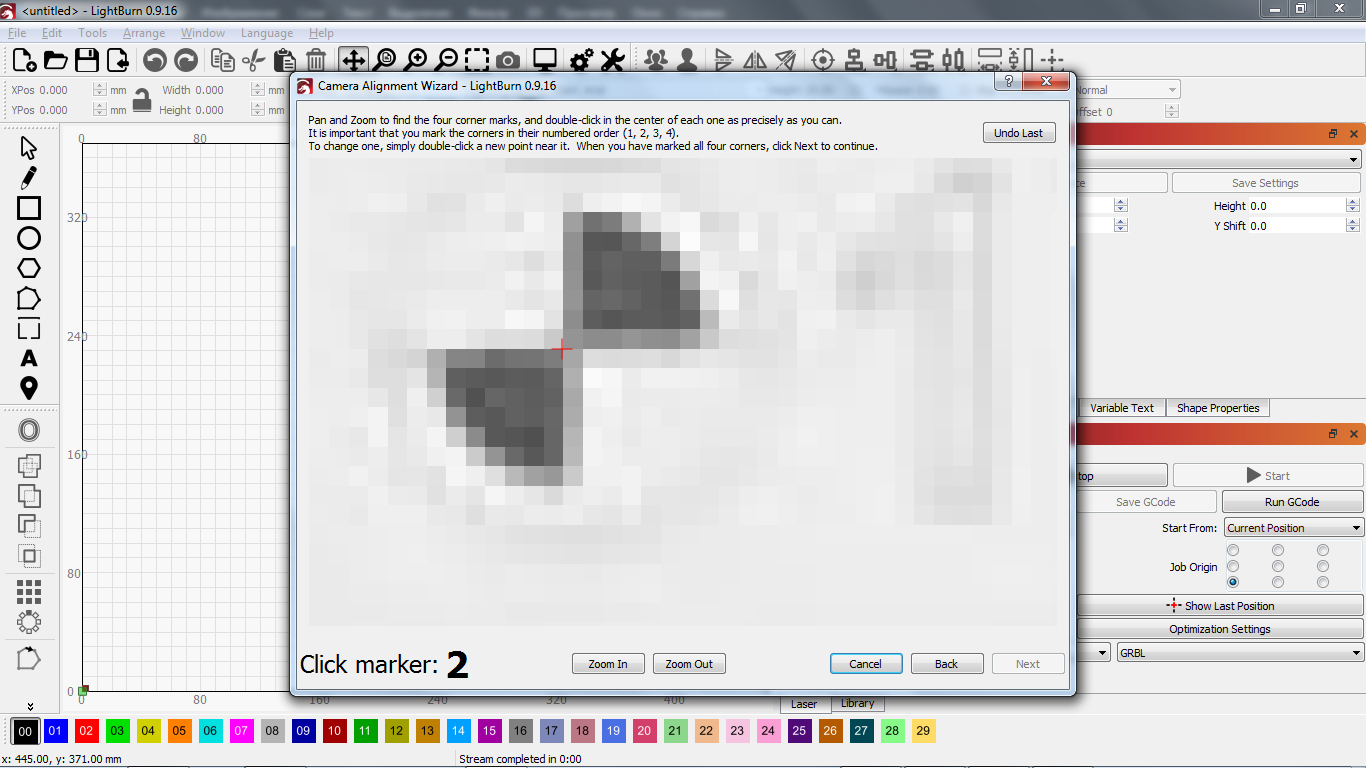
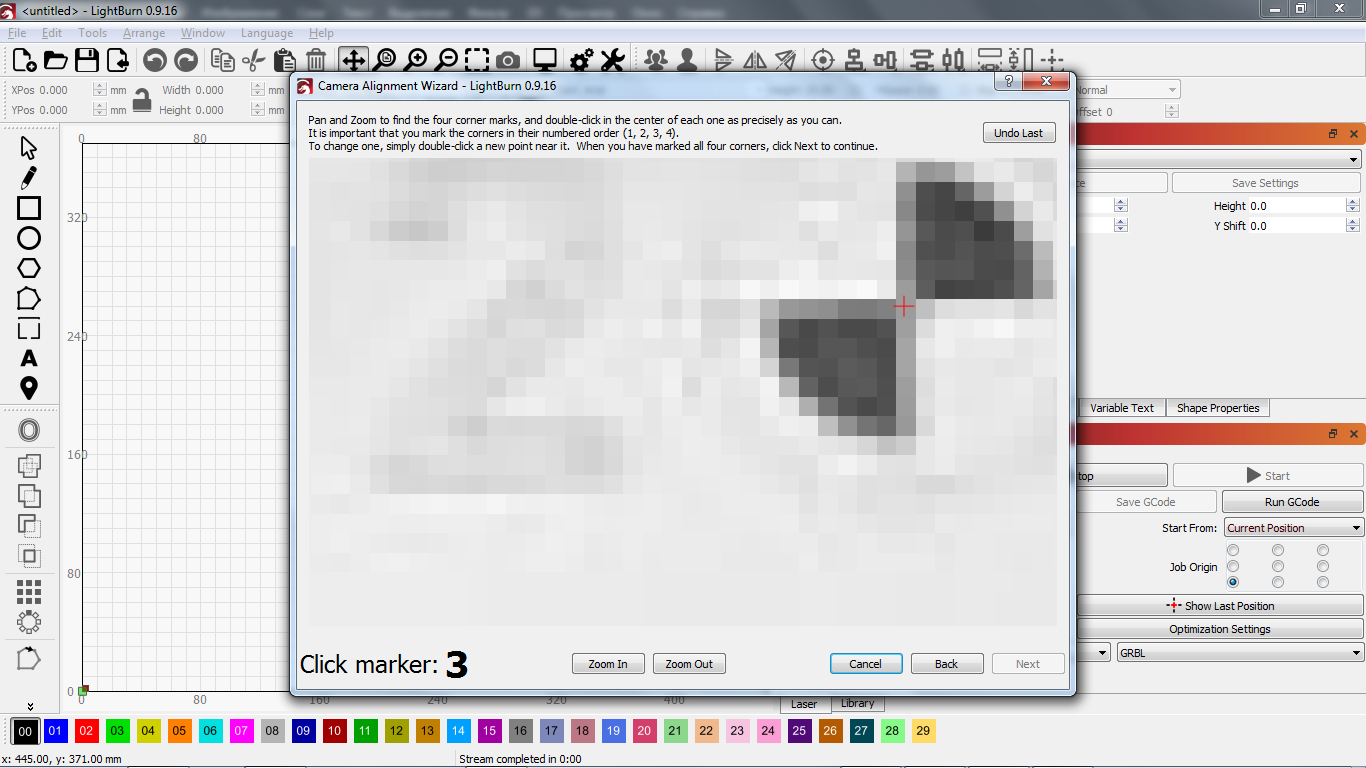
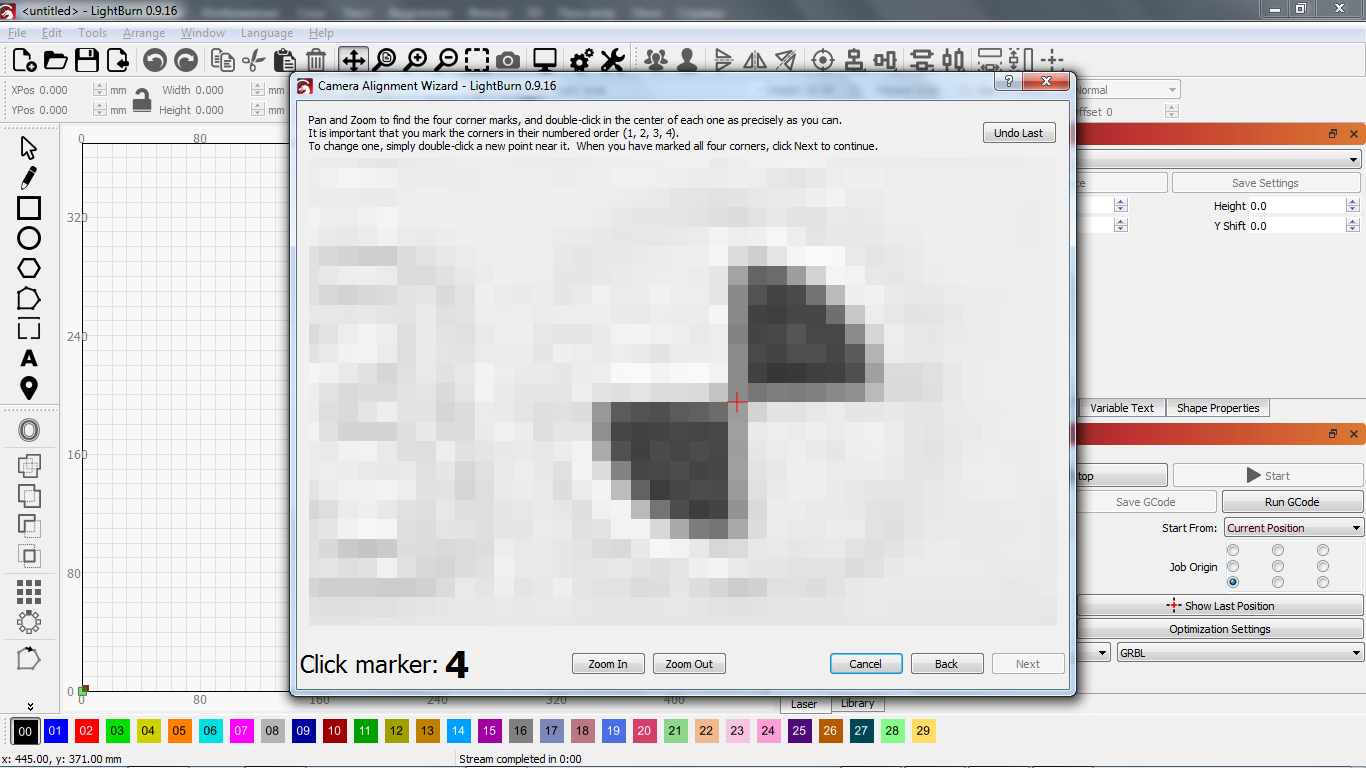
Now you need to mark the centers of the four circles by double-clicking the left mouse button. Each circle is marked with a corresponding number and they are marked in the same sequence. For greater accuracy, the image can be enlarged / reduced using the mouse wheel or the buttons “Zoom In” and “Zoom Out”. Then we press the button “Next”.

In the next window, click the “Finish” button. We do not remove the engraving of the adjustment image from the machine anywhere.
6. Correctness of the calibration.
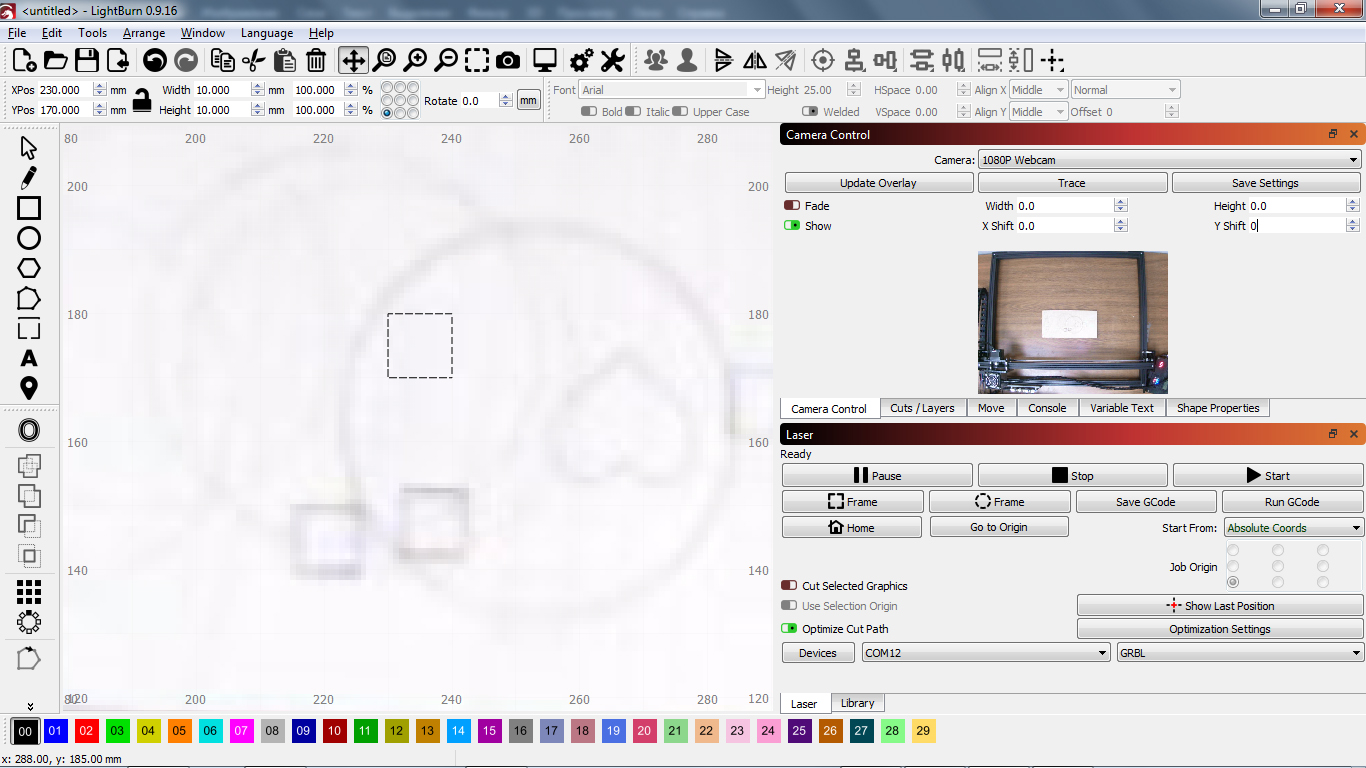
Now we check the correctness of the calibration. Open the “Camera Control” tab, select our camera, turn off the “Fade” function and press the “Update Overlay” button. On the left of the working area of LightBurn, a picture from the camera will appear in the background, on which the setting engraving will be visible. If the “Scale” parameter was specified at 100 when setting it, then the distance between the centers of the circles vertically and horizontally will be 180 mm. Using the LightBurn tools, draw a 180x180mm square and move it to align with the centers of the circles.

In our case, everything coincided. If the centers of the circles formed a rectangle, or a square of a larger or smaller size, then using the “Width” and “Height” parameters, it is necessary to compress or stretch the image so that the centers of the circles coincide with our square.
7. Check is the correspondence of the camera and the frame
The last thing left for us to check is the correspondence between the machine coordinates and the camera coordinates.
Remove the square and draw a new 10x10mm somewhere in the center of the working area. We will also remove the adjustment engraving (so as not to spoil it) and place some unnecessary piece of material in the center of the machine for checking.

Switch to the Cuts / Layers tab and set the engraving parameters. Also check that the “Start From:” parameter is set to “Absolute Coords”. Then we press the “Start” button and wait for the end of engraving.

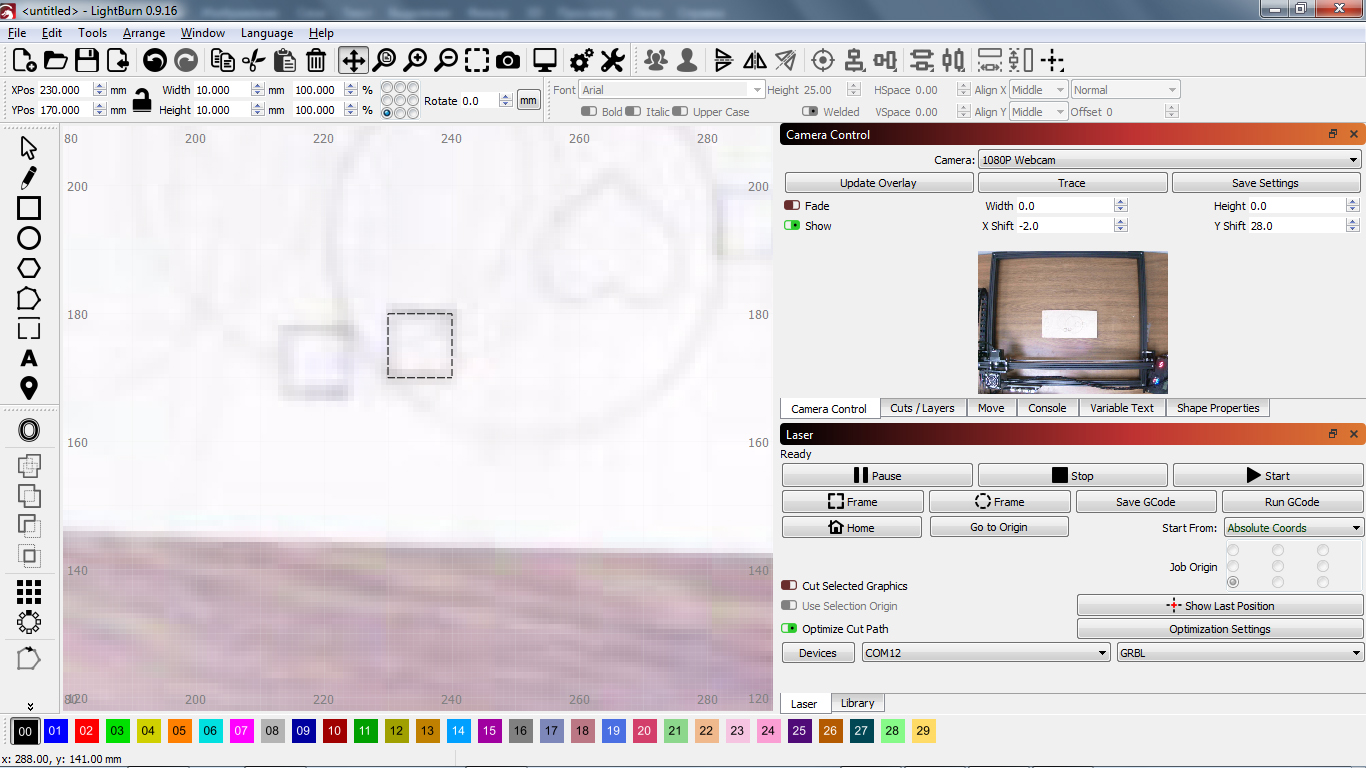
Switch back to the “Camera Control” tab and click the “Update Overlay” button.

As you can see, the engraved square is lower and to the right than it should have been.
Let’s adjust this offset using the “X Shift” and “Y Shift” parameters.
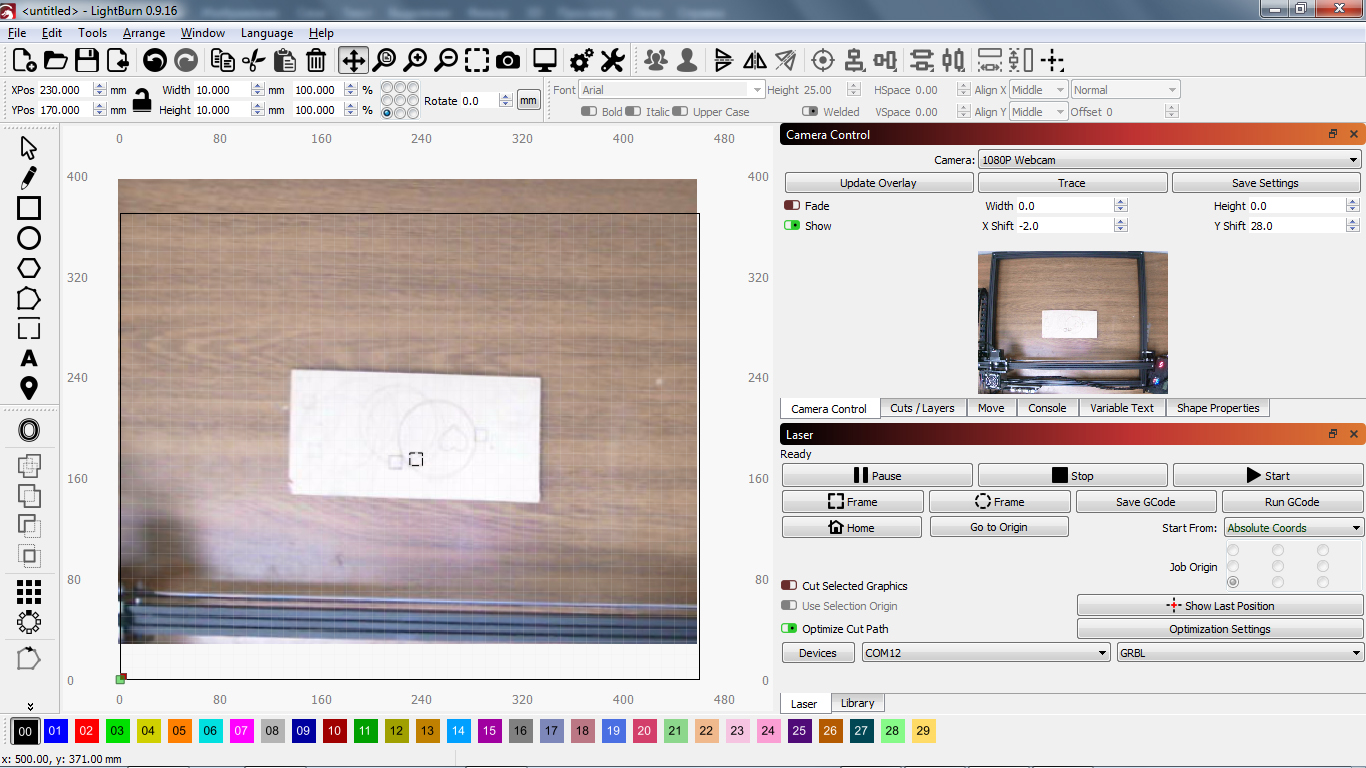
The squares are now fully aligned and the setup is complete.
As a result of the fact that the camera was placed slightly off the center of the working area of the machine, it does not show the working
A detailed video of setting up the camera for Lightburn software