Generic selectors
Exact matches only
Search in title
Search in content

Snapmaker wiring. Replacing the laser. Pinouts

Snapmaker: THE 3-IN-1 3D PRINTER

Replacing the laser on a Snapmaker


How to Connect an Endurance Laser to Snapmaker


Snapmaker PWM

https://www.endurancelasersusa.com/blogs/news/snapmaker-2-0-dpssl-add-on-assembly

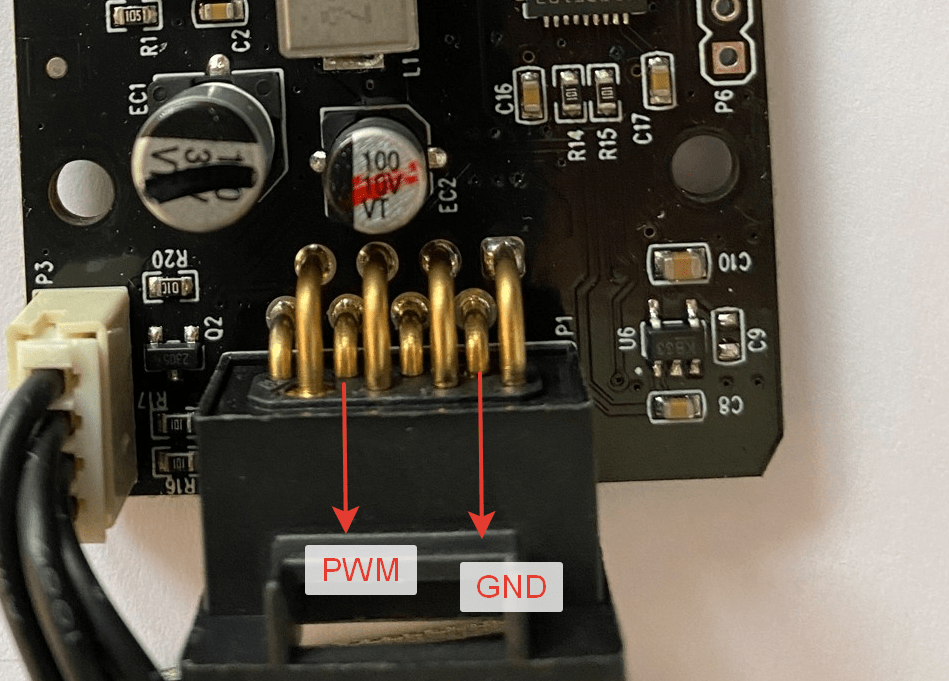
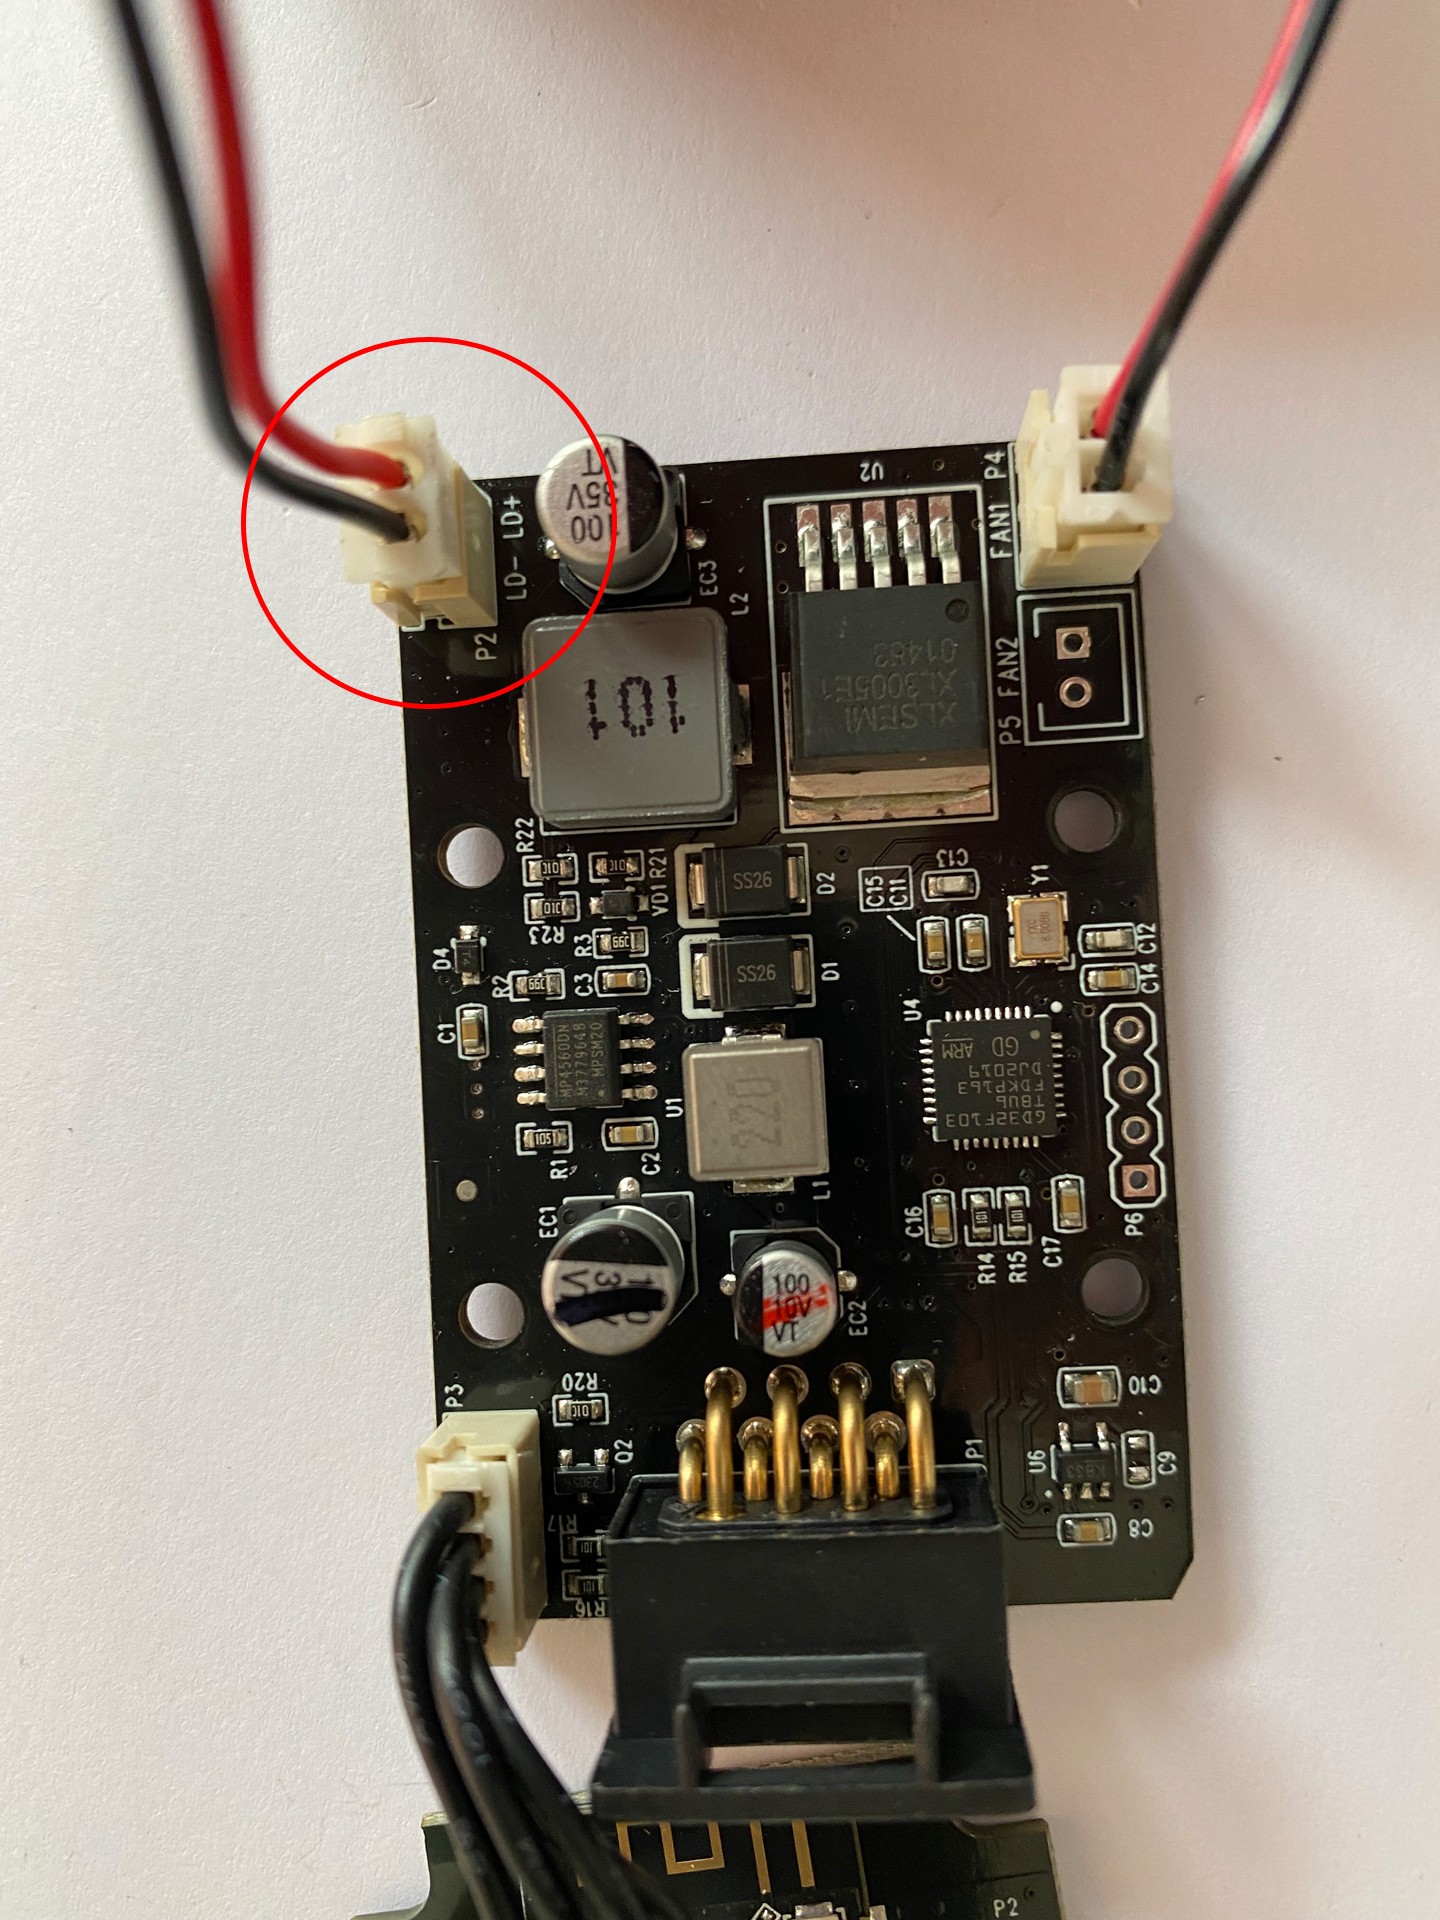
Endurance laser can be connected via the “P2” connector.

Snapmaker laser driver


A Dynamic PWM box is connected to this connector (“img2”: contact “1” – “-“, contact “2” – “+”).

Endurance laser dynamic PWM box


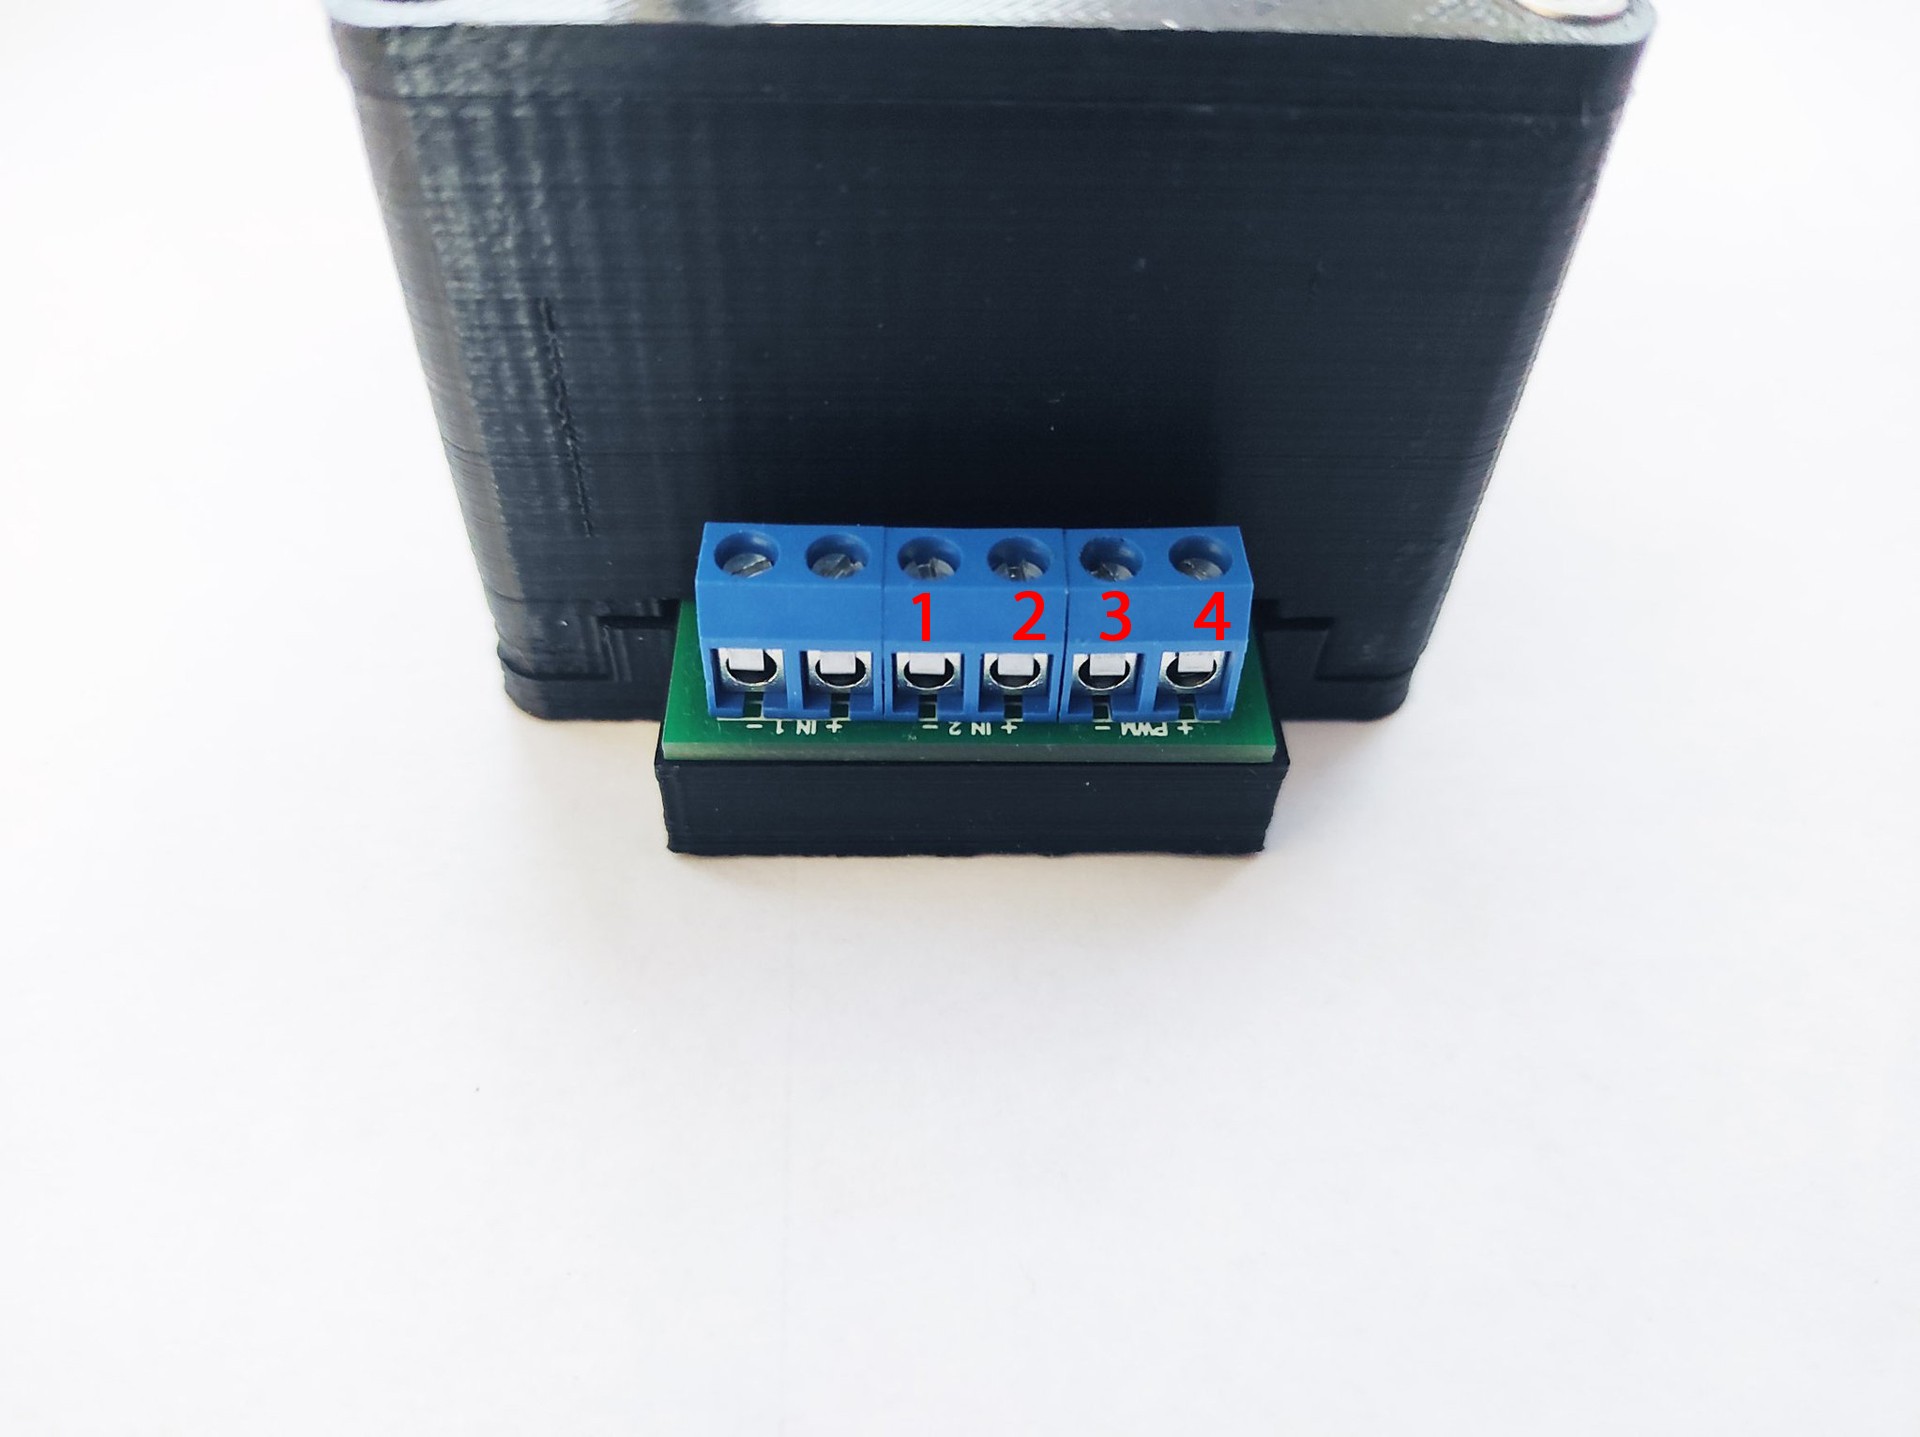
The PWM-wires of our laser are connected to the PWM-box (“img2”: contact “3” – “GND”, contact “4” – “PWM”).

Before connecting, command the printer to turn on the laser at 100% power and check the voltage at the “P2” connector.


SMLaser Snapmaker

DIY-Laser-Module

Snapmaker laser pin out

Snapmaker2_A150_EN_V1.3.0-min

Snapmaker2_A250_EN_V1.3.0-min

Snapmaker2_A350_EN_V1.3.0-min

User manual of laser engraving-V0.0.2-min

GRBL_LASER_CNC _Controller_Manual_V1.1-min

Instruction_Manual_GRBL_Controller_V1_2-min


Snapmaker 2.0 A350 Setup Guide


Stay updated with Endurance newsletter.
I have read and agree with the Endurance privacy policy
X

    Get a quote?

    Get an individual offer now... Just leave your contacts..


    X

      Get a quote?

      Get an individual offer now... Just leave your contacts..