
The Devil Made me do White stone Laser Engraving

As my day was coming to an end I was looking for a clean object to challenge my engraving skills with.
I found a Elida Ceramica White 3-in x 6-in Honed Natural Stone Marble Subway Floor and Wall Tile
Item #1351442Model #LW0319045
That I had purchased at Lowes for $.99 quite a few weeks back. I had noticed that I had engraved on it before. The engraving was nothing I would show and tell with so I took this tile over to my belt sander and resurfaced it. It cleaned up very nicely on the sander. I used 8-watt laser for this. Since this tile is a very white and reflective material I brushed on a water base paint solution. I call it a solution because I keep the tiny paintbrush in a glass with water in it to keep it soft. It also was a sample I pickup up at the local hardware store. I use this to engrave white tile. With my low-power laser, I have used this highly diluted solution to do laser etching images on tile and glass. So now I put the high diluted paint solution on the white tile. As you can see drip runs on the glass in the picture that is all that is need for aid in engraving. Tiny particles of the paint getting hot under the power of laser light.

After engraving laserwurks.com into the tile I washed the tile in water it cleaned up so well you could not see the engraving very well because it was white on white with no burn marks showing.
Next was to dry the white marble tile and apply blackboard spray paint on the tile. And bring into Lightburn The Tasmanian devil that made me do it. I did several passes at slower than normal speeds for deep engraving I was going to clean it after and then put colors to it and clean off the excess just like doing an Inlayed engraving.
The Tasmanian devil came out so well for now I decided to leave it as it. In the black you can see the detailed engraving of text showing up very well we as the blackboard paint settled into the engraved text.
I will purchase more of this tile another day and have some more fun engraving these white tile and engrave my Tasmanian Devil some more. Gold Flake inlay on the white stone. Engraved Stone using water base paint clean and dry after with water and sunshine us or heat gun.

The spray-on gold flake and let dry until hard. I put this in the sun for 30 minutes.
The paint was not markable with fingernails so then I got a small peace of fine sanding paper and gentaly clean off the tile. Leaving nothing but gold flake in the laser engraving groves. Noted this is the first attempt at gold flake under the Devil is blue painters tape. Now if I removed the tape covering the devil and left the surrounding tape in place The devil would end up looking like this picture without the tape marks.

Noted I used water the base paint on this guy and the blue tape on each pass I repainted just to see how deep the engraving might be in this stone tile. If you messed up a tile and would like to recover it for a new engraving I have found a belt sander that will scrub it clean. Of course you can polish the surface after with a orbital sander and fine grit.
This tile was engraved using no blue tape just water base paint because it cleans up very quickly using plain old tap water. The red is a light tile do let a little light come thru them.

Also, you can put images successfully on White Stone Tiles. For this, I used a zinc compound called cold galvanizing spray. You spray on with an even coating let dry. Don’t breathe in the fumes are toxic. Center your picture best you can with Light burn set your power setting high and speed where desired.
I choose a Dead tree picture at 254 DPI in light burn and power 100% letting light burn having one hunder persent control of shading. Picture before cleaning with steel wool and water looks like this.

After cleaning my 8 watt power output laser engraver gave me this picture to view.

Note you can see the white Marble stone and the skeleton of a tree. Use your imagination on all your projects for laser engraving is a art form for the inventive and creative minds.
Written by Bruce Benson
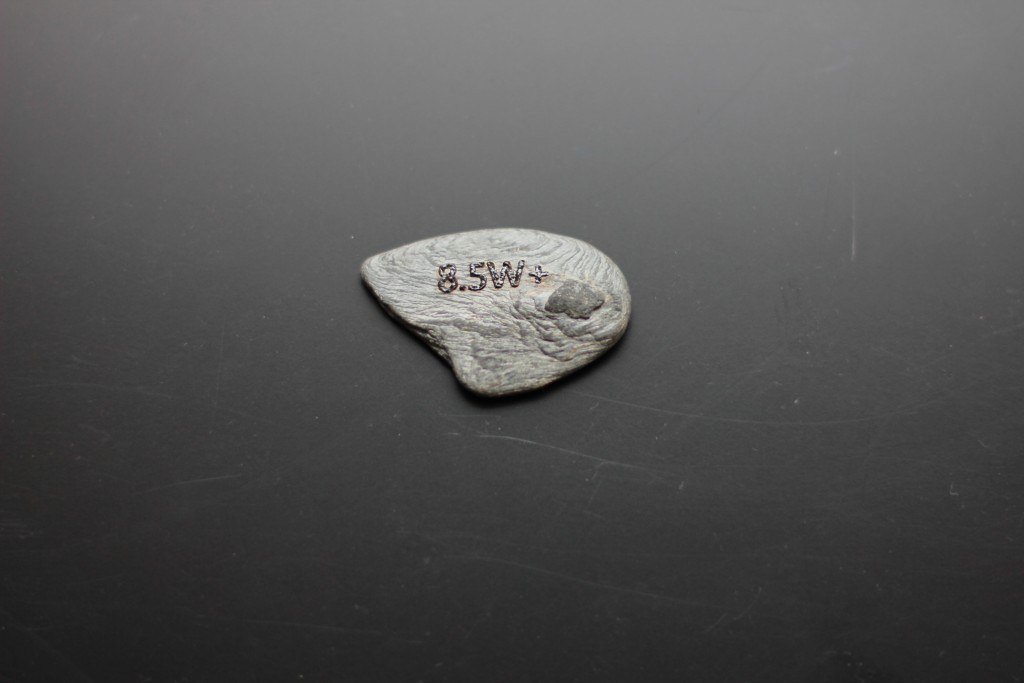
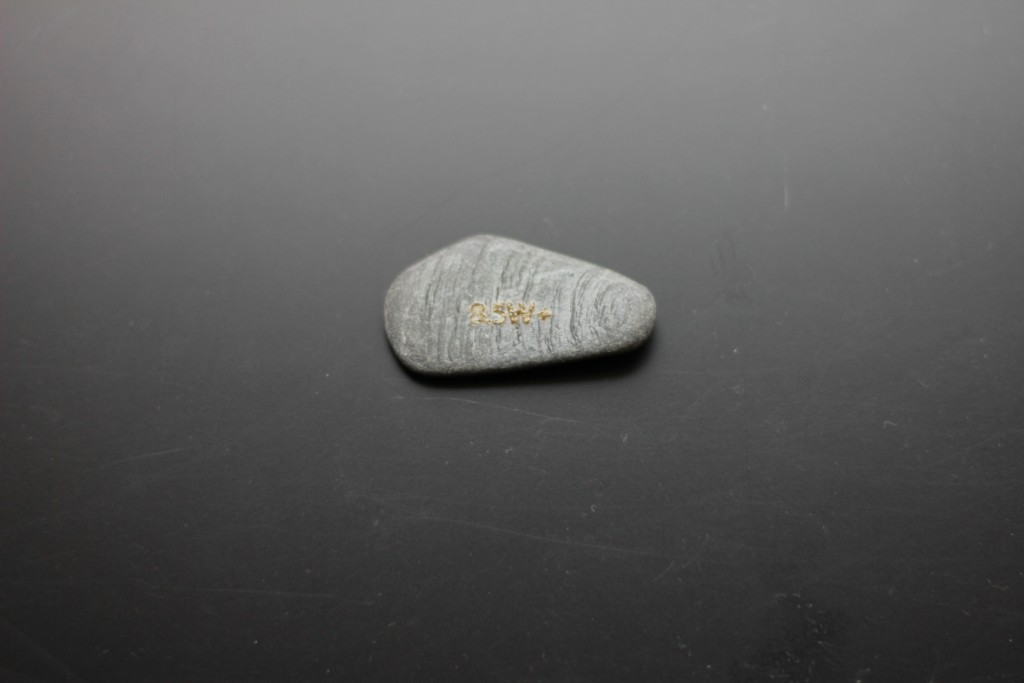
Many Endurance customers ask if it is possible to engrave on natural stone. It was not an easy task before an 8.5W+ laser. We made a few tests and found out that it is possible to engrave on a natural stone surface with a single pass at an average speed of 100-250. So the best parameters:
– Amount of passes: 1
– Speed: 100-250
– Power output: – 100%
– Type of lens: G2 (short focal)
Stone laser engraving – parameters and settings.
Many Endurance customers ask if it is possible to engrave on natural stone.
It was not an easy task before an 8.5W+ laser.
We made a few tests and found out that it is possible to engrave on a natural stone surface with a single pass at an average speed of 100-250.
With more passes, more charring appears.
If you setup the speed <100 (less than 100) then the stone melts and blackens (charring appears).
So the best parameters:
- Amount of passes: 1
- Speed: 100-250
- Power output: – 100%
- Type of lens: G2 (short focal)
An impressive and fast stone engraving on an Endurance DIY galvo machine
