Useful materials about preparing a nice g-code and what to do and how to get started to making your g-code for laser cutting or laser engraving.
Watch more video instructions
Endurance’s G-code plugin for Inkscape. Learn how to create a g-code with 5 clicks
This tutorial will go over how to create drawings and text in inkscape and then create the G Code file needed to run on your 3D printer or CNC machine. We will cover a couple of common items that you can do in inkscape and then use with your laser.
http://endurancerobots.com/download-center-lasers/ (J Tech Photonics Laser tool)
Overview
The new plug-in allows for multiple commands for laser on and off for all the different versions of printers as well as the ability for multiple passes for cutting. Here is a description of the features of the plug-in.
Laser ON Command: The command for turning ON the laser. For example, M03 or M106.
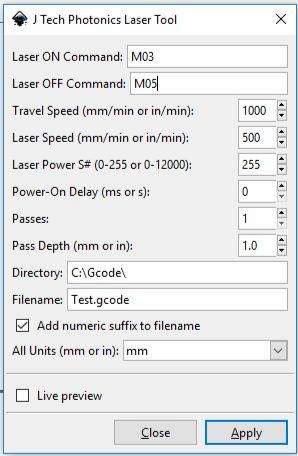
Laser OFF Command: The command for turning OFF the laser. For example, M05 or M107.
Travel Speed: The speed of the machine when the laser is OFF in mm/min.
Laser Speed: The speed of the machine when the laser is ON in mm/min.
Laser Power: If you have PWM control, then you can adjust this. For J Tech firmware and most 3D printers use a number between 0 and 255 (255 being full power). For
GRBL 0.9 and 1 standard, use a number between 0 and 12000 (12000 being full power). If you don’t have PWM, keep at max power (either 255 or 12000).
Power On Delay: This will turn on the laser and wait to move until the delay is complete. It is used to heat up the material and initiate the burning process. Delay in ms for 3D printers and seconds for GRBL.
Passes: If cutting, this will repeat the entire path by the number of passes. If engraving leave as 1.
Pass Depth: This will move Z axis down by this amount for each pass. For example, 3mm piece of material with 3 passes might use 1mm per pass to cut all the way through.
Directory: The directory to store the file.
Filename: Name of the file.
Add numeric suffix to filename: Adds a number to the name in case there already is a file with the same name in the directory.
All Units: Change the units to either mm or inches. This will make everything in inches or mm.
Live preview: Shows the path being generated.
Apply: Click to run the converter.
*We change the look of the plugin sometimes, so the pictures of the plugin might be slightly different. This overview section will always have the newest plugin explanations.
Drawing Text
Engraving text into materials is a very common need for the laser upgrade. Here is how to accomplish this.
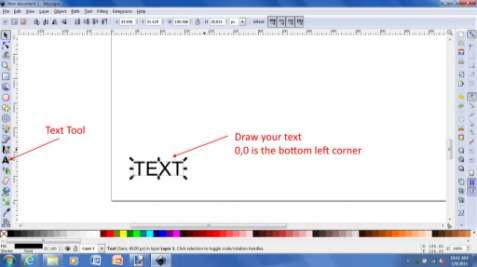
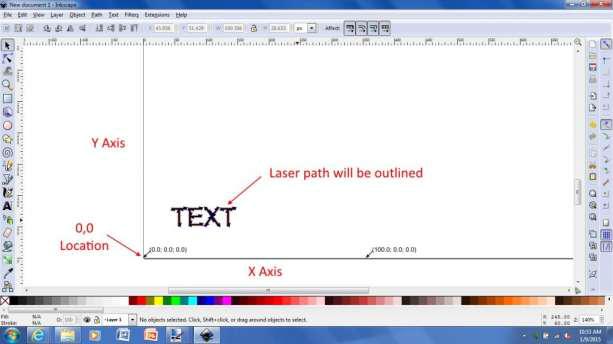
Step 1: Use the TEXT tool in inkscape to draw your text. The bottom left corner is you 0,0 location of you machine.
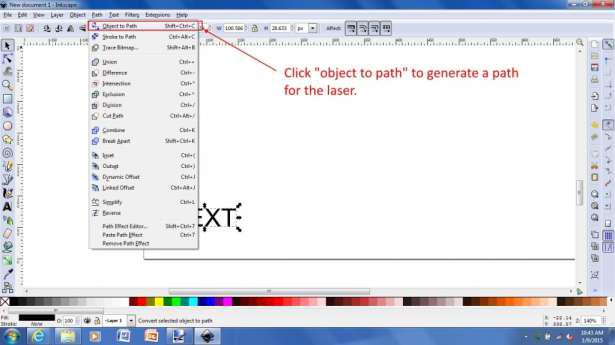
Step 2: You need to convert the object into a path. All items drawn in inkscape are a vector object. You can convert them into a “path” that will actually “draw” the object. The laser then takes this path to generate the G Code.
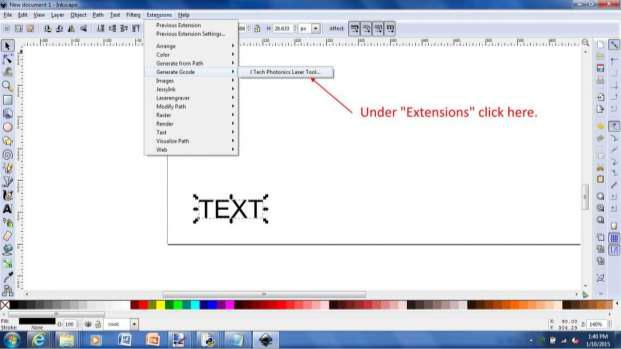
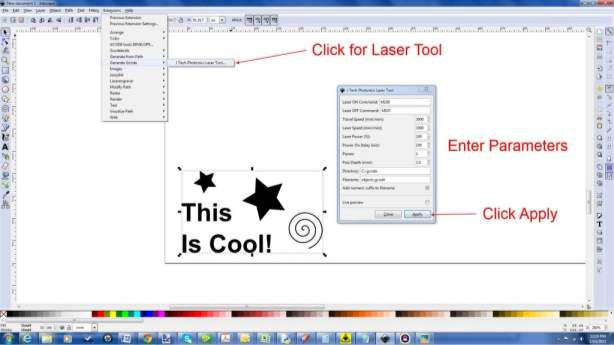
Step 3: Under “Extensions” click on “Generate G Code” and “J Tech Photonics Laser Tool.
Step 4: Fill out the Laser Tool Dialog.
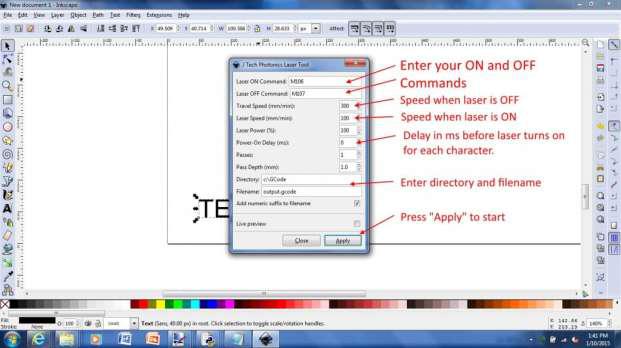
Step 5: When finished filling out the form, click APPLY to start.
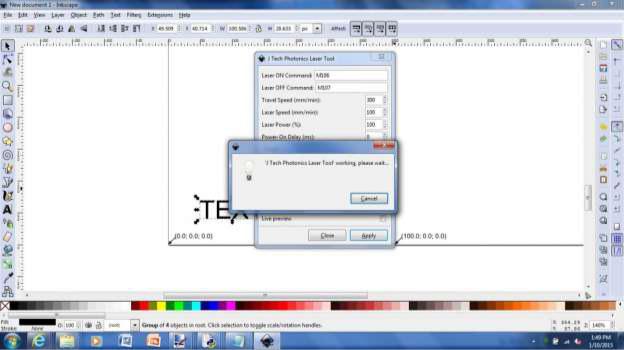
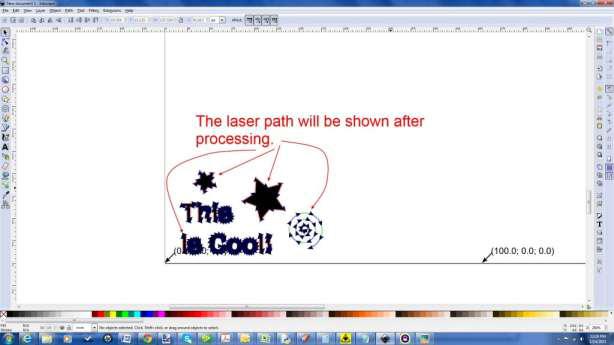
Step 6: The laser path will be outlined and the code will be generated in the location provided in the tool.
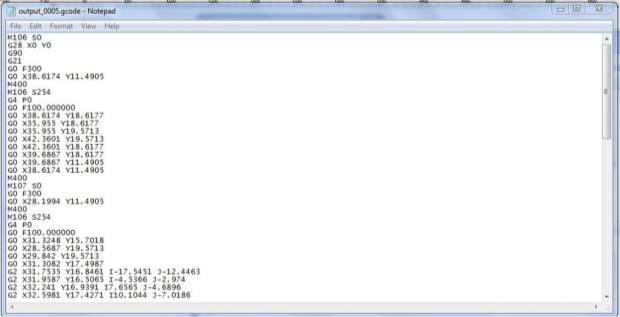
Here is an example of the G Code file produced.
Drawing Other Objects
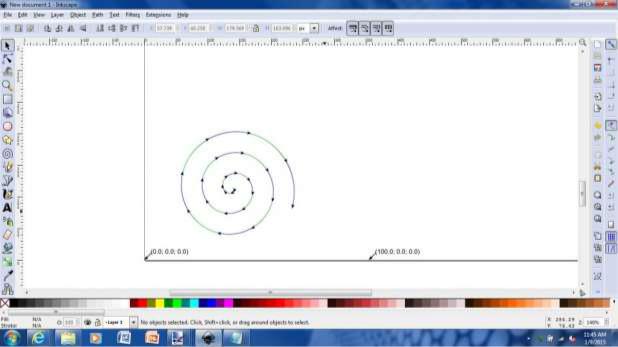
Similar to the text, you can draw anything you want with the other tools. Just at the end when you want to convert it to G Code for the laser. Here is an example of a swirl:
Drawing Multiple Objects
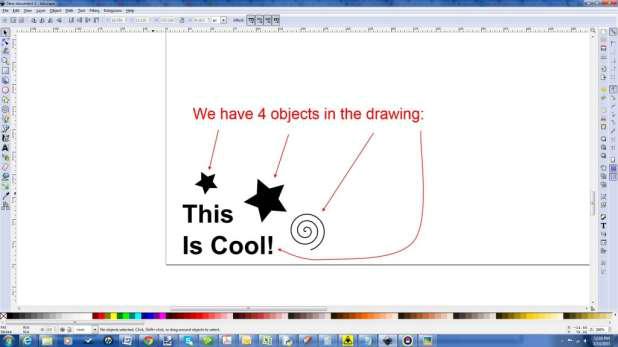
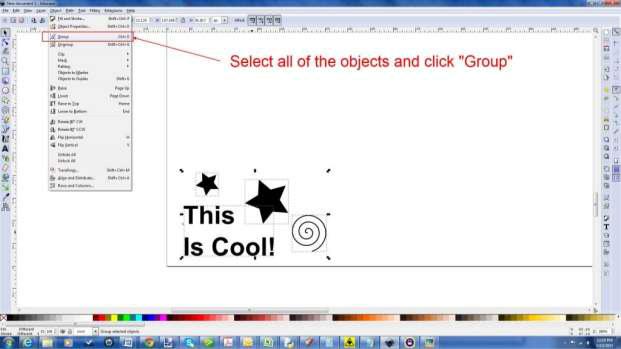
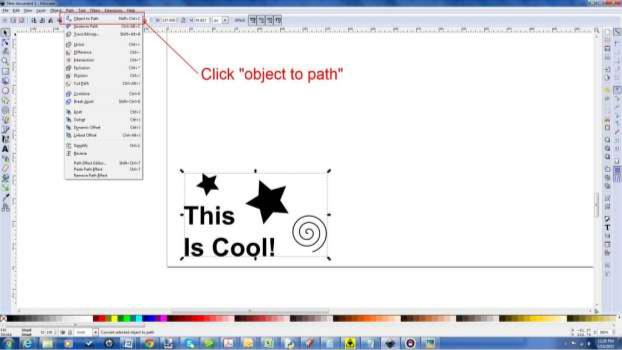
In order to draw multiple objects in the same toolpath, you must first group all of the objects and convert to path before generating. Here is an example:
Step 1: Draw your separate objects.
Step 2: Group your objects.
Step 3: Turn them all into a path.
Step 4: Start the Laser Tool converter.
Step 5: Press Apply and run the converter.
Importing Black and White Pictures
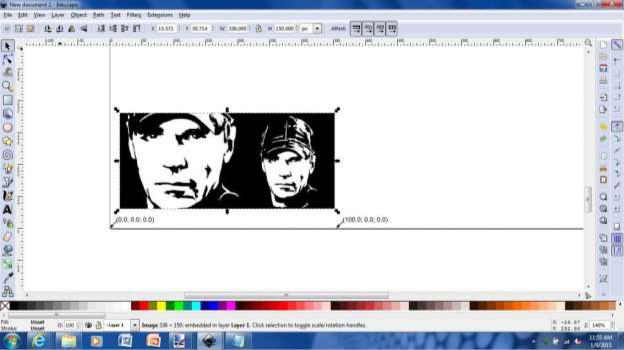
A cool thing to engrave are black and white “high contrast” images that only have two colors. Here are the steps to engrave them.
Step 1: Import your image on “file -> Import”. Note it is two colors.
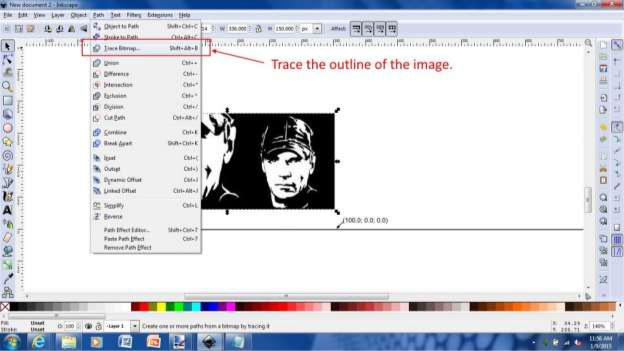
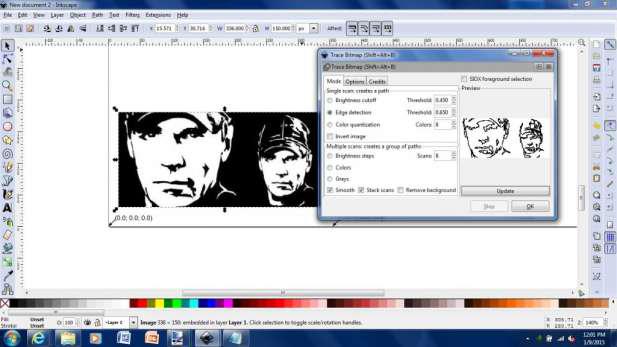
Step 2: Trace the outline of the image to get the path for the laser.
Step 3: Using edge detection, update the image and press “OK” to apply the changes.
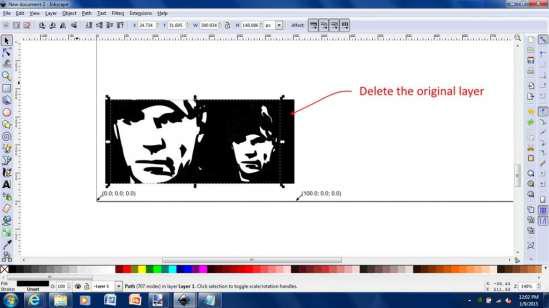
Step 4: Delete the original layer underneath the new edge detected layer.
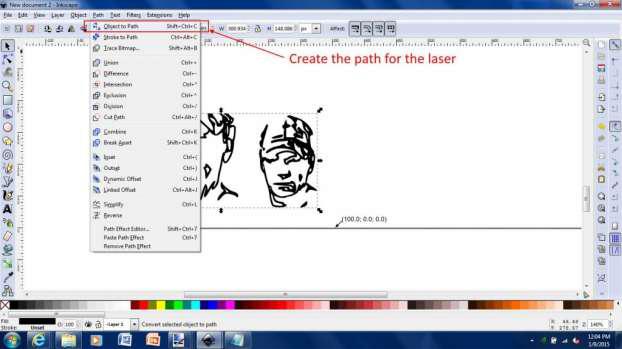
Step 5: Select “object to path” to create laser path.
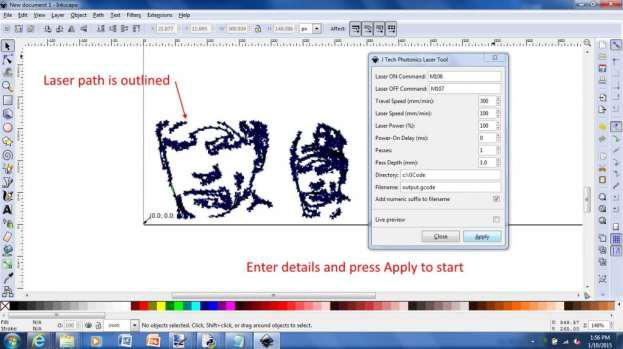
Step 6: Generate your laser G Code file by entering your parameters and pressing “Apply”. The laser path will be outlined.
Creating C Gode for Engraving and Cutting on the Same Drawing
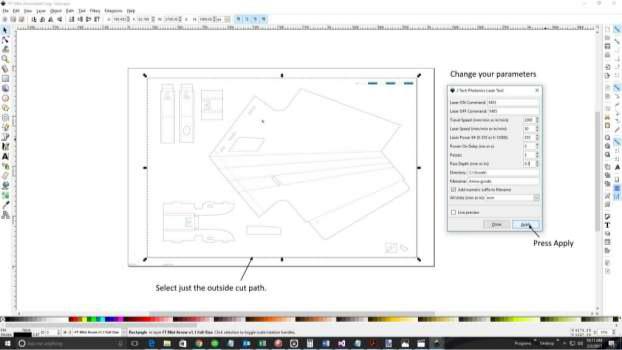
For cutting and engraving on the same file in inkscape, you need to make at two “objects”. One object will be the engraving and one will be the cut outline. Select the engraving object and click “object to path” and run the inkscape plugin. Put the engraving laser speed for the engraving. Then, click on the cut object (like a line border) and click “object to path” and run the plugin again. This time, put the speed to be a cutting speed (a lot slower) and use multiple passes if needed. Change the name of the file and press apply (or have the “add numeric suffix” button enabled). You will now have a “engraving” G Code file and a “cut” g code file. You can either combine the two in the same file, or you can run the engraving code first, then run the cut code *without* moving the part you are working on. It should all line up if nothing moves.
You can do this process for as many objects as you want to have different parameters in the inkscape Laser Tool Plugin. In this example, we have imported a drawing we would like to engrave at one speed and then cut the outside border.
Step 1: Ungroup objects into separate items. *note* If you have drawn several things on your drawing by yourself, then you would do the opposite. You would group your items you want the same parameters together.
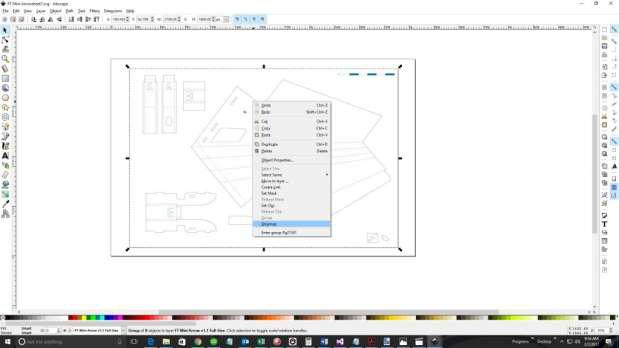
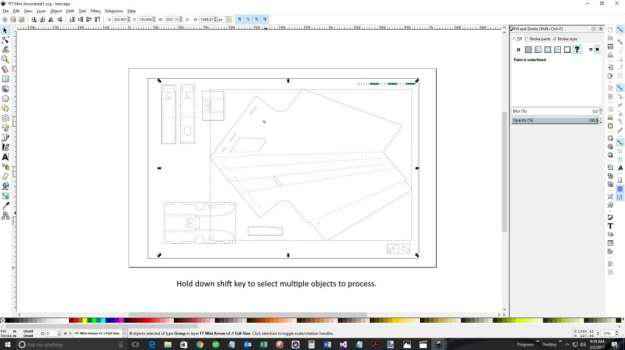
Step 2: Select items you want to have the same parameters. If you want to engrave items all at the same speed for example. Hold the shift key down to select multiple objects.
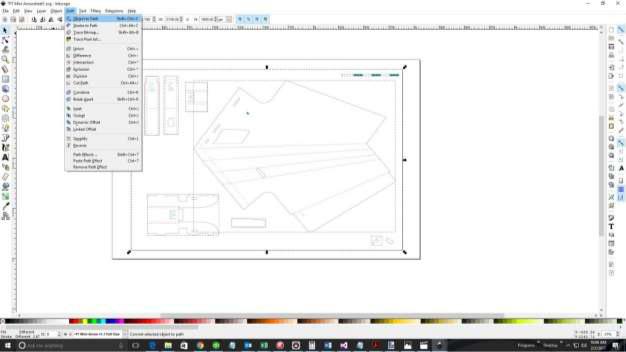
Step 3: Press “object to path”
Step 4: Open Laser Tool Plugin. Make sure “Live Preview” is Unchecked (Live preview assumes you want the whole page engraved the same). Then, enter parameters for the engraving and press “Apply”. This will generate a G Code file for the engraving portion of the drawing.
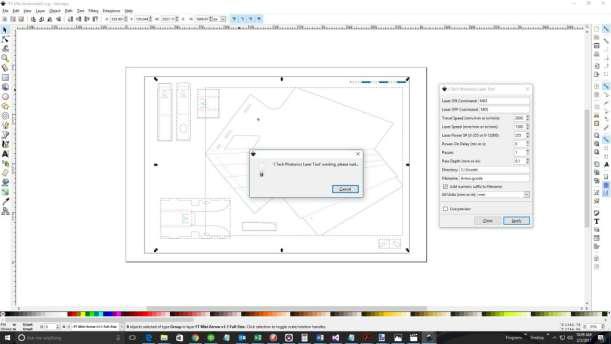
Step 5: Deselect the engraving objects and just select the cut object (or objects).
Press “object to path” again and then change the parameters in the Laser Tool Plugin.
In this case, we lowered the laser speed and increased the passes to 5. Press “Apply” to generate another G Code file for the cutting.
Step 6: G Code files.
You now will have at least two separate G Code files, one for engraving and one for cutting (in this example). You can either run them one after another as long as you do not move your workpiece. Alternatively, you can combine the files into one using a text editor and run it at the same time.
So there it is! Now you are ready to start creating!
Free of charge. Big amount of settings. Easy to use.
Download now an Endurance Lasers G-code plugin for an InkScape
Explore more our download center.
Download the JTech photonics plugin by visiting the JTech Photonics website jtechphotonics.com.
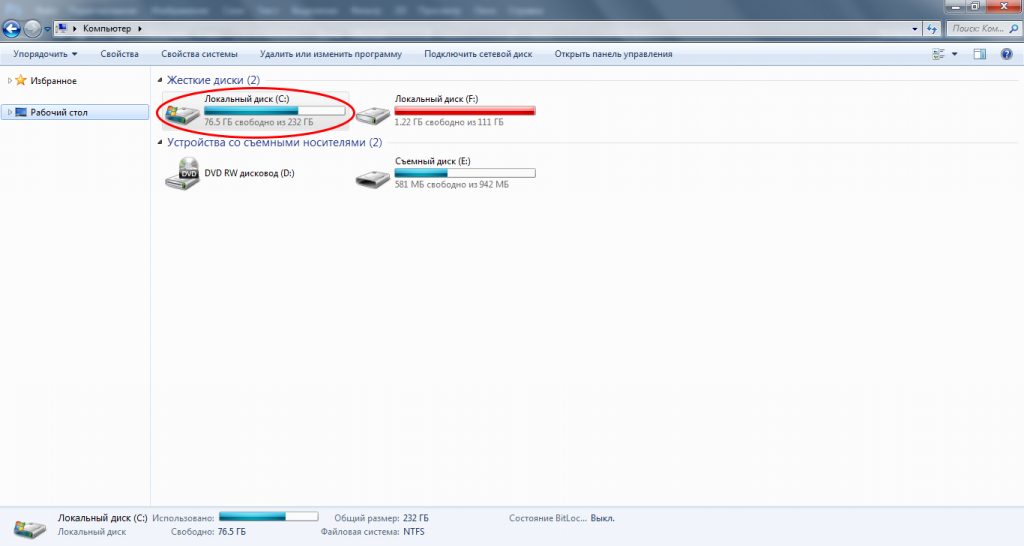
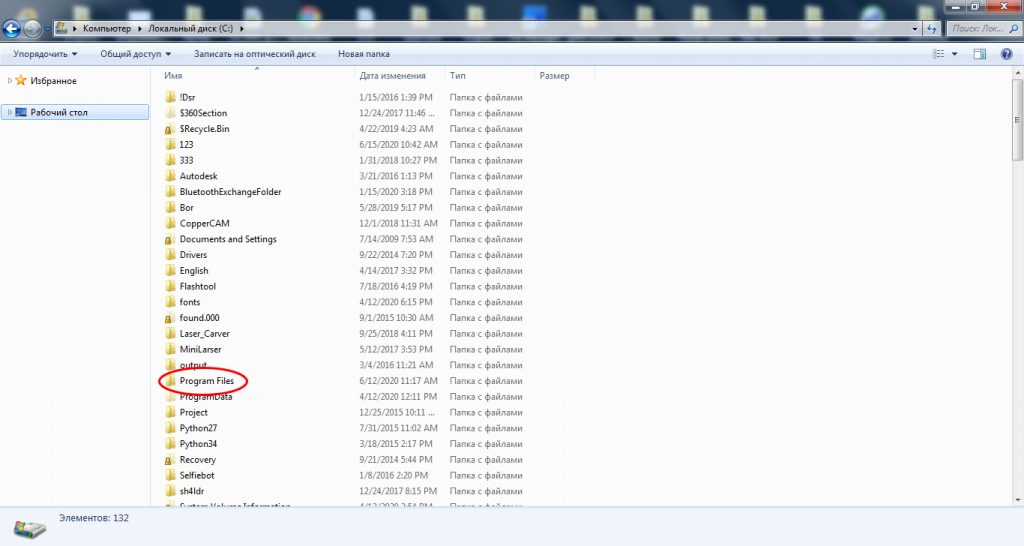
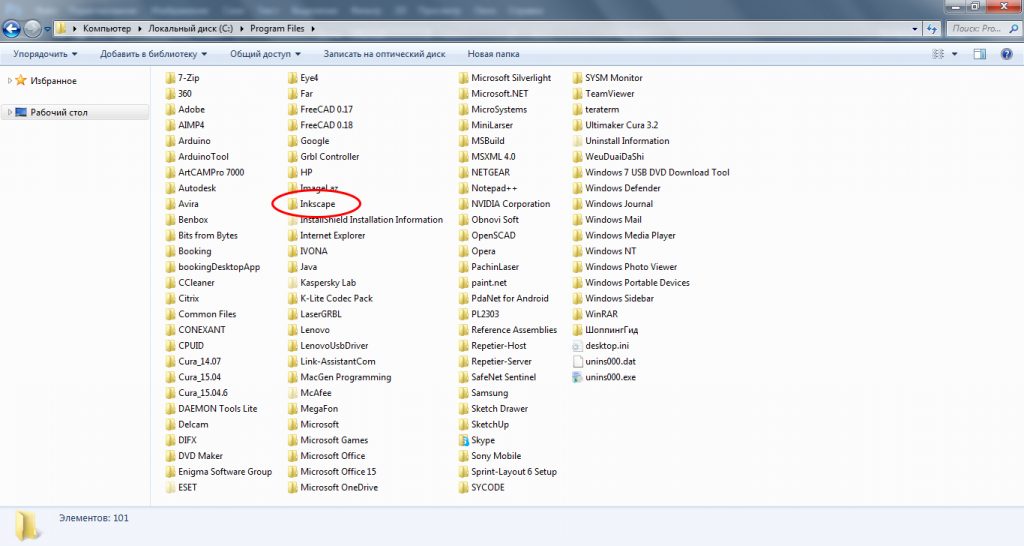
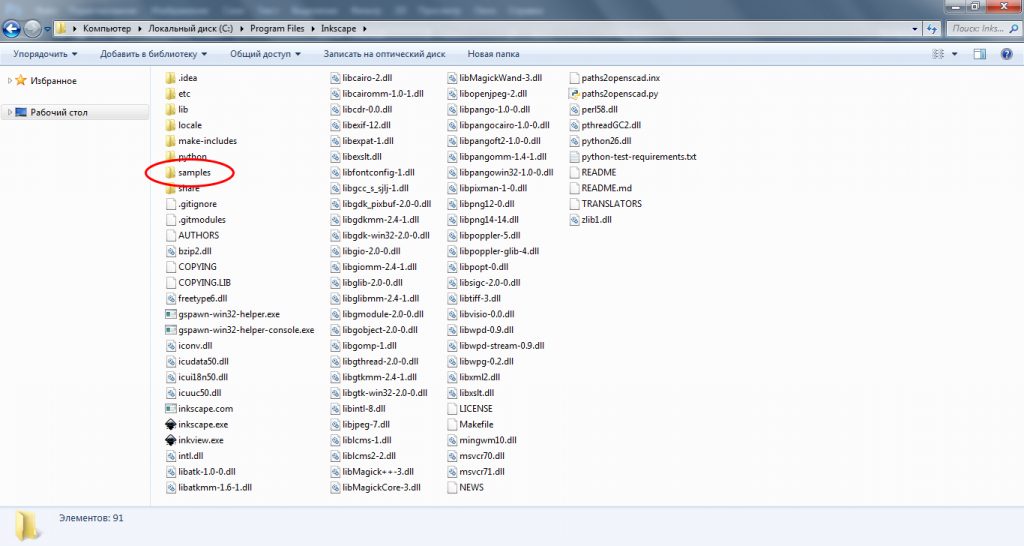
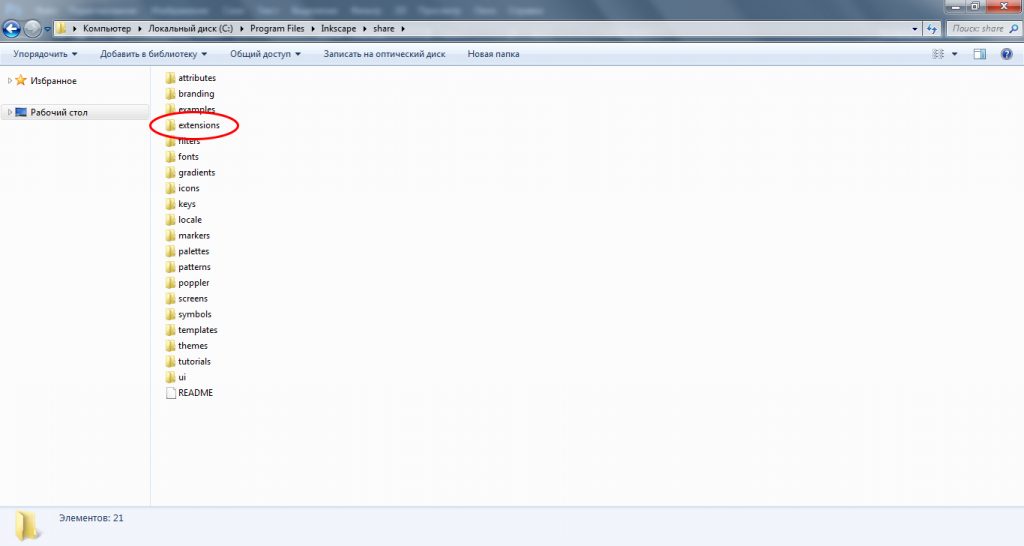
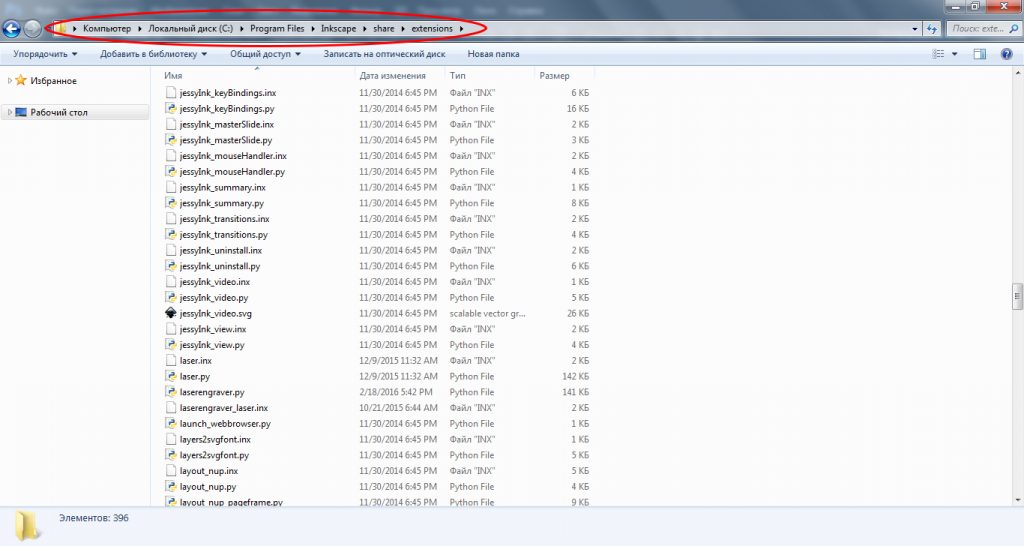
Where to upload plugins for Inkscape
All you need to know about G-code
Our YouTube video footages >>>
G-code examples
G-code examples and images for laser engraving and laser cutting
About GRBL
An important things you need to know about GRBL parameters, firmware settings
High-quality standard
Multi-level testing system.
Industrial components.
Ultra reliable
The guaranteed duration of the continuous operation ~48-72 hours.
True continuous power output
Our products have the rated power output as advertised – unlike Chinese analogues.
TTL mode
Can be turned on and off with 3.5-24V.
Variable power output.
Plug and play
Universal and compatible mount.
Compatible with most 3D printers and CNC machines.
Friendly return policy
Do not like the laser?
Simply return within 30 days and get a full refund.
Real-time advice
We assist and give advice by Phone / Email / Facebook messenger / Telegram / Whatsapp / Viber.
Professional support
We help to install and tune the laser. We offer qualified after-sales support.
Everything you need
We ship everything you need in one parcel to get started.
Immediate delivery
We ship all units within 4-24 hours. DHL express delivery allows you to get the package in 3-5 days.
Lifetime warranty
All our lasers are tested and could work up to 10000 hours.
Upgrade option
Do you have an old model? Upgrade your unit with more powerful one.

