
Contents
- What Is 3D Printing?
- How Does It Work?
- A Brief Background
- Printing Materials for FDM 3D Printers
- The best material for beginners (and why)
- The second-best material for beginners
- 3D Printer Companies
- Buy a new, assembled or partially assembled unit!
- Assembling Your Printer
- Getting Started – FDM 3D Printer
- Getting Started – SLA 3D printer
- Should You Upgrade Printer Parts?
- What can you print?
- Sites to obtain premade 3d printing objects to download and print
With technological advances driving down prices and making 3D printing more affordable to the everyday hobbyist, there has never been a better time to dive in. Despite the mass of resources out there, the world of 3D printing can easily seem overwhelming, but it doesn’t have to. From first-time users to professional printers, the best place to start is with the basics. As much as we all want to just dive in head-first, some of the most important steps in 3D printing happen before the machine is ever plugged in.
This article will inform you about what 3D printing is, how it works, who some of the companies are that make 3D printers (in DIY Kits as well as ready-to-use units), what some of the better materials are for beginners, and what you need to print your first 3D object.
What Is 3D Printing?
3D printing is the creation of a physical representation of an object from a digital 3d model. This is accomplished by layering material on top of itself based on the layout instructions for that particular layer. This is a form of automated additive manufacturing because the printer is adding material to create the end product.
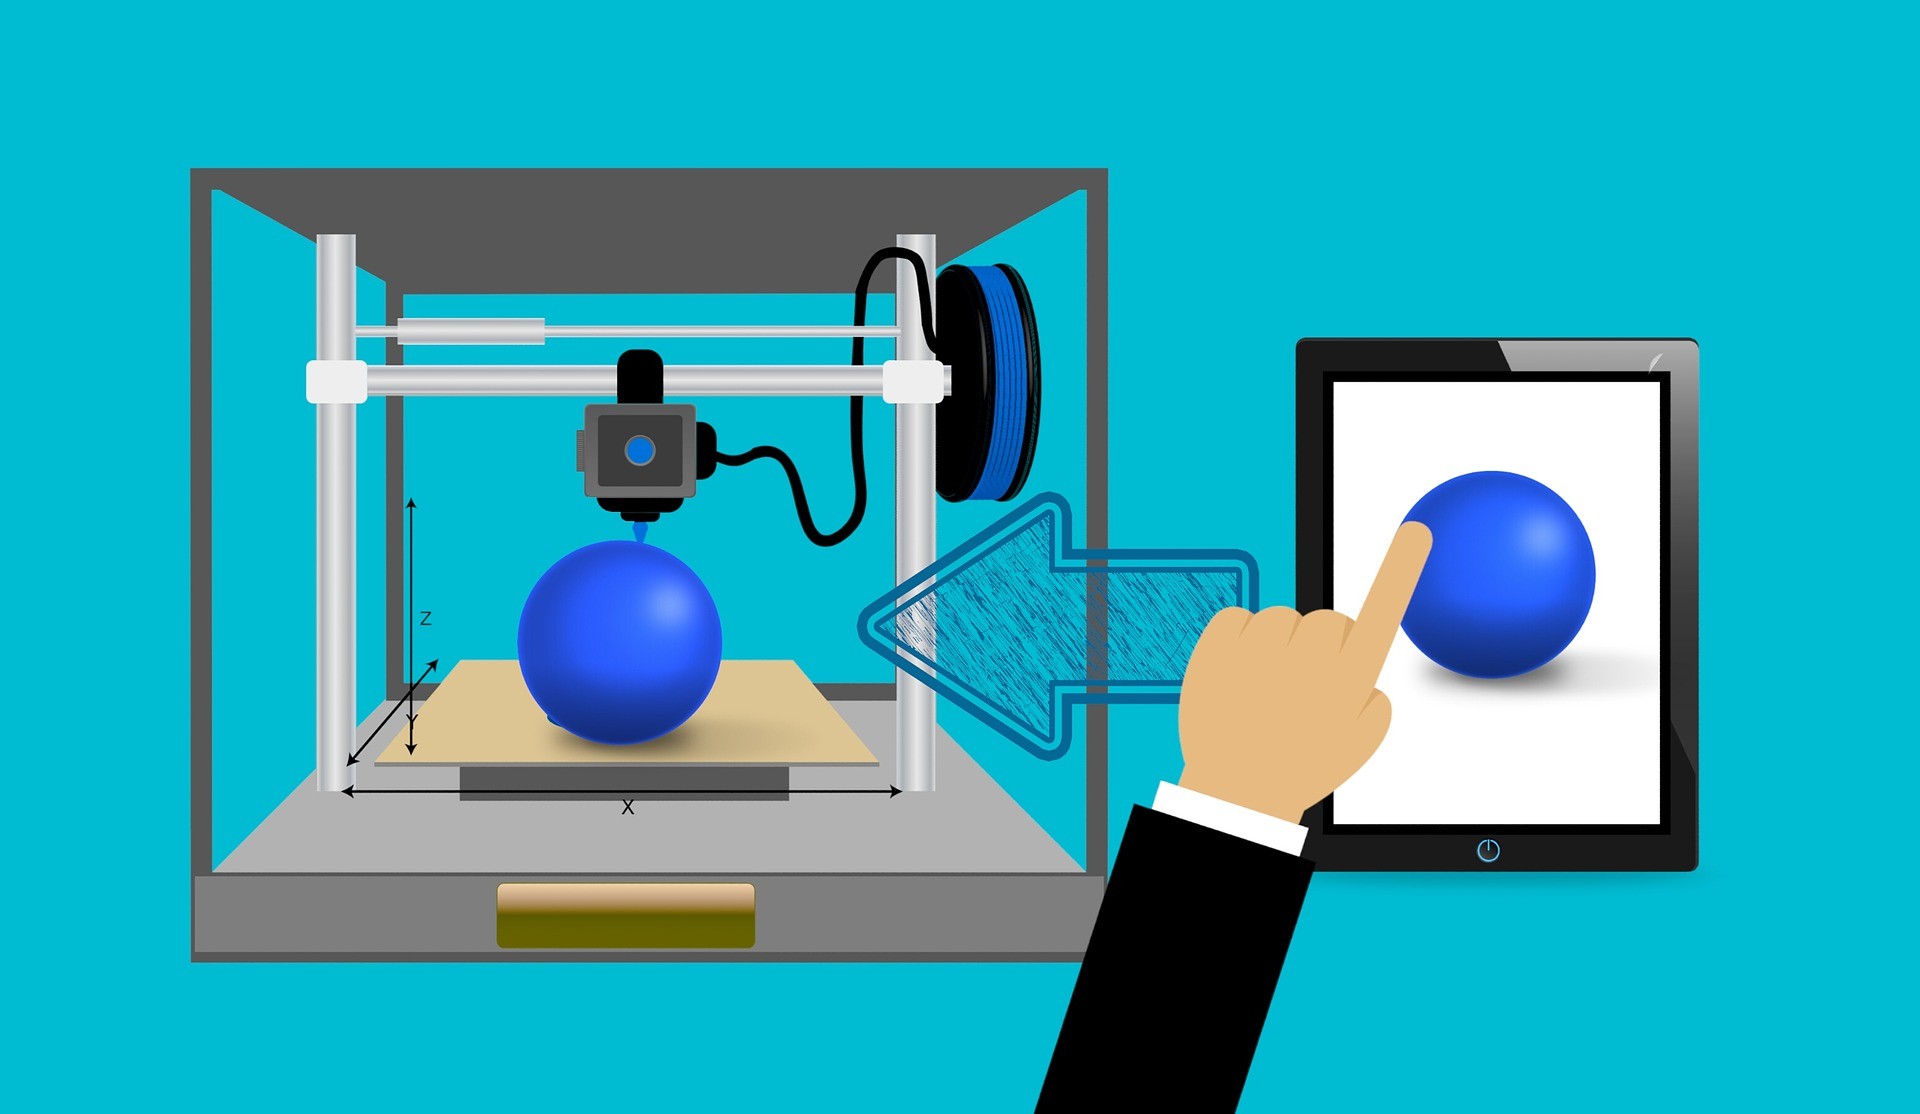
How Does It Work?
- The object you wish to print is created in digital data within the 3D modeling application, and saved in a format that can be read by the next application in the workflow, the slicer.
- The slicer takes the 3D model and slices it up into layers in order to facilitate the printing process. It then processes the layer data and other parameters such as the material being used for the print, the 3D printer’s configuration data, and other items to compile a numerical control (NC) program.
- Typically, the NC program is composed of GCode, which is widely used as the standard language for 3D printers and other modern consumer motion control systems such as CNC routers. This GCode contains instructions that govern the movement coordinates and speed of the printer’s extruder, the temperature of the print bed and extrusion hotend, thickness of layers, and other instructions such as smoothing of arcs, and cooling fan speeds.
- Once the NC program has been created, it is sent to the 3D printer, often by USB cable, but sometimes by WIFI connection or by memory card.
From here, the printer (FDM) sets to work, heating filament material and pushing it gradually as needed through the extruder head and heated by the extruder’s hotend (a nozzle made of a material such as copper that is heated to melt the filament material to a nearly liquid state) and extruded out to be deposited onto the print bed in a small bead of material that grows into a line as the nozzle is moved about the bed much like silicone caulk forms a bead line when it is applied. - This process is, as previously mentioned, repeated for each layer, with the printed object becoming taller and taller and slowly taking shape until it’s finally completed.
A Brief Background
3D printing has been around since the 1980’s. While there are several different types of printers, the two primary types of printers on the hobbyist market are Fused Deposition Modelling (FDM) and Stereolithography Apparatus (SLA) printers.
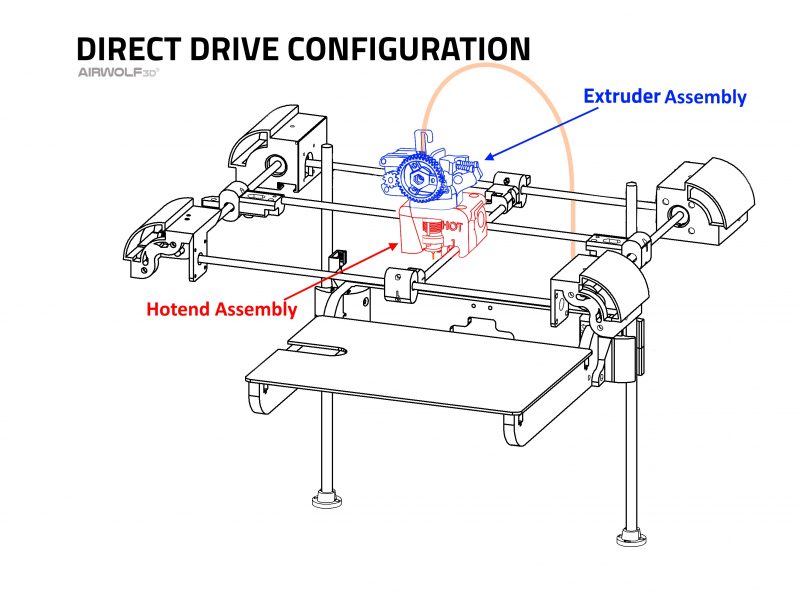
FDM printers use an extruding motor to push filament through a hotend assembly (containing a heatsink, heating element, thermistor, and nozzle) where the heating element set to a specific temperature melts the filament before it is forced through a precisely sized nozzle.
This is done as the hotend assembly moves across its axis, allowing the molten filament to be laid in layers of a precise width and thickness. These layers are fused together as the filament is laid and cooled, creating a 3D model layer by layer.
SLA printers, on the other hand, utilize a build surface, ultraviolet light element, resin tank, and photopolymer resin. The resin tank is filled with the photopolymer resin of choice and inserted into the printer.
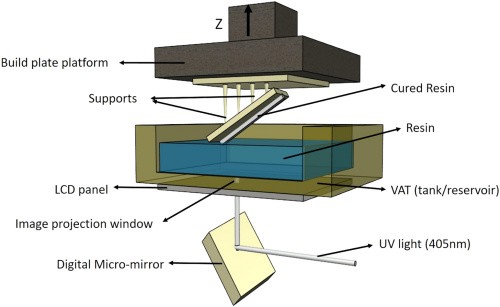
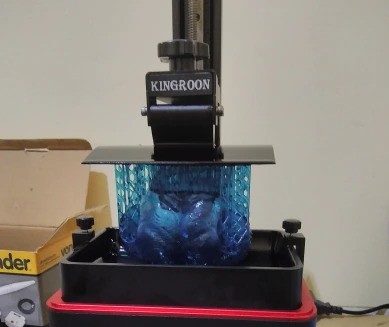
The printer then lowers the build surface into the resin tank. Once the build surface is in place, the printer displays UV light in the precise shape of the specific layer of the model it is printing. The light remains on for a given amount of time (which varies by resin), curing the resin in place. The build surface then raises to allow the more liquid resin to flow beneath it, before being lowered again, repeating the process for the next layer. Once the print is complete, the build surface raises fully with the completed model attached to it upside down.
It is important to note that photopolymer resin in an uncured state is considered a toxic substance. Precautions, such as the proper use of safety equipment (gloves, goggles, respirator, etc.) should be taken at all times to ensure that uncured resin does not touch the skin, and that the fumes are not breathed in. For this reason, post-processing of resin is also necessary. The resin should be washed in a bath of warm water or alcohol (per the manufacturer’s guidelines) to remove any resin remaining on the surface, and then left to finish cure in a UV curing box or outdoors in the sun. This post-curing process can take anywhere from a matter of seconds in a high-strength curing box to several days if left outside to cure by sunlight. Once the resin has been fully post-processed, the element of toxicity is removed, and it is perfectly safe for handling.
Printing Materials for FDM 3D Printers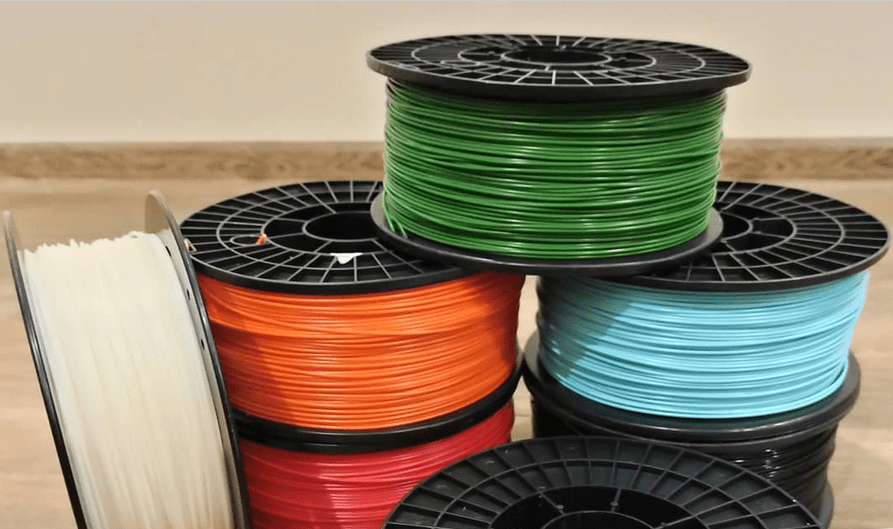

There is a wide range of materials a 3D printer can use, each one of them have different attributes that make them good or bad for various prints. Below is a general overview of many of the materials that 3D printers can use. For the sake of brevity, details about each material will not be given in this article, but in the footnotes, I have linked Makerbot’s list of all the materials I reference and their list includes details about each one.
| ABS | Acrylonitrile Butadiene Styrene |
| PLA | Polylactic Acid |
| PVA | Polyvinyl Acid |
| Nylon | |
| HDPE | High-Density Polyethylene |
| PET | Polyethylene Terephthalate (T-Glase) |
| PETG | Polyethylene Terephthalate + Glycol |
| Wood Filament | |
| Sandstone | |
| Ceramics | |
| Metal Filament | |
| Carbon Fiber Mix | |
| Flexible Filament | |
| Conductive Filament | |
| Cobalt Chromium | |
| Inconel | |
| Paper | |
| SLA Resins | |
| Polyjet Resins | |
| Alumide | |
| PEEK | Polyetheretherketone |
| Wax |
The best material for beginners (and why)
If you asked 100 experienced 3D printer users what filament material they think is the best for beginners in the field, I’d be willing to bet $20 that at least 95% of them would say PLA and the other 5% were just being contrary.
All jokes aside, PLA is hands down the most commonly used material that new 3D printing enthusiasts find themselves using until they feel ready for the challenges of some of the other materials.
PLA’s lower melting point and the fact that it sticks well to a print bed that’s been simply covered in blue painter’s tape or had a basic glue stick smeared evenly over the bed’s surface makes it very easy to use on low-cost 3D printers, which do not always have a very high wattage hotend heater, a high-temperature print bed, or sometimes even a print bed that is heated at all.
It’s wide melting temperature range also helps, as a misconfiguration is less likely to result in scorched material or even a flaming pile of filament on your print bed2.
1 List of materials and material information courtesy of Makerbot.com
2 You may think that I’m just trying to be funny again here, but I am not. One of my first attempts to print on a XYZ Davinci Pro resulted in filament being extruded that was so overheated that it came out black and smoking!
The second-best material for beginners
In my semi-humble opinion, not to mention my conclusion resulting from a LOT of research for this article, PET-G is the runner-up to PLA in the “best material for beginners” contest. The reasoning is quite simple. It’s almost as easy to print as PLA, but has similar properties to ABS. Many of my information sources as well as much of the 3D printing community consider PET-G to be a material that is very much the middle ground between PLA and ABS, making it a great step up from your first material without having to jump into the deep end of the filament pool, so to speak.
3D Printer Companies
Now that we’ve discussed what 3D printing is, how it works, and the materials the 3D printers uses, it’s time to give you a list of companies that make 3D printers. This list is by no means ranked by any metric, and it’s not to be considered comprehensive, but it should give you a good base listing of the companies that you can purchase your first 3D printer from.
Buy a new, assembled or partially assembled unit!
I want to acknowledge that one could very well find an excellent deal on a secondhand 3D printer on sites like eBay. However, I want to warn you against buying a used unit as your first 3D printer.
My reasoning for this is because you’re never able to be absolutely sure that the unit you’re buying doesn’t have issues that are not disclosed or possibly even known by the seller. For instance, my first 3D printer was an XYZ DaVinci Pro, and I had nothing but issues with it from the second print I ever tried on it. The first print was a very small cube with the letters X, Y, and Z on 3 of the faces. When I say small, I mean it was literally 1 inch cubed. Later, after parting with that printer, I found out the reason why I could never get a print to complete without “bird’s nesting” (excess filament strings that eventually become so entangled that the print ends up looking something like a schizophrenic bird’s nest) was because that brand and model of 3D printer was a totally enclosed model and did not have adequate cooling of the filament after deposition. The fix? 2 blower fans mounted on the print head. I believe it would have been about $20 to resolve the issue.
The problem was, I didn’t know about the fix and I had searched online for a total of about 45 hours. Even more problematic was that I sold that unit for much less than it was worth (as did many other owners of this model), because I didn’t want to charge too much for a unit that I had listed as having the aforementioned issue. I got in touch with the buyer when I discovered the problem and its remedy, but not seller is so scrupulous. Now, imagine all that, and you’re the buyer.
Now consider that you don’t know anything about the printer, and the seller most likely wouldn’t have done anything I did before, during, and after the sale.
This scenario would most likely result in you not knowing why the printer you bought wasn’t working properly, not knowing enough about all the processes involved in designing, slicing, and printing a 3D print, and that you may not be as resourceful as I was. That would be a lot of frustration and stress trying to get that secondhand printer working.
That, dear reader, is why I suggest purchasing a new, assembled, or partially assembled unit. If you received an assembled unit, it more than likely is properly assembled and should be able to print PLA with little to no problems. With partially assembled units, the most troublesome assembly steps (such as building the extruder head and hotend) are typically performed at the factory, leaving steps that are much less likely to cause premature hair loss or the pieces of the printer being thrown across a room.
With that said and without further ado, I present you with the list of 3D printer manufacturers.
3D Printer Manufacturers
- Creality
- Flashforge
- Prusa Research
- Anet
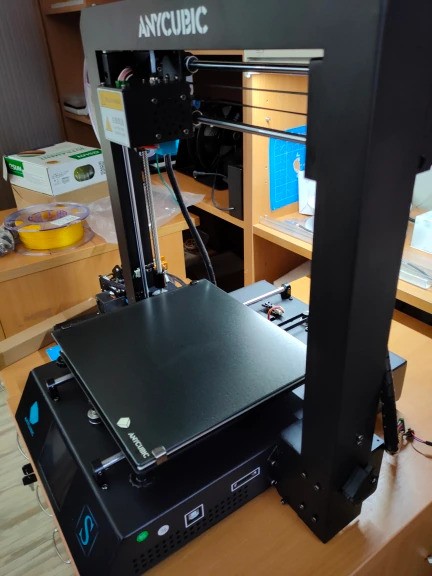
- Anycubic
- XYZ
- Voxelab
- Makerbot
Assembling Your Printer
Once your printer is home and out of the box, your first challenge is going to be assembled. You don’t need to be a mechanical savant to put your printer together, but this is definitely a step you want to make sure you don’t rush and is one that is frequently overlooked. The easiest way to ensure a smooth and proper assembly is to break it down into smaller tasks:
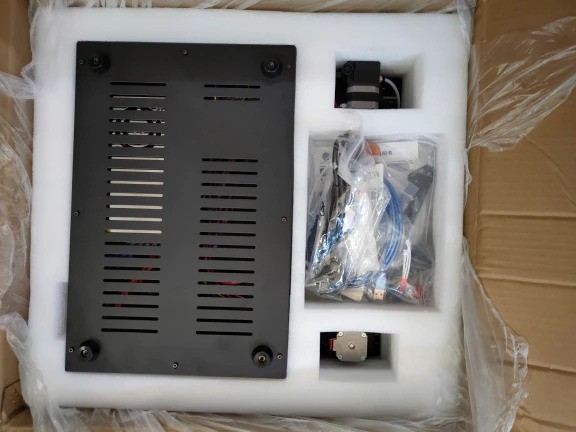
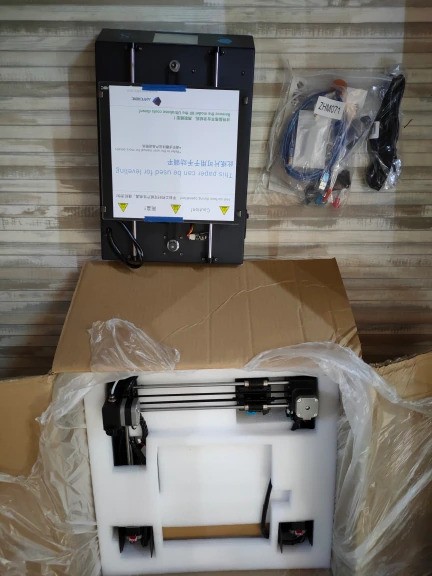
- Unpack your printer parts
- Find and read through the instructions
- Inventory your parts
- Assembly
- Double-check your work
Unpacking Your Printer Parts
Not all printers are packaged equally. Some printers come tightly packaged and mostly assembled, requiring very little work from the user. Others, however, come in enough pieces to give anyone a moment of anxiety. The first step is just unpacking everything and sorting your parts out. Try to keep like parts together. This will save you some time as you go, and make things a bit smoother by eliminating the need to search. Most printers will come with a packet containing basic tools, a small roll of filament, spare parts, and instructions. This packet should have everything you need to move forward.

The Instructions
Instructions for 3D printers can be something of a lottery. Sometimes you get an instruction guide and user manual that is thorough, in-depth, and easy to follow, and sometimes you’re lucky to get anything at all. Worry not. Step by step instructions for assembling and getting started on your printer can often be found on YouTube or with a quick google search.
Inventory
Inventorying your parts before you start assembling your printer is critical. While manufacturers are generally good about including what is needed, boxes do ship out without everything that is needed from time to time. If your printer is missing a piece, it’s much better to figure it out before you start than in the middle of assembly. If you do discover something is missing, appears damaged, etc., try to reach out to the manufacturer first. Most are good about getting replacements to the customer quickly.
Assembly
While SLA printers will typically come pre-assembled, FDM printers typically require the user to build them before use. When it comes to assembling your 3D printer, there are two crucial things to keep in mind.
The first is simply to take your time. For some, assembling a 3D printer can be done in an hour or two. For others, it may take a day or two.
As tempting as it can be to rush through the build so you can get printing, this only increases your chances of making a mistake that can cause hours, days, weeks or more of frustration down the road. There is no “right” amount of time that it should take, so find a pace that you’re comfortable with and take it piece by piece.
The second thing to keep in mind is that your biggest focal point in assembly is going to be rigidity.
This is commonly overlooked but makes a world of difference. The more rigid your printer is, the less vibration and movement travel through it as it prints. This equates to more stabilization which results in smoother, cleaner prints and less of a chance of common issues like adherence problems and artifacts in your print surface.
The way to ensure rigidity in your build is by paying special attention to how pieces fit together. You want to make sure that any joints where two bars meet are perfectly squared and aligned. With that, you want to make sure that as you tighten your bolts down your parts don’t twist or shift out of alignment. As you tighten things down, you want your bolts nice and snug, but try not to over-tighten them. Most of the printer’s support components are going to be softer aluminum, so over-tightening usually leads to stripping out the threads, which can be difficult to repair without the proper tools on hand.
There will be a few steps in the instructions that recommend using specific spacing during setup. This is typically for shimming the Z axis (up and down) motors that control the leadscrew to keep the leadscrew straight. Having incorrect spacing here will cause the leadscrew to bend slightly, which can cause the printer to bind as it prints leading to a failure.
Another typical step is when setting your nozzle height from the print bed.
It helps to have a set of shims or feeler gauges on hand, but if you don’t it’s ok. Simple household items like business cards and Post-It notes can save the day in their place.
For reference, the typical yellow Post-It note is about 0.076mm (0.003”) thick. The standard business card averages approximately 0.406mm (0.016”) thick, while thicker business cards tend to average 0.813mm (0.032”) thick.
You can use any of these in a pinch to act as spacers/shims/feeler gauges as needed. Again, take your time, and if you run into an issue, remember that you very likely aren’t the only one that has run into it, and the answers are out there. A quick google search will help you resolve most issues, but don’t be afraid to get creative if you need to.
A few last tips regarding assembly:
- Eccentric nuts are the nuts attached to some of your rollers that have an off-center hole. By spinning this, you can tighten or loosen that wheel’s grip on the support beam it rides on. You want this to be tight enough that it supports the assembly and prevents it from sagging, but not so tight that you have to force it to move the assembly by hand. You should be able to lift/lower the beam with minimal resistance, but not turn the roller with your finger. If the eccentric nut is too tight, your rollers will wear down at a much faster rate, and you’ll begin to notice large quantities of dust accumulating on the rollers and beam. If it is too loose, you run the risk of the rollers allowing excess movement and the beam not remaining level.
- If you get your printer assembled, attempt to home it, and either 1) your bed springs are fully compressed but the nozzle still touches the bed before ever reaching the Z end stop switch, or 2) the bed springs are fully released, but the Z axis triggers the Z end stop switch before getting low enough, it is ok. Simply loosen the bolt(s) on your end stop switch and slide it further up or down as needed.

Double-Check
This step is just as easy as it sounds. Once your printer is assembled, take a moment to go back through. Ensure that nothing has twisted or been knocked out of alignment and that all bolts are tight.
Creality Ender 3 Assembly Guide For Beginners
How to build a 3D printer – DIY!
Getting Started – FDM 3D Printer
Now that your printer is assembled, it’s time to finish the setup so you can start printing. The setup process can be broken down into a few easy steps:
- Load your filament
- Level your print bed
- Find a test model
- Prepare to print
- Run your test print and adjust as you go
Loading Your Filament
Your spool of filament should have come secured (often by tape or ties). Take great care when loading your filament to ensure the spool does not come loose. The spool coming loose can lead to the filament overlapping itself, which can lead to print failures and snags.
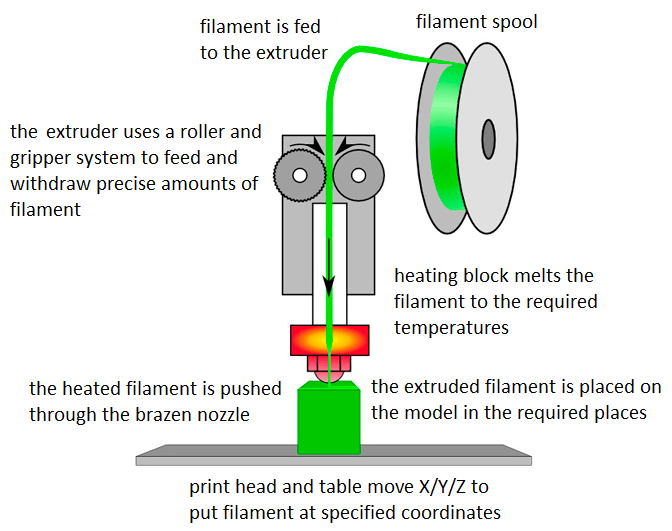
Once you’ve located the end of the filament and removed the device securing it, squeeze the lever on the extruder of your printer and feed the filament through the extruder and into the Bowden tube, feeding it until it reaches the nozzle. Ensuring you keep the filament spool tightly wound, place it on the printer’s spool holder, and you’re ready to move on.
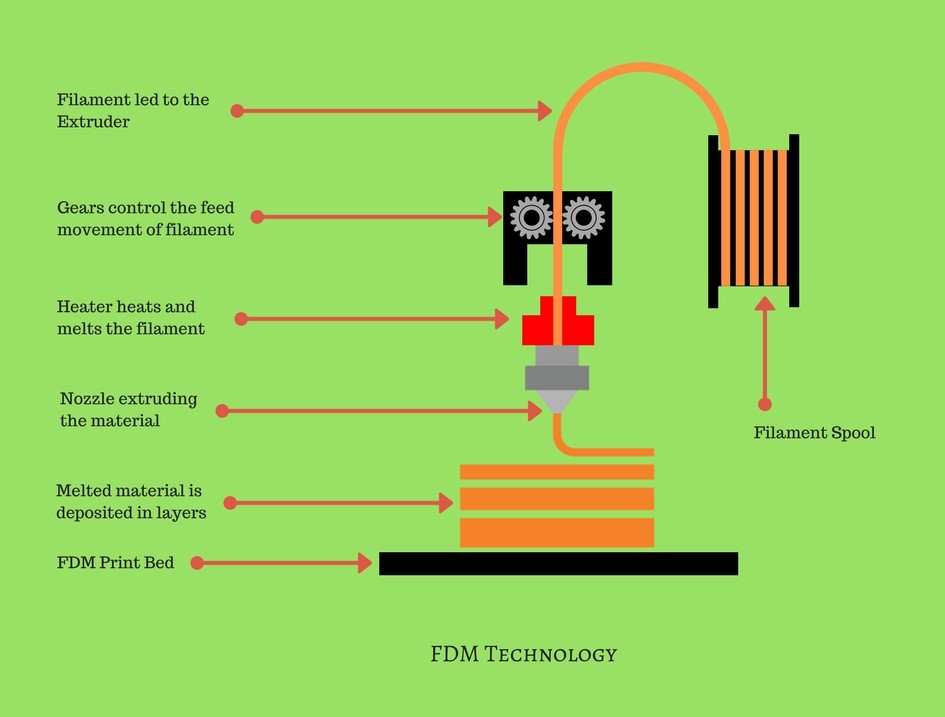
The process of an FDM Printer. (Photo provided by Manufactur3D)
Level Your Print Bed
The procedure for leveling your print bed will vary from setup to setup. Depending on whether you have a standard printer requiring a manual touch-off, a printer that automatically touches off using its nozzle, or a printer that utilizes a touch-off probe, the instructions will change. Because of this, for specific step by step instructions, follow the manufacturer’s recommendations.
The general idea, however, remains the same regardless of the method your printer utilizes. As a general rule of thumb, you want your nozzle to be 0.060mm (0.002in) to 0.200mm (0.008in) from the print bed. If you recall from above, your standard Post-It note is just thicker than minimum needed.
If you need to manually touch off, or manually set your Z offset, you can set a Post-It on your bed, and lower your nozzle until you just start to feel light resistance as you move the Post-It. You’ll want to touch off on each corner, as well as in the center of the bed. Repeat this process as needed until consistent results are achieved, as the bed may continue to shift as you make your adjustments.
3D printer beds frequently come from the factory with slight warping. If you notice that the corners are all level, but a low spot remains in the center, you can place aluminum foil or similar thin, heat-resistant material underneath the center of the bed to help level it out. After leveling your printer’s bed, follow your printer’s steps to home each axis.
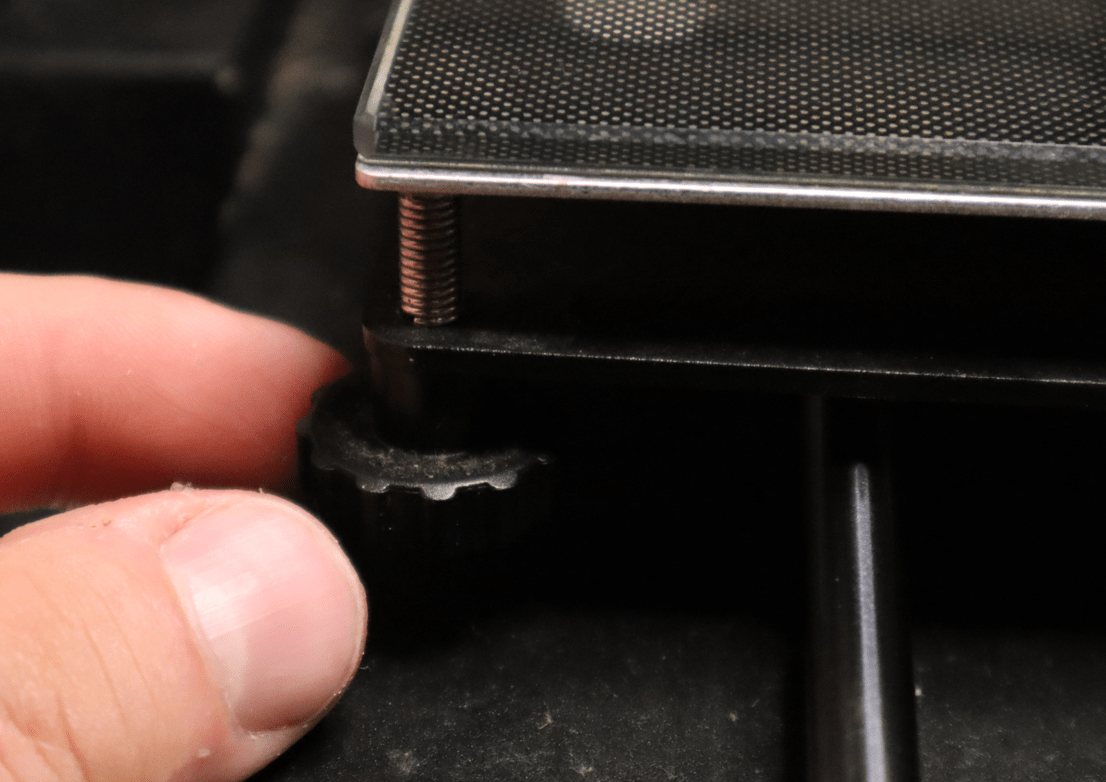
An FDM printer bed corner being leveled using a business card to establish the proper nozzle height.
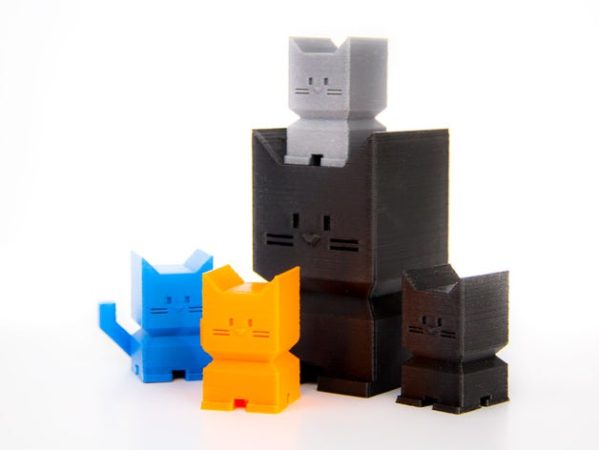
Find a Test Model
Deciding what to print first can be a challenge. For your first print, I recommend going with something smaller. This will give you a shorter print time and allow you to evaluate the first few layers, as well as the quality of the print once it is completed.
While many 3D printers come with a small assortment of models to test-print, there are a number of websites offering free and paid models of every shape and size. For anyone who would rather create their own model, this can be done using a Computer Aided Drafting (CAD) or 3D modeling software, of which many free and paid options are available. This will be covered in more detail in a future article.
Prepare to Print
3D model files are often formatted as a .STL or .OBJ file format. These formats allow the modeling software to open the file as a 3D image, but unfortunately, do not contain the right data for your printer to be able to print that image. In order for your printer to create your print, it reads a type of code called G-Code which feeds it instructions line by line, including what temperature to heat the bed and nozzle to, how fast and when to run the fans, and where to move and at what speed.
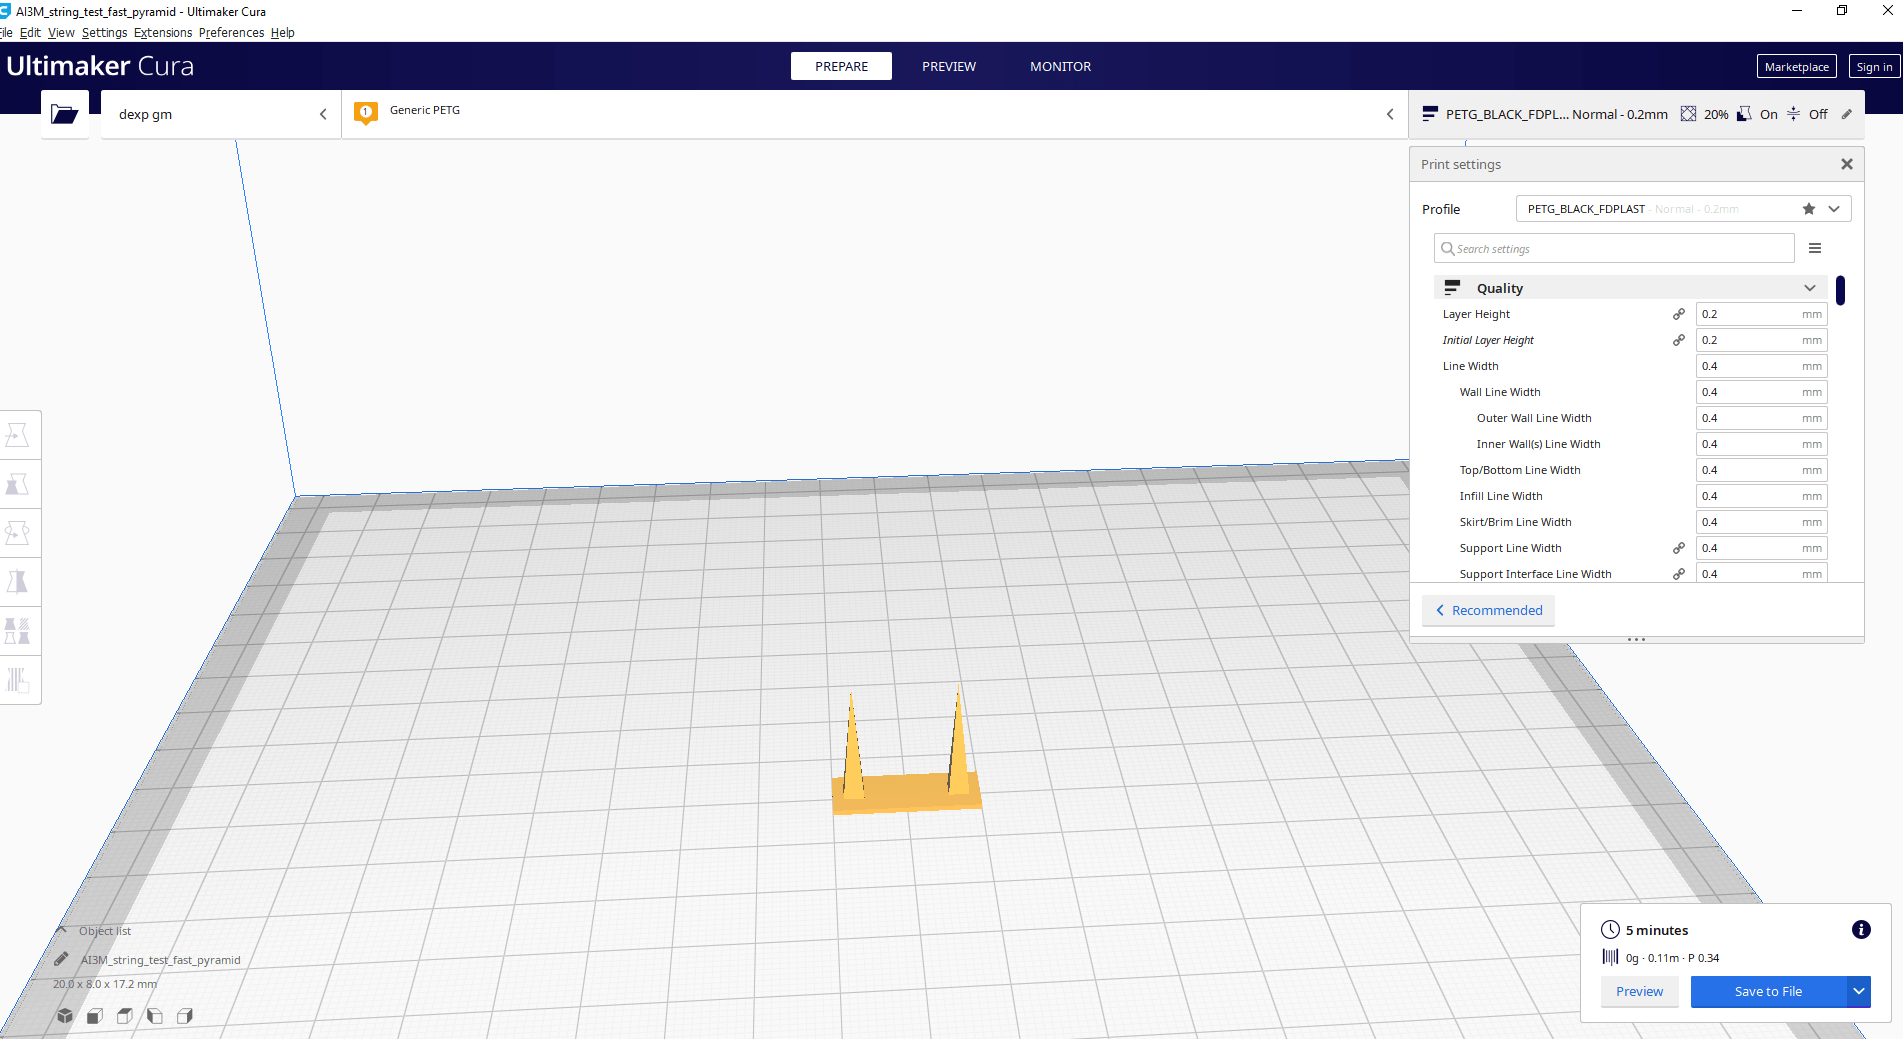
In order to create the G-Code file from your 3D model, it must first be opened in a slicing program such as Cura, PrusaSlicer, or similar. Here, you’ll have the ability to modify your print settings as needed, but for now, start with the recommended settings.
When your model opens in your slicing software, you’ll have the ability to change its orientation, where it will print on your printer bed, as well as the quantity of models it will print. It is important to orient your part in a way that gives the best chances at a successful print.
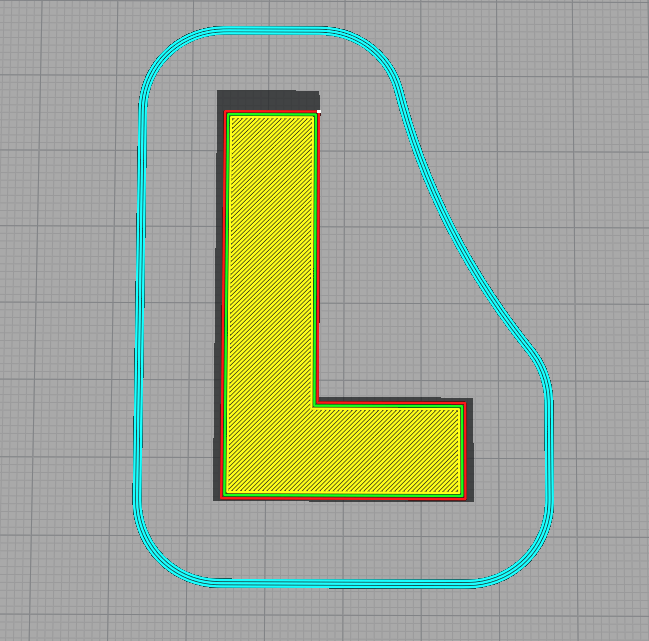
You want the print to maintain as much contact with the bed as possible. If your model contains steep overhangs or spans long distances with a void underneath (such as the model of an action figure with its arms spread out, or a model of a bridge with nothing beneath it), consider using supports to help hold the model in place as it prints. It is also important to keep in mind the use and function of your model when deciding how to orient it. A fused print will generally have its weakest point where two layers meet. As a result, your model will generally be strongest when force is applied perpendicular to the print path.
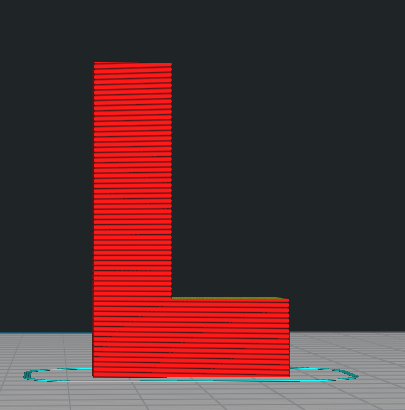
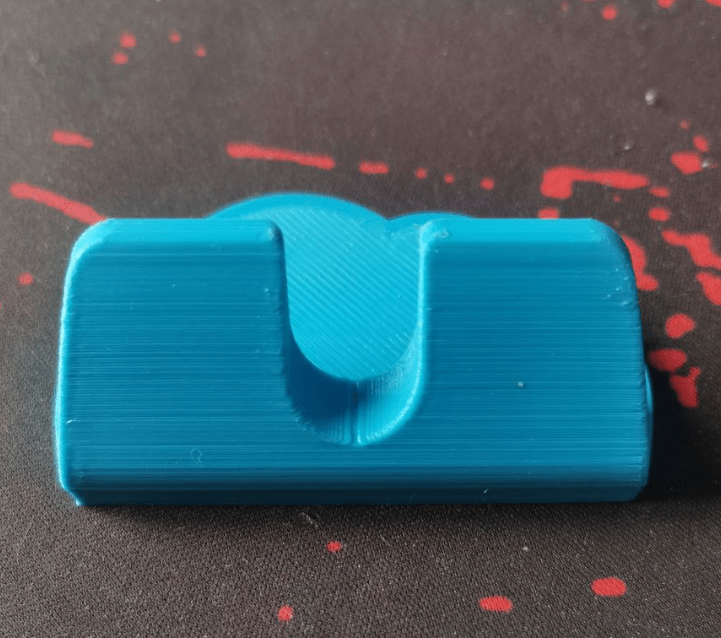
As an example, compare the images below of two L shaped brackets. The intended use would be for the longer arm to mount vertically to an object, with a weight hanging off the shorter arm. With the weight applying downward force to the horizontal arm of the L, the model on the left would have a greater chance of failure where indicated, as the weight attempts to pull the fused layers apart (delamination). Under the same circumstances, however, the model on the right would be impacted significantly less by downward force, with the most likely failure being sagging of the horizontal arm rather than delamination and breakage.
Run Your Print and Adjust as You Go
Once your model has been sliced, it’s finally time to print. Load your G-Code file into the printer and hit start. After your printer homes its axes, it will preheat the bed and nozzle, and then begin printing. It is important to pay close attention as your printer lays down its purge line, skirt, and the first layer of your print. If your bed is slightly out of alignment or the distance between your nozzle and bed is off, this gives you the opportunity to make small adjustments to dial your printer in.
You want your layer to be squished as it gets laid, flattening into a smooth line of material. If your filament is coming out in a thinner or rounded line instead, you’ll want to raise your bed or lower your Z height. On the other hand, if you notice that the layer is squished so much that it is becoming translucent, uneven, or not laying filament down, your nozzle may be too close to your bed. If you notice a clicking noise coming from your extruder, or find that dust is building up on the extruder from grinding against your line of filament, this is often also an indication that your nozzle is too close to the bed.
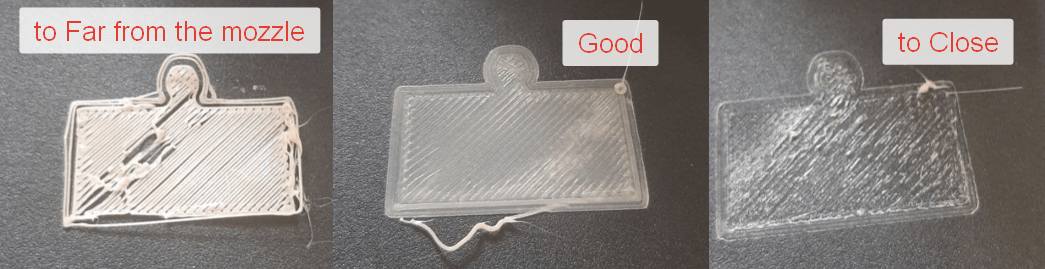
An example of how to tell what adjustments to make as the first layer of your print is being laid down.
Common Problems and Their Causes
Warping – Warping at the base of your print is generally caused by parts of your print cooling faster than others. This is generally caused by the build plate being too hot, the part cooling fan being too high, or both.
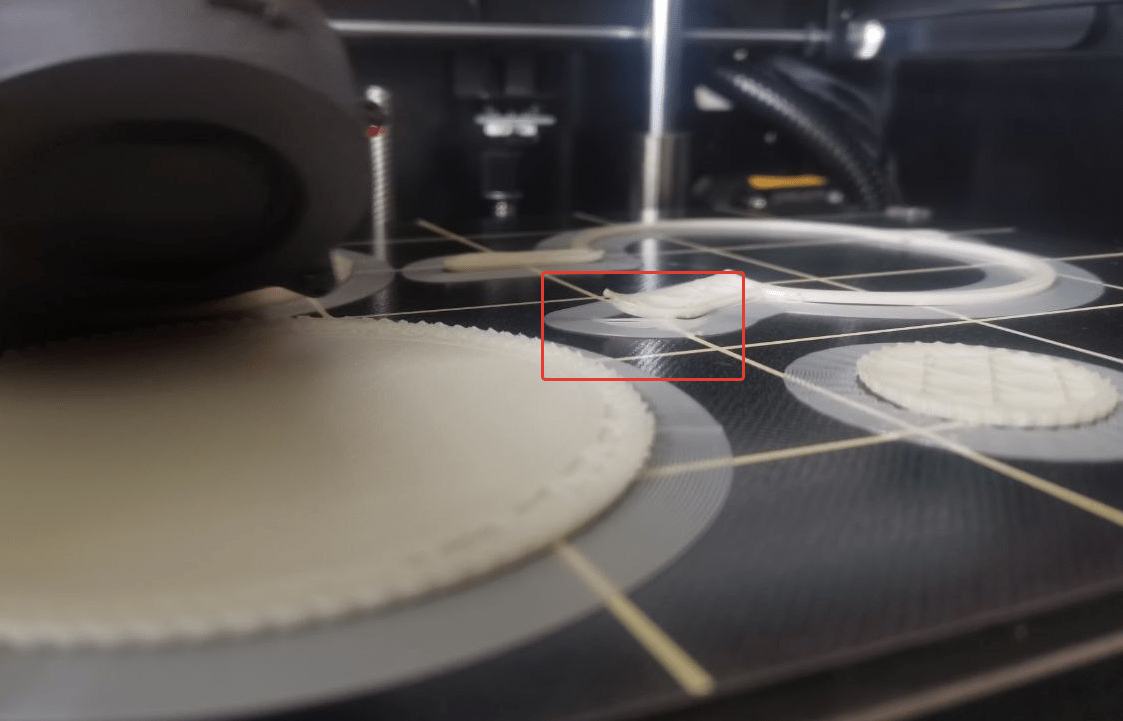
A hollow cube with a warped base.
Poor Bed Adhesion – Parts not adhering to the bed properly can be caused by a number of things, including improper bed temperature, the nozzle being too far from the bed, and the bed having residue from fingerprints, other printed models, dust, or other contaminants. Cleaning the bed with alcohol is a good place to start. As a quick fix, you can use painters’ tape or hair spray to obtain better bed adhesion, but the best results come from fixing the true underlying cause.
Stringing – Stringing is the wispy threads or filament lines spanning gaps in the print. This is caused by the filament within the nozzle drip out during movements. This can generally be corrected by lowering the nozzle temperature, increasing your retraction speed/distance, or by turning the Combing feature on. Combing causes the printer to stay within the perimeter of the print during travel movements.
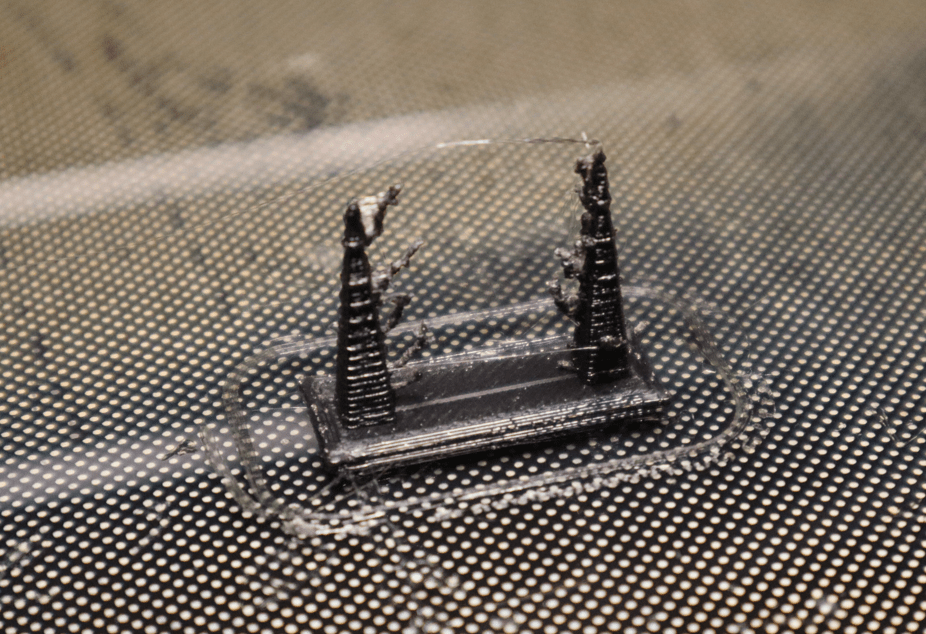
A test print displaying stringing that occured as the hotend traveled from pillar to pillar.
Ghosting/Ringing/Echoes – Ghosting, Ringing or Echoes, in your print are the faint repeated patterns across the skin of your print. For example, if you were making a cube with a hole in the center, you may see the perimeter line of the hole repeated several times in the skin moving away from the hole, similar to ripples in water.
This is typically caused by several factors, including printing at too high of a speed, having acceleration or jerk settings that are too high, the printer frame not being rigid enough, and rapid/sharp angle changes. If you’ve ensured your printer frame is rigid (bolts are tight, everything is still square, you feel no play in the rollers), the best place to start is by lowering your print speed. From there, you can move through the remaining settings as necessary until the issue lessens or goes away.
Ringing can be seen to the right of the Y, looking similar to ripples in water, or a ghost of the letter repeating.
Layer Shifting – Just like it sounds, this is what it’s called when layers of your print shift. It can occur in a number of small shifts occurring over a series of layers (so what should have been a cube ends up looking more similar to a staircase), or in one big shift (where the first half of your cube prints perfectly in place, and the second half prints perfectly, but off to the side of the first half). This is often caused by a combination of printer belts being too loose, and print speeds being too fast. This combination causes the belt to skip teeth as it prints, which results in a larger hot end movement than what was intended.
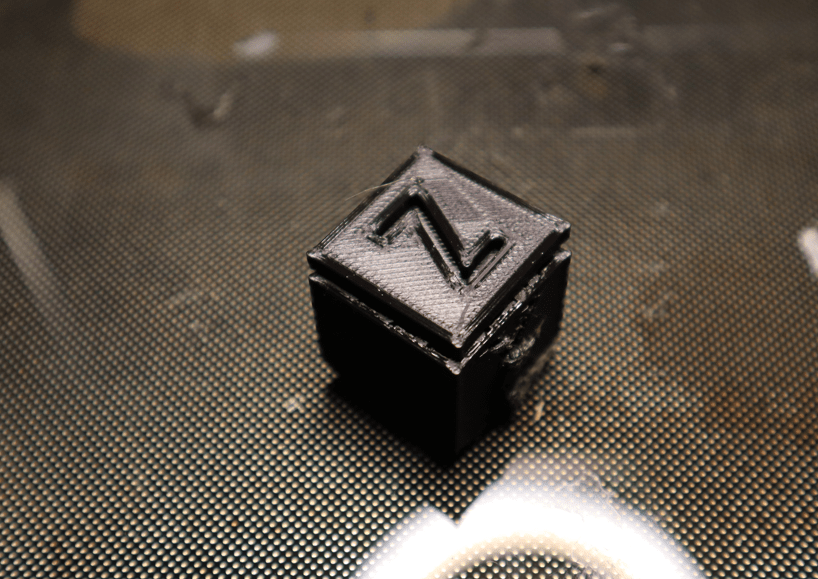
Examples of layer shifting in a 3D print on an FDM printer.
Print Stuck to Bed – In the case of your print sticking too firmly to your bed, do not force it. Doing so can cause damage to the print and your print bed. Waiting for the print bed and print to fully cool will often release the print, but placing the bed into the freezer can also help. Additionally, you can use a spatula to help remove the print by sliding it under the edge of your print, and then gently twisting it to pop the print off the surface.
Learn how you can add a diode laser on your 3D printer
Adding a 10 watt Delux laser on Anycubic I3 Mega
Getting Started – SLA 3D printer
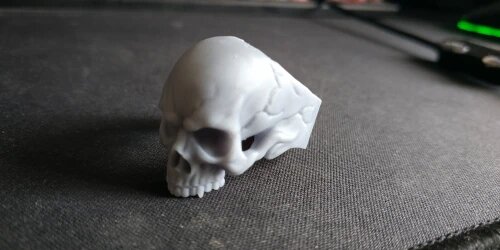
SLA printers come with added safety protocols and post-processing steps, but there are also benefits to using SLA over FDM. Since SLA printers cure resin in place rather than fusing layers together, you are able to produce models that come off the printer with smooth surfaces instead of layer lines. With SLA printers being able to create their prints without the need for heat elements and molten material, it is able to achieve astonishing levels of detail and clarity. This makes it the perfect choice for detail-oriented models.
Additionally, print times with SLA printing can be longer for individual models, but dramatically shorter for multiple models. This is because while an FDM printer must print each individual model one at a time (so if printing one model took one hour, printing two at the same time would take roughly two hours), an SLA printer is able to let UV light through in multiple areas of the screen at the same time, so as long as your models all print on the build plate, they all print simultaneously. So, whether you’re making one print of a given model or ten, your one-hour print time still remains one hour. Much like with an FDM printer, the process of creating prints with an SLA printer can be broken down:
- Safety
- Level your build surface
- Fill your resin tank
- Find a test model
- Prepare to print and print your model
- Removing your model
- Post-Processing
- Post-Curing
- Cleanup and disposal
Safety
SLA printers can produce incredibly detailed models, and can be very easy to use. It is extremely important, however, to practice proper safety precautions when handling resin and resin printer.
The chemical properties of the photopolymer resin are what make it so hazardous before curing. Along with having the potential to cause contact dermatitis, photopolymers have the carcinogenic property of binding themselves to matching partners. In the case of living tissue (such as your body), the photopolymer bonds to the body cells and attempts to alter the way they function. In short, this means that the photopolymer absorbs into the body and alters the body’s cells so that it is unable to process or control the carcinogen.
While minimal exposure treated properly can have little to no effect, repeated exposure can cause the carcinogenic substance to accumulate in the body resulting in serious long-term illnesses and effects. The other potentials for safety concerns both resin fumes and UV light. Breathing in fumes from uncured resin can cause respiratory irritation and illnesses. UV light at the wavelength used to cure photopolymer resin is harmful to the human eye. Care should be taken to avoid eye exposure to the light sources. It cannot be stressed enough that this is not something that should be taken lightly. Uncured resin is considered a hazardous material, and should be treated as such. We will cover proper cleanup and disposal, and why it is necessary, later in this article. For now, here are some simple steps you can take when using resin to ensure your printing experience is not only smooth and fun, but safe.
- Wear surgical gloves any time you may come into contact with the resin
- Use carbon filtration systems, a respirator, and a well-ventilated area to help prevent breathing in potentially toxic fumes
- Wear laser-safe/UV-safe eye protection rated for the wavelength of your printer’s light source when you have the chance of being exposed to UV light
- Clean up any resin spills immediately in a safe manner
- Recycle unused resin and dispose of used resin/waste following safe and proper procedures
- Ensure all printer covers and doors are in place and secure before starting your print
- Avoid touching your print without protection until after it has been cleaned and cured
Level Your Build Surface
As with FDM printers, maintaining a level build surface on an SLA printer is a critical step in getting successful prints. The process for leveling an SLA printer can vary from printer to printer, so it is recommended to follow the manufacturer’s directions.
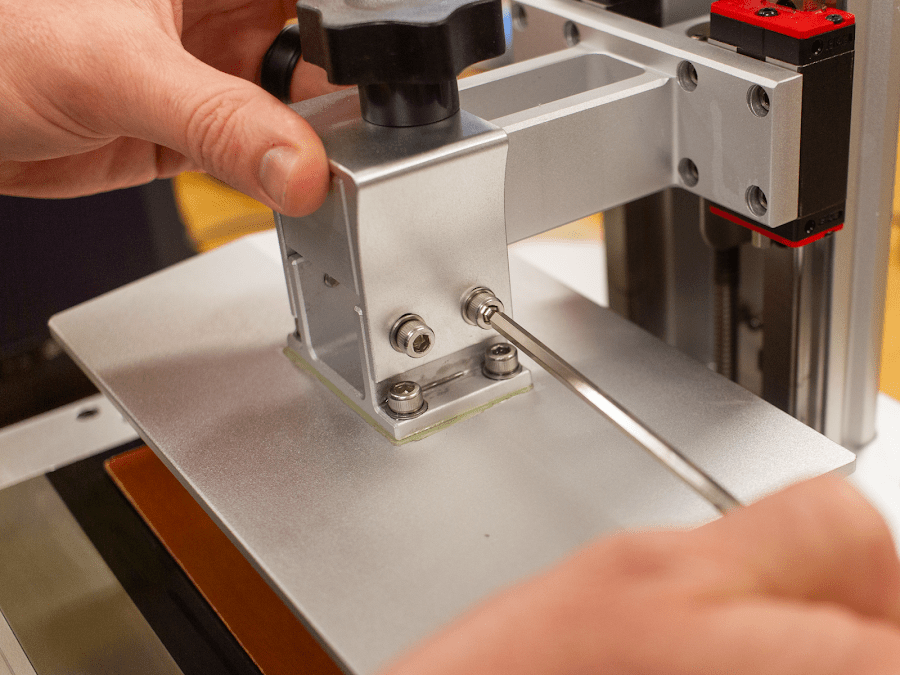
An SLA Printer build surface being leveled. (Photo provided by MatterHackers)
Fill Your Resin Tank
When you fill your resin tank, it’s important to do so carefully. Exercise caution to ensure the resin doesn’t drip or spill. When filling the tank, follow these steps:
- Shake the resin cartridge/bottle thoroughly. Most resin manufacturers recommend doing so for approximately five minutes
- Pour the resin into the tank through a mesh filter to eliminate any solids or contaminants that may be inside the container. Disposable paint filters work well for this, but take care to dispose of the used filter properly
- Pour the resin into the tank slowly, taking care not to pass the max-fill line
- Let the resin sit for a minimum of five to ten minutes after pouring before printing to allow any bubbles that have formed to dissipate
Preparing To Print and Printing
When it comes to preparing to print using an SLA printer, much of what was said above for FDM printers will also apply. SLA printers read G-Code files very similar to those FDM printers read, made by slicing software from the same .STL or .OBJ 3D model files. The differences come in when it comes to the print settings and process itself. Fortunately, slicing software specifically for SLA printers, such as Chitubox, Lychee Slicer and PrusaSlicer can give us a good starting point.
While we recommend starting with the print settings provided by the resin manufacturer, it is important to understand what some of the settings do in order to understand their impact on your printing process.
Layer Height – Your options for what your layer height can be set to will vary from printer to printer. Consumer SLA printers on average can range in their capabilities from layer heights of 0.025mm up to 0.125mm, with most being able to handle 0.050mm to 0.100mm. Your layer height impacts your print speed dramatically, but also impacts the time required for each layer to cure. Because of this, it is important to adjust these settings accordingly. While it may seem ideal to aim for the smallest layer height to achieve the highest level of detail, it is important to consider your needs from the print and try to balance your level of detail and print time to best suit your needs.
Exposure Time – This is the amount of time each layer will be exposed to UV light to cure. If the exposure time is set too low, the resin may not fully cure. This can result in the model pulling apart as the build surface raises to prepare the next layer. It can also lead to the print stretching as it is made. For example, if you create a model that has a hole, the hole may come out oval-shaped rather than circular. If the exposure time is set too high, the layer may stick to the bottom of the resin tank. This can result in the model being pulled loose from the build surface leading to a print failure. The proper exposure time will depend on the resin being used and the strength of your printer’s UV source.
Bottom Exposure Time – The bottom exposure time is simply the exposure time for the bottom layers. This is typically set 6 to 12 times longer than your standard exposure time. The higher your bottom exposure time is set, the more your print will stick to the build surface. Likewise, the lower it is set, the less it will stick.
Lift Distance – How far from the bottom of the resin tank the printer will lift the build surface/print between each layer.
Retract Distance – How far the build surface/print moves toward the bottom of the resin tank after lifting (typically the same as your lift distance).
When setting up your model in the slicing software, there are a few things to keep in mind. Unlike with FDM printing, you generally want to avoid large surface areas sticking to the build plate.
For example, if you were printing a cube, you would typically want to orient it flat on an FDM printer, but at a 45-degree angle on an SLA printer. Reducing the amount of surface area contacting the bottom of the resin tank at any given time reduces the likelihood of the print releasing from the print surface. The downside to orientating this way, however, is that it also reduces the amount of your print that is attached to the build surface.
Using a raft can help rectify this. It provides you with a flat surface sticking to the build surface providing a better grip to hold your model, without increasing the amount of your model that sticks to the tank. It is also important to use plenty of supports between your build surface/raft and print. Additionally, you want to include holes in your print to allow the drainage of trapped resin. Resin that is uncured can, over time, deteriorate the cured resin model. This can cause the model to partially dissolve and leak uncured resin over time, destroying the model and posing a health risk.
Unlike with FDM printing, it is very difficult to see your model as it prints in an SLA printer. With that said, if your build surface has raised enough during a print that you can see your model and you notice that your model either looks incorrect or is missing, stop your print. It is likely that some or all of your model has stuck to the bottom of the resin tank causing the print to fail. The more times the residue stuck to the printer is exposed to the UV light, the more it will stick to the bottom of the tank.
Removing Your Model
As mentioned in the safety section, at this point in the process, your print is still not safe to handle without proper safety precautions. While wearing gloves, use a metal spatula between the build surface and raft to remove the model from the build surface. If you experience heavy resistance, do not force it, as this can cause damage to the printer and print.
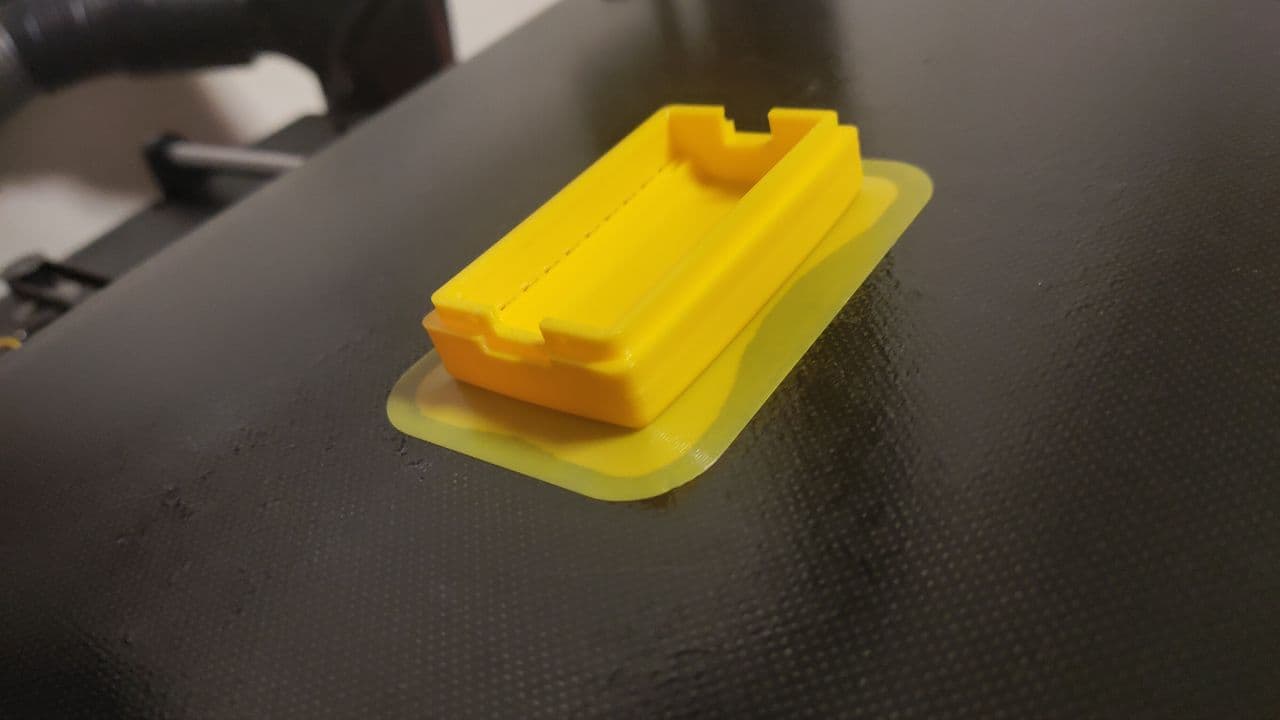
A 3D model is being removed from the build surface using a metal spatula.
Post-Processing
Once your model has been removed from the build surface, it is important to clean away any remaining surface resin. If you’re using a resin made to be cleaned with water, it can be cleaned by repeated dips into a tank of warm water while being lightly scrubbed. If your resin is not specifically listed as water-washable, the most effective way to clean your print is by utilizing the same process with 99% Isopropyl Alcohol.
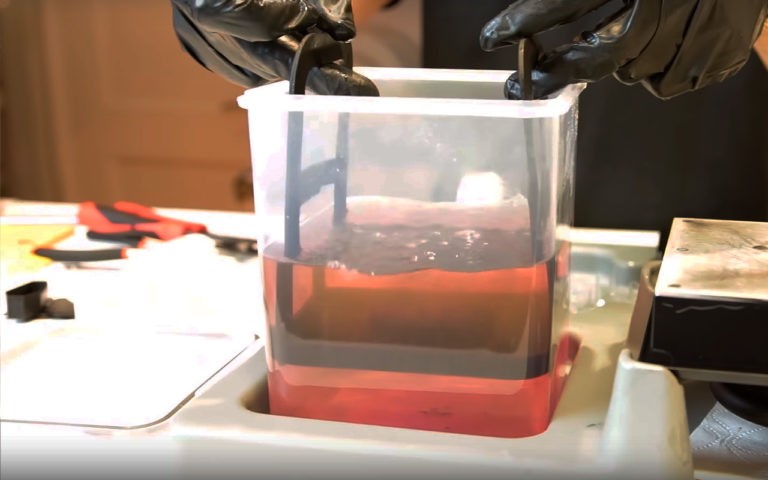
An SLA print being washed by repeatedly dunking the model in a warm isopropyl alcohol bath. (Photo provided by SINTERIT16)
Post-Curing
Once the model has been cleaned, it’s important to ensure it is fully cured before considering it safe. It is important to follow the curing recommendations of the resin manufacturer. With that in mind, post-curing can be completed using a UV curing box (a box containing UV lights and typically a turntable for even curing), or by placing the print outside in direct sunlight. When fully cured, the model should not feel sticky or tacky. It is important to avoid over-curing your part. Over-curing can also cause the resin to break down, leading to brittleness and deterioration.
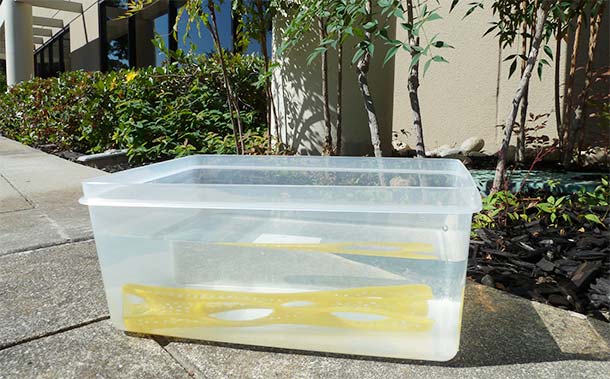
A resin 3D print being post-cured by sunlight. (Photo provided by Kudo3D17)
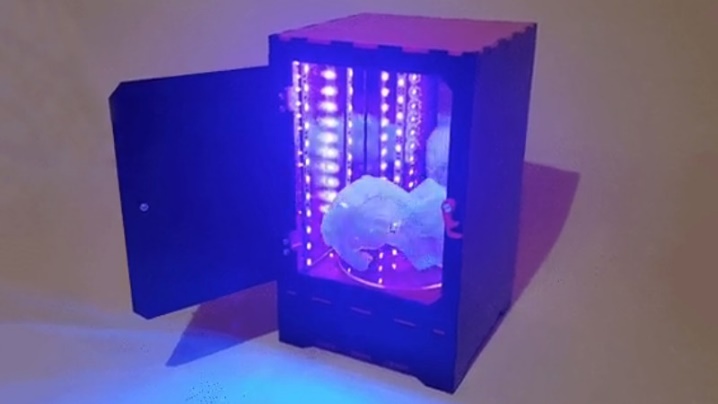
A resin 3D print being post-cured in a UV curing box. (Photo provided by HackADay)
Cleanup and Disposal
When you’ve finished printing, it is important to remove the resin from your resin tank and clean everything properly with warm water/IPA. The resin is stable sitting in the resin tank for between two days and a week depending on the manufacturer’s recommendations, but after that it will begin to break down. This is why it is important to pour any remaining resin back into its container for later mixing and use. It is highly recommended to pour it through a mesh filter when doing so to filter out any solid remnants or debris from your print that may be remaining.
With resin being as toxic as it is, it is important to use every drop of what you have that you can. This not only reduces the amount of waste that you’ll need to care for, but will reduce your cost in purchasing new resin as well.
When your tank is empty, if you notice remnants of solidified resin stuck to the bottom of the resin tank, do not use anything sharp to remove it. You can use a plastic spatula to attempt to slide it off and remove it, but it can be easier at times to lightly press up from the bottom of the tank. The solidified resin will not want to bend, and as a result, often times breaks itself loose.
Outside of personal safety precautions, proper cleanup and disposal are the most important part of printing with an SLA printer. Just as photopolymer resin is toxic to humans, it is equally toxic to wildlife and the environment.
Resin that is improperly disposed of can leach toxic and carcinogenic chemicals into the ground and water supply, significantly harming plants, animals, and anything else that comes into contact with the contaminated elements. Any resin, including anything that has come into contact with resin (including resin containers, gloves, paper towels, the water/IPA used for washing and cleanup, remnants/residue, etc.) should be fully cured by placing them in a curing box or in direct sunlight before being sealed in a container and properly disposed of.
Should You Upgrade Printer Parts?
On nearly every 3D printing forum, you’ll see a massive number of users discussing part upgrades to their printer. Everything from mainboards to motors, stepper drivers to hotends. So, is it really necessary? In short, the answer depends on your use. For example, the average hobbyist doesn’t typically need a large touch screen. It’s nice to have, but isn’t a necessity.
On the other hand, a hobbyist using a more abrasive filament, such as glow-in-the-dark or carbon fiber filled filaments, would want to invest in a nozzle that can withstand that abrasion without deteriorating, such as an A2 tool steel or tungsten nozzle instead of the standard brass. Before jumping into any upgrades, though, it is important to take the time to learn your printer just how it comes. Often, trying to upgrade your printer too fast leads to frustration, over-complication, and wasting money. No two printers are identical. So even if you have the same make and model printer as someone else, your results may vary slightly. By taking the time to learn your printer specifically before you make any upgrades, you give yourself a number of benefits:
- You can learn your specific printer’s strengths and weaknesses. Instead of just replacing parts for the sake of replacing them, you can focus on upgrading just the parts that will help your printer, saving time and money. Likewise, you may find that your printer prints beautifully without any upgrades.
- Upgrades such as the mainboard, stepper drivers, and the addition of touch screens can require modification of the printer’s firmware. This can, in some cases, be overwhelming or complicated for the average user.
- By getting used to your printer in its factory state, you have the ability to focus almost entirely on the printed model side of things, rather than the technical side. You’ll learn how to make adjustments, troubleshoot problems and achieve desired results by making changes to print settings, rather than relying on new parts to potentially do it for you. This allows you to build a solid foundation of knowledge and understanding that will be invaluable as you continue on in your printing journey.
If you do decide to upgrade your printer at some point, do so one step at a time. While swapping out multiple parts at once may save time initially, if an issue arises as a result, it makes it much harder to pinpoint which component the problem is being caused by. The old adage “slow is smooth, smooth is fast” definitely applies here. By taking your time and installing one part at a time, ensuring it works properly before moving forward, you are able to troubleshoot as you go instead of trying to unwind a ball of chaos at the end. This may cost you a little more time up front, but it will save you a world of time and headache in the end.
What can you print?
There’s a saying in the 3D printing community that’s been floating around for quite some time. “If you can draw it, you can print it”. While this isn’t always true due to the limitations of materials or the machine being used, 3D printing is very versatile. Here is a video with 50 different items you can print, and that’s not even a mote of dust in the scope of what can be done with 3D printers!
Sites to obtain premade 3d printing objects to download and print
Below is a short list of sites that offer 3d models for download that you can then slice and send to your printer for fabrication. This is just a quick list, there are a LOT of sites out there, but these sites are ones I’ve used and as far as I can recall none of them have content that would be considered NSFW.


Image Sources
- ISD-Soft – https://isd-soft.com/
- Kankan Swargiary, Pasit Jarutatsanangkoon, Pimpakan Suwanich, Romuald Jolivot, and Waleed S. Mohammed, “Single-step 3D-printed integrated optical system and its implementation for a sensing application using digital light processing technology,” Appl. Opt. 59, 122-128 (2020) – https://www.osapublishing.org/
- Airwolf3D – https://airwolf3d.com/
- Manufactur3D – https://manufactur3dmag.com/
- MatterHackers – https://www.matterhackers.com/
- SINTERIT – https://www.sinterit.com/
- Kudo3D – https://www.kudo3d.com/
- HackADay – https://hackaday.com/
Written by S. “Ronin” McGowan
Learn more about 3D printers and how to upgrade them
Upgrade your 3D printer with powerful Endurance lasers!
Increasing 3D printer output with cutting and engraving capabilities from Endurance Lasers
Read on 3dnatives about Endurance Lasers: Easy to install on your 3D printer