
LightBurn is a native application written for Windows, Mac OS, and Linux.
Lightburn is a very versatile program. There is an opportunity to work with both vector and raster graphics. All necessary options for laser control are available. Also, without additional programs, you can adjust the size of the image and make simple manipulations with text and vector images.
All you need to know about LightBurn software – main features
Looking for an opportunity
So, you’ve bought and assembled your shiny, new CNC (in my case, a Shapeoko 3 XXL), and are ready to get to work. You bought a slew of bits to do any job imaginable, theoretically. So, whatcha gonna make?
Signs, boxes, desktop organizers, furniture, earrings, aluminum parts… The possibilities are positively mind-boggling!
For my wife and me, the primary goal was to make wooden products to sell on Etsy. We bought our unit in the fall, so had (overly) ambitious plans to make a bunch of Christmas-themed items. Ideas, ideas… We needed ideas. I have an extensive graphics background (vector/bitmap) but, since we were already poking around on Etsy, why not save time (money) and use something someone else had already designed? (FYI: Dozens of reasons.) So, we keyed “Christmas CNC” into their search bar, and voila! 1,716 results.
Those Christmas tree ornaments looked wonderful. I had some really tiny bits which oughta cut the intricate detail, so we bought several pattern files, chose one design, and proceeded to cut. Pushing the feeds ‘n’ speeds to near bit-snapping levels, one stinkin’ $10 ornament in 1/4” ply took over an hour! Couldn’t make any money at that rate. Now what?
“Honey… I need a laser!” It wasn’t bad enough that I had just spent two grand. But which one? There were those Chinese K-40 types on eBay, but the beds were too dinky. What if I wanted to make something BIG?
Hey! They have lasers for CNC machines and 3D printers! Research, research, research…
The solution from J Tech
Several forum posts referenced a company called JTech, who had a plug-n-play kit specifically for my Shapeoko. After a few promises to the wife that we would soon be millionaires, and that I’d never ask for another dime, I placed my order for a 3.8 watt. In addition to the laser and wiring kit, I also took them up on their software recommendation, i.e., LightBurn, my main reason for writing here.
Before I continue, I must confess that I am no tech genius, so my words here are strictly a layman’s understandings. Proceed with due caution, please.
My Lightburn story…
The instructions that JTech provided for LightBurn setup were pretty good, but I (and countless others) had one heck of a time understanding how the various Origin options worked. Several CNCs, including Shapeoko, use the back right for their 0,0,0 (machine “home”). To LightBurn (and the entire CAD world), everything to the left and closer to you from that point is considered negative space/coordinates, which LightBurn does not like. Try as users have over the millennia to convince LightBurn to provide what to them would be a more intuitive means of indexing, the LightBurn crew insists that it would not make good sense for them to do so. Actually, I understand this – now.
But, before you start slamming your spindle carriage (or laser!) into the rails, let me give you a tip that really helped me: When you set up your LightBurn macros per JTech’s instructions, add another line to the
“Use Laser” macro that reads $10=0. Then add $10=255 to “Use CNC.” This toggles the origin from back right to front left so LightBurn will now play nicely with your brain. Just be sure to hit “Use CNC” when you’re done with the laser, or your belt’s teeth will need a dentist.
Aside from the original problem, most of LightBurn works really well. They currently (June ‘19) have an acknowledged bug with their “Relative Z” option that is supposed to drop the Z per pass by increments relative to the current Z position, where you’ve just spent a great deal of time getting your laser into focus. Upon initiating the cut, the Z now rises all the way to the top (zero), effectively reducing your $500 laser to a
nice, bright flashlight.
Once you understand the Origin options, LightBurn does a fine job. Some users are entirely happy with it as a complete design and cut package with hopes that it will eventually operate their CNCs, too. At $40-ish,
it’s almost ridiculously underpriced for all that it does so very well. The support community is very active, and the company itself is very responsive.
Looking for a new Endurance 10 watt+
As for the Christmas ornaments, we never made the deadline. That 3.8-watt laser, while excellent at wood engraving, was way too underpowered for production thru-cutting, even with 85 lbs of air assist. I now have my (soon to be poked out by the wife) eyes on an Endurance 10+ Pro.

Download LightBurn
The links below will let you download the different versions of LightBurn V0.9.09:
Linux 64-bit version (.run) (alternate .7z)
Adding camera to your engraving machine
Using a camera in a lightburn software. Convert your smartphone camera into a webcam.
Lightburn tutorial (extra)
Do you need to cut your materials, but you don’t know the best way to go about it? Diode laser cutting and the engraving does not mean you need to purchase expensive upgrades to get the strength and precision of this machine. With the right settings, image preparation, and material preparation, it’s possible to achieve high precision and reliable operation. For this article, we will be using Lightburn software.
A detailed video by Datulab.Tech
In this video I show you how I create the g-code for laser cutting and engraving, using LightBurn. I go over all the important features of LightBurn to get you started right away with your own designs. The Laser I’m using is the 10 watt module from Endurance Lasers
Explore T2Laser software
Manual for T2Laser software – laser engraving cutting software
Lightburn Inlays and pockets
Lightburn Inlays and pockets
I use Lightburn software to create a g-code for my laser. Lightburn is not specifically made to work with Mach 3 but it can produce code that is compatible with some edits. I use the GRBL-M3 setup within Lightburn to create G-code. 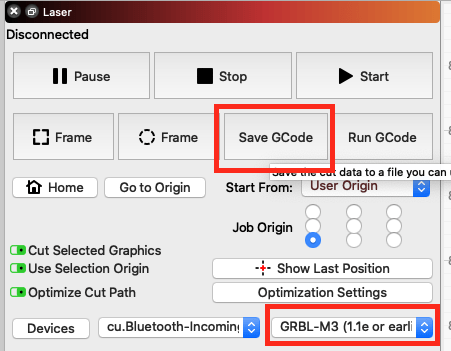
This produces the g-code that Mach 3 can run but with the M3/M5 commands. M3/M5 are much too slow when used in Mach 3. To be successful with your laser using Mach 3 you must have M11/M10 Px Sx commands configured within Mach 3. This setup is a bit beyond the scope of this article.
To cut the inlays and pockets 2 separate programs are needed. The inlay is an easy one. Import your image into Lightburn and scale it to the correct size for your project. Select the outline you want to cut and click Save G-code. Save G-code allows you save the laser program to a file for later use.
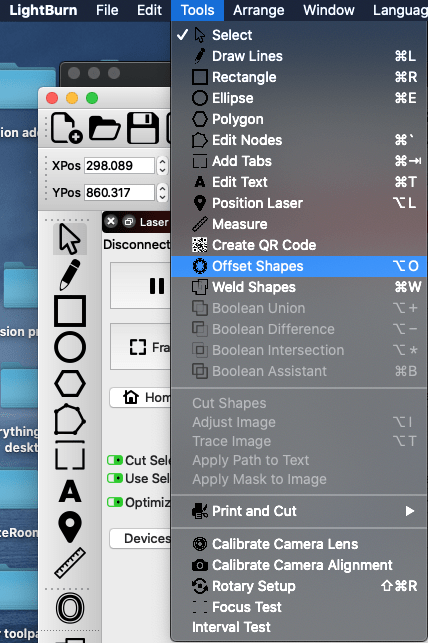
The pocket cut is a little harder initially. But once you understand how it works it is also quite easy to do. 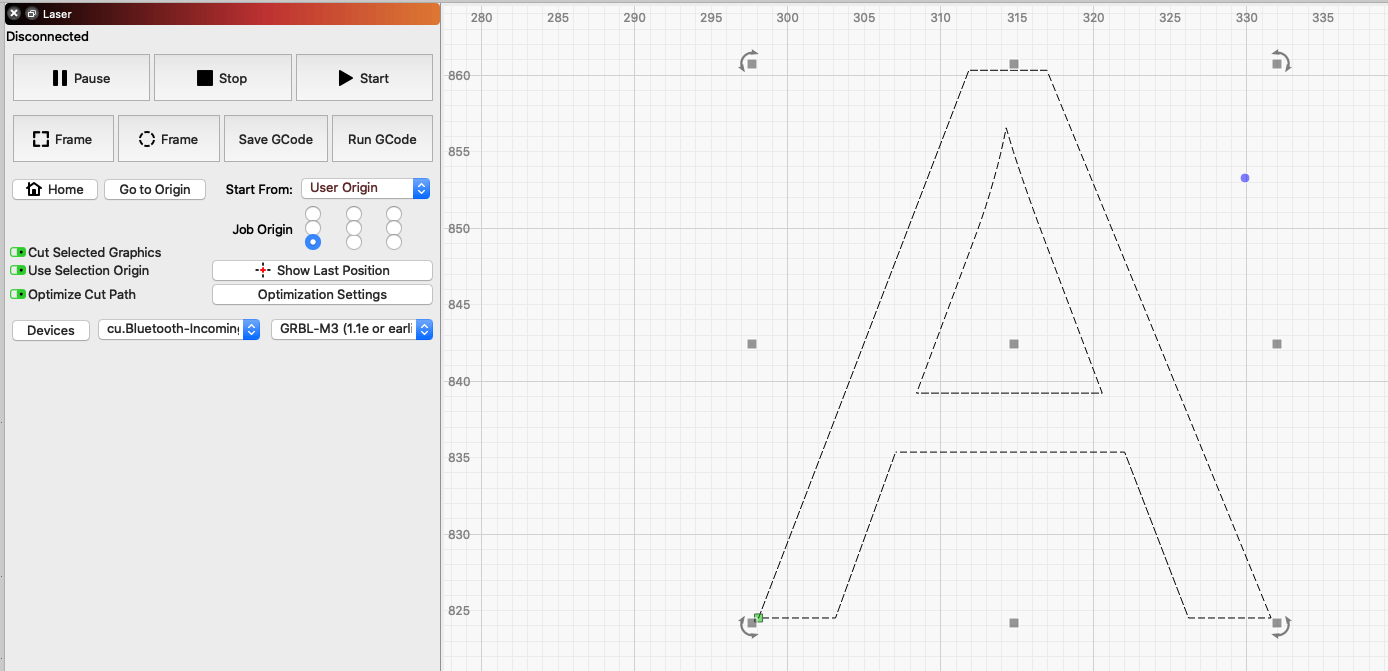 The pocket that the inlay needs to fit in this could be as small as 0.1-0.2 mm. It helps me to think about this as if I need to cut the inlay with the inside edge of the laser spot and cut the pocket with the outside edge of the laser spot. Using this method should give you a pocket that matches the outline of your inlay. In Lightburn, to create a pocket that is the right size select the outline of your image. Next in the Tools menu, select an Offset image.
For this type of cut, select an inward offset with a distance of 0.2mm. Select Corner for the corner style. This should keep the corners of your object sharp instead of rounding them off. In the options setting I usually check Select resulting objects” and Optimize/Simplify results. You can experiment with these settings to see what works best for you. 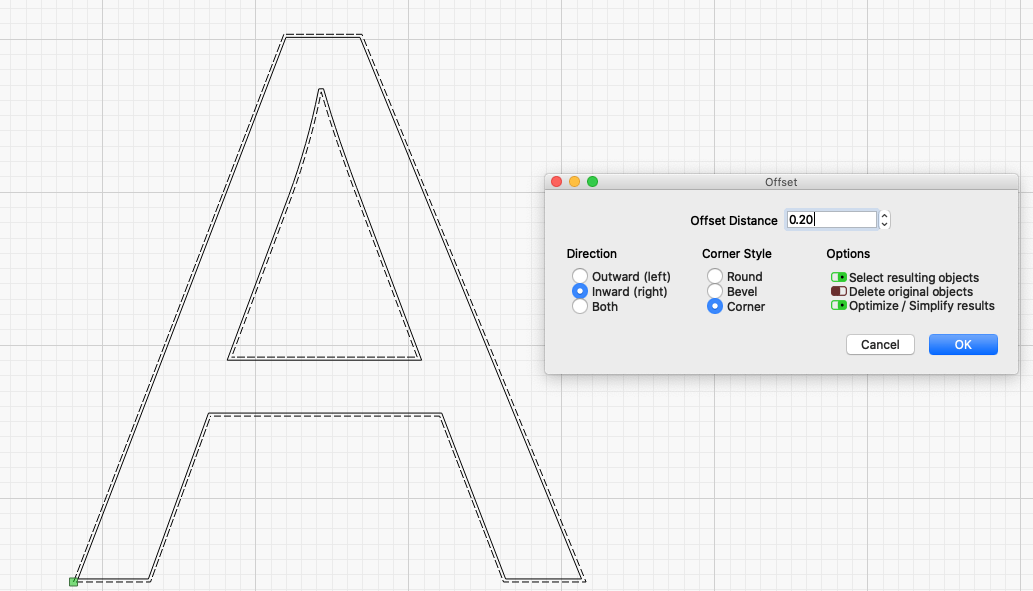
After you offset the shape, save your g-code 
The M3/M5 commands must be changed to M11/M10 Px Sx in a text editor. To edit your G-code use the Edit>Find and Replace All function to change M3 to M11 Px Sx and M5 to M10 Px commands. This technique can be used to edit the F command also. F refers to your laser feed rate. 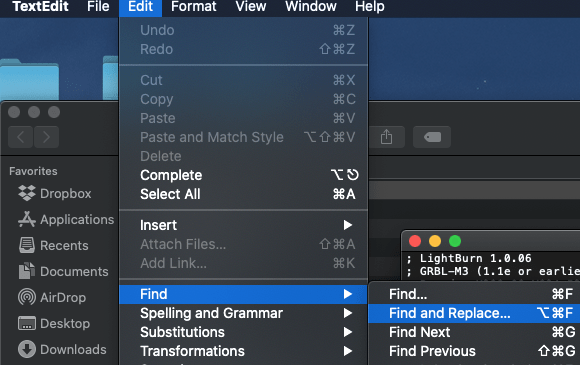
Px refers to what port you have assigned your laser to within Mach 3 and Sx refers to your desired laser power from S0 to S100. It takes only a couple of minutes to make these edits.
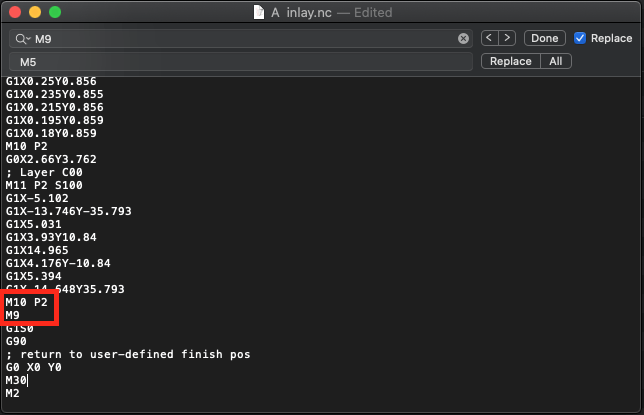
One important note when using Mach 3 for laser applications. There must be a single M5 code at the end of you program to fully turn off your laser. I use the method above to change the M9 code (coolant off) that Lightburn inserts into the code to an M5 command. I also manually add an M30 code to send the laser back to its origin after the program is complete. 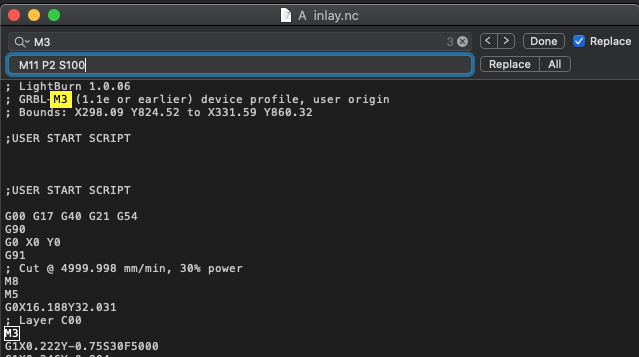
After this is complete, save the new g-code. This code can then be loaded into Mach3 and run on my CNC.
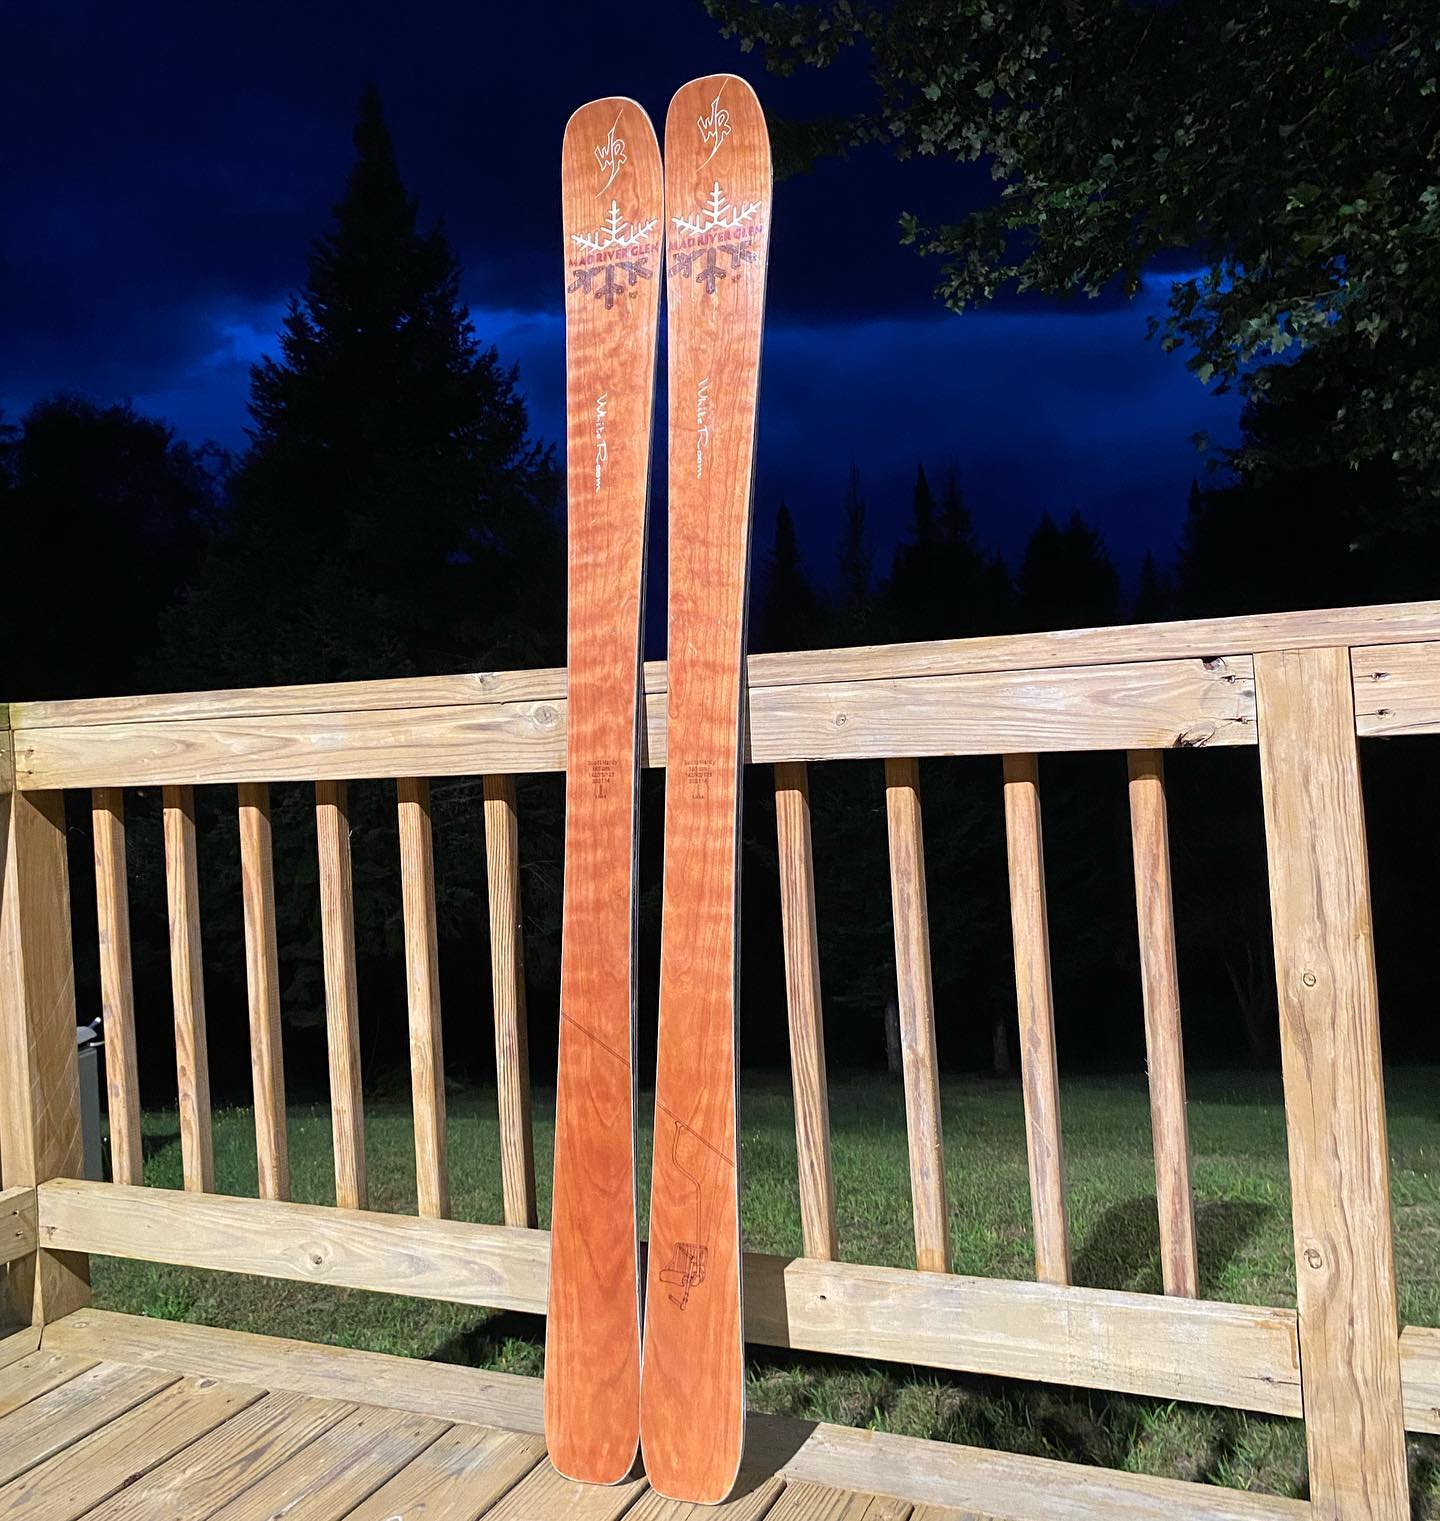
For my application, I use a G2 lens to cut the wood veneers. I usually focus my laser with 2 sets of glasses on to cut the brightness down so I can see the spot better. When the laser is focused I use a speed of 550mm/min to cut the 0.6mm thick veneer in a single pass. For the engraving of the fine details of the pine flake branches, I unfocused the laser until I had a spot width of ~1 mm and ran this program at 3500mm/min. This made the pine needles appear more robust with a thicker line width. 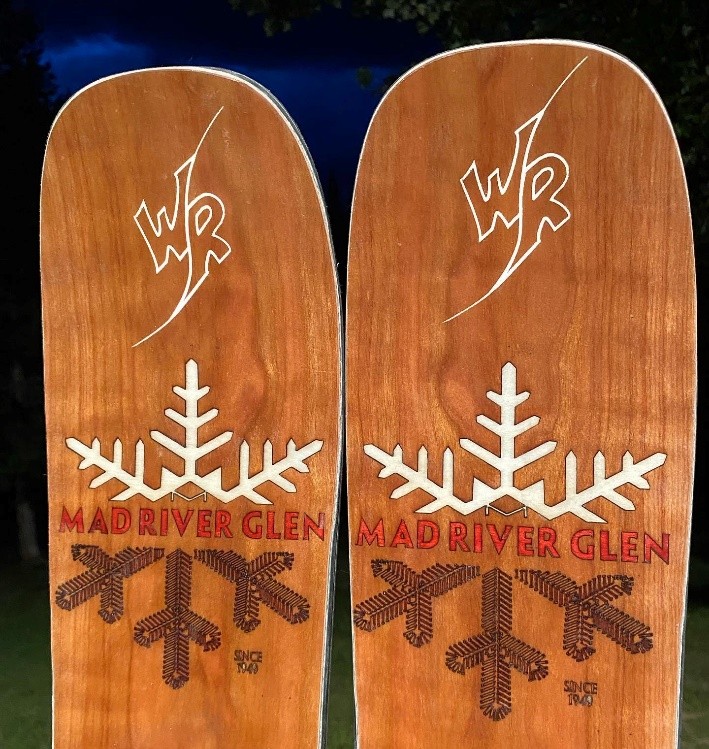
This is the finished product after being pressed into a custom ski. Buying an Endurance Laser for my business was one of the best things I have done. It did take some research and some workarounds to make it work with my specific CNC setup, but now that I have the process smoothed out I find it to be one of the most versatile tools in my shop. It allows me to be more creative, improves my productivity, prevents wear and tear on my hands, and saves material that would have otherwise been lost due to damage from other types of cutting.
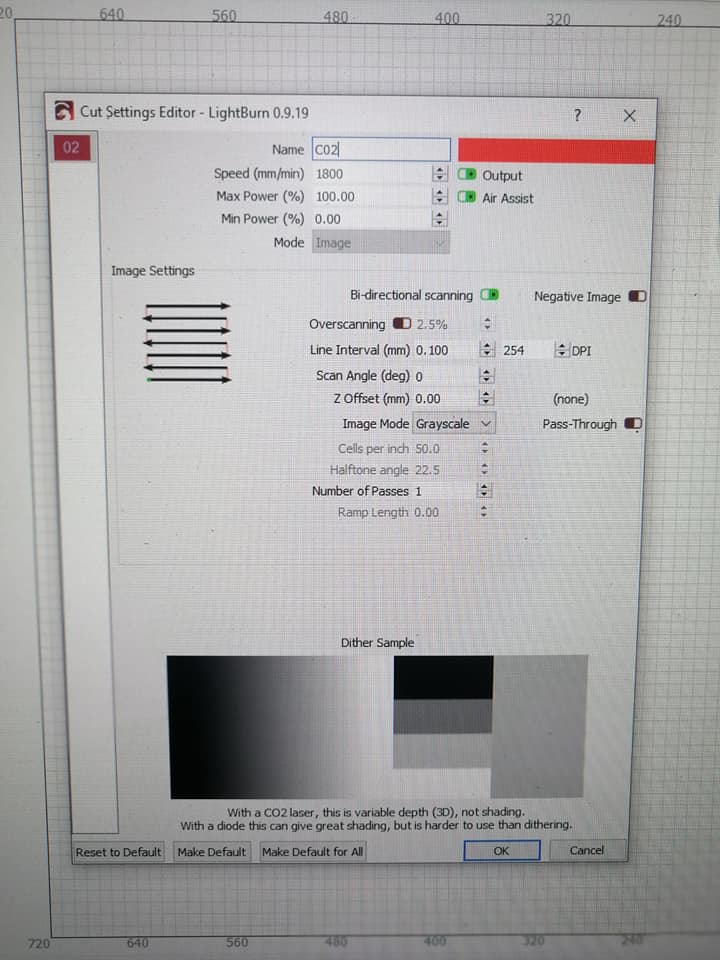
we solve the problem of correct adjustment of the laser power in Lightburn software
Using Lightburn for Laser Cutting and Laser engraving – settings and parameters