
One of the most popular question is how to connect the Endurance laser. There are physical fastening of the laser to a 3D printer or CNC machine and connection of the laser power to the control board of a 3D printer or CNC machine. Laser connection to the control board of a 3D printer or CNC machine.
One of the most popular questions is:
How to connect the Endurance laser?
This question has two aspects:
• physical fastening of the laser to a 3D printer or CNC machine,
• connection of the laser power to the control board of a 3D printer or CNC machine.
Laser mounting to a CNC machine or 3D printer
To physically attach the laser to a CNC machine or 3D printer, you can either make an adapter yourself or buy a fastening adapter from Endurance.
Many 3D printers and CNC machines have their own fixation holes, so it is impossible to make a universal fastener for all machines in advance.
We have open 3D models of fasteners in * .skp format, if you decide to make your hardware, however, we recommend attaching the laser to the regular metal casing of a 3D printer or CNC machine.
An additional fastening adapter is used to fasten a laser to a CNC machine or 3D printer. It can be L-shaped, U-shaped or even T-shaped,
Below there are examples of laser mounts.

Laser connection to the control board of a 3D printer or CNC machine
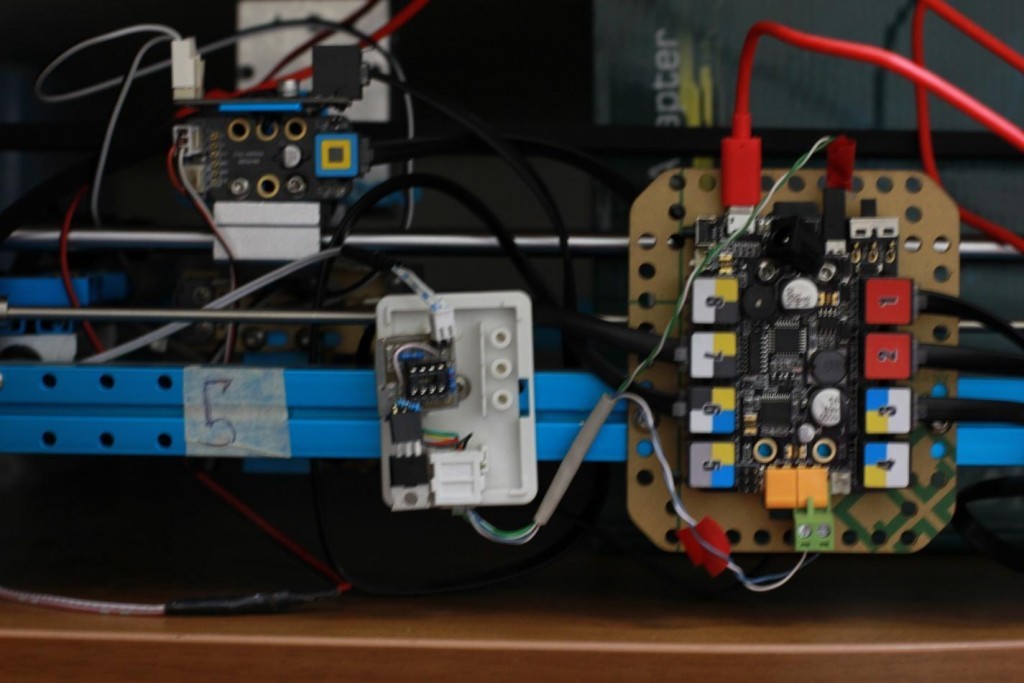
To connect the Endurance laser to a CNC machine or any 3D printer, you need to find a 12-volt output on the control board of the device. You will need an output of 1-5 A (for different laser modifications you need different amperage … for example, for a 2.1 W laser you need 2 A, for 8 W – 5-6 A).
If the control board current is less than required, connect the laser by means of a special Endurance MO1 PCB, which enables to power the laser from an external source.
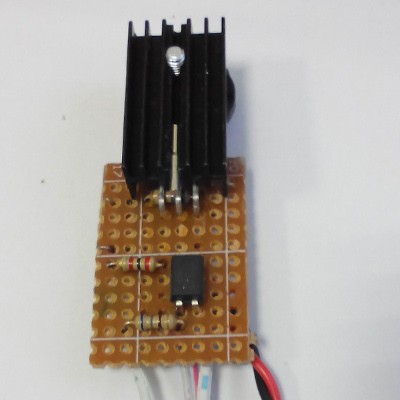
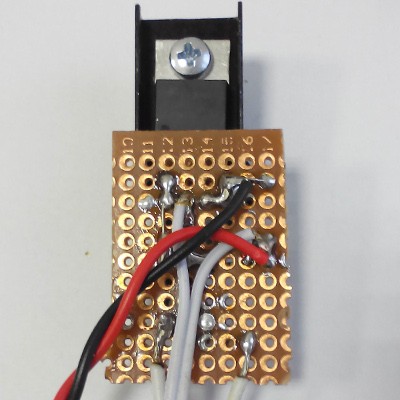
It is important not to violate the operating conditions of the control board of the CNC machine or 3D printer, not to ovreheat the control board, otherwise it might fail.
In some 3D printers, you can use the fan output, but only for low-power lasers 2.1 W and 3.5 W. To connect a 5.6 W or 8 W laser, you can use either the heater output with the required amperage, or the Endurance adapter MO1.
If there is a PWM on the control board, the TTL + laser output should be connected to the PWM. (When the laser has three wires, the third one controls the laser on/off switch, changing the so-called signal duty ratio.) If the signal duration is short, the laser glow will be weak. As the signal duration increases the laser emission power will increase too.
We pay special attention to the fact that since the digital MOSFET is used, the signal voltage varies from 0-7 volts, but the duty ratio depends not on the voltage, but on the pulse duration.
Many people believe that by modulating the signal in the range from 0 to 7 volts, you can achieve different emission power. But that is not true! The power of the emission depends only on the pulse duration.
If there is no PWM on the control board, as on many 3D printer control boards, the TTL laser output is to be connected to a 12-volt input of the device to ensure the maximum laser emission.
If you have any questions concerning the laser connection, let us know and we’ll find a solution.
To help you connect the laser to the 3D printer control board, we need:
• the control board schematics
• control board photo
• control board manual
If you have any questions or concerns, please share with us!