 Plywood")
Chess Figures
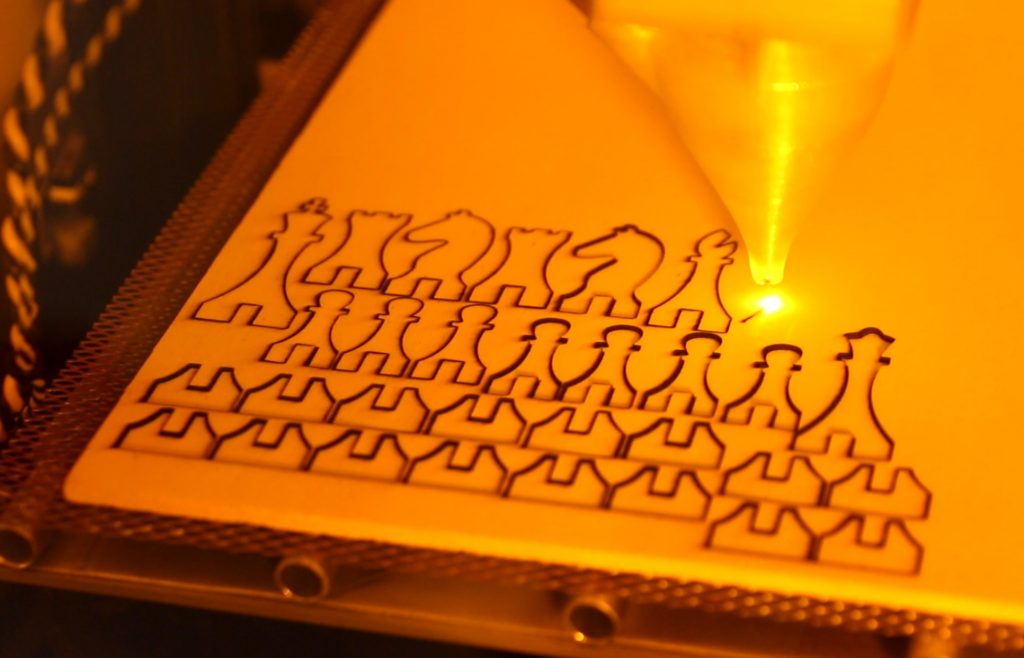
In a recent video I made a chessboard out of some white oak. Now everything that was missing were the chess pieces to play with. That’s why I set out to make them now. They are cut out of 4mm plywood and then glued together from two pieces to create a 3d figure. For the white figures, I left them in the wood color, while on the black ones, I just spray-painted the plywood black before cutting. That works out great, as the edge will be black due to the cutting anyways.
The Process
I found the design for the pieces online, though it did need some fixing, as some of the figures were not quite straight. I also had to scale it, so that they would have the right proportions for the board. When scaling I had to pay attention, that the slot, where the two pieces mate together, is the right size for the plywood I’m using. Luckily it worked out quite well, and in the end the proportions ended up looking good. The setting I’m using to cut 4mm plywood on my 10W laser is 170mm/min with two passes. I found that I can get through in just one pass if I slow it down enough, but the cut comes out cleaner if I do two faster passes. I am also stepping down 1mm in between the passes, to move the focus point down a bit. That isn’t strictly necessary, but just helps to make sure it cuts through everywhere. With cutting plywood, it also helps a lot to have an air assist, which blows all the smoke out of the cut. That way the laser isn’t weakened by having to go through heavy smoke.
The Results
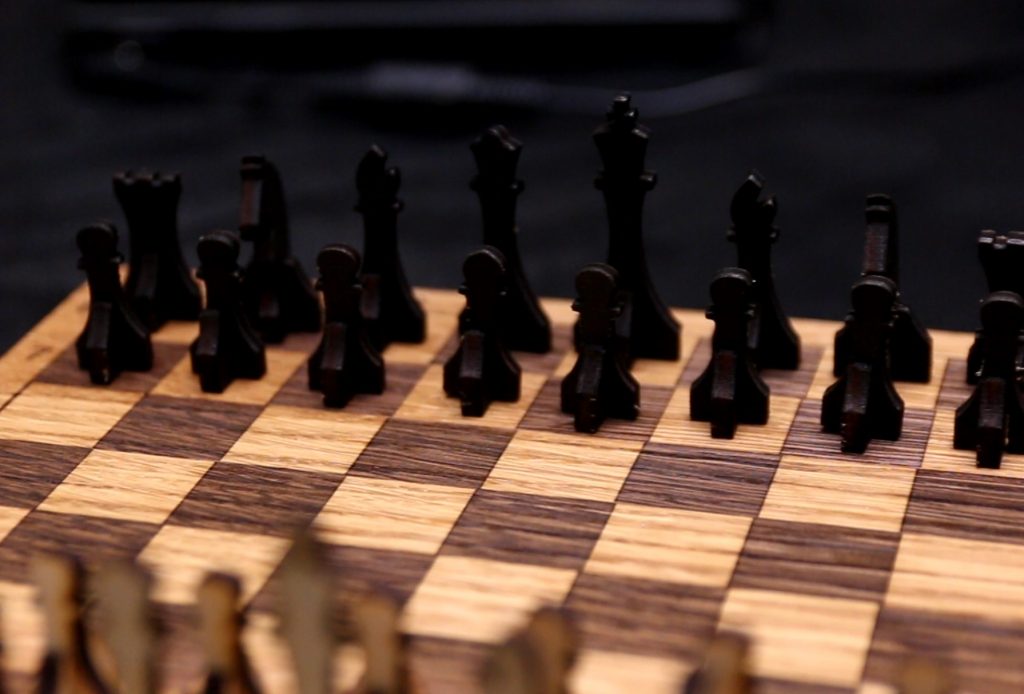
After cutting out the pieces, all that was left was to glue them together. That was easily done with some wood glue, just making sure it sits straight. As I painted the black pieces before cutting, they were also done already after gluing, and are looking really sharp. If you are worried about getting dirty fingers from the burnt edges, you can go over all of them with a thin coat of clear lacquer. I didn’t feel it do be necessary though. Overall, I am really surprised just how good the figures look, although they are quite simple. From a playability standpoint however, they are a bit too light. That makes them feel a bit cheap when actually using them. For a display they are perfect though.
My setup: I am using a 10W Endurance Laser, which is mounted to my CR-10 using a quick release. I am also using an enclosure I built with an exhaust outside to control the fumes. Depending on the project I also use my air assist, which is hooked up to the air compressor.